When an AC will not turn on at all, it most often comes down to one of a few things: a power problem, a control problem (thermostat or low-voltage power), or a safety switch intentionally keeping it off. The good news is that the first checks are quick, cheap, and homeowner-friendly.
I have chased this exact problem on my own 1970s ranch more times than I care to admit. The trick is to troubleshoot in a calm, repeatable order so you do not skip the simple fix and jump straight to expensive parts.
Before you start: If you smell burning plastic, see smoke, hear buzzing at the panel, or the breaker will not stay reset, stop and call a pro. Electrical faults can turn serious fast.
Safety first (read this once)
- Turn power off before opening any AC access panels: use the outdoor disconnect for central AC and the plug for window units.
- If you are not sure, do not open the condenser panel. There is line voltage inside, even for simple visual checks.
- Capacitors can hold a charge even when the power is off. If you are not comfortable using a multimeter and discharging safely, skip the capacitor section and call an HVAC tech.
- Know what you have: Central AC has an indoor thermostat plus an outdoor condenser unit. A window AC is self-contained and usually only needs a good outlet and controls.
Quick triage: what exactly is “not turning on”?
These two symptoms point to different causes:
- Nothing happens anywhere (no indoor fan, no outdoor unit, no display on thermostat): think power supply, breaker, fuse, outlet, thermostat power, a float switch, a door switch, or a GFCI that tripped.
- Indoor air handler runs but outdoor unit is dead: more likely the outdoor disconnect, condenser breaker, capacitor, contactor, or control wiring to the condenser.
If you can, listen for a faint click at the thermostat when you call for cooling. That click means the thermostat is at least trying to send a signal.
One timing note: Many systems have a built-in compressor protection delay. After you reset power or change thermostat settings, give it about 5 minutes before deciding nothing worked.
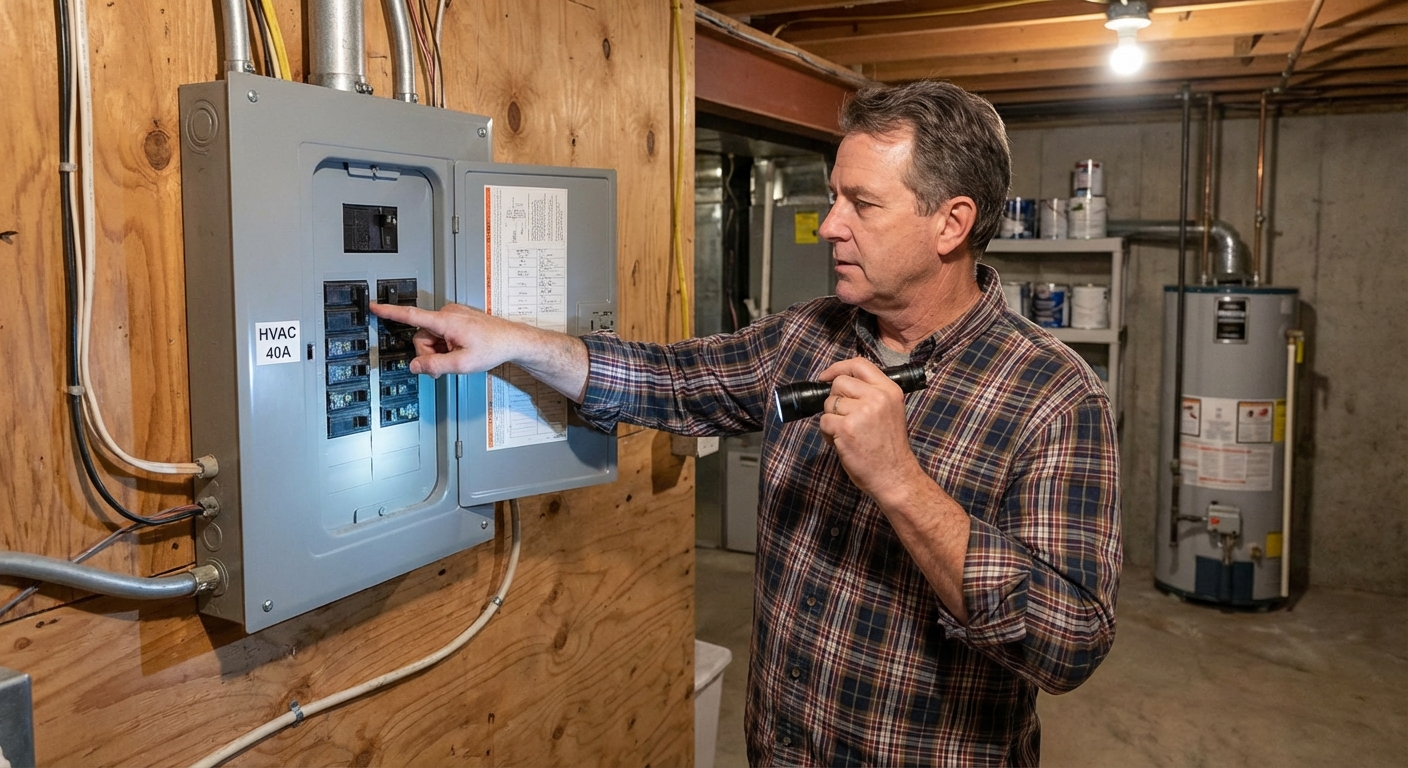
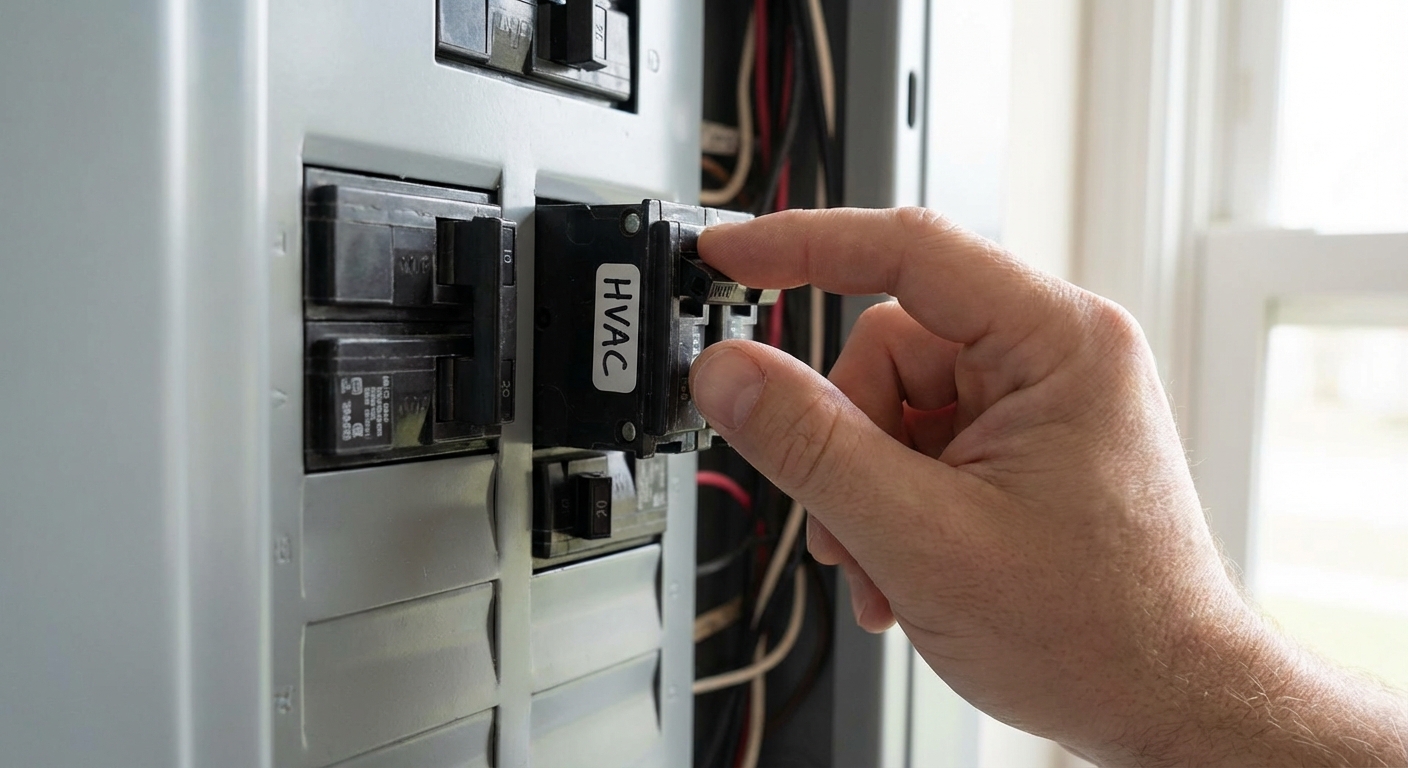
Fix 1: Reset a tripped breaker (or outdoor disconnect)
Power issues are the most common reason an AC will not start. Central AC often uses two breakers: one for the outdoor condenser and one for the indoor air handler or furnace. Some homes (and package units) may only have one.
Step-by-step
- Go to your main electrical panel and look for breakers labeled AC, condenser, heat pump, furnace, or air handler.
- If a breaker looks off or sits in the middle position, reset it by switching it fully OFF first, then back ON.
- Check the outdoor disconnect box near the condenser. Make sure it is seated firmly (pull-out style) or switched on (lever style). On some pull-out disconnects, the handle can be inserted upside down, which can leave the unit off.
If it trips again
Do not keep resetting. A repeated trip can mean a shorted wire, failing compressor, failing capacitor, or a seized fan motor. That is a pro call.
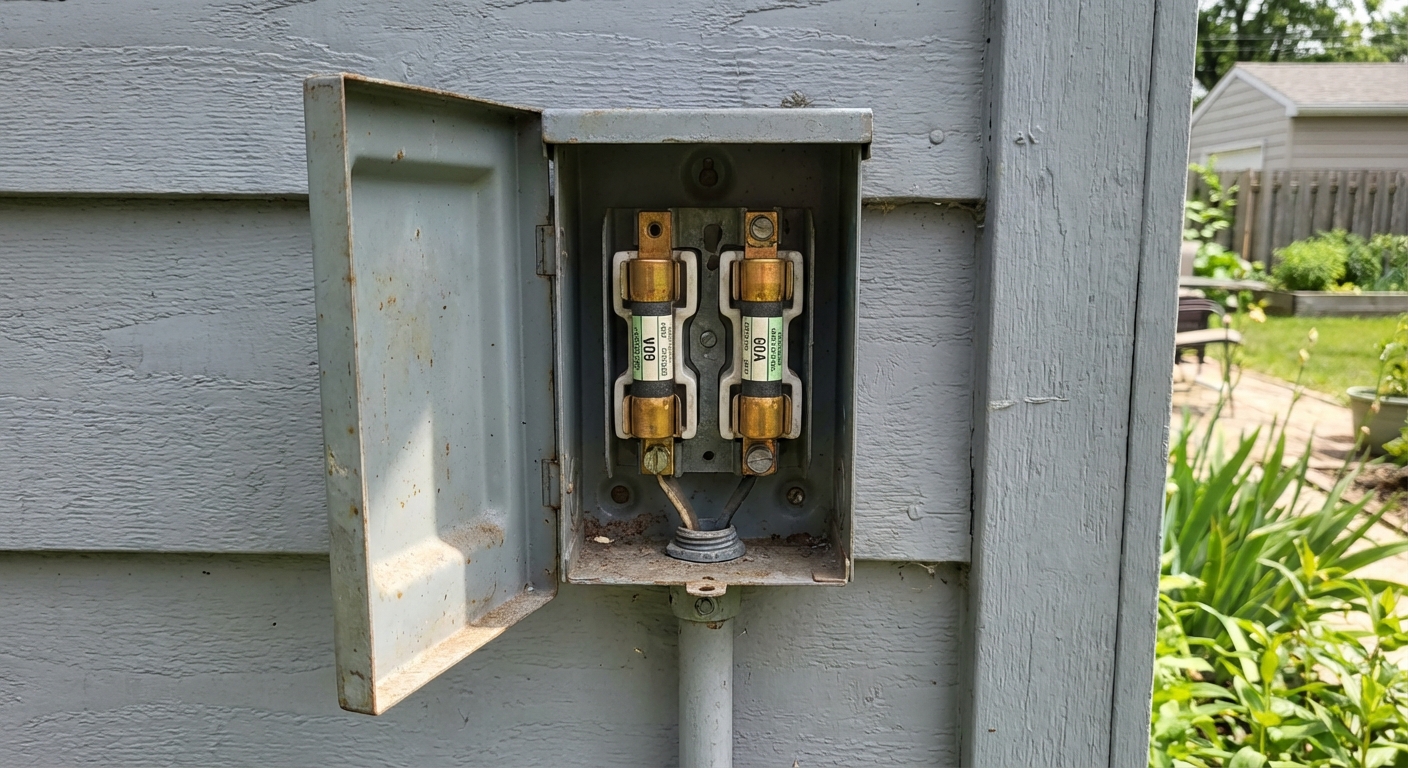
Fix 2: Check for a blown fuse (disconnect, furnace, or plug)
Some setups include fuses in places homeowners forget to look: inside the outdoor disconnect, inside the indoor air handler control board, or in a fused plug or outlet.
What to check
- Outdoor disconnect fuses: Some disconnects contain two cartridge fuses. If one blows, the condenser may be completely dead.
- Indoor air handler fuse: Many furnaces and air handlers have a small automotive-style blade fuse on the control board, commonly 3A (sometimes 5A). If it is blown, the thermostat may go blank and the system will not respond.
- Window AC: Check the plug. Many have a resettable safety plug with TEST and RESET buttons. Press RESET.
Step-by-step (homeowner friendly)
- Turn off power at the breaker and disconnect before opening any panels.
- For a window unit, press RESET on the plug and try again.
- For central systems, if you can safely access the indoor control board fuse, pull it and inspect. A blown blade fuse often looks dark or has a broken metal link.
Thrifty tip: If an indoor blade fuse is blown, replacing it is cheap, but it often blows for a reason. Common causes include thermostat wire shorts (staple through wire, nicked insulation) or a shorted contactor coil.
Fix 3: Thermostat settings, power, and simple misconfigurations
This one sounds obvious, but it gets people every summer, especially after a power outage or a battery change. I have personally “repaired” an AC by switching the thermostat from Heat to Cool and then pretending it never happened.
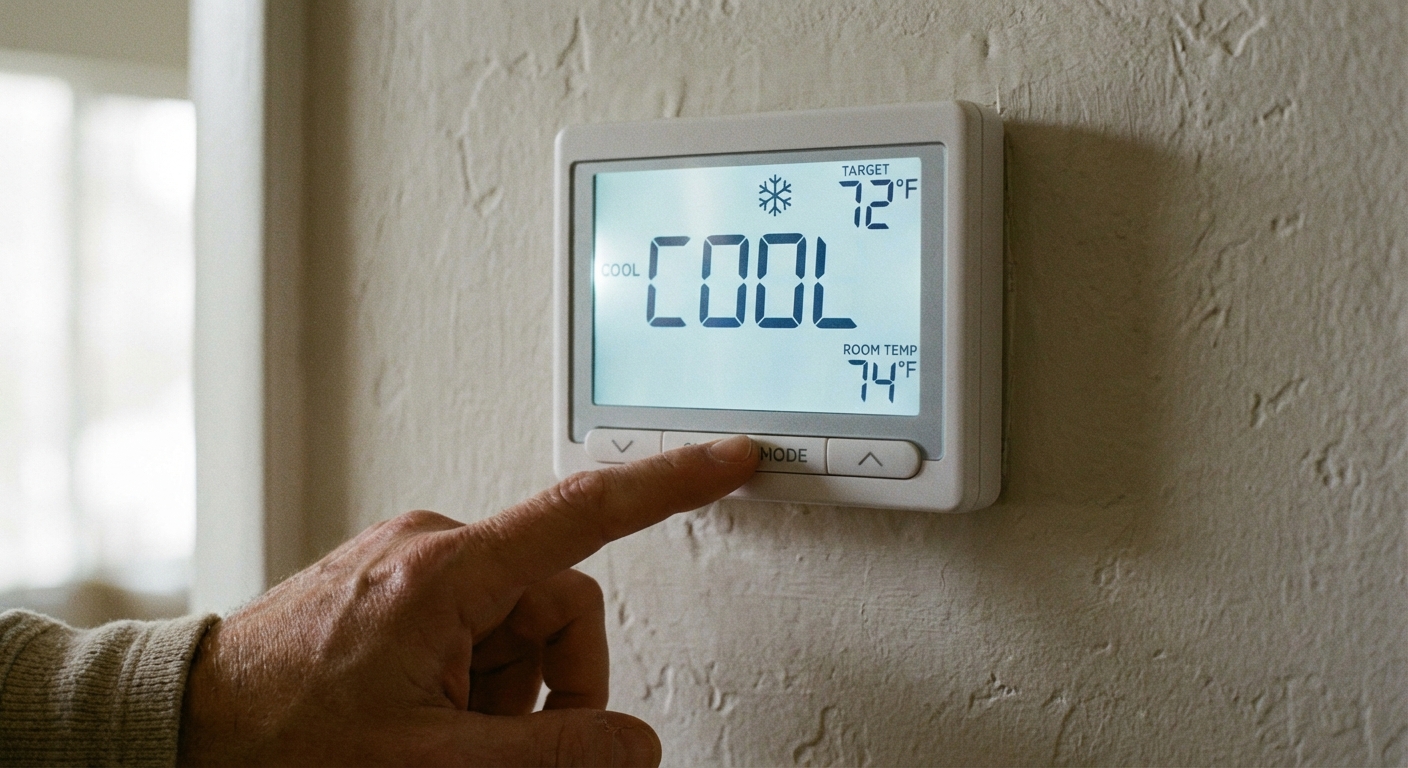
Step-by-step
- Set Mode to Cool.
- Set the temperature at least 5 degrees lower than the room temperature.
- Set Fan to Auto (not On) for testing. Some systems behave differently in Fan On.
- If your thermostat has batteries, replace them even if the screen is faintly on.
- Check for a thermostat blank screen. If it is blank and has no batteries, you may have lost 24V power from the air handler (often a blown fuse, float switch, door switch, tripped GFCI, or transformer issue).
For smart thermostats
- Verify it is connected to Wi-Fi and not showing an equipment error.
- If it reports low power, check the air handler fuse and condensate safety switch next.
Fix 4: Check the central AC air filter
If your system technically “turns on” but then shuts down, runs weakly, or behaves inconsistently, do not skip the easiest maintenance item. A severely dirty filter can restrict airflow, contribute to an iced evaporator coil, and in some setups can trip safety limits or cause nuisance shutdowns.
Step-by-step
- Turn the system off at the thermostat.
- Find the filter at the return grille or at the air handler filter slot.
- If it is packed with dust, replace it with the same size and an appropriate MERV rating for your system.
- Turn the system back on and give it a few minutes (see the built-in delay note above).
Quick reality check: A dirty filter is not the most common reason for a totally dead system, but it is such a frequent “runs weird, then stops” cause that it is worth checking early.
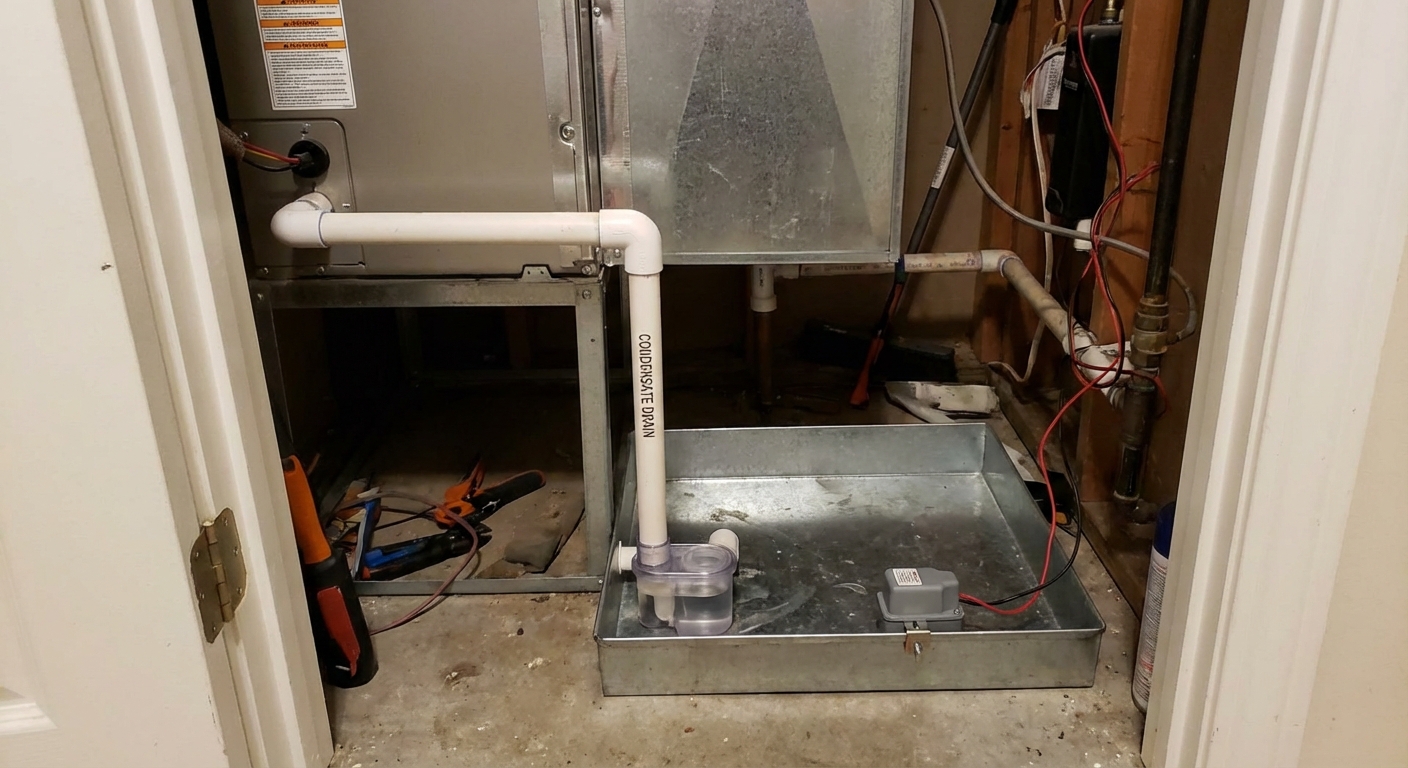
Fix 5: Clear a clogged condensate drain (float switch safety shutoff)
If your central AC has a clogged condensate drain, a small safety device called a float switch can shut the system down to prevent water damage. This is a very common “AC will not turn on” culprit in humid months.
Signs this might be the issue
- Your thermostat is blank or the system is totally unresponsive.
- You see water around the indoor unit or a full drain pan.
- You have had the AC running hard and have not cleared the drain line in a while.
Step-by-step
- Turn off power to the air handler at the breaker.
- Find the condensate drain line. It is usually white PVC coming off the indoor unit.
- Check the drain pan and the float switch. If the pan is full, carefully remove water (shop vac or towels).
- Clear the line: the easiest homeowner method is a wet/dry shop vac on the outside drain termination for 1 to 2 minutes.
- After suctioning, pour a cup of water into the drain at the cleanout (if you have one) to confirm it flows freely.
- Restore power and try the AC again.
My hard-learned lesson: Bleach can be harsh on some pumps and seals and it can create fumes. If you use it at all, use small amounts and follow manufacturer guidance. I use a small amount of white vinegar occasionally, but I rely more on vacuuming the line and keeping the trap clear. Vinegar is not a cure-all for a seriously sludged line.
Fix 6: A failed capacitor (common, but use caution)
The capacitor is a common failure point in the outdoor condenser. When it goes bad, the unit may do nothing at all, or you might hear a faint hum with no fan movement. Sometimes the indoor blower runs but the outdoor unit never starts.
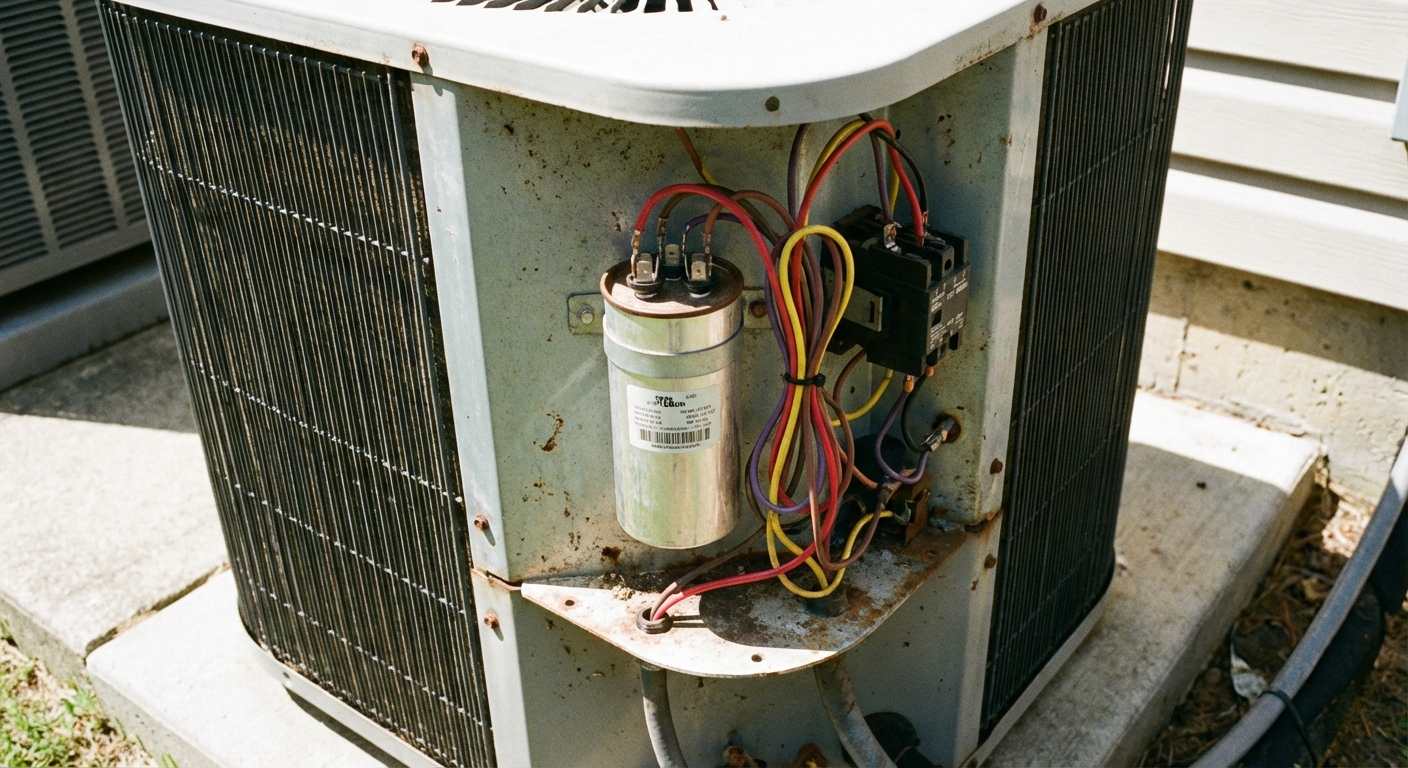
What you can check safely
- Visual check: Turn off power at the disconnect and breaker. A bad capacitor is often bulged on top or leaking oil.
- Do not touch terminals unless you know how to discharge a capacitor safely.
When to call a pro
- If the capacitor looks swollen or leaking. Replacement is straightforward for a tech, but still involves stored energy risk.
- If you are not comfortable matching the exact microfarad rating and voltage rating.
Beginner-friendly alternative: If you suspect the capacitor and everything else checks out, it is often cheaper to pay for a service call now than to keep forcing hard-start attempts and stressing the system.
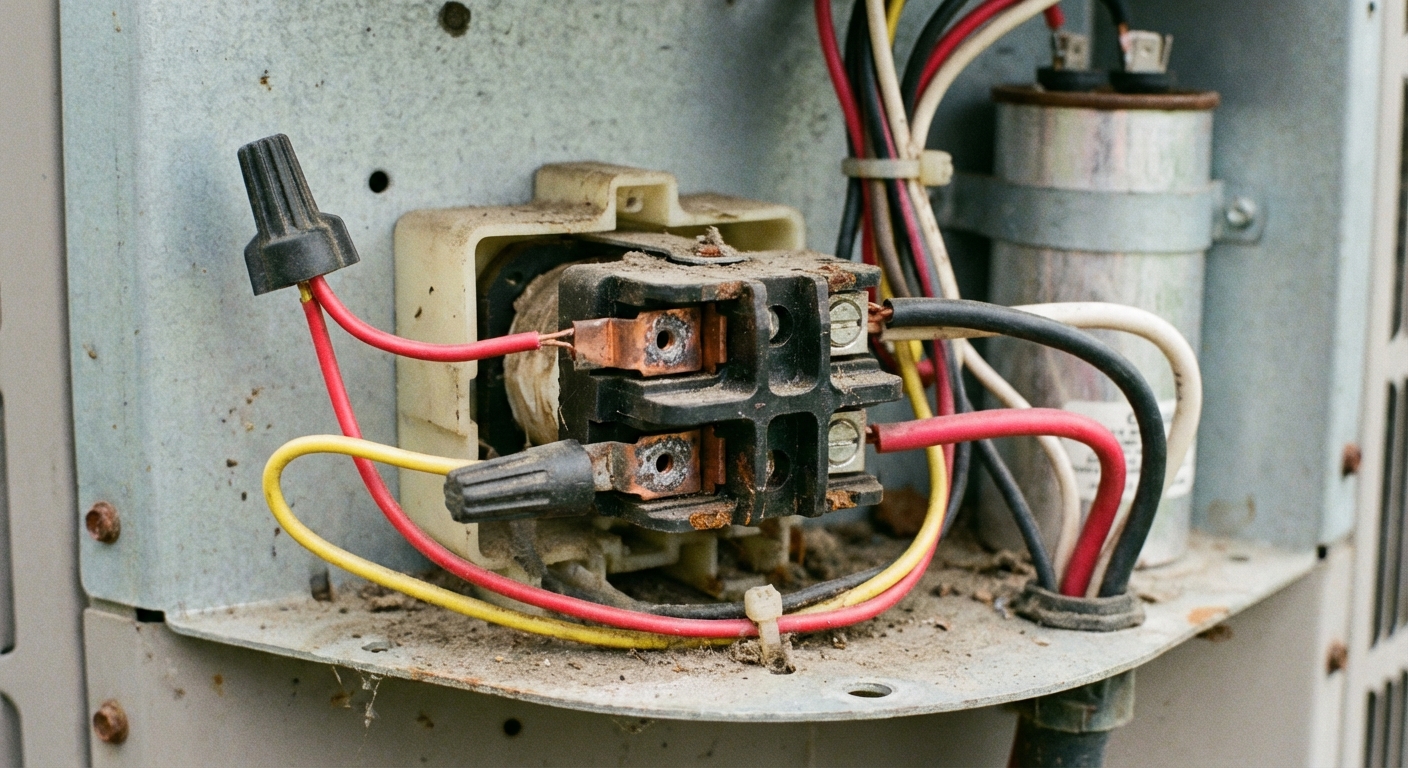
Fix 7: Contactor issues (the outdoor unit is not being told to start)
The contactor is an electrical switch in the outdoor unit that pulls in when the thermostat calls for cooling. If it fails, the condenser may stay completely off even though you have power.
Common symptoms
- Indoor blower runs, but the outdoor unit is silent.
- You hear a click at the thermostat, but nothing happens outside.
- Heavy pitting, scorching, or melted plastic around the contactor is a bad sign. Light pitting can still work, so lack of pull-in is the bigger clue.
Homeowner checks
- Confirm the condenser has power (breaker on, disconnect on).
- With power off, inspect for burnt wiring, insects packed into the contactor area, or obviously damaged parts.
- If you see melted insulation or charred wires, stop and call a pro.
Diagnosing whether the contactor coil is receiving 24V, or whether low-voltage control wiring is intact, usually requires a multimeter and comfort working around electrical equipment. If you are new to this, this is the handoff point.
If none of these worked
At this point, you have ruled out the common, high-probability causes. The remaining possibilities tend to be more technical:
- Failed transformer (no 24V control power)
- Bad control board in the air handler or furnace
- Door interlock switch open (some air handlers will not run if the blower door is not seated)
- Tripped GFCI outlet feeding the furnace, condensate pump, or controls (surprisingly common in basements and garages)
- Pressure switch or other safety lockout (heat pumps and some high-efficiency systems)
- Seized condenser fan motor or compressor
- Low-voltage thermostat wire short or open
When you call an HVAC tech, tell them what you already checked. It saves time, and in my experience it helps the appointment stay focused and efficient.
Window AC: a fast checklist
If you are dealing with a window unit, the troubleshooting is simpler:
- Try a different device in the same outlet to confirm you have power.
- Press RESET on the plug (if equipped).
- Check the breaker for that room.
- If the unit has a removable front filter, clean it and make sure the front panel is seated correctly. Some models will not run if the panel is misaligned.
- Let it sit unplugged for 5 minutes, then plug back in. Some units need a control reset after power issues.
Tools that make troubleshooting easier
- Flashlight or headlamp
- Wet/dry shop vac (for condensate drains)
- Non-contact voltage tester (basic sanity check)
- Multimeter (only if you are comfortable using it)
What not to do
- Do not bypass a float switch. It is there to prevent water damage.
- Do not upsize fuses. Replace with the same type and rating.
- Do not keep resetting a breaker that trips repeatedly.
- Do not poke around inside the condenser with power on.
When to stop DIY and call for service
- Breaker trips repeatedly or you see damaged wiring
- Burning smell, smoke, or loud buzzing or humming from the panel or condenser
- Capacitor or contactor diagnosis requires live testing
- Your system is under warranty and you do not want to risk coverage
If you made it through Fixes 1 through 5, you did the best homeowner-level checks. That alone often solves the problem, and if it does not, you have solid info to hand to a technician.
About Marcus Vance
Content Creator @ Grit & Home
Marcus Vance is a lifelong DIY enthusiast and self-taught home renovator who has spent the last decade transforming a dilapidated 1970s ranch into his family's dream home. He specializes in budget-friendly carpentry, room-by-room renovations, and demystifying power tools for beginners. Through his writing, Marcus shares practical tutorials and hard-learned lessons to help homeowners tackle their own projects with confidence.