🚨 In a DIY emergency or rush?
Skip the details and jump straight to our 30-second cheat sheet for the most crucial info.
When people tell you to “add more insulation,” they are not wrong. But they are often skipping the part that actually fixes the drafty rooms and high bills.
Here is the simple truth I learned the hard way renovating my 1970s ranch: insulation slows heat transfer, but air leakage can carry a lot of heat right through and around it. If warm air can shoot into your attic all winter, it is like trying to wear a puffy jacket with the zipper open.
This guide will show you the attic leaks that steal money, how to seal them safely, and what to do before you drop one more batt or blow in one more bag.
Quick check: what kind of attic is this?
Most homes have a vented attic where insulation sits on the attic floor and outside air moves in through soffit vents and out through ridge or gable vents. That is what this article is written for.
If your attic is a sealed or conditioned attic (spray foam on the underside of the roof deck, no soffit ventilation by design), do not randomly add vents or start sealing without a plan. In that setup, the “air barrier” is usually at the roofline, not the ceiling plane, and the details change.
Air sealing vs insulation
What air sealing does
Air sealing blocks airflow through gaps, cracks, and holes between your conditioned space and the attic. This reduces:
- Heat loss in winter and heat gain in summer
- Drafts and room-to-room temperature swings
- Moisture being carried into the attic (a big deal)
- Dust and insulation fibers drifting into the house
What insulation does
Insulation resists heat flow. It works best when it is fluffy, continuous, and not wind-washed by air movement.
The problem with “just add batts”
If you lay batts over leaky top plates, open chases, or a leaky attic hatch, you can end up with:
- Insulation that looks thick but performs poorly
- Cold spots that never go away
- Moisture issues from warm, humid indoor air reaching cold attic surfaces
Air seal first, then insulate. That sequence matters.
Safety first
Attics are equal parts awkward and hazardous. A few quick rules keep this project firmly in the “weekend DIY win” category.
Before you start
- Walk only on joists or solid decking. Drywall ceilings will not hold you.
- Wear a respirator (especially with old insulation and when using spray foam), gloves, and eye protection.
- Bring good lighting and keep a clear path to the hatch.
- Watch for knob-and-tube wiring in older homes. If you have it, stop and call an electrician before adding insulation or foam near it.
Heat and clearance rules
- Chimneys and metal flues: Use metal flashing and a sealant rated for the application, not standard spray foam. Clearances are governed by the venting type (masonry, B-vent, single-wall) and local code. Follow the manufacturer specs.
- Recessed lights: If they are not IC rated (insulation contact), you must keep insulation and many sealing materials away. Even if they are IC rated, they can still leak air unless they are also labeled airtight (often IC-AT).
If anything looks scorched, improvised, or loose, fix that first.
Tools and materials that actually work
You do not need a truck full of specialty products. You need the right handful of materials for the right kind of gap.
My go-to attic air sealing kit
- Caulk: Acrylic latex or siliconized acrylic for small cracks along drywall and wood
- One-part spray foam: For small to medium gaps (read the label for gap size limits)
- Listed fireblocking product: Use a listed fireblocking material where fireblocking is required (often orange foam is labeled for this purpose, but verify on the can)
- Sheet metal or aluminum flashing: For around chimneys and hot flues
- High-temperature sealant: Only when it is rated for the temperature and application
- Rigid foam board (polyiso or EPS): For attic hatch covers and larger blocking patches
- Foil HVAC tape or mastic: For duct leaks (not “duct tape”)
- Weatherstripping + latches: For attic hatches
- Utility knife, straightedge, stapler, screw gun
Rule of thumb: Caulk for gaps under about 1/4 inch. Foam for bigger gaps. Metal and heat-rated sealant anywhere heat is involved.
Where the biggest leaks hide
If you only seal a few places, seal these. They are the usual suspects in older homes and builder-basic new ones alike.
1) Top plates and drywall edges
The “top plate” is the horizontal framing at the top of your walls. In many homes, there is a crack where drywall meets the framing, plus wiring holes drilled through the plate. That crack runs the entire perimeter of the house, so it adds up fast.
- Pull insulation back from the perimeter.
- Run caulk along the drywall to plate seam where accessible.
- Use spray foam where wires and pipes pass through the plate.
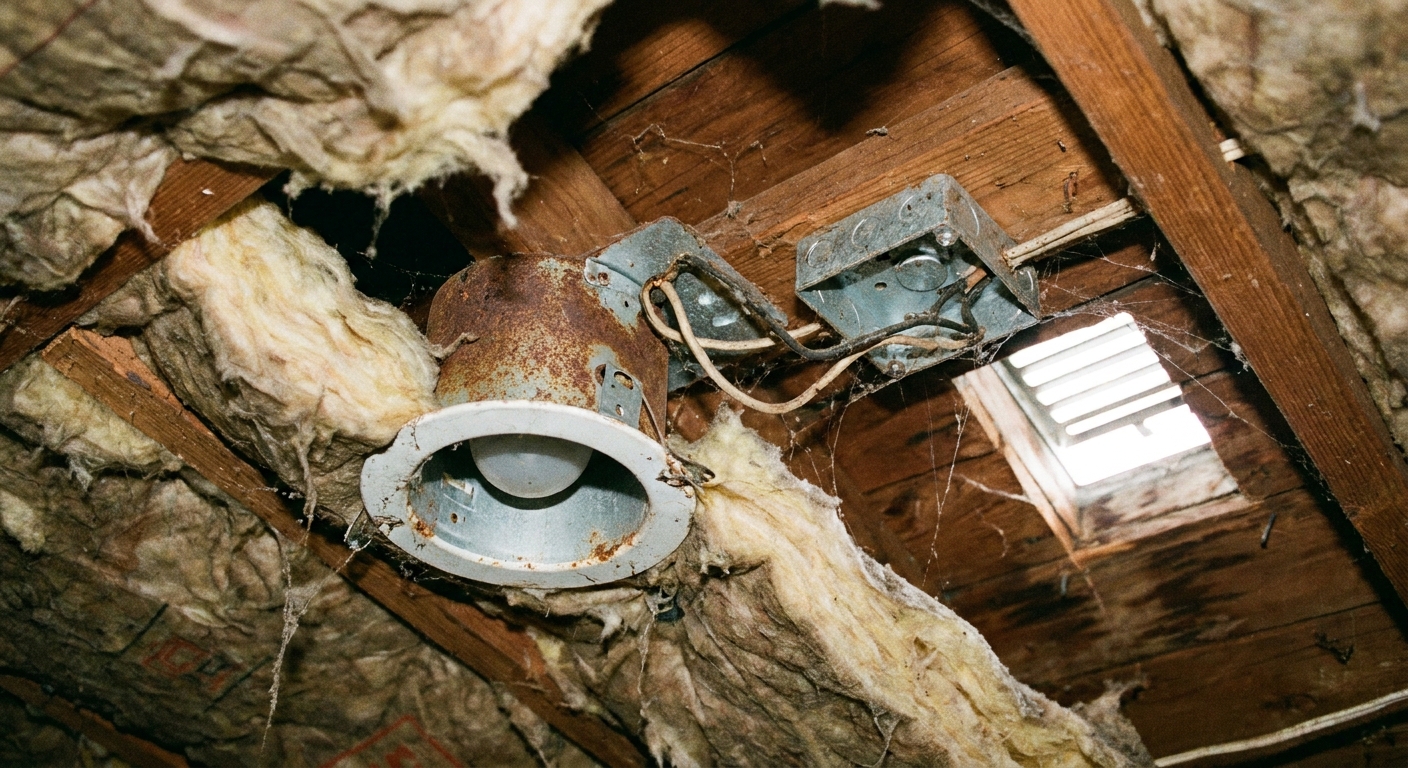
2) Recessed lights and electrical boxes
Recessed can lights can leak like a chimney. Electrical boxes over light fixtures and ceiling fans also commonly have gaps around them.
- For recessed lights: Check the label. IC means insulation contact. AT (often shown as IC-AT) means airtight. If it is not airtight, assume it leaks air. If you build a cover box, make sure it is an approved method for your fixture, maintain manufacturer-required clearances, and use materials that are allowed. When in doubt, treat it as non-IC and do not crowd it with insulation.
- For ceiling boxes: Foam or caulk the drywall gap around the box. Seal cable penetrations where possible.
My early mistake was stuffing fiberglass around a leaky can and calling it good. Fiberglass does not stop air.
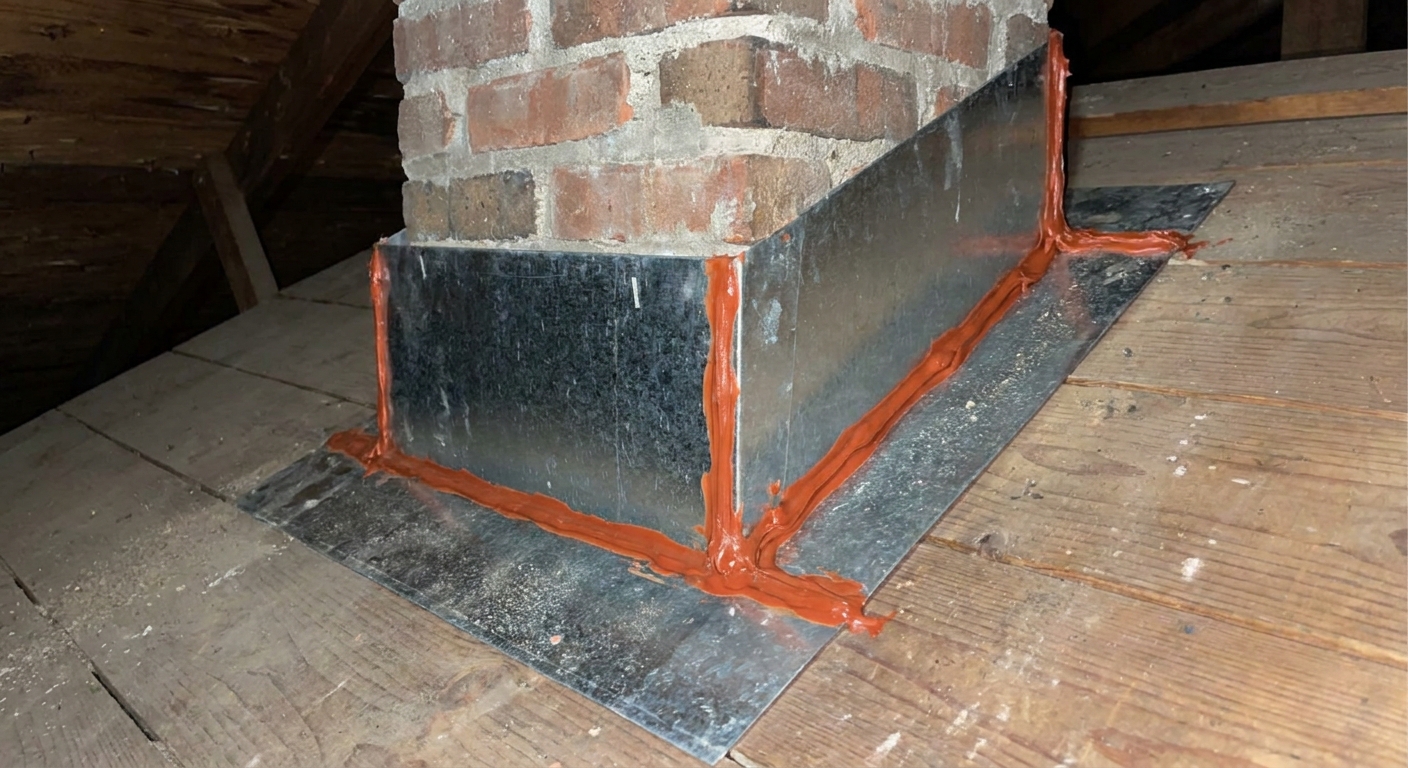
3) Chimney and flue gaps
This is the big one, and it needs the right materials.
- Cut sheet metal flashing to fit around the masonry or metal flue.
- Fasten the flashing to framing where possible.
- Seal edges and seams with a sealant rated for the heat and application.
Do not use standard spray foam in contact with a chimney or flue. Heat and foam do not belong together.
4) Open chases and soffits
Many homes have vertical pathways that run from basements or wall cavities straight into the attic: plumbing chases, tub soffits, dropped ceilings, and framing cavities that were never capped.
If you see a dark hole down into the house, that is your money leaving.
- Cover large openings with rigid foam board, plywood, or drywall.
- Seal the edges with foam or caulk.
- For very large or irregular openings, use framing scraps to create a backer, then cover and seal.
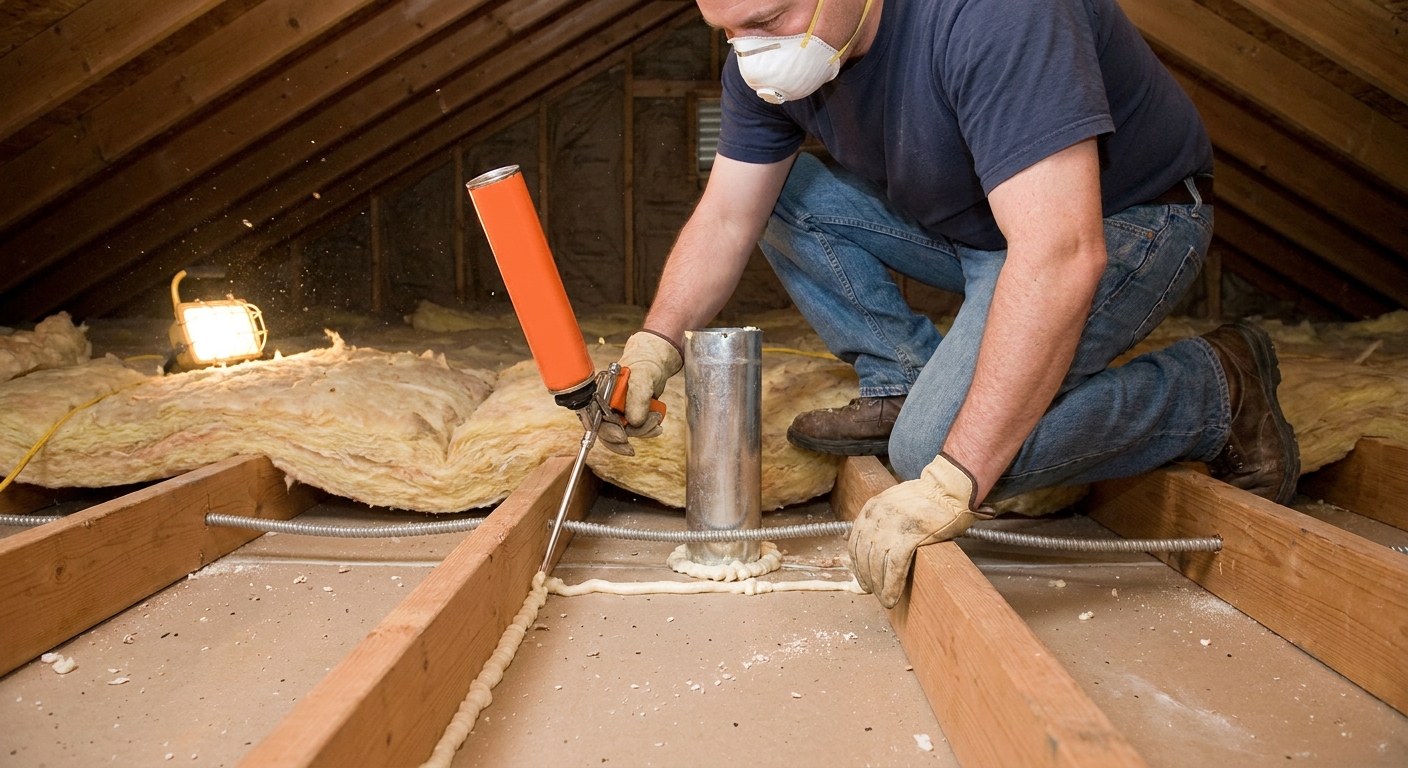
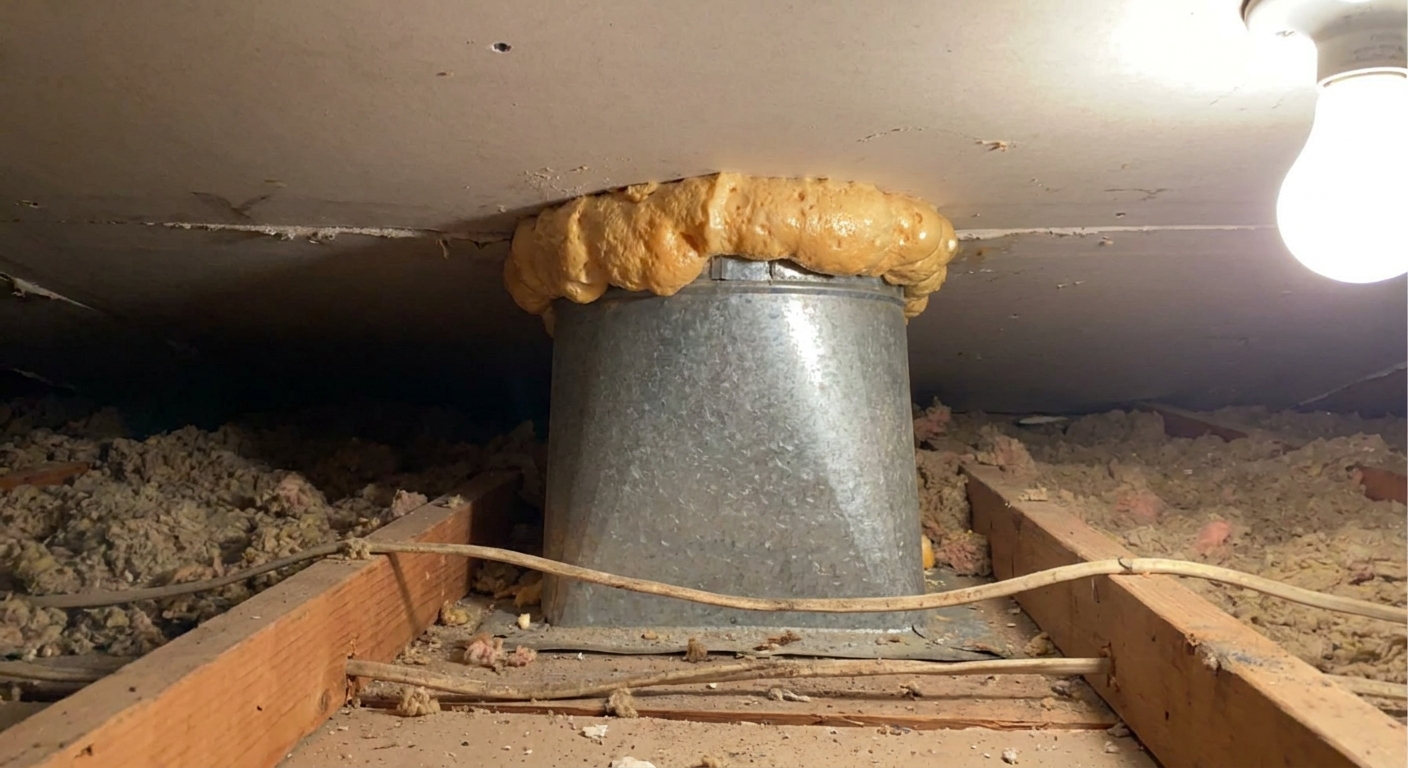
5) Plumbing vent stacks and pipe penetrations
Pipes are sneaky. The hole around a plumbing vent stack often looks “close enough,” but it leaks all day long.
- For small gaps, caulk works well.
- For larger gaps, use foam with a backer (or rigid foam as a collar), then seal the edges.
- If the penetration involves fireblocking requirements, use a listed fireblocking material where required.
6) Duct boots and bath fan housings
Where a supply register or return grille meets the ceiling, air can leak around the metal boot. Bath fan housings often have gaps as well.
- Seal the boot-to-drywall gap with caulk or foam where appropriate.
- Seal duct seams with mastic or UL-181 foil tape.
- Make sure bath fans vent outside, not into the attic.
- If you are sealing penetrations that connect to a garage or a fire-rated assembly, follow local fire and smoke code details and use appropriate materials.
7) Whole-house fans and attic fan openings
If you have a whole-house fan, it is basically a giant hole in your ceiling when it is not running. Same idea with some powered attic fan housings.
- Add a sealed, insulated cover box you can remove when needed.
- Weatherstrip the perimeter so it actually seals, not just “sort of sits there.”
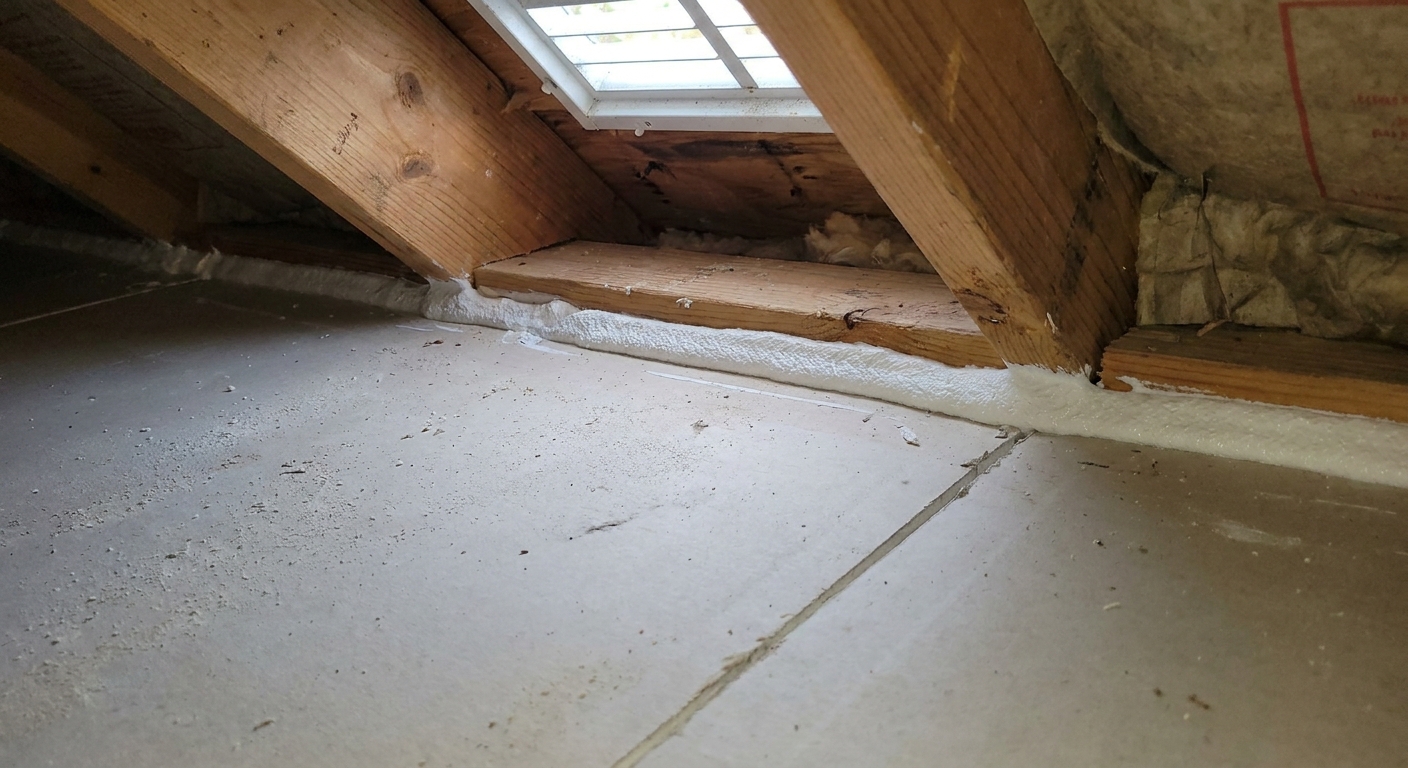
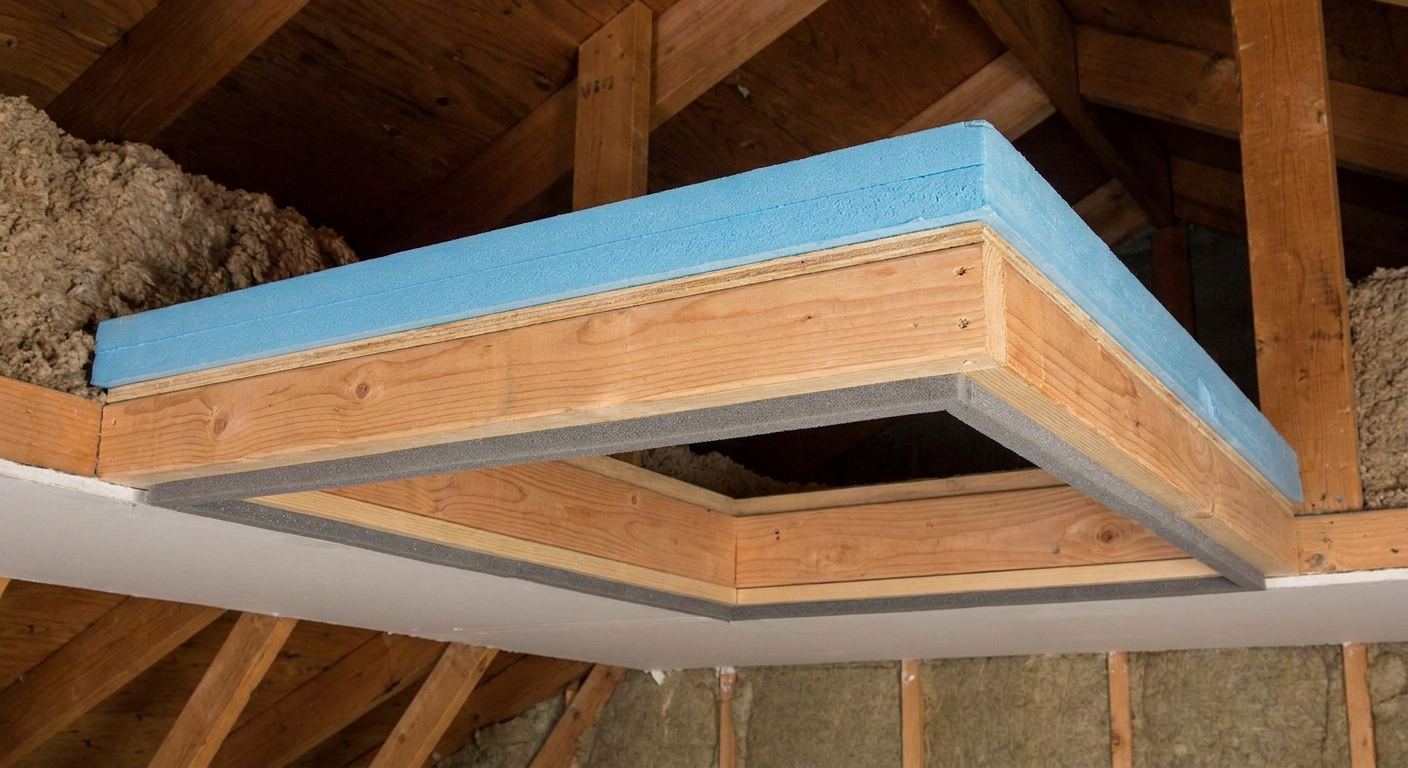
8) Attic hatch or pull-down stairs
Your attic access is basically a big, leaky door to an unconditioned space. It needs two things: air sealing and insulation.
- Add adhesive weatherstripping on the hatch frame.
- Install latches so the hatch compresses the weatherstripping.
- Glue rigid foam to the top of the hatch or build an insulated cover box over pull-down stairs.
When you get this right, you will feel it immediately in the hallway below.
Step-by-step workflow
Air sealing goes smoother when you work in a tight order. Here is the process I follow so I am not crawling over fresh foam or losing track of what I already sealed.
Step 1: Pick the right day
Attics get brutal. Aim for a mild day. Early morning is your friend.
Step 2: Clear and stage
- Lay down a few boards for stable kneeling paths if needed.
- Bring a trash bag for old scraps and a bucket for tools.
- Ventilate per product instructions. If you use a fan, set it up so you are exhausting to the outdoors and not pulling dusty attic air into the living space.
Step 3: Do a quick walkthrough
You do not need fancy gear to find common leaks. Look for:
- Dirty insulation lines (air movement leaves dust tracks)
- Daylight around penetrations
- Cold air drafts on a windy day
- Big open cavities above bathrooms and closets
If you use incense to spot air movement, do it carefully and keep flames well away from insulation and framing. Safety first.
Step 4: Seal big holes first
Open chases, soffits, whole-house fan openings, and chimney gaps give you the biggest payoff. Knock these out before you get lost in hairline cracks.
Step 5: Seal medium and small leaks
Top plates, wiring holes, plumbing penetrations, duct boots, and fixture boxes.
Step 6: Let products cure
Check the label. Some foams expand for a while and need trimming.
Step 7: Put insulation back and then add more
Once the lid is tight, you can add batts or blow-in insulation with confidence. If you are blowing in cellulose or fiberglass, install baffles at the eaves first so you do not block soffit ventilation.
Common mistakes
- Stuffing fiberglass into gaps and calling it air sealing. Fiberglass filters air, it does not stop it.
- Foaming near hot flues. Use metal flashing and a heat-rated sealant instead, and follow clearance requirements.
- Assuming IC means airtight. Many IC cans still leak air unless they are also AT (IC-AT).
- Sealing without thinking about ventilation. You want to seal the ceiling plane, not plug soffit vents or ridge vents.
- Ignoring the attic hatch. It is one of the biggest leaks in many homes.
- Skipping duct sealing. Leaky ducts in an attic can be a comfort killer, especially in hot climates.
What results to expect
Every house is different, but attic air sealing typically shows up as:
- Fewer drafts, especially near ceilings and hallways
- More even temperatures between rooms
- HVAC that runs less and cycles more normally
- Less risk of attic moisture problems in winter climates
If you have persistent condensation, frost, or damp insulation, treat it as a signal: tighten obvious air leaks, verify ventilation pathways are clear, and keep indoor humidity in a reasonable range.
If you want to measure improvement, a local energy audit with a blower door test will quantify leakage before and after. It is not required, but it is satisfying.
How much insulation is enough?
After air sealing, add insulation based on your climate and local code. A simple starting point is to look up the current Department of Energy recommendation for your zone, then aim for that level or your local requirement, whichever is higher. The key is that it performs better once the air leaks are handled.
When to call a pro
DIY is great, but a few situations deserve backup:
- You suspect knob-and-tube wiring or unsafe electrical splices
- You have bath fans venting into the attic and need new ducting routes
- You see roof leaks, mold, or wet insulation
- You have a complex roofline with lots of chases and are unsure about fire clearances
- You have atmospherically vented combustion appliances and are making major air sealing changes, and you want a pro to confirm safe drafting
A good insulation contractor or energy auditor will focus on air sealing first. If they only want to blow insulation on top of everything and leave, keep shopping.
The 30-Second Cheat Sheet
Essential takeaways for: Attic Air Sealing Before Insulation
What to do first
- Air seal before you add insulation. Insulation slows heat, but air leaks can carry a lot of heat right through and around it.
- Start with the biggest holes, then work down to small cracks.
- Confirm your attic type. This guide assumes a typical vented attic with soffit and ridge or gable vents. If you have a sealed, conditioned attic, the approach can be different.
Top leak locations to hit
- Top plates and wiring or plumbing holes through them
- Recessed lights and electrical boxes (look for IC and IC-AT labels, follow clearances)
- Chimney and flue gaps (sheet metal flashing + sealant rated for the application, no foam)
- Open chases and soffits above bathrooms, closets, dropped ceilings
- Plumbing vent stacks and other pipe penetrations
- Whole-house fans or attic fan housings (big leakers)
- Duct boots and duct seams (mastic or UL-181 foil tape)
- Attic hatch or pull-down stairs (weatherstrip + latch + insulation on top)
Materials that match the job
- Caulk for small cracks
- Spray foam for larger gaps (use a listed fireblocking material where fireblocking is required)
- Metal flashing + sealant rated for heat near chimneys and flues
- Rigid foam board to cap big openings and insulate hatch covers
Fast workflow
- Pull back insulation where you will seal.
- Seal chimney and big chases first.
- Seal top plates, penetrations, and duct boots.
- Weatherstrip and insulate the attic hatch.
- After curing, put insulation back, then add more.
Big warnings
- Do not spray foam against hot flues or chimneys. Follow manufacturer clearances and local code.
- Do not block soffit or ridge ventilation. Seal the ceiling plane, not the roof vents.
- If you see knob-and-tube wiring or unsafe electrical work, call a pro.
- If you have atmospherically vented combustion appliances, tightening the house can affect drafting. Have working CO alarms and consider a pro check.
💡 Tip: Scroll up to read the full article for detailed, step-by-step instructions.
⬆️ Back to topAbout Marcus Vance
Content Creator @ Grit & Home
Marcus Vance is a lifelong DIY enthusiast and self-taught home renovator who has spent the last decade transforming a dilapidated 1970s ranch into his family's dream home. He specializes in budget-friendly carpentry, room-by-room renovations, and demystifying power tools for beginners. Through his writing, Marcus shares practical tutorials and hard-learned lessons to help homeowners tackle their own projects with confidence.