Attic mold is one of those home problems that feels unfair. You do not see it every day, you are not splashing water up there, and yet one day you peek into the hatch and notice dark speckles on the roof deck.
The important thing to know is this: attic mold is most often a symptom of a moisture pathway and an airflow imbalance, not a cleaning problem. In practice, most situations fall into two big buckets: bulk water intrusion (a roof leak) or condensation (warm, moist indoor air reaching cold roof wood).
That is also why this article is intentionally different from bathroom surface mold removal. In a bathroom, the moisture is obvious and the materials are designed to get wet. In an attic, moisture is almost always sneaking in through a roof leak or being carried by warm indoor air that should never have reached the cold roof sheathing in the first place.
Warning signs of attic mold
Sometimes you spot mold directly. Other times, you catch the clues first. Here are the most common signs I look for when helping a friend troubleshoot their attic.
What it can look like
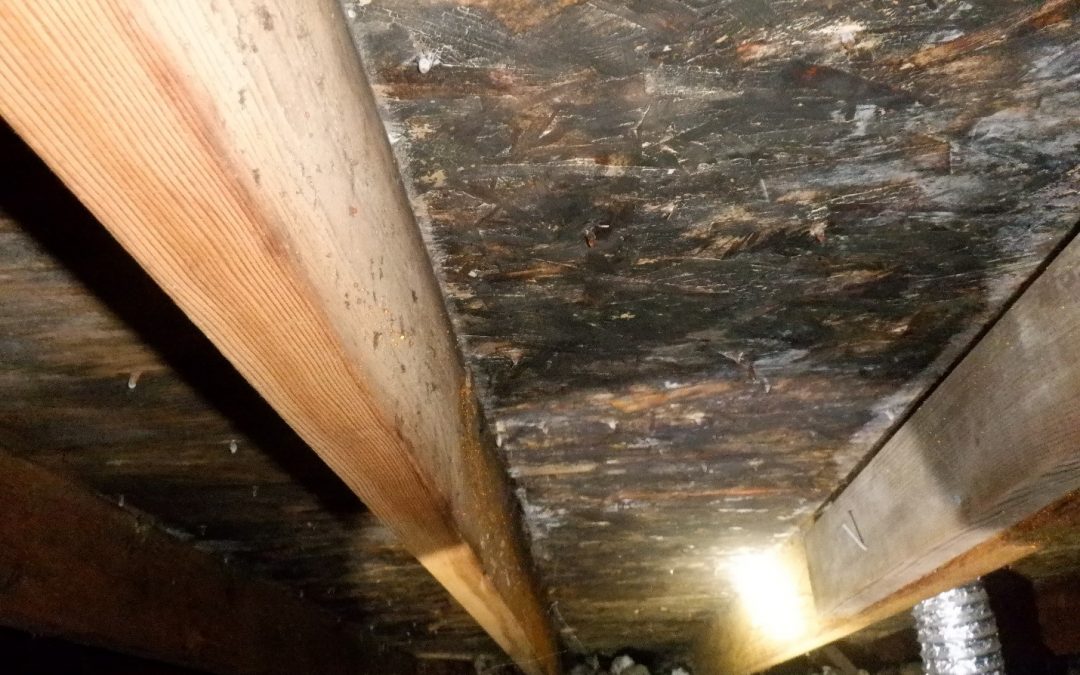
- Black, gray, or green speckling on roof sheathing, rafters, or truss chords (the diagonal and horizontal truss members)
- Fuzzy or velvety patches on wood, especially on the north-facing roof plane
- Dark "shadowing" that follows the line of rafters or shows up around nails
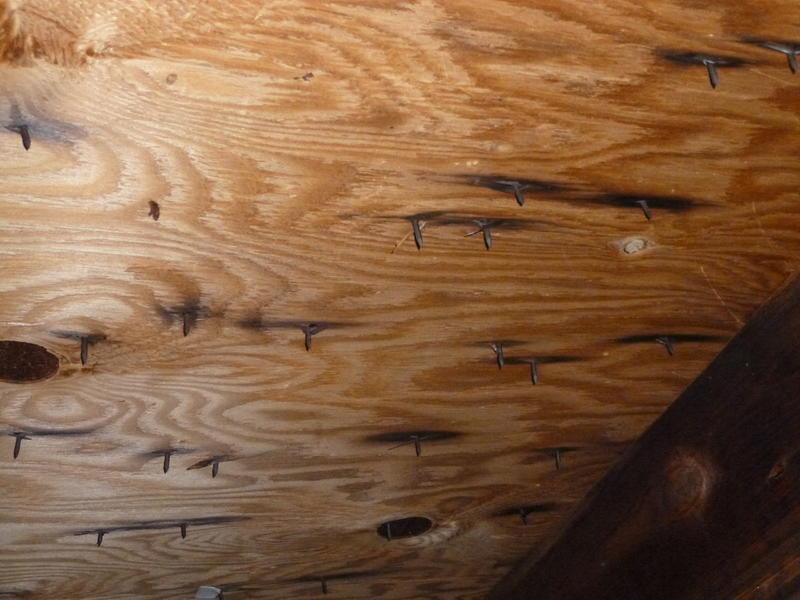
- White, powdery growth on wood (can be mold or other fungal growth)
Look-alikes to keep in mind
Not every dark mark in an attic is mold. Some staining can be soot, tannin bleed from wood, or iron staining around fasteners. If you are unsure, treat it cautiously (do not dry-scrape it), and focus on the moisture clues below. When documentation matters (real estate, insurance, disputes), that is a good time to involve a qualified inspector or remediator.
Other clues that point to moisture
- Musty odor near the attic hatch or in closets below the attic
- Rusty nail heads on the underside of the roof deck, especially in winter
- Frost on the roof sheathing during cold snaps, followed by wet wood when it warms up
- Compressed, damp, or matted insulation around bath fans, can lights, or the hatch
Why attic mold happens
Mold needs two big things: moisture and something it can feed on. Your attic has plenty of food because framing lumber and roof sheathing are organic. So the entire game is moisture control. In most homes, attic mold traces back to one or more of these causes.
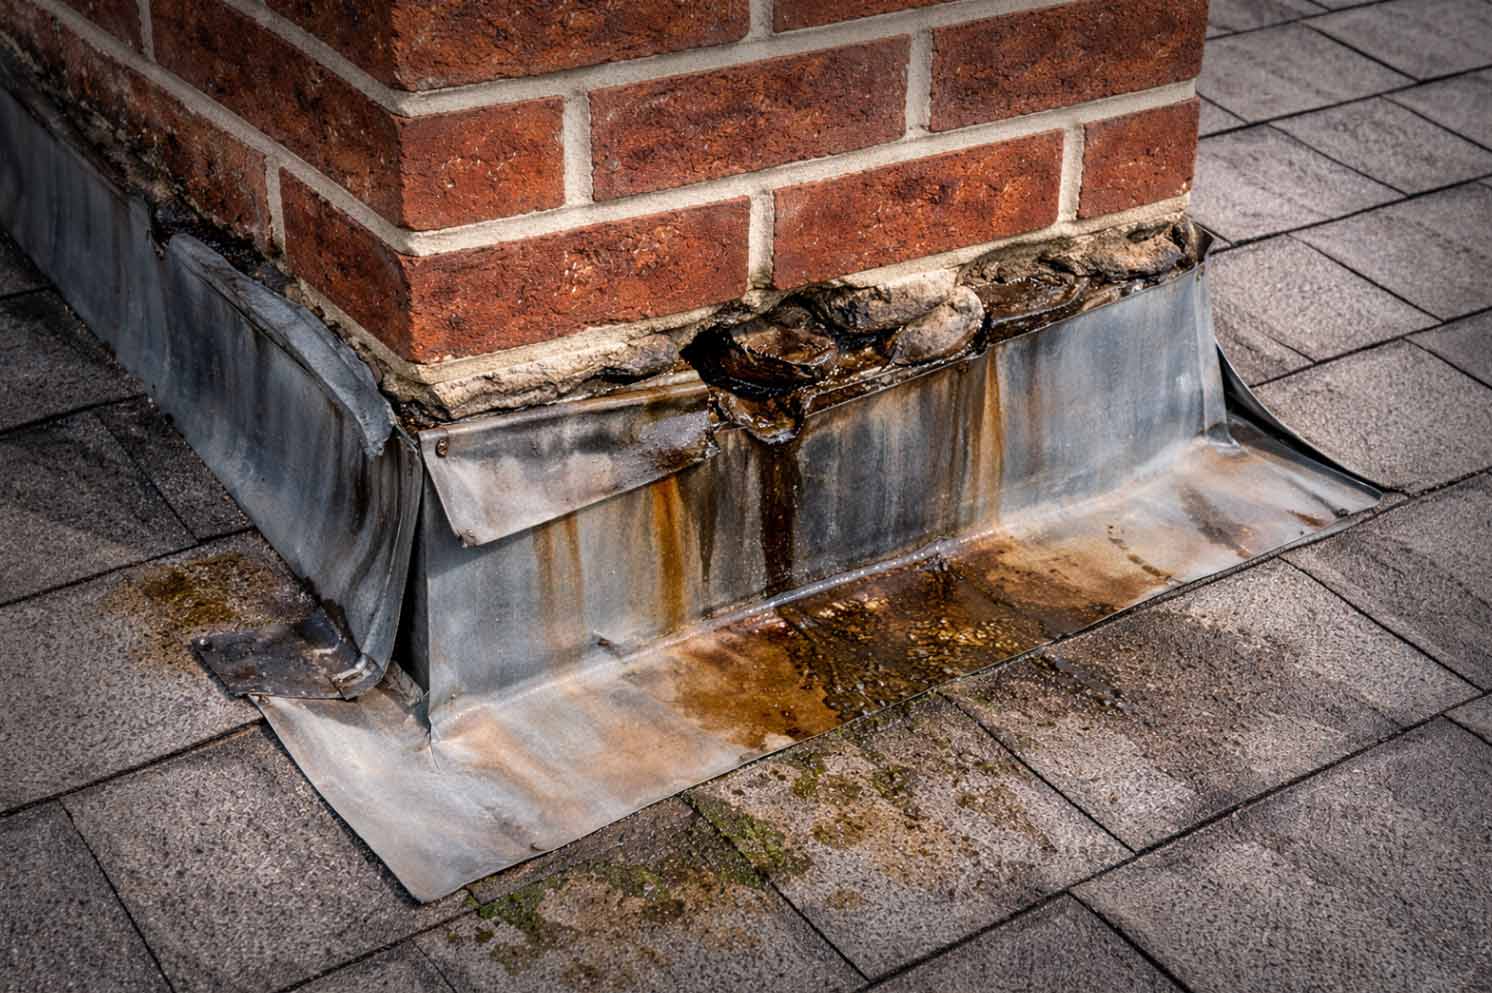
1) Roof leaks and flashing failures
A small roof leak can create a big mold problem because it wets wood repeatedly, often without leaving a dramatic ceiling stain right away.
- Leaking pipe boots around plumbing vents
- Chimney flashing issues
- Skylight flashing failures
- Ice dams forcing water under shingles in winter climates
- Missing shingles, nail pops, or damaged underlayment after a storm
My rule of thumb: If the staining is localized and follows gravity down one bay, I start by suspecting a roof water entry point before I blame ventilation.
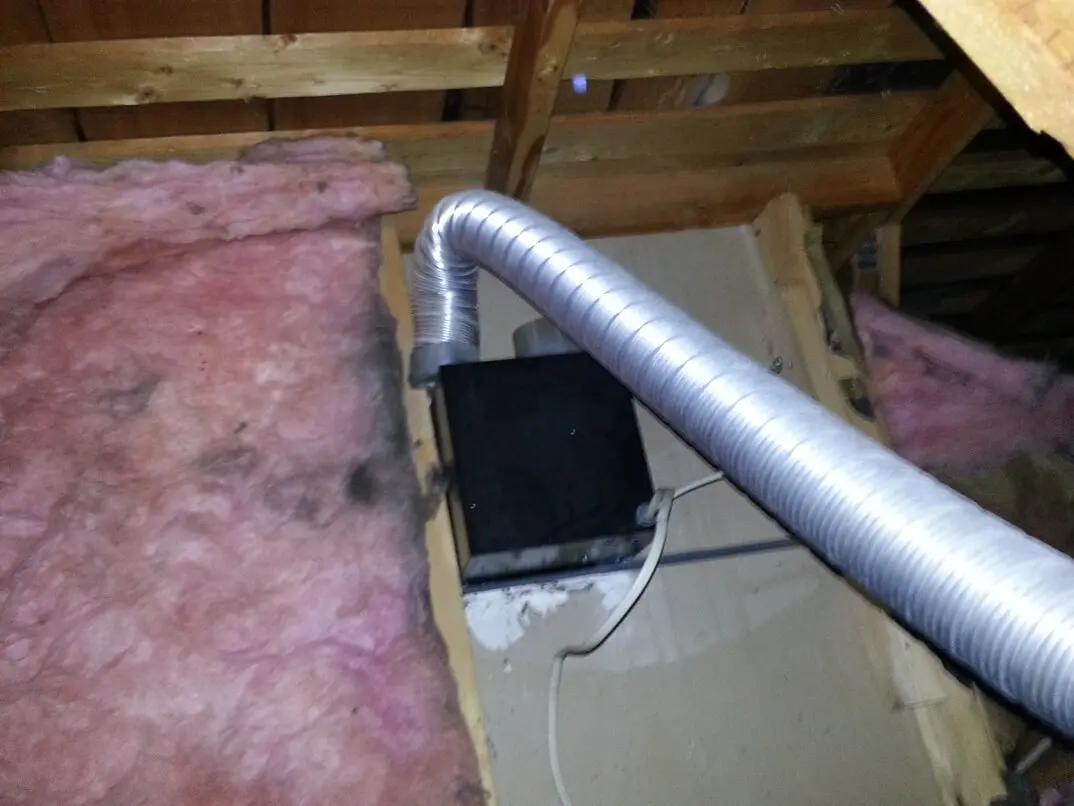
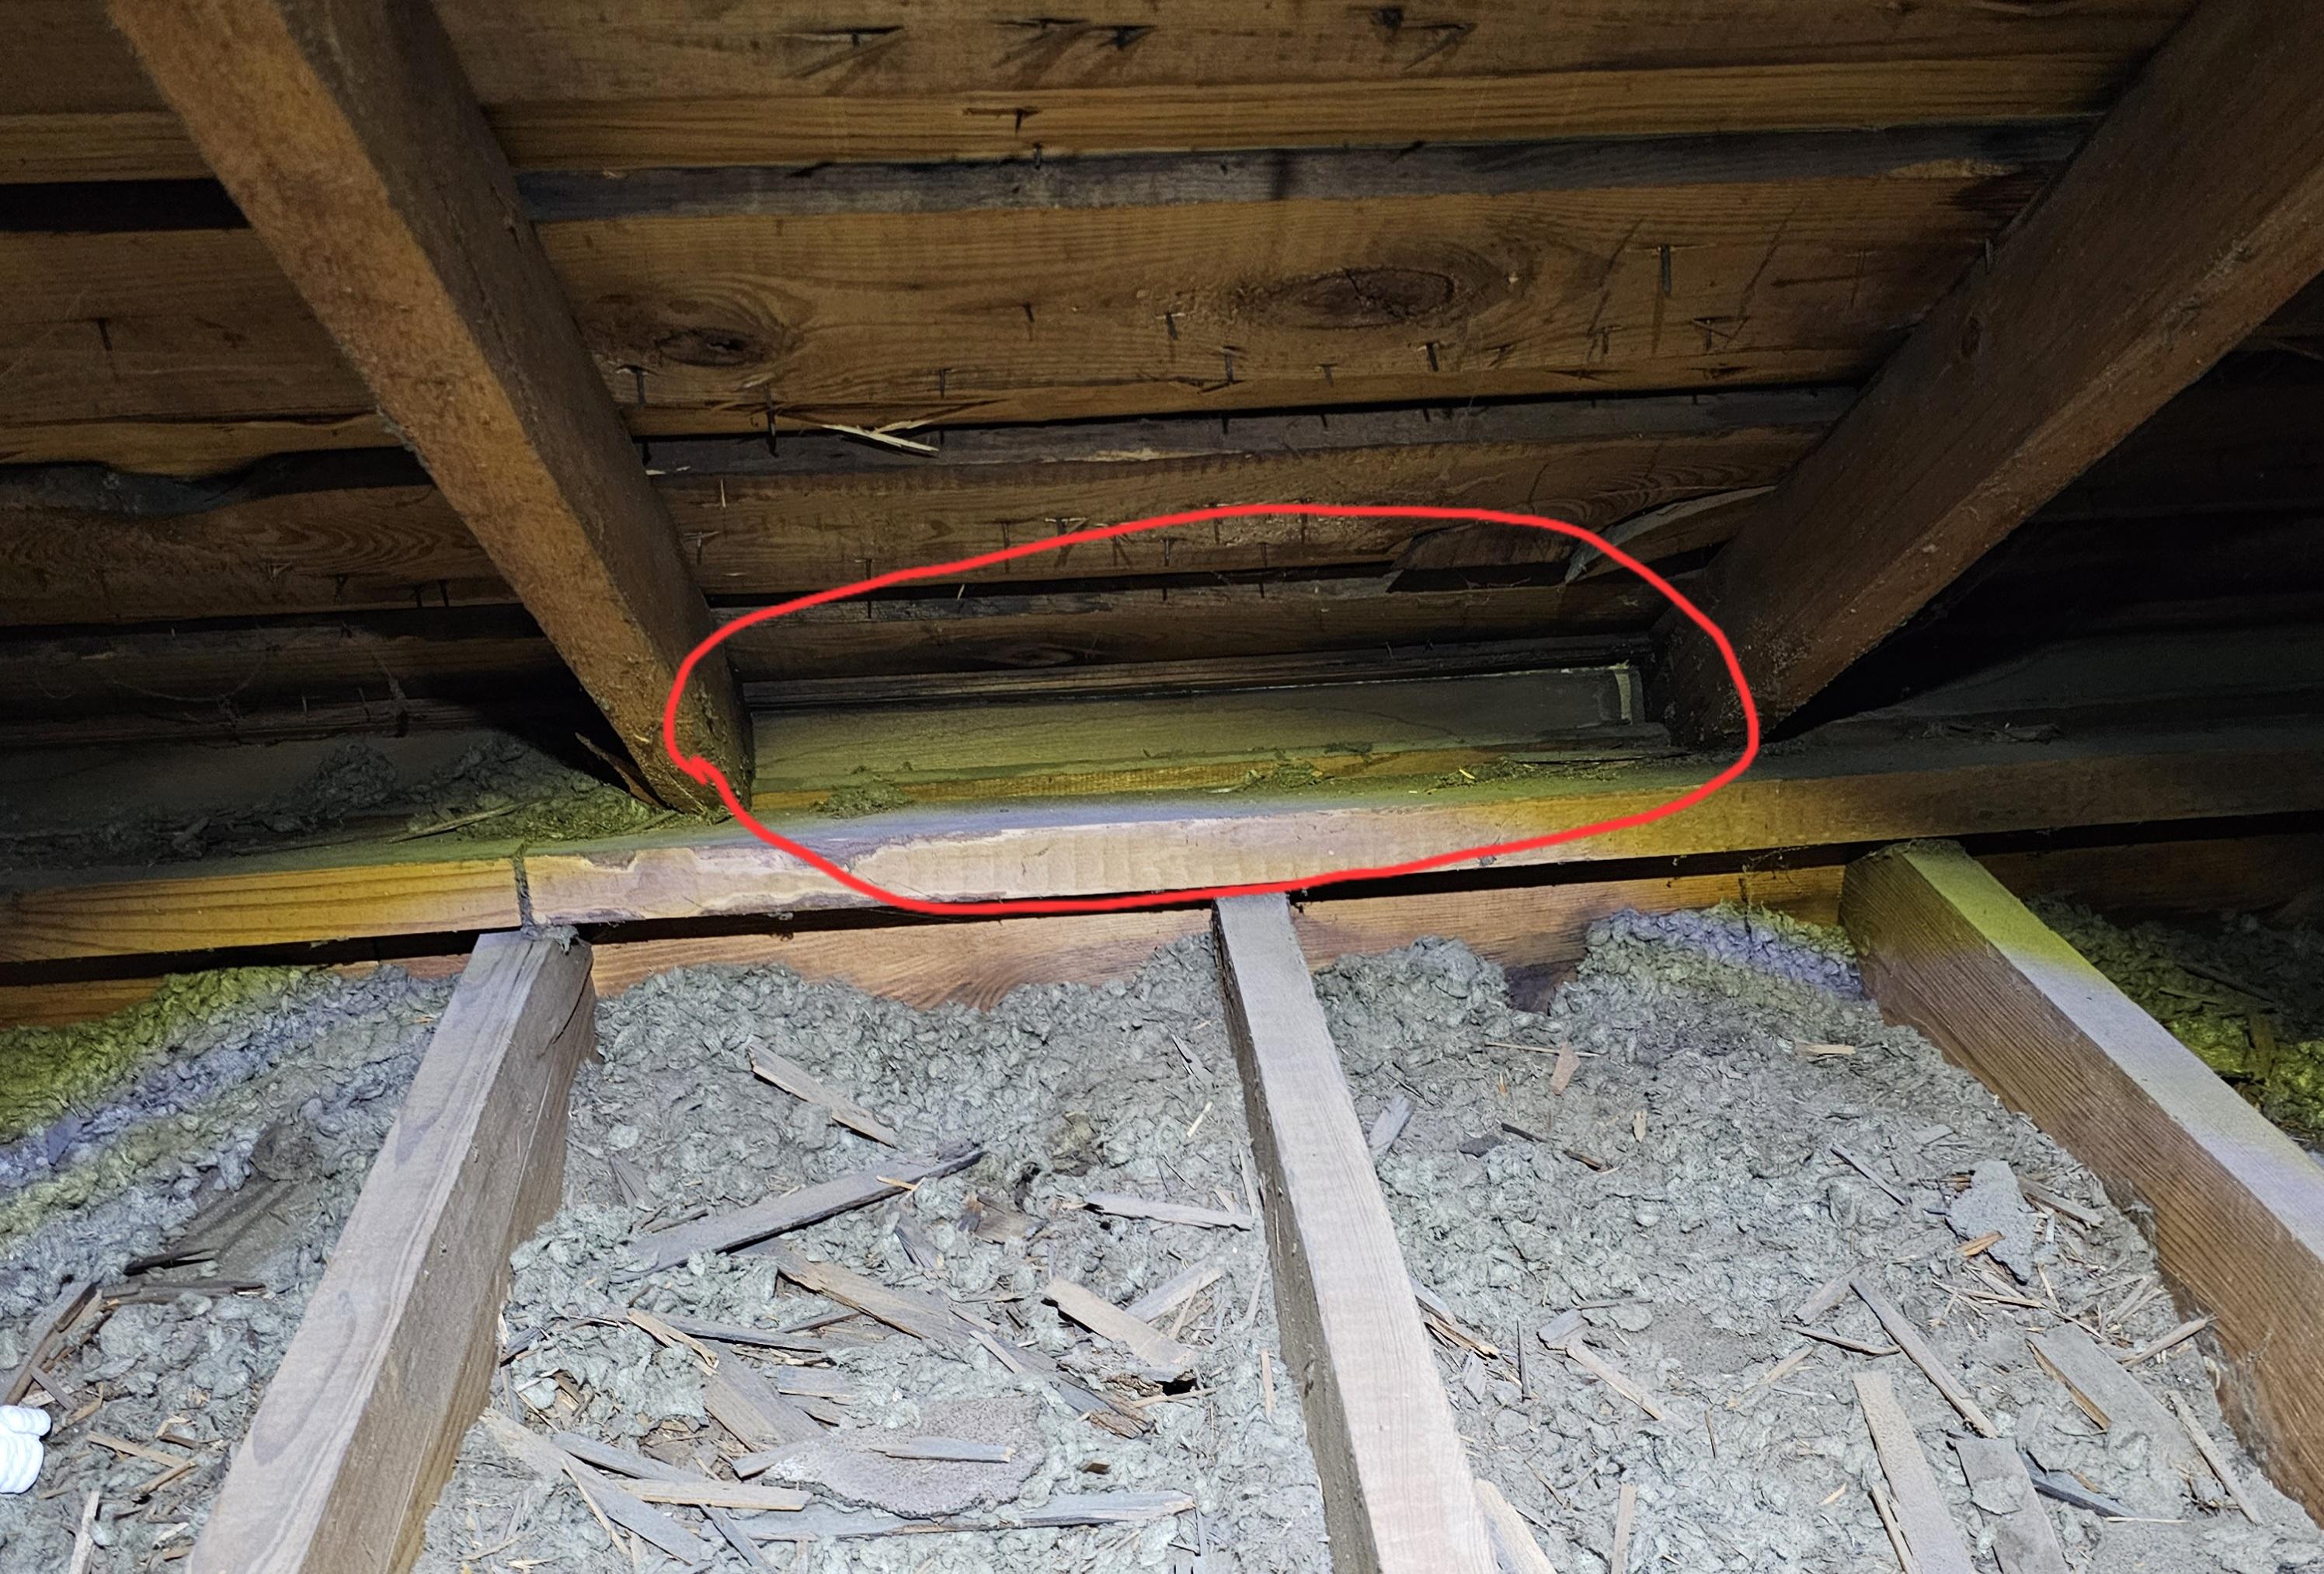
2) Bathroom exhaust ducting mistakes
This is the one I see the most, especially in older homes and quick remodels. A bath fan is supposed to dump warm, wet air outside. When it dumps into the attic, it is basically a moisture machine aimed at cold wood.
- Fan venting straight into the attic instead of outdoors
- Loose or disconnected duct that fell off the fan housing or roof cap
- Uninsulated duct in a cold attic, leading to condensation inside the duct
- Duct run is too long or too saggy, creating low spots where water collects and drips
- Wrong termination, like terminating near a soffit vent where it can be drawn right back in
Quick test: On a cold day after a shower, go to the attic and look for a damp duct, dripping joints, or a wet spot on insulation near the fan line.
3) Air leaks and insulation gaps
Insulation is not just about comfort. It is also about keeping indoor heat from reaching your roof deck in winter. When warm indoor air leaks into the attic, it carries moisture. When that warm, moist air hits cold roof sheathing, it can condense and feed mold.
- Thin or missing insulation near eaves or around the attic hatch
- Recessed lights or gaps that allow air leakage (especially older, non-IC rated fixtures)
- Open chases around plumbing stacks, soffits, or ductwork
- Wind washing at the eaves where outside air moves through loose insulation and reduces its effectiveness
One of my own early mistakes was thinking "more insulation" alone would solve moisture issues. It helps, but air sealing is what stops the moisture highway.
4) Ventilation balance problems
Attic ventilation works best when it is balanced: intake air comes in low (usually soffit vents) and exhaust air leaves high (ridge vent, gable venting, or roof vents). When intake is inadequate or blocked, ventilation can become ineffective. In some cases, it can also increase pressure-driven air leakage from the house into the attic, especially when powered attic fans are involved.
Common scenarios:
- Soffit vents blocked by insulation because baffles were never installed
- Ridge vent present but no functional intake, so airflow can be weak and the attic can rely more on air leaking from the home
- Gable fans or powered vents that can depressurize the attic and increase house-to-attic air leakage
- Mixed vent types that can reduce ventilation effectiveness depending on placement and wind and stack effects (for example, some vents can pull air from nearby vents instead of washing the underside of the whole roof deck)
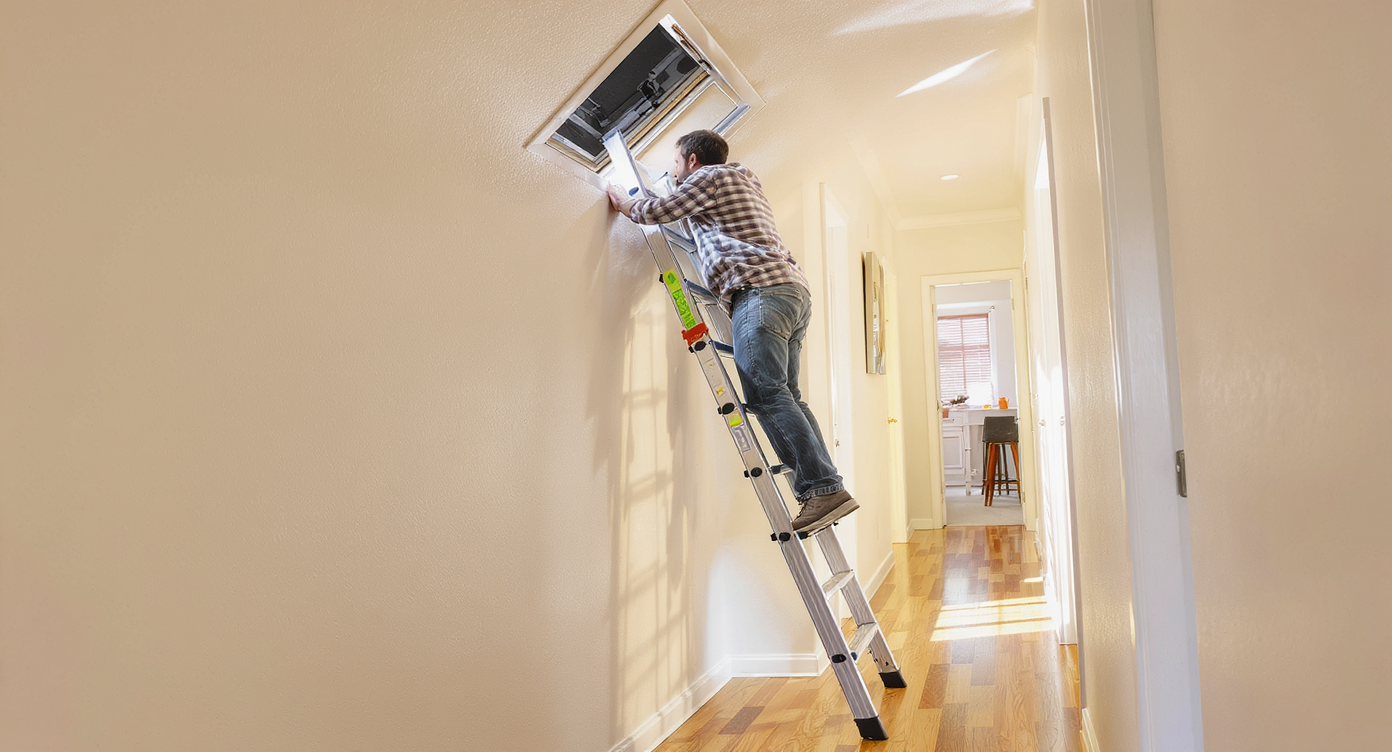
Safe DIY assessment
I am all for homeowner investigation, but mold is not a situation for guesswork. The goal is to confirm there is a problem, collect enough information to plan next steps, and avoid spreading spores or getting into structural or electrical trouble.
Safety first
- Wear N95 or P100 respiratory protection
- Use gloves and eye protection
- Step only on framing or a stable walkway, never on drywall
- Bring a bright flashlight or headlamp
- Do not run an attic fan or disturb growth just to "see better"
What to look for
- Pattern of staining: localized (leak) vs widespread (condensation, air leakage, ventilation issues)
- Moisture sources: bath fan ducts, kitchen exhaust, dryer vent routing, plumbing vents
- Air leakage points: attic hatch, recessed lights, top plates, wire penetrations
- Ventilation paths: are soffits open, are baffles installed, is ridge vent continuous
Simple tools that help
- Moisture meter for wood (spot checks help you see if areas are currently wet)
- Thermal camera or infrared attachment (useful for air leaks and missing insulation)
- Humidity and temperature meter or a small data logger to understand attic conditions over time
A note on mold testing: In many homes, you do not need lab testing to decide that visible growth plus moisture needs remediation. Testing can be useful when you cannot see the problem, you need documentation, or you are in a dispute. Otherwise, spend the money fixing the moisture pathway.
What not to do
- Avoid bleach on porous attic wood as your primary method. It does not fix the moisture cause, it is not ideal on porous materials, and overspray can add moisture. Follow EPA guidance or a professional protocol for your situation.
- Do not crank up ventilation with a powered fan as a first move if you have major air leaks. You can pull more humid air from the house.
- Do not cover mold with paint unless the wood is clean, dry, and the cause is solved. Encapsulation can be part of a plan, not the plan.
- Do not disturb large areas of growth without containment. Scrubbing can aerosolize spores.
Fix the cause first
If you take one thing from this page, make it this: remediation without moisture control is a reset button, not a solution. Here is the order I like.
Step 1: Stop roof water entry
- Inspect roof penetrations, flashing, valleys, and damaged shingles
- Repair leaks before any cleaning
- If ice dams are part of the story, address air sealing and insulation first, then consider roof edge strategies
Step 2: Correct exhaust ducting
- Vent to the outdoors through a proper roof cap or wall cap
- Use smooth, rigid duct where possible, and keep runs short
- Slope the duct slightly toward the exterior so condensation drains out, not back to the fan
- Insulate ducts in cold attics to reduce condensation
- Seal joints with foil tape or mastic, not cloth duct tape
Small but important caveat: Make sure the exterior termination uses a proper damper, and route the duct so any condensate does not drip onto soffits, fascia, or walkways where it could cause staining or icing. Local codes and fan manufacturers can have specific requirements, so follow them.
Step 3: Air seal the attic floor
- Seal plumbing and wiring penetrations with appropriate fire-rated products where required
- Weatherstrip and insulate the attic hatch
- Address recessed lights correctly, especially older fixtures
Step 4: Fix insulation and ventilation balance
- Install baffles to keep soffit intake paths open
- Confirm intake and exhaust are balanced and unobstructed
- Replace wet insulation and correct the reason it got wet
DIY removal steps
If the scope is small and you can fix the moisture source right away, DIY removal can be reasonable. The goal here is not to make attic wood look brand new overnight. It is to remove growth safely, keep spores out of the living space, and get the wood dry.
Before you start
- Fix the moisture problem first (or at least stop active wetting)
- Wear respiratory protection (N95 minimum, P100 is better), gloves, and eye protection
- Keep the attic hatch area clean, and avoid tracking dust through the house
- If possible, lay plastic or drop cloths to protect insulation below the work area
Basic method
- HEPA vacuum (if you have one): Gently vacuum surfaces to capture loose dust and spores. Do not use a standard shop vac without a HEPA filter.
- Apply a suitable cleaner: Use an EPA-registered antimicrobial labeled for mold or a common option like 3 percent hydrogen peroxide in a spray bottle. Lightly mist the area. You want damp, not dripping.
- Agitate and wipe: Scrub with a nylon brush or abrasive pad as needed, then wipe with disposable rags. Work small sections so you stay in control of moisture.
- HEPA vacuum again: After the surface dries, HEPA vacuum once more to pick up remaining residue.
- Dry thoroughly: The wood needs to dry. Improve ventilation as appropriate and address attic conditions so the moisture problem does not restart.
When to stop and upgrade the plan
- If material is crumbly, delaminating, or looks structurally compromised
- If you cannot work without creating lots of dust or dropping debris into insulation
- If the area keeps getting wet, or wood moisture readings stay elevated
DIY size rule of thumb: Many homeowner guidelines use an area threshold (often around 10 square feet) as a point where professional remediation becomes more appropriate. Treat that as a practical guideline, not a magic number. If anyone in the home has asthma, immune issues, or significant sensitivity, I would lean pro sooner.
DIY vs pro
Attic mold is a broad spectrum problem. Sometimes it is a small patch from one bath duct mistake. Other times it is widespread growth across the whole roof deck. The safest approach is to match the response to the scope.
DIY may be reasonable when
- The affected area is small and localized
- The wood is structurally sound and not crumbling or delaminating
- You can correct the moisture cause immediately
- You can work without creating dust clouds and without exposing the living space
Call a qualified remediation pro when
- Growth appears widespread across many bays or multiple roof planes
- You have health concerns like asthma, immune issues, or mold sensitivity in the household
- The attic ties into HVAC equipment or ductwork that could distribute spores
- There is wet, rotten wood or you suspect structural damage
- You need documentation for a real estate sale, landlord issue, or insurance claim
Why this matters: Pros can set up containment, negative air, and HEPA filtration, and use removal methods that reduce cross-contamination. That is hard to replicate safely with a shop vac and good intentions.
Keep it from coming back
Once the mold is addressed, your goal shifts to keeping attic wood dry year-round.
- Run bath fans during showers and for 20 to 30 minutes after (a timer switch helps)
- Make sure dryers and range hoods vent outdoors and that ducts are intact, sealed, and routed correctly
- Keep soffits open and insulation pulled back with baffles in place
- Check the attic after big weather events, especially wind-driven rain
- Watch indoor humidity in winter. Many homes do best around 30 to 40 percent in colder climates, and sometimes up to about 50 percent in milder climates depending on window performance and condensation risk
- Inspect duct connections annually. Flexible duct can sag and clamps can loosen
- Recheck after the next cold snap and confirm the wood stays dry. A moisture meter or a small humidity data logger can make this feel a lot less like guessing
Quick checklist
- Look for visible growth on sheathing and around nails
- Confirm every bathroom fan vents outdoors and the duct is insulated and sealed
- Confirm dryer and kitchen exhaust vent outdoors and are not leaking into the attic
- Check for roof leaks around penetrations and flashing
- Air seal obvious ceiling penetrations before adding insulation
- Make sure soffit intake is not blocked and airflow has a clear path upward
- Decide if the scope is small enough for DIY, or if it is time for a remediation pro
If you want, I can help you think through the likely cause based on what you see. The most helpful details are: where the staining is located (ridge area vs eaves), whether it is on one roof plane or both, and whether you have bath fans, a dryer vent, or a range hood running through the attic.
About Marcus Vance
Content Creator @ Grit & Home
Marcus Vance is a lifelong DIY enthusiast and self-taught home renovator who has spent the last decade transforming a dilapidated 1970s ranch into his family's dream home. He specializes in budget-friendly carpentry, room-by-room renovations, and demystifying power tools for beginners. Through his writing, Marcus shares practical tutorials and hard-learned lessons to help homeowners tackle their own projects with confidence.