Mold in the basement can feel like a personal failure. It is not. Basements are naturally cooler, closer to wet soil, and full of surfaces that love to collect condensation. The trick is to treat mold like a moisture detective story: find where water is coming from, stop it, then clean up what is left.
This page covers the common warning signs, the usual causes (foundation, grading, HVAC, plumbing), and safe first steps you can take without making the problem worse. I will also help you tell mold from efflorescence, which gets misdiagnosed all the time.
Warning signs you should not ignore
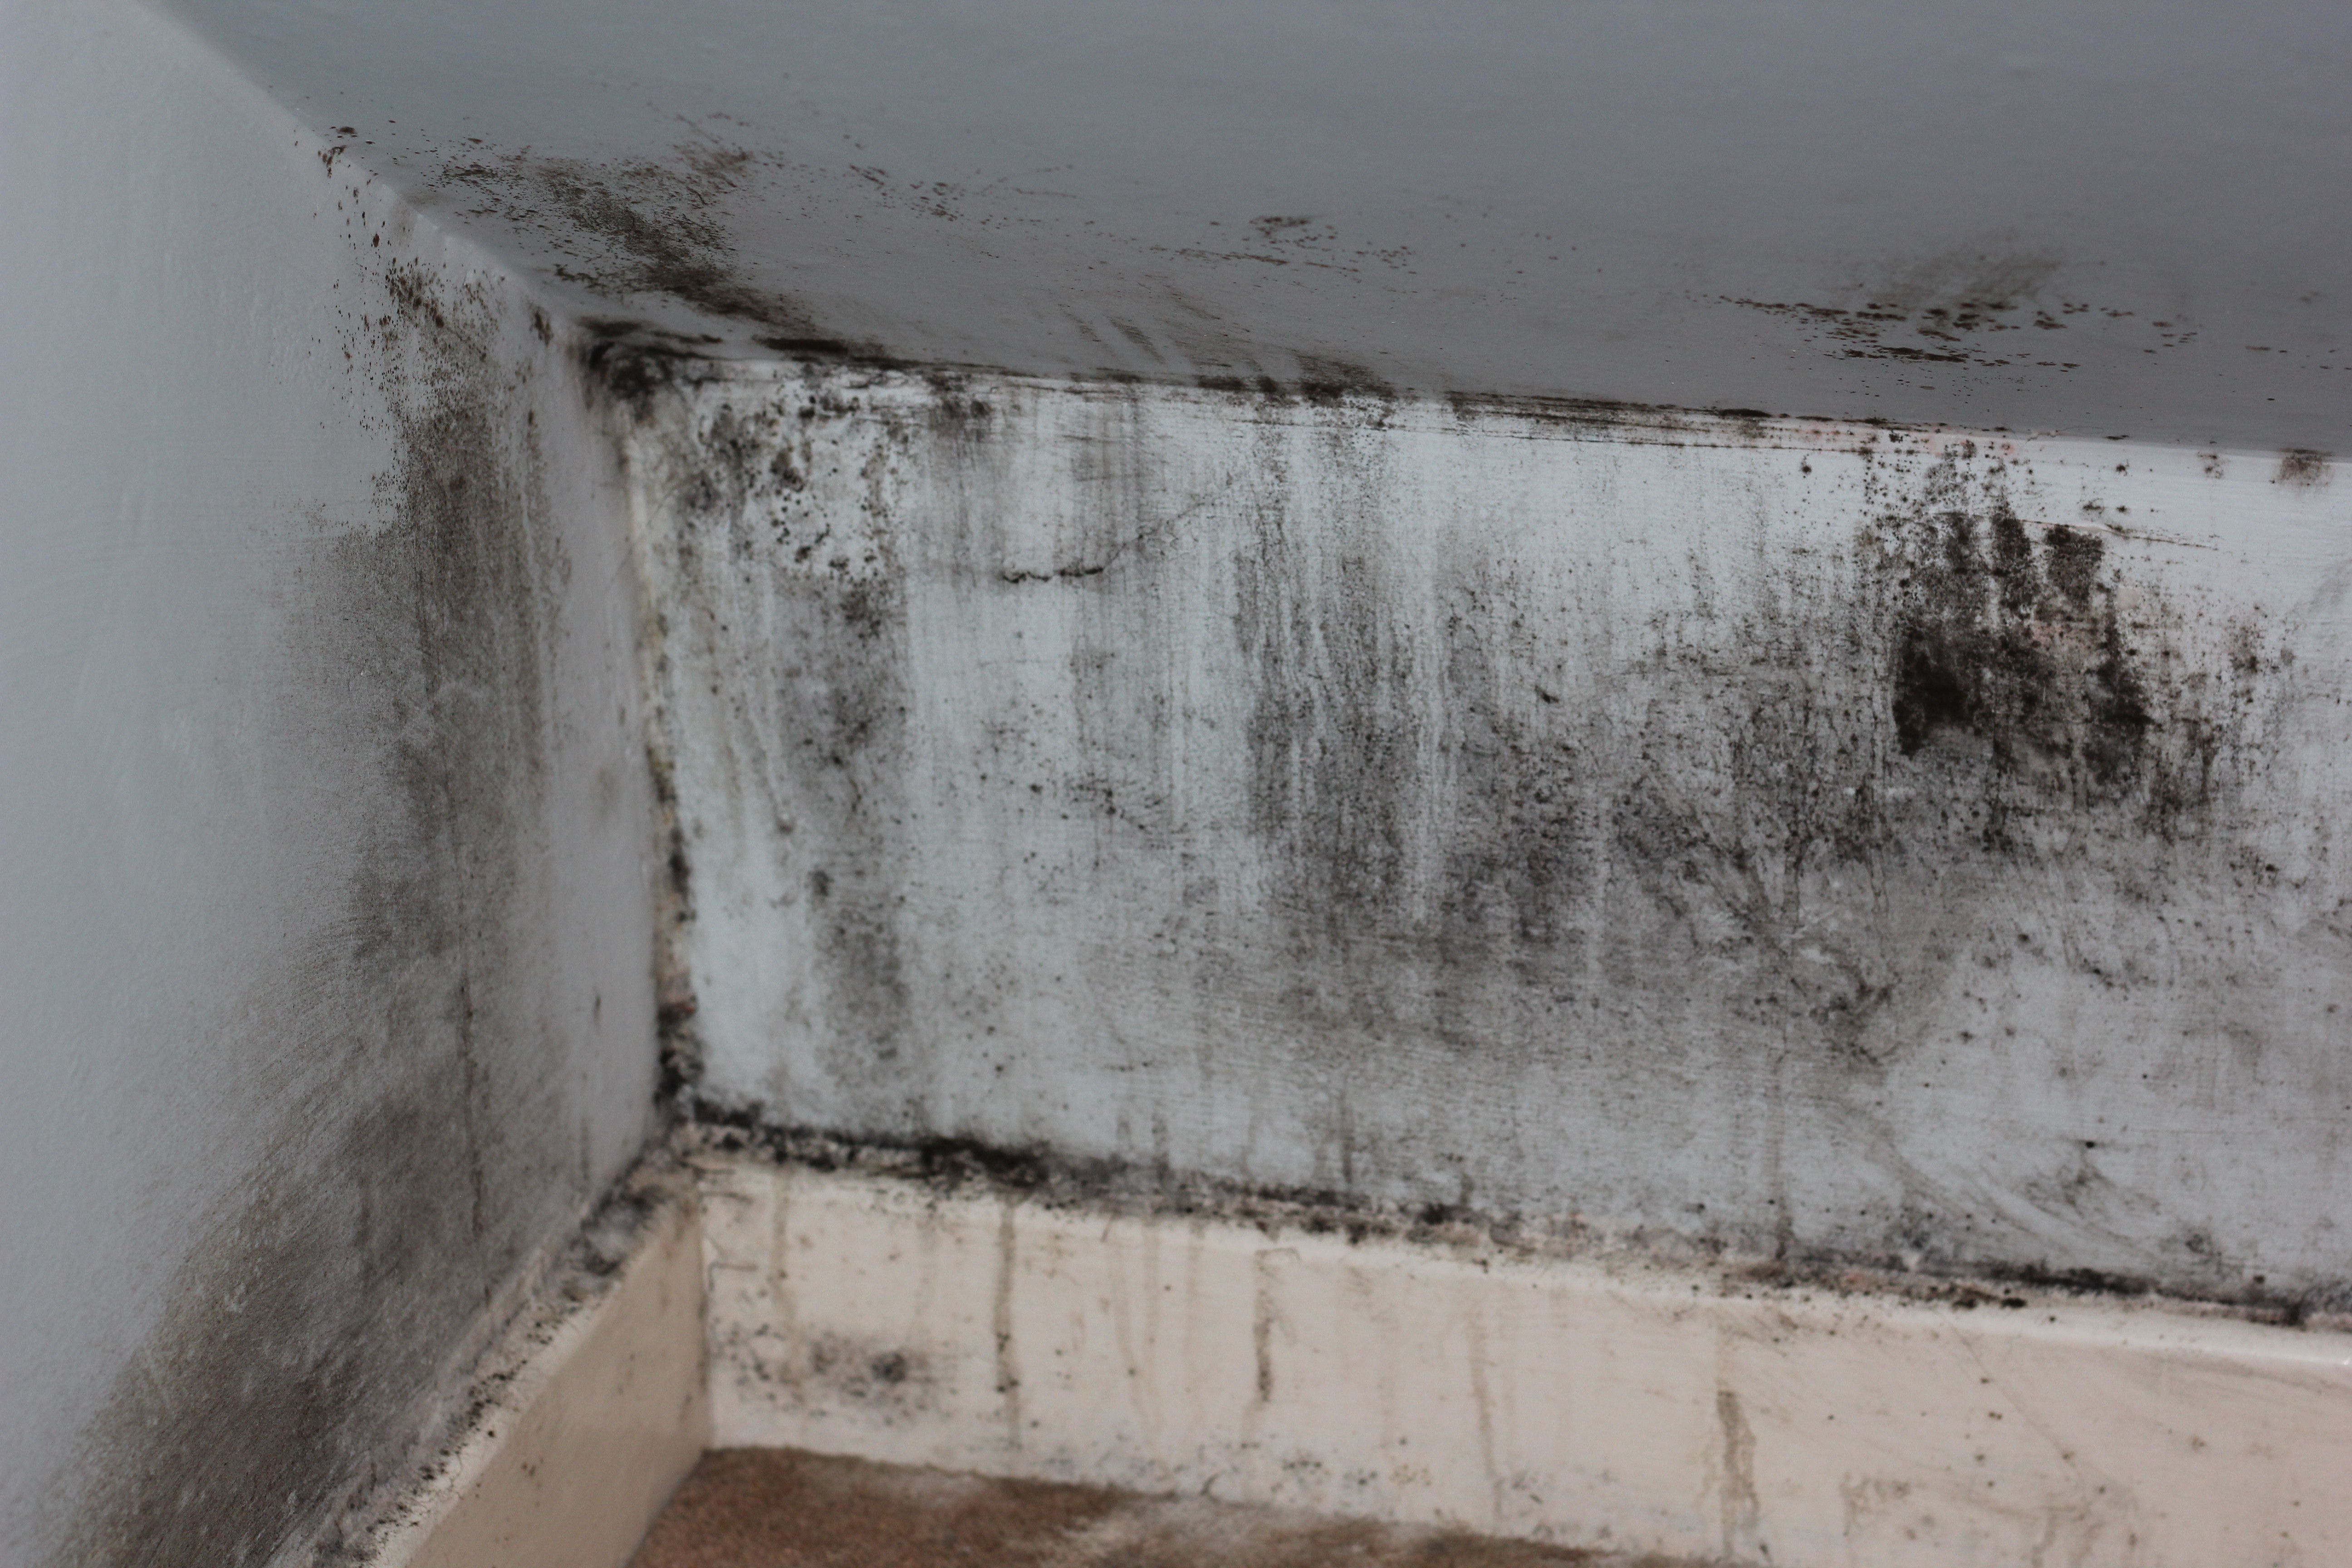
Basement mold does not always show up as fuzzy black patches. Sometimes the first clues are subtle and easy to rationalize away.
- Musty smell that returns quickly after cleaning or airing out.
- Condensation on ducts, water lines, windows, or the inside of exterior walls.
- Paint bubbling or peeling on foundation walls, especially behind shelving or stored boxes.
- Warped baseboards, swelling trim, or buckling laminate or vinyl flooring near the perimeter.
- White or gray powder on masonry (might be efflorescence, might be both).
- Rusting on metal shelving, nails, or the bottom of a furnace or water heater jacket.
- Allergy or asthma flare ups that seem worse after time in the basement.
If you have had a flood, sewer backup, or long standing leak, assume mold can be present even if you cannot see it yet.
Mold vs. efflorescence: a quick field test
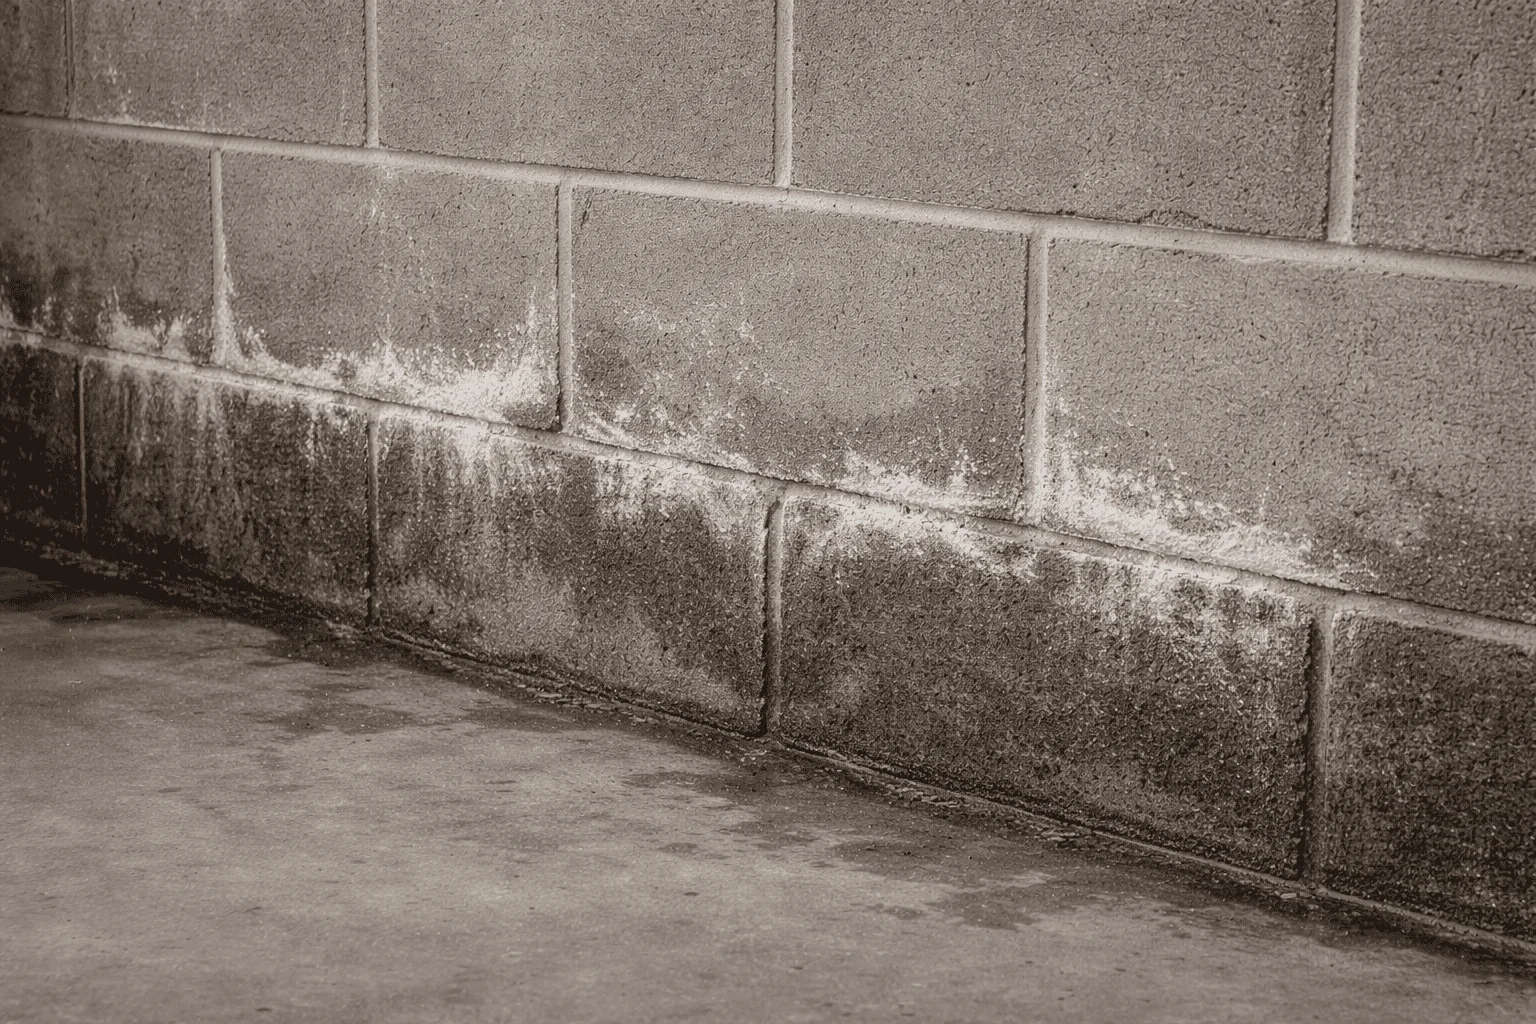
Efflorescence is a mineral salt deposit that forms when moisture moves through concrete or block and evaporates on the surface. It is common, and it is a big clue that water is migrating through the wall. It is also not “mold,” even though it can look scary.
How to tell them apart
- Color and texture: Efflorescence is usually white, light gray, or chalky. Mold is often dark (green, black, brown) but can be white too, and it tends to look fuzzy, speckled, or slimy.
- Where it shows up: Efflorescence typically forms on masonry surfaces where moisture is moving through. Mold likes organic material, like wood framing, cardboard, paper faced drywall, dust, and fabric.
- Simple wipe test: Wearing gloves, wipe a small spot with a damp paper towel. Efflorescence usually smears like chalk and dissolves. Mold often smears like dirt or leaves staining.
- Vinegar test on masonry: A drop of household vinegar on a suspected area can fizz slightly on mineral deposits. Do not use this as your only test, but it can be a clue.
Important: You can have both. Moisture that causes efflorescence can also raise humidity enough to grow mold on nearby wood, insulation, or stored items.
Where basement moisture usually comes from
In my experience, basement mold is rarely a “mystery spore problem.” It is almost always one of these moisture sources, or a few working together.
1) Foundation seepage and hydrostatic pressure
When soil around your foundation stays wet, water pressure pushes moisture through tiny cracks and pores in concrete. Even without visible puddles, that slow dampness can feed mold on anything organic nearby.
- Hairline cracks that darken after rain
- Damp spots at the wall to floor joint
- Efflorescence on block or concrete
2) Bad grading and gutter drainage
This is the unsexy fix that solves a lot of basements. If the ground slopes toward the house, or downspouts dump water next to the foundation, you are basically watering your basement every storm.
- Soil should slope away from the house for the first several feet.
- Downspouts should discharge well away from the foundation.
- Overflowing gutters can soak the wall line and drive seepage.
3) HVAC and ductwork sweating
Cold supply ducts running through a humid basement can sweat like a glass of iced tea. That dripping or steady condensation can create mold on joists, insulation, and the top of drop ceilings.
- Check for wet duct insulation, rusty hangers, and water lines on the floor below ducts.
- Look for air leaks at duct seams that blow cold air onto wood surfaces.
4) Humidity and poor air movement
A basement can look “dry” and still sit at 65 to 75% relative humidity in summer. That is high enough for mold to grow on dust and cardboard.
- If your basement has a musty smell but no obvious leak, start with a hygrometer.
- Target 30 to 50% relative humidity for most homes.
5) Plumbing leaks and hidden wet spots
A slow leak under a laundry sink, a sweating water line, or a small pinhole leak in copper can keep a corner damp for months.
- Inspect around the water heater, softener, laundry area, and any bathroom rough-ins.
- Look up: wet subflooring often means a leak from above.
6) Window wells and exterior penetrations
Basement window wells that fill with water, or gaps around utility penetrations, can send water right where you do not want it.
- Clear debris from window wells and verify drains function.
- Seal obvious gaps around pipes and conduits after the area is dry.
If your home also has a damp crawl space, the root causes can overlap. Stack effect and shared air pathways can move moisture and odors through the house. For a deeper moisture control plan, see our crawl space moisture guide on Grit & Home.
Safe first steps before you clean
Here is the order I recommend. The goal is to avoid stirring spores and to stop feeding the problem with new moisture.
Step 1: Do a quick health and risk check
- Keep kids and pets out of the area.
- If anyone in the home is immunocompromised or has severe asthma, lean toward professional help sooner.
- If you smell gas, see electrical hazards near water, or have active flooding, address safety first and call the right pro.
Step 2: Find and stop the moisture source
Cleaning without fixing moisture is like mopping while the faucet is still running. Start here:
- After rain, check walls and the wall to floor joint for fresh dampness.
- Run a dehumidifier and track humidity with a hygrometer.
- Inspect gutters, downspouts, grading, and window wells.
- Check ductwork and cold water lines for sweating.
- Look for plumbing drips and damp insulation.
Step 3: Document what you see
Take photos and note where you found growth and how large the area is. This helps you plan, and it is useful for insurance if the cause is a covered event.
Step 4: Dry the space fast
- Run a dehumidifier that drains continuously if possible.
- Use fans for air movement, but avoid blasting air directly at visible mold.
- If weather allows, open basement windows briefly to purge damp air, but only if outdoor humidity is lower than indoors.
PPE and containment basics
I have made the mistake of “just wiping a little spot” without proper protection. It is not worth it. Even small cleanups can kick particles into the air.
Minimum PPE for small areas
- Respirator: N95 at minimum, preferably a half-face respirator with P100 filters if you have it.
- Gloves: Nitrile or rubber.
- Eye protection: Safety glasses or sealed goggles.
- Clothing: Long sleeves and pants. Disposable coveralls are great if you are working overhead or in insulation.
Simple containment that helps
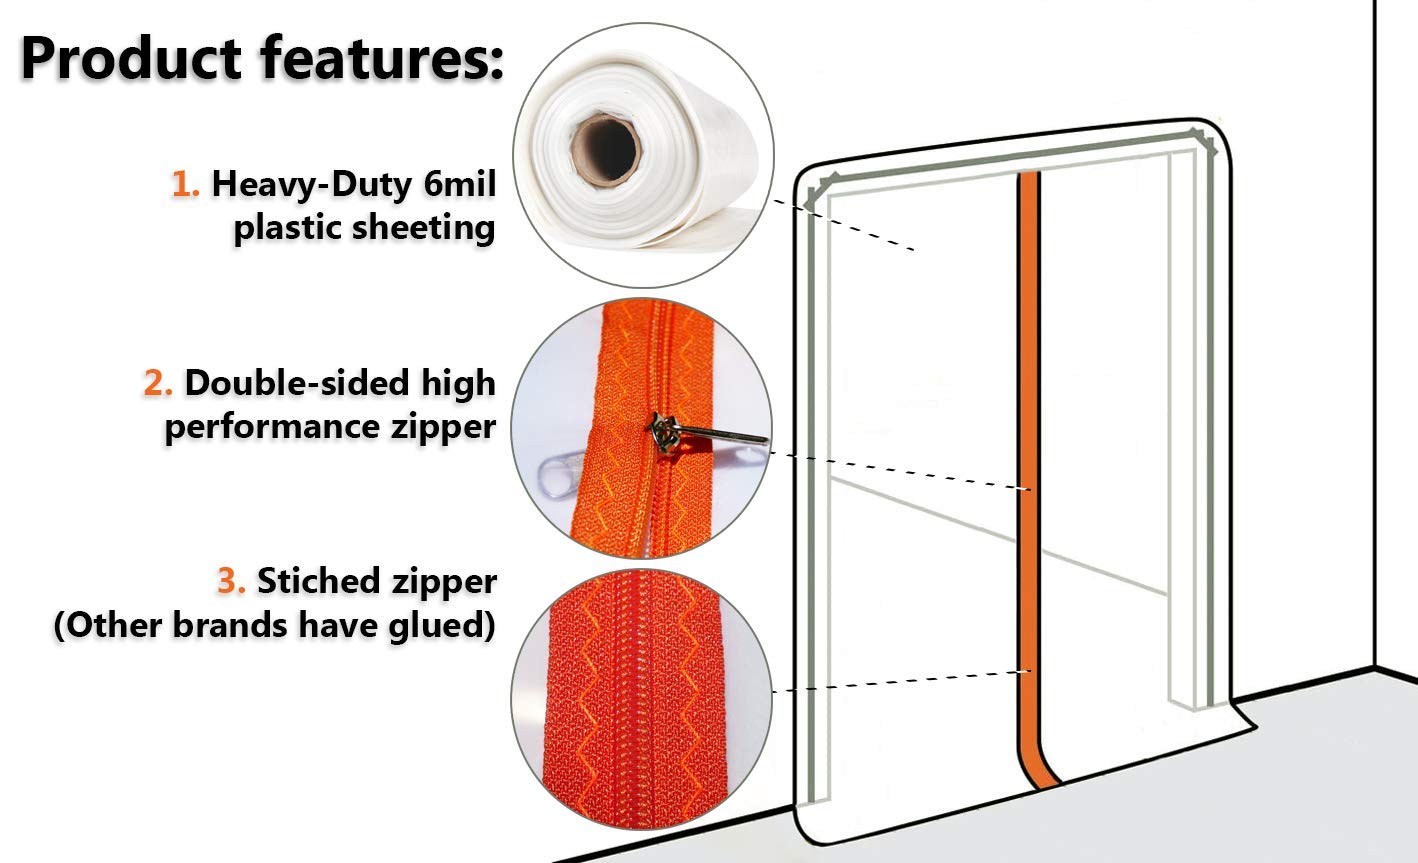
- Close doors and block off the work area with plastic sheeting and painter’s tape.
- Turn off fans or HVAC that could spread spores through the house while you disturb the area.
- Bag debris immediately in heavy contractor bags.
- Use a HEPA shop vac if you have one. A standard vacuum can make things worse.
How to clean small mold areas
If the area is truly small, you have corrected the moisture issue, and the mold is on a non-porous or semi-porous surface, you can often handle it yourself. The goal is simple: remove the growth, clean the residue, and dry the material completely.
What to use
- Soap and water: For many hard surfaces, warm water with a little dish soap and a scrub brush works well.
- Commercial antimicrobial cleaner: Choose one labeled for mold and mildew and follow the label exactly for dwell time and ventilation.
- Hydrogen peroxide (3%): Sometimes used on hard surfaces. Spot test first for discoloration.
Cleaning steps
- Set up containment and PPE (respirator, gloves, eye protection), then remove anything you can safely carry out in sealed bags.
- Lightly mist the surface with water to reduce dust if you will be scrubbing. Do not soak materials.
- Scrub with your chosen cleaner. Work small sections so you can control splatter.
- Wipe and rinse with clean water on hard surfaces, then wipe again with a clean cloth.
- Dry completely using a dehumidifier and gentle air movement. If it stays damp, it will come back.
- HEPA vacuum the area after it is dry, if you have a HEPA unit, to pick up settled particles.
A bleach reality check
Bleach is often treated like a magic mold fix. It is not. On porous materials like wood, drywall paper, or framing with rough grain, bleach may not penetrate to where roots can be, and the added water can make the problem worse. If you are dealing with porous material, the better move is often removal and replacement, especially if it is soft, crumbling, or stained deep.
If the surface is bare concrete or tile, bleach solutions are sometimes used, but they still are not my first choice. In basements, I would rather focus on physical removal (scrub and wipe), then keeping humidity controlled.
What you can DIY (and what you should not)
Homeowner cleanup is best for small, non-porous surfaces and minor spots where you are confident you can control dust and moisture.
Often DIY-friendly
- Small areas of growth on sealed concrete or glazed tile where the material is intact
- Mildew on painted surfaces that are not bubbling or peeling
- Surface growth caused by a one-time humidity spike you have already corrected
Usually not DIY-friendly
- Mold on drywall, especially if it is soft, crumbling, or widespread
- Mold in insulation or inside wall cavities
- Growth on framing that is extensive or paired with rot
- Any situation involving sewage or contaminated floodwater
One rule I live by: if the material is porous and the mold has had time to root into it, cleaning the surface is rarely enough. Removal is often the right call.
When to call a professional
Professional remediation is not just about stronger chemicals. It is about controlled demolition, containment, filtration, and verifying that the moisture problem is solved.
- Large area: If you have more than about 10 square feet of visible mold, or multiple areas across the basement.
- Hidden spread: Mold smell with no obvious source, or growth behind finished walls, baseboards, or flooring.
- Water event: Flooding, sewer backup, or long-term leak that saturated building materials.
- HVAC involvement: Mold in ducts, on the air handler, or on fiberglass duct liner.
- Health concerns: High-risk occupants or symptoms linked to the basement.
- Structural concerns: Rotting sill plates, rim joists, or compromised studs.
If you bring in a pro, ask how they will control dust, what level of containment they use, whether they run HEPA air scrubbers, and what their post-job verification looks like. A good company will talk moisture control first, not just “spray and fog.”
Moisture control fixes
Once you have handled the immediate issue, prevention is where you win long-term.
Outside the house
- Clean and repair gutters, then extend downspouts away from the foundation.
- Improve grading so surface water runs away from the home.
- Keep mulch and soil from piling above the siding line.
- Maintain window wells and verify they drain.
Inside the basement
- Run a dehumidifier during humid months and keep humidity in the 30 to 50% range.
- Insulate cold surfaces that sweat, like ducts and cold water pipes.
- Store items in plastic bins, not cardboard, and keep storage off the floor.
- Leave a small gap between furniture and exterior walls for air movement.
If you are finishing a basement, make moisture management part of the plan. Basements can be beautiful living spaces, but they need the right materials and details for your climate.
Quick checklist
- Smell or see something suspicious? Limit access and take photos.
- Find the moisture source: rain patterns, plumbing, HVAC sweating, humidity.
- Start drying: dehumidifier, controlled ventilation, targeted fans.
- Use PPE: respirator, gloves, eye protection.
- Confirm if it is mold or efflorescence on masonry.
- Clean small, controllable areas with soap and water or an appropriate antimicrobial cleaner.
- Decide: small surface spot you can contain, or time to call a pro.
If you are stuck, leave a comment with what your basement walls are made of (poured concrete, block, or finished drywall), what climate you are in, and when you notice the smell most. Those three details usually narrow the cause fast.
About Marcus Vance
Content Creator @ Grit & Home
Marcus Vance is a lifelong DIY enthusiast and self-taught home renovator who has spent the last decade transforming a dilapidated 1970s ranch into his family's dream home. He specializes in budget-friendly carpentry, room-by-room renovations, and demystifying power tools for beginners. Through his writing, Marcus shares practical tutorials and hard-learned lessons to help homeowners tackle their own projects with confidence.