🚨 In a DIY emergency or rush?
Skip the details and jump straight to our 30-second cheat sheet for the most crucial info.
Bifold closet doors look simple until one starts hopping off the track and turning every morning into a tiny wrestling match. The good news is most “won’t stay on track” problems come down to three things: the bottom pivot pin and bracket, the top guide (the little plastic piece that slides), or a door that is rubbing somewhere and getting forced out of position.
I have fought this exact battle in our 1970s ranch more times than I care to admit. The first time, I kept tightening random screws like I was playing whack-a-mole. The fix got easy once I learned what each piece actually does.
How it stays on track
Most bifold systems are built around a simple idea:
- The pivot side (one outer edge of the door) has a top pivot pin and a bottom pivot pin.
- The bottom pivot pin sits in a floor bracket (sometimes on the jamb, sometimes on the floor).
- The top pivot pin sits in a top bracket.
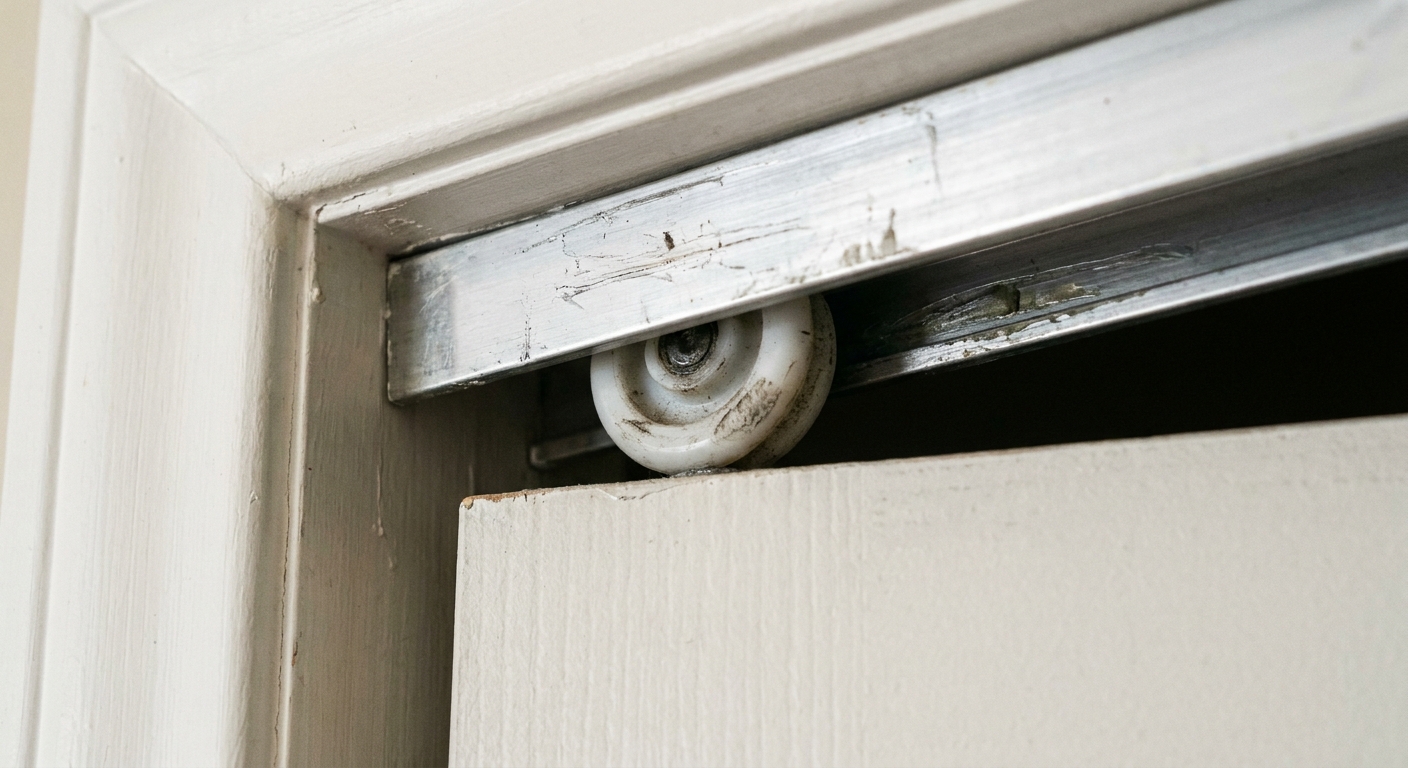
- The other outer edge uses a top guide (usually plastic) that slides inside the top track.
If the door is too tall for the opening, twisted, rubbing carpet, or the pivot pins are not centered in their brackets, the guide gets shoved sideways and eventually pops out.
Tools and supplies
- Phillips screwdriver or drill with clutch set low
- Flathead screwdriver (helpful for prying a guide back in)
- Adjustable wrench or pliers (for some pivot pins)
- Level (small torpedo level is fine)
- Flashlight
- Replacement parts (optional): top guides, pivot pins, bottom bracket
Safety note: Bifold doors are light, but they can still pinch fingers when they fold. Keep hands clear of the hinge side when lifting and re-seating pins.
Step 1: Check easy problems
Is it rubbing carpet or a rug?
If your door drags, it is constantly being pushed upward and sideways. That force works the pins out of alignment and makes the guide jump the track.
- Open and close the door slowly and watch the bottom edge.
- If it brushes carpet, check whether the carpet is thicker than when the door was installed, or if the door has sagged.
- Try lifting the door slightly while closing. If it suddenly behaves, you have a height or sag issue.
Quick fixes: raise the door using the threaded bottom pivot pin (Step 3), adjust the bottom pivot bracket (next steps), tighten loose hinges, or trim the door only if adjustments cannot create enough clearance.
Is the top track dirty or bent?
Top guides hate friction. A little drywall dust or a paint ridge inside the track can make the guide bind, then pop out when you push the door.
- Vacuum the track.
- Wipe with a damp rag and let it dry.
- Look for screws sticking down into the track channel.
- Check for a dented track lip near where it pops out.
Lubricant tip: If you want lubrication, use a dry silicone spray sparingly. Avoid greasy products that turn the track into a dust magnet.
Step 2: Reseat the door
If the door has partially come out, start by getting it properly seated. Adjusting hardware while it is half-out just creates new problems.
- Fold the door and lift slightly to take weight off the bottom pivot.
- Snap the top guide back into the track. Most guides angle in and then pop up into the channel.
- Set the bottom pivot pin fully into the bottom bracket.
- Let the door hang naturally and see what it wants to do. If it immediately leans or rubs, that is your clue where to adjust.
If your door keeps falling out the second you let go, skip ahead to the sections on worn pivots and damaged brackets.
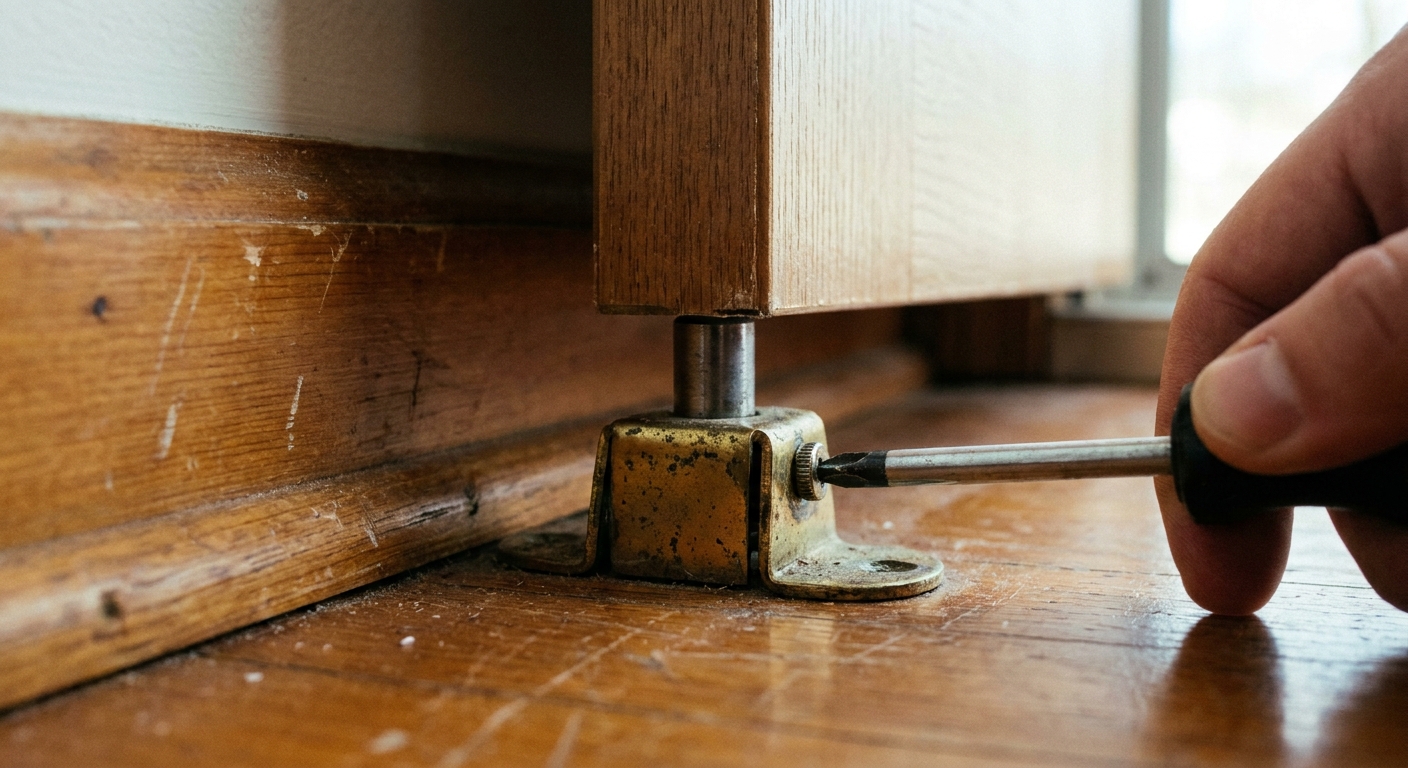
Step 3: Adjust door height
This is the step I wish someone had drilled into my head earlier. Most bifold doors have a threaded bottom pivot pin (or an adjustment nut on the pin) specifically so you can raise or lower the entire door. If your door is rubbing carpet, this is usually the standard first move before you touch a saw.
Find the adjustable pin
- Look at the bottom corner on the pivot side. The metal pin often threads into the door edge, or it passes through a bracket with an adjustment nut.
- Some designs have a small hex nut you turn with a wrench. Others let you rotate the pin itself with pliers.
Raise or lower in small turns
- Fold the door and lift slightly to take weight off the bottom pivot pin.
- Turn the adjustment nut or rotate the threaded pin a little at a time.
- Re-seat the pin in the bracket, close the door, and check for rubbing and smooth travel.
- Aim for consistent clearance at the bottom. If you can get close to about 1/4 inch, you are usually in the happy zone.
Small warning from experience: do not crank it wildly. A couple of turns can make a big difference, and over-adjusting can make the top guide bind just as badly as dragging on the floor.
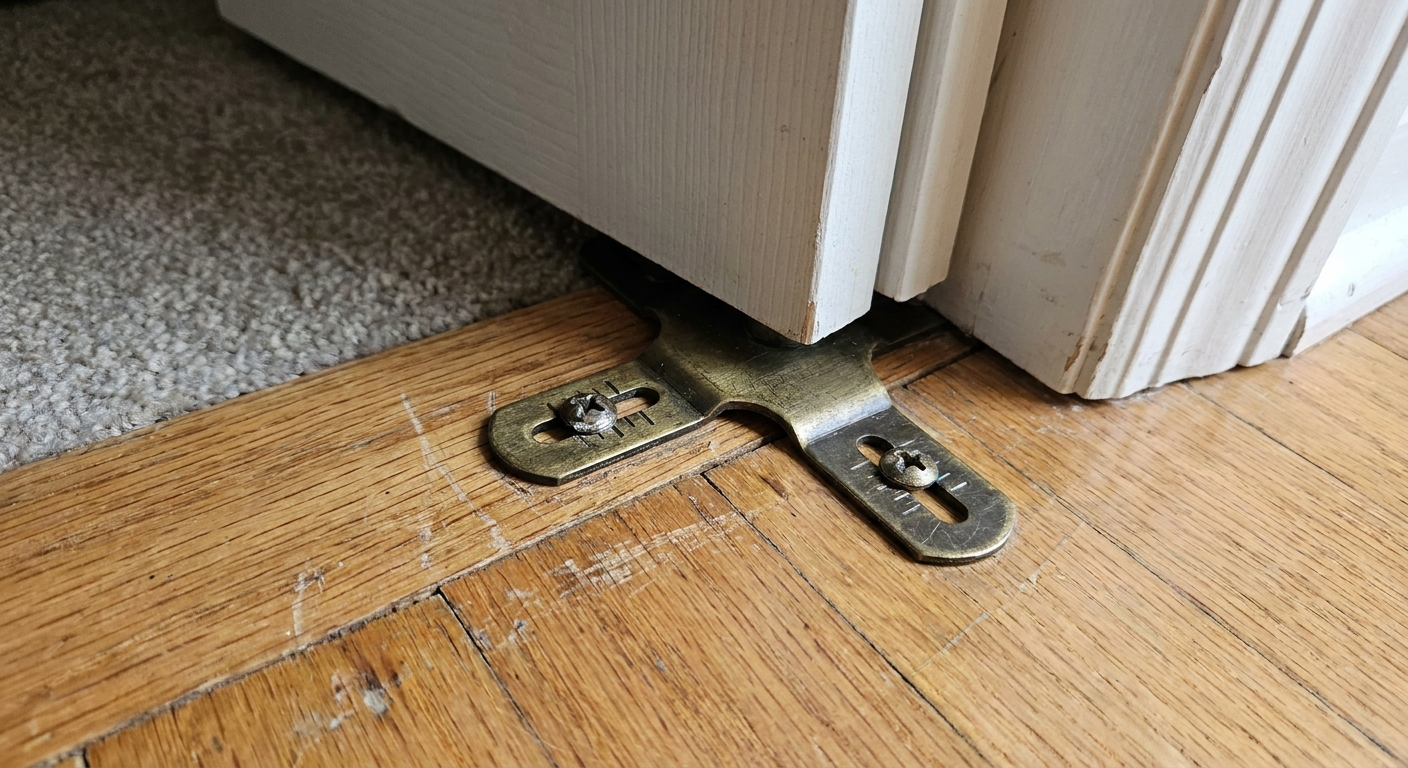
Step 4: Adjust bottom bracket
The bottom bracket controls where the door “stands” in the opening. A door that is too far left, too far right, or twisted slightly will shove the top guide sideways and eventually jump the track.
Find the adjustment screws
Most bottom brackets have either:
- Slotted screw holes so the bracket can slide left or right.
- A cam-style adjustment or screw that moves the pivot position slightly.
Adjust in small moves
- With the door closed, look at the gap along the jamb and between the two door panels.
- Loosen the bracket screws just enough to move it.
- Slide the bracket 1/16 to 1/8 inch at a time. Tighten and test.
- Your goal is a door that closes without rubbing and without pushing the top guide against the track wall.
My rule: if the top guide wants to climb out on the left, it is often being pushed left by a bottom pivot that is positioned wrong or a door that is leaning. Correct the lean at the bottom first.
Step 5: Align top hardware
If the bottom pivot is solid and the door still pops out, move up top.
Top pivot bracket
The top pivot pin needs to sit straight and centered in its bracket. If the bracket is skewed or loose, the pin shifts, the door tilts, and the guide binds.
- Check that the top pivot bracket screws are snug.
- Look for a bracket that has slipped so far that the pivot pin is riding the edge.
- If it has slotted holes, loosen slightly, nudge into position, re-tighten.
Top guide issues
The top guide is a sacrificial part. When something is off, it is often the first thing to crack or wear down.
- If the guide is cracked, loose, or missing a wheel, replace it. Adjustments will not compensate for broken plastic.
- If the guide is worn into a sharp edge, it will catch on the track lip and pop out.
- Make sure the replacement guide matches your track style. “Universal” sometimes means “almost fits.”
Step 6: Tighten hinges
When the hinges between the two door panels loosen, the panels twist slightly. That twist shows up at the top guide as binding and derailment.
- With the door half open, check each hinge screw. Tighten gently.
- If screws spin, pull them, fill the hole with a few wood toothpicks and wood glue, let it set, and re-drive the screw.
- If the door is visibly sagging at the outer edge, adjust the pin height first, then the bottom bracket, then re-check hinge tightness.
Common mistake (I have made it): over-tightening hinge screws into soft, stripped wood. They feel tight for a day, then the door sags again. Fix the stripped holes and you usually fix the sag.
Worn pins and brackets
If your adjustments won’t hold, the hardware may be worn out. Here is what to look for.
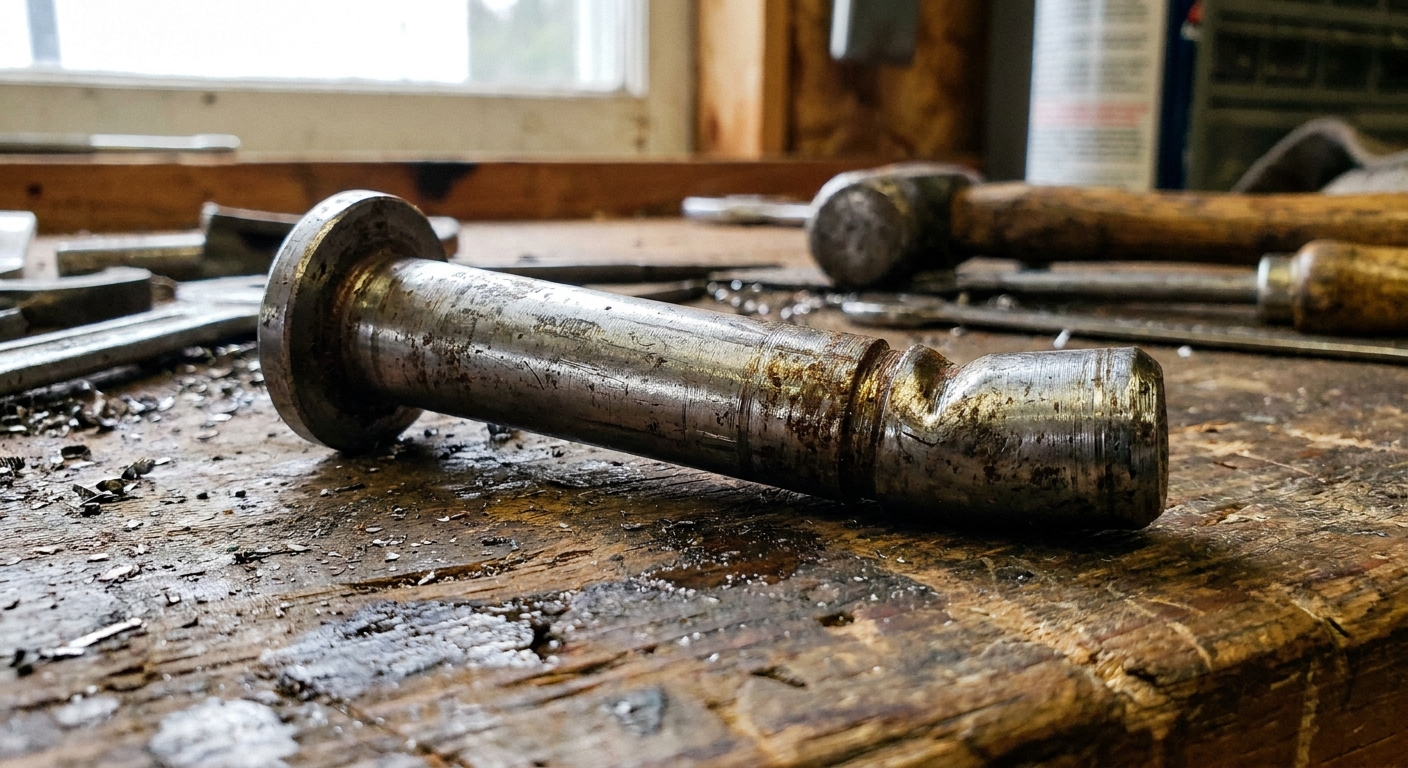
Worn pivot pins
- Pin looks bent or has a shiny flat spot where it has been grinding.
- Pin feels loose in the door edge, even when seated.
- Door can be lifted and you see the pin jump inside the bracket.
Worn bottom bracket
- Bracket is spread open so it no longer captures the pin.
- Bracket rocks because the screw holes are wallowed out.
- Metal is bent from repeated derailments.
Thrifty reality: If the bracket is misshapen, you can sometimes bend it back, but it usually fails again. A new bracket is cheap and saves you from repeating the same adjustment every two weeks.
When rubbing is real
If the door clears when the carpet is pressed down but rubs when the carpet fluffs up, you have a clearance problem that hardware adjustments may not fully solve.
- New carpet or thick pad: Sometimes the door was never resized after flooring changes.
- Added floor layers: Vinyl plank over old flooring can shrink the opening height.
- Swollen door bottom: In humid basements, hollow-core doors can swell and drag.
Order of operations: raise the door using the threaded pivot pin first, then try bracket adjustments, then consider trimming the bottom edge if you cannot get consistent clearance.
If you trim: remove the door, mark a straight cut line, and use a fine-tooth blade. Seal the cut edge with paint or polyurethane so it does not wick moisture.
Replace or adjust
I love fixing things instead of replacing them, but there is a point where you are “adjusting around” worn parts.
- Replace the top guides if they are cracked, loose, or worn. This is the cheapest win.
- Replace pivot pins if they are bent or sloppy in the bracket.
- Replace the bottom bracket if it will not firmly capture the pin after tightening.
- Replace the entire hardware set if multiple components are worn and the door still hops the track after proper alignment.
A full bifold hardware kit is usually less money than the time cost of constant tweaking. If your door is original to an older home, the metal may simply be tired.
Quick troubleshooting
- Door pops out when closing: top guide binding, track dirty, or door leaning due to bottom bracket position.
- Door pops out when opening: top guide worn, top pivot bracket loose, or hinge sag twisting the panels.
- Door won’t stay square: bottom bracket slipped, stripped screws, bent pivot pin, or pin height set wrong.
- Door rubs floor: pivot pin height needs adjusting, sagging hinges, floor height change, or door needs trimming.
Wrap-up
When a bifold won’t stay on track, resist the urge to muscle it. Get the door seated, clean the track, adjust the door height at the threaded bottom pivot pin, then fine-tune the bottom bracket in tiny moves. After that, dial in the top bracket and replace any worn guides. If the pins or brackets are worn, replacement will beat endless adjustment every time.
The 30-Second Cheat Sheet
Essential takeaways for: Bifold Closet Door Won’t Stay on Track? Fix Pins and Brackets
Fast diagnosis
- Pops off track usually means: bottom pivot bracket misaligned, top guide worn, or door rubbing carpet.
- Drags on carpet means: door is too low (pin height, sagging hinges, or bracket position) or floor height changed.
- Keeps happening after adjustment means: pivot pins or brackets are worn or bent.
30-second fix order
- Reseat door: top guide fully in the top track, bottom pivot pin fully in bottom bracket.
- Clean top track: vacuum, wipe, remove paint ridges, check for screws protruding into the channel.
- Adjust height: raise or lower the door by turning the threaded bottom pivot pin or its adjustment nut. Re-seat and test.
- Adjust bottom pivot bracket: loosen screws, slide 1/16 to 1/8 inch, tighten, test. Aim for even gaps and no side pressure on the top guide.
- Tighten hinges: fix stripped screw holes with toothpicks + wood glue if needed.
- Check top pivot bracket: tighten or nudge in slotted holes so the pin sits centered.
Replace instead of adjusting when
- Top guide is cracked, loose, or worn.
- Pivot pin is bent or sloppy in the bracket.
- Bottom bracket is spread, bent, or will not capture the pin firmly.
- You have made multiple adjustments and it still derails.
Pro tip
If you changed flooring or installed thicker carpet, start by raising the door with the threaded bottom pivot pin. Trim the door bottom only after you have exhausted pin height, bracket, and hinge fixes, then seal the cut edge.
💡 Tip: Scroll up to read the full article for detailed, step-by-step instructions.
⬆️ Back to topAbout Marcus Vance
Content Creator @ Grit & Home
Marcus Vance is a lifelong DIY enthusiast and self-taught home renovator who has spent the last decade transforming a dilapidated 1970s ranch into his family's dream home. He specializes in budget-friendly carpentry, room-by-room renovations, and demystifying power tools for beginners. Through his writing, Marcus shares practical tutorials and hard-learned lessons to help homeowners tackle their own projects with confidence.