🚨 In a DIY emergency or rush?
Skip the details and jump straight to our 30-second cheat sheet for the most crucial info.
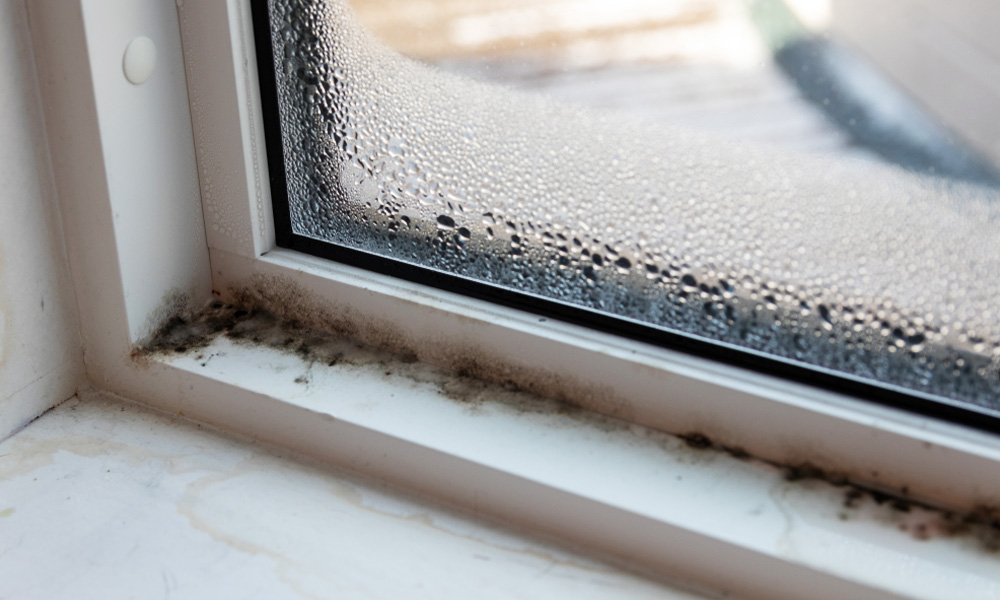
That black fuzz or peppery speckling on a window sill is most often a moisture problem first, and a cleaning problem second. The good news: most window-sill mold is surface growth from condensation, and you can handle it with careful, HEPA-first steps. The better news: if you fix why the sill is staying wet, you can usually keep it from returning.
I’ve battled this in my own 1970s ranch every time the first cold snap hits and the indoor air stays warm and humid. Once I treated the cause, the “mold season” around our windows basically disappeared.
First, make sure it is mold
Window sills collect a weird mix of stuff: dust, soot from candles, dirt from blinds, even insect specks. Here’s a quick reality check.
- Likely mold: irregular specks or smudges that smear greenish, brownish, or black when wiped with a damp paper towel, often near corners and along the bottom where water sits.
- Likely dirt or soot: a uniform gray film that wipes clean easily and does not reappear quickly unless you burn candles or have dusty airflow.
- Could be mildew: lighter gray or white dusty growth, still moisture-related and treated similarly.
If you are dealing with a thick, fuzzy mat of growth, stained drywall around the window, or a musty smell that hits you when you walk into the room, skip ahead to the “when to test or call a pro” section.
Why sills grow mold
Mold needs moisture, a food source (dust counts), and time. Window sills are perfect because condensation can wet them daily without you noticing. Less often, the moisture is coming from an exterior leak or a localized mechanical issue (like HVAC condensation).
Common causes
- Indoor humidity is high (showers, cooking, humidifiers, lots of plants, damp basements) and it condenses on cold glass.
- Cold window surfaces from older double-pane units, failed seals, or single-pane glass.
- Air leaks around the frame that chill the interior trim and create cold spots where moisture forms.
- Poor airflow from heavy curtains, closed blinds 24/7, or furniture blocking vents. Stagnant air lets moisture linger.
- Wet track or weep issues on sliding windows where water collects, plus dust and pollen make a perfect “snack bar.”
My rule of thumb: if you regularly see fogged glass in the morning, you will eventually see mold on the sill unless you change something.
Condensation or a leak?
This matters because condensation is usually a humidity and airflow fix, while a leak is a building-envelope fix.
- More like condensation: fogging on the glass, water beads on the interior in the morning, issues worsen on cold nights, and multiple windows show the same pattern.
- More like a leak: dampness shows up after rain or wind, staining is localized to one corner or the wall below the window, paint bubbles repeatedly, or you see water trails.
- Quick checks: inspect exterior caulk and flashing, make sure window weep holes are open, and look for gaps around interior trim that could be pulling in cold air.
If you are a renter or in a condo, recurring moisture that looks like a leak is worth documenting and reporting to property management sooner rather than later.
Wood vs vinyl sills
Cleaning is similar, but how aggressive you can be is different.
Vinyl or painted PVC
- More forgiving. Non-porous, so mold is usually on the surface grime.
- You can use a bit more scrubbing without ruining the material.
- Bleach can discolor some vinyl and does not penetrate grime well, so it is not my first choice.
Wood or painted wood
- Wood is porous. If the finish is damaged, moisture can soak in and staining can remain even after cleaning.
- Over-wetting is the enemy. Too much liquid can drive moisture deeper.
- If paint is peeling or the wood feels soft, treat it as potential deeper damage, not just surface mold.
- Raw or unfinished wood: if growth is embedded or keeps returning, the fix may involve sanding, sealing, or replacing damaged material after the moisture issue is solved.
Safety setup (HEPA-first)
You do not need a hazmat suit for a few small spots, but you do want to avoid blasting spores into the room and breathing them in.
Gear checklist
- N95 or P100 respirator (at minimum an N95)
- Nitrile gloves
- Eye protection
- True HEPA vacuum (sealed unit designed for fine particles, not “HEPA-like”)
- Disposable paper towels or clean rags you can hot-wash immediately
- Trash bag for immediate disposal
Keep it contained
- Keep kids and pets out of the room while you clean and until everything is dry.
- Open the window if outdoor humidity is lower than indoors and weather allows.
- Turn off any fan that will blow across the sill and spread dust.
- If you have a portable air purifier with HEPA, run it nearby.
- Store cleaners out of reach and recap them as soon as you are done.
Cleaning steps
What you need and how long
- Time: about 20 to 45 minutes per window (plus dwell time).
- Supplies: true HEPA vacuum, paper towels or rags, gloves, eye protection, N95, cotton swabs or toothbrush, and one cleaner (peroxide or vinegar).
This method focuses on capturing spores and not soaking the surrounding wood or drywall.
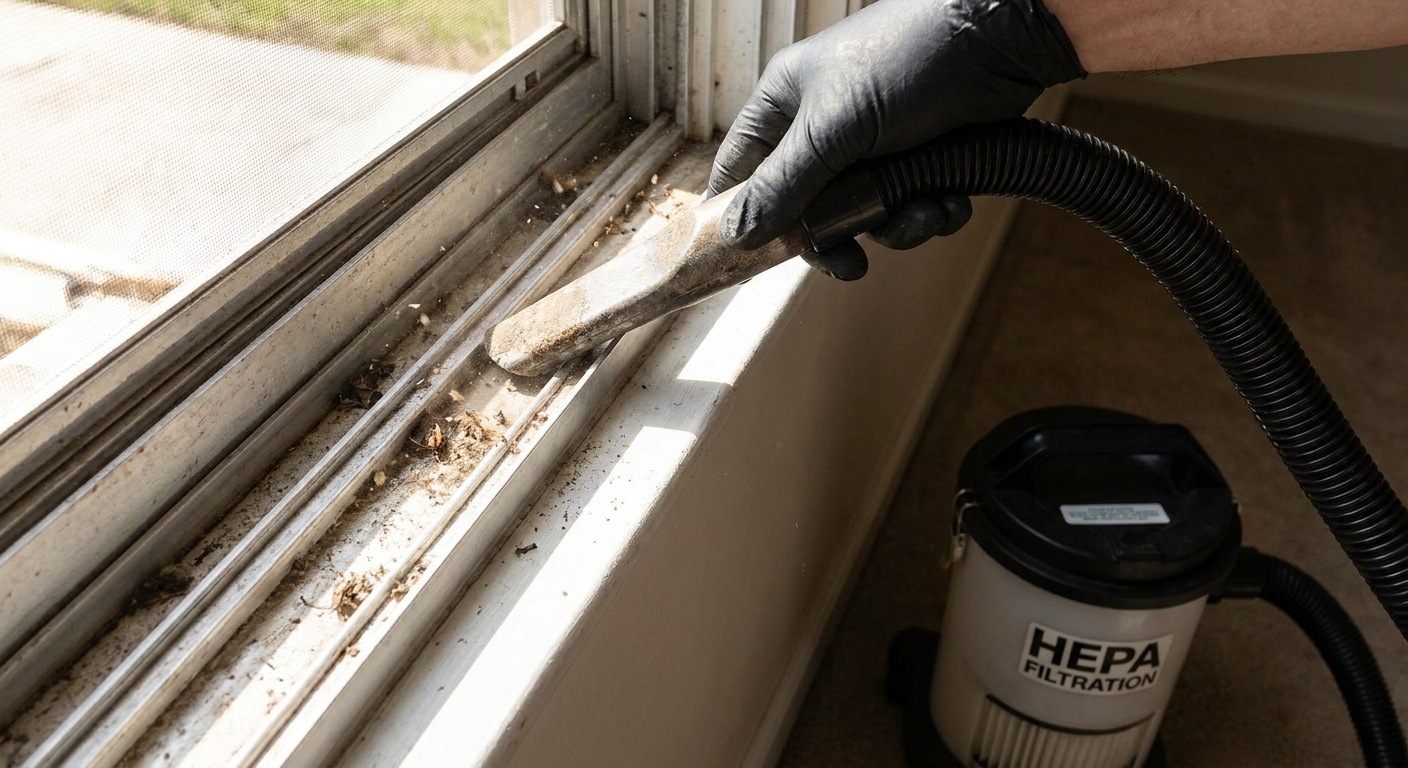
Step 1: Vacuum the dry surface
Gently vacuum the sill, corners, and window track while the surface is still dry, using a true HEPA sealed vacuum. Gentle is the key. You want to lift dust and loose particles without whipping them into the air. Avoid non-HEPA vacuums for this job.
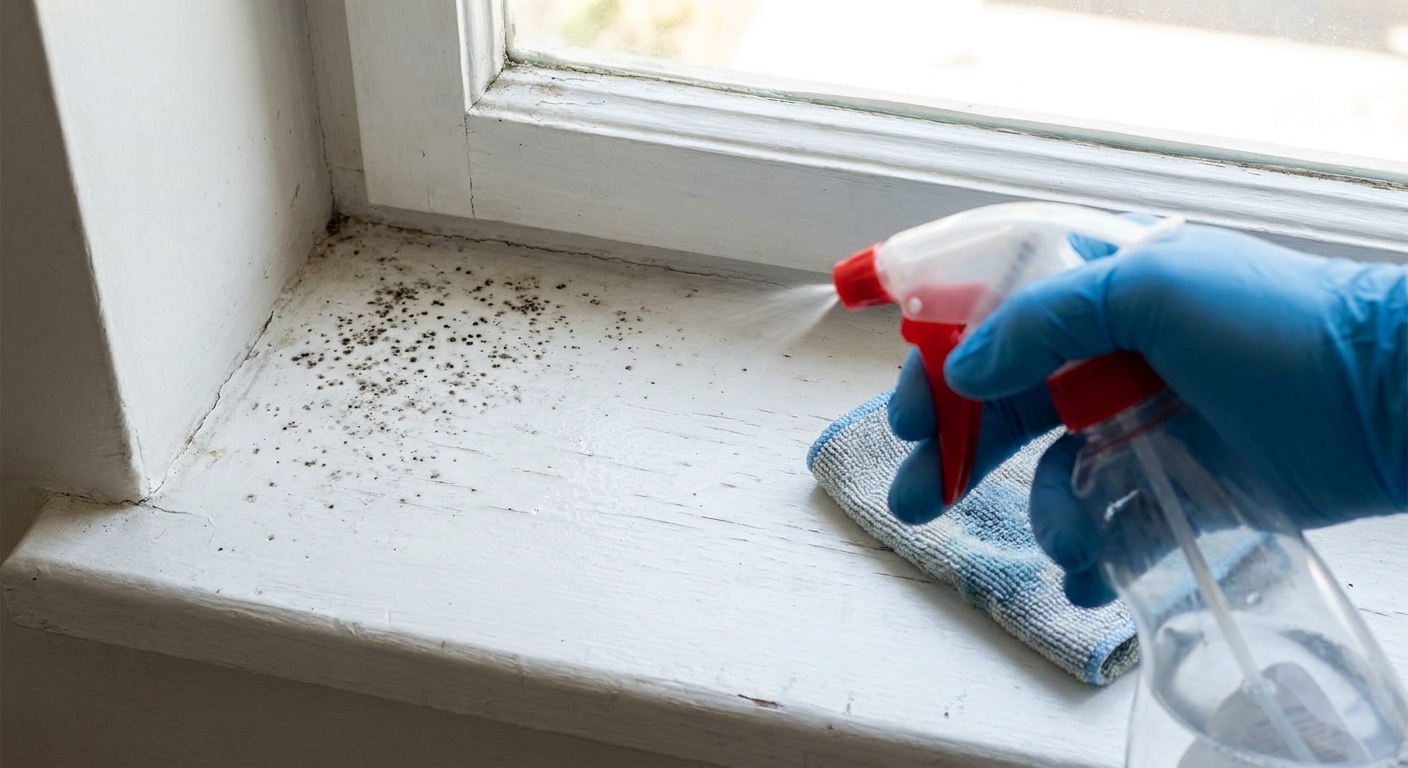
Step 2: Apply a cleaner
Lightly mist your cleaner onto a paper towel or rag first, then wipe the sill. I prefer wiping over spraying directly, especially on wood, because overspray soaks into joints and paint seams.
- Hydrogen peroxide (3%): great general option for hard surfaces and painted trim. Let it dwell for about 10 minutes (typical), then wipe. Test a hidden spot first.
- White vinegar (undiluted): works well on many surfaces. Let it sit 30 to 60 minutes (typical), then wipe. Note: the smell fades, but it is strong at first.
- Soap and water: best for the first pass on greasy grime or heavy dust, then follow with peroxide or vinegar.
Do not mix cleaners: never mix bleach with vinegar or ammonia. Also do not mix vinegar and hydrogen peroxide together (combined they can create an irritating acid). If you switch products, rinse with water and dry between steps.
About bleach: I avoid it for window sills. It can discolor finishes, it is harsh on lungs, and on porous materials it often does not solve the root of growth. If you choose to use it, ventilate aggressively and never combine it with other cleaners.
Step 3: Detail corners and the track
Use cotton swabs or an old toothbrush for the tight seams, then wipe everything up with disposable towels. Mold loves corners because water sits there.
Step 4: Dry it completely
Dry the area with a clean towel. If the sill is wood, point a small fan toward the room for 30 to 60 minutes, or run a dehumidifier nearby. The goal is simple: no dampness left behind.
Step 5: Bag and wash
- Bag paper towels, swabs, and disposable gloves.
- Hot-wash reusable rags separately.
- Rinse your vacuum attachments (if washable) and let them dry.
If staining remains
Black discoloration does not always mean active mold. It can be staining in paint, tannin bleed from wood, or dirt embedded in old caulk.
- Vinyl: persistent discoloration is often grime in micro-scratches. Repeat cleaning, then consider a non-scratch pad gently.
- Painted wood: if the stain is in the paint film, you may need to prime with a stain-blocking primer and repaint after you fix the moisture issue.
- Caulk lines: mold often roots into old caulk. If it keeps returning in the same seam, remove and recaulk once the area stays dry.
When to test or call a pro
Most small window-sill outbreaks are DIY-friendly. The tricky part is knowing when you might have a bigger moisture problem hiding in the wall.
Call a pro if
- The affected area is roughly larger than about 10 square feet. EPA commonly uses this as a practical rule of thumb for when professional help may be appropriate, not as a hard cutoff.
- You see mold on drywall, insulation, or inside the wall cavity around the window.
- The wood is soft, crumbling, or swollen, or paint is bubbling repeatedly.
- There is a roof, flashing, or window leak (water intrusion), not just condensation.
- You have asthma, immune issues, or symptoms that flare in that room.
- You cleaned it twice and it returns quickly, even after lowering humidity.
Do you need testing?
Testing can be useful if you need documentation for a landlord, insurance, or you suspect widespread hidden growth. For a small, obvious patch on a sill, spending money on a test usually does not change the fix: remove the growth and solve the moisture.
If you do test, look for an inspector who focuses on moisture mapping and building science , not just selling you an air sample.
If drywall or other porous material is affected
If mold is on drywall, insulation, or raw wood and it is more than a small surface spot, cleaning alone may not be enough. Porous materials can hold growth below the surface. In those cases, removal and replacement is often the cleanest long-term fix after the moisture source is corrected.
Stop regrowth
Cleaning removes today’s problem. Prevention removes next month’s problem.
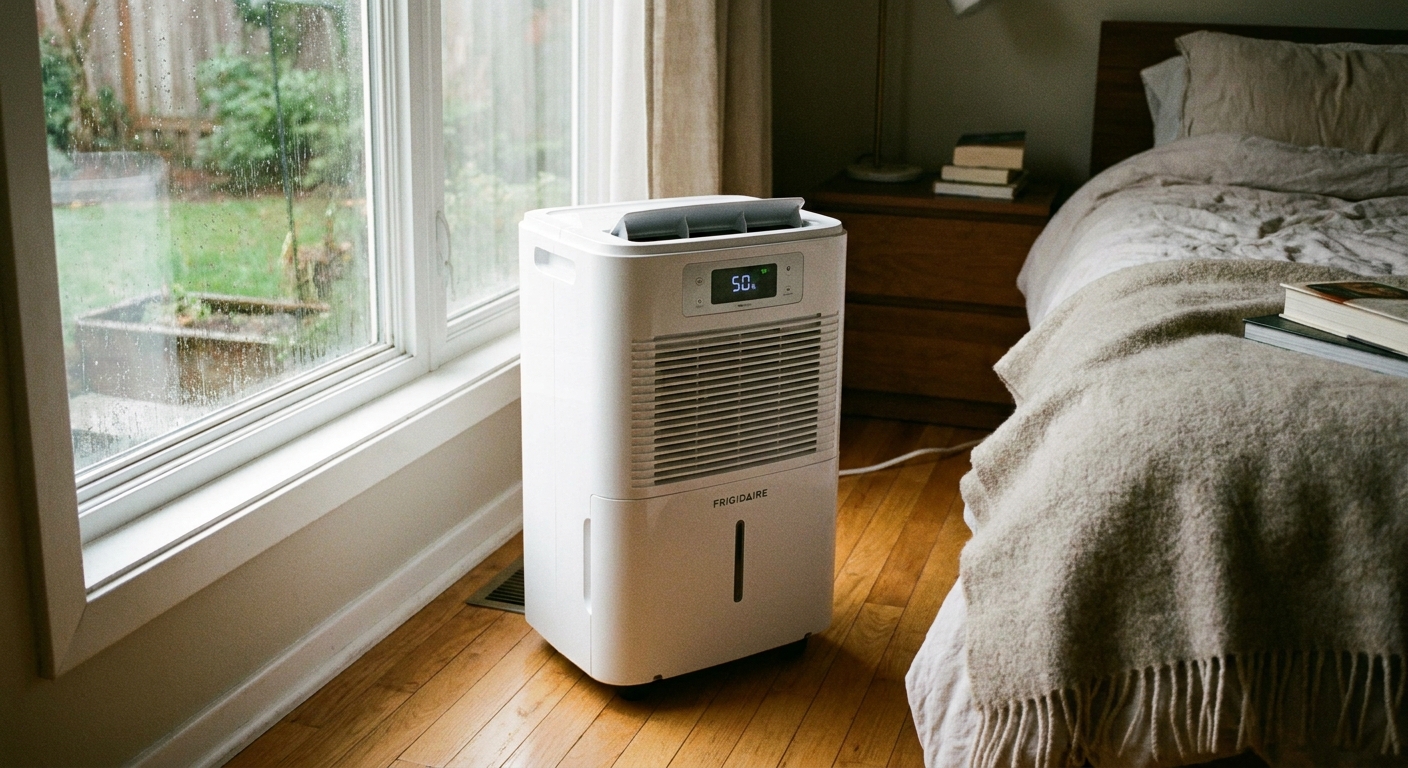
1) Control humidity
- Aim for about 30% to 50% RH indoors (common building-science guidance). In cold climates, you may need to be closer to 30% in winter to prevent condensation.
- Use bath fans during showers and run them 20 minutes after.
- Use a range hood while cooking, especially boiling water.
- Run a dehumidifier in damp basements.
Thrifty tip: a simple hygrometer is cheap, and it takes the guesswork out of why your windows keep fogging.
2) Improve airflow
- Open blinds a bit during the day to warm the glass.
- Leave a small gap in curtains so air can circulate.
- Make sure supply vents are not blocked by furniture.
3) Seal drafts and warm cold surfaces
- Seal interior trim gaps with paintable caulk where air leaks are chilling the sill.
- Install or repair weatherstripping so cold drafts do not hit the interior frame.
- In winter, consider insulating window film as a temporary fix for very cold glass.
- If the window is old and constantly wet, upgrading to a better-performing unit can be a real mold-prevention move, not just an energy one.
4) Keep the track draining
- Vacuum the track regularly so water does not pool in dirt.
- Check exterior weep holes (if your window has them) so water can drain out.
5) Keep surfaces wipeable
- On painted wood, maintain the paint film. Bare wood invites moisture absorption.
- Replace moldy, deteriorated caulk lines once the area is dry.
If it keeps coming back
- Condensation every morning: lower indoor humidity and increase air movement at the window.
- Only one window: check for air leaks, a failed window seal, missing insulation around the frame, or a supply vent blowing moist air onto cold trim.
- Only after rain: suspect exterior water intrusion, flashing issues, or a window installation problem.
- Only in the bathroom: upgrade the bath fan, run it longer, and keep the door closed during showers.
My bottom line
If the mold is limited to the sill and you are not seeing wet drywall or soft wood, you can usually clean it safely with a HEPA-first approach and a simple cleaner like peroxide or vinegar. The long-term win is reducing condensation by controlling humidity, improving airflow, and sealing drafts. Fix the moisture pattern, and the mold loses its foothold.
The 30-Second Cheat Sheet
Essential takeaways for: Black Mold on Window Sills: Clean It and Stop Regrowth
What causes black mold on window sills?
- Most often: condensation from warm, humid indoor air hitting cold glass and trim.
- Other common causes: air leaks around the window, poor airflow from curtains or blinds, or an exterior leak (flashing, caulk, siding).
- Sometimes it is not mold: dust, candle soot, and grime can look similar.
Fast, safe cleaning steps (HEPA-first)
- Put on N95 (or better), gloves, and eye protection. Keep kids and pets out of the room.
- Gently vacuum the dry sill and window track with a true HEPA, sealed vacuum (avoid non-HEPA household vacuums that can blow particles back out).
- Wipe with 3% hydrogen peroxide (typical dwell: about 10 minutes) or undiluted vinegar (typical dwell: 30 to 60 minutes), then wipe clean. Dwell time depends on surface and grime.
- Detail corners and caulk seams with a toothbrush or swab.
- Dry completely and bag trash. Hot-wash reusable rags.
Important: do not mix cleaners
- Never mix bleach with vinegar or ammonia.
- Do not mix vinegar and hydrogen peroxide (together they can create an irritating acid).
Wood vs vinyl
- Vinyl: usually surface growth, more scrub-friendly.
- Wood: avoid over-wetting. If paint is failing, wood is soft, or it is raw/unfinished, the issue may be deeper than surface mold.
When to test or call a pro
- Area larger than about 10 sq ft (EPA uses this as a common rule of thumb), recurring fast, or spreading to drywall.
- Soft/rotting wood, bubbling paint, musty odor, or symptoms worsening in the room.
- Mold that shows up after rain or wind points to a leak, not just condensation.
Stop regrowth
- Keep indoor humidity about 30% to 50% RH (building-science rule of thumb, with the lower end often needed in winter if windows fog).
- Run bath fan during showers and 20 minutes after.
- Open blinds, leave curtain gaps, and improve airflow.
- Seal trim gaps, fix weatherstripping, and keep tracks clean and draining.
💡 Tip: Scroll up to read the full article for detailed, step-by-step instructions.
⬆️ Back to topAbout Marcus Vance
Content Creator @ Grit & Home
Marcus Vance is a lifelong DIY enthusiast and self-taught home renovator who has spent the last decade transforming a dilapidated 1970s ranch into his family's dream home. He specializes in budget-friendly carpentry, room-by-room renovations, and demystifying power tools for beginners. Through his writing, Marcus shares practical tutorials and hard-learned lessons to help homeowners tackle their own projects with confidence.