🚨 In a DIY emergency or rush?
Skip the details and jump straight to our 30-second cheat sheet for the most crucial info.
When brick steps or a brick wall starts “crumbling,” most homeowners blame the brick. A lot of the time, it is actually the mortar joints giving up first. That is good news because mortar is meant to be the sacrificial, repairable part of the system.
The trick is knowing what you are looking at and what caused it. If you repoint over a hidden water problem or a moving foundation, the new joints can fail faster than the old ones. Let us walk through the common symptoms, what they usually mean, and how to decide between a careful DIY tuckpointing job and calling in a mason.

First, identify the problem
These three issues get mixed up constantly: efflorescence, spalling, and joint erosion. They can appear together, but they are not the same problem.
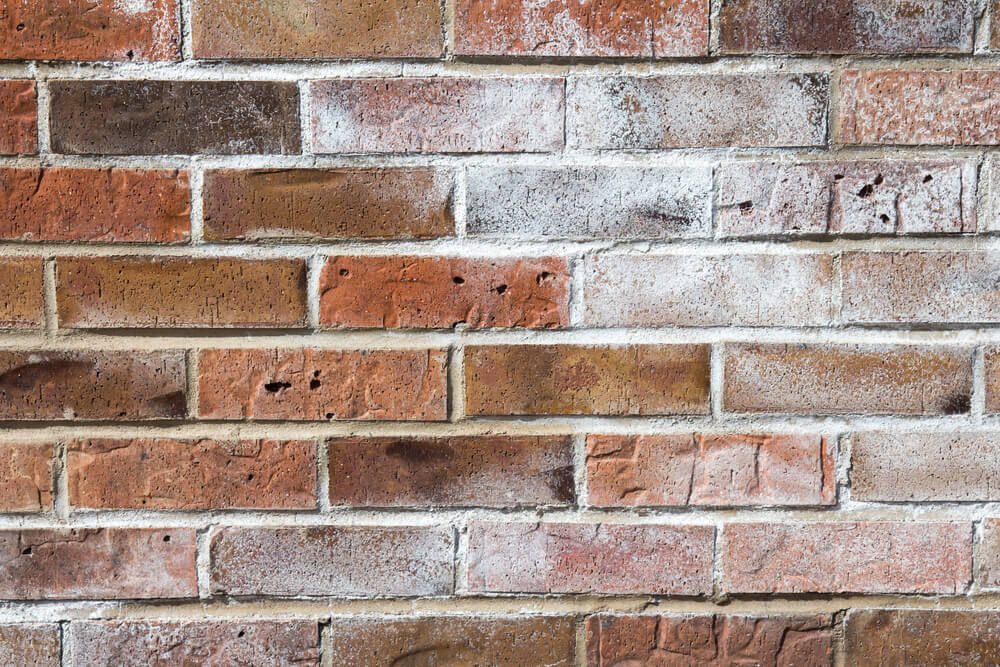
Efflorescence: white, dusty salts
What it looks like: a chalky white film or fuzzy crystals on brick or mortar. You can often wipe some of it off with your finger.
What it means: water is moving through the masonry and carrying dissolved salts to the surface. Efflorescence itself is usually cosmetic, but persistent or heavy efflorescence is a bright sign that moisture is lingering where it should not.
Homeowner test: lightly brush it with a dry nylon brush. If it powders off and the brick underneath is solid, you are probably seeing efflorescence.
Cleaning caution: skip the high-pressure washer. It can drive water deeper into the brick and joints, which can lead to more efflorescence later and more freeze-thaw trouble in cold climates.
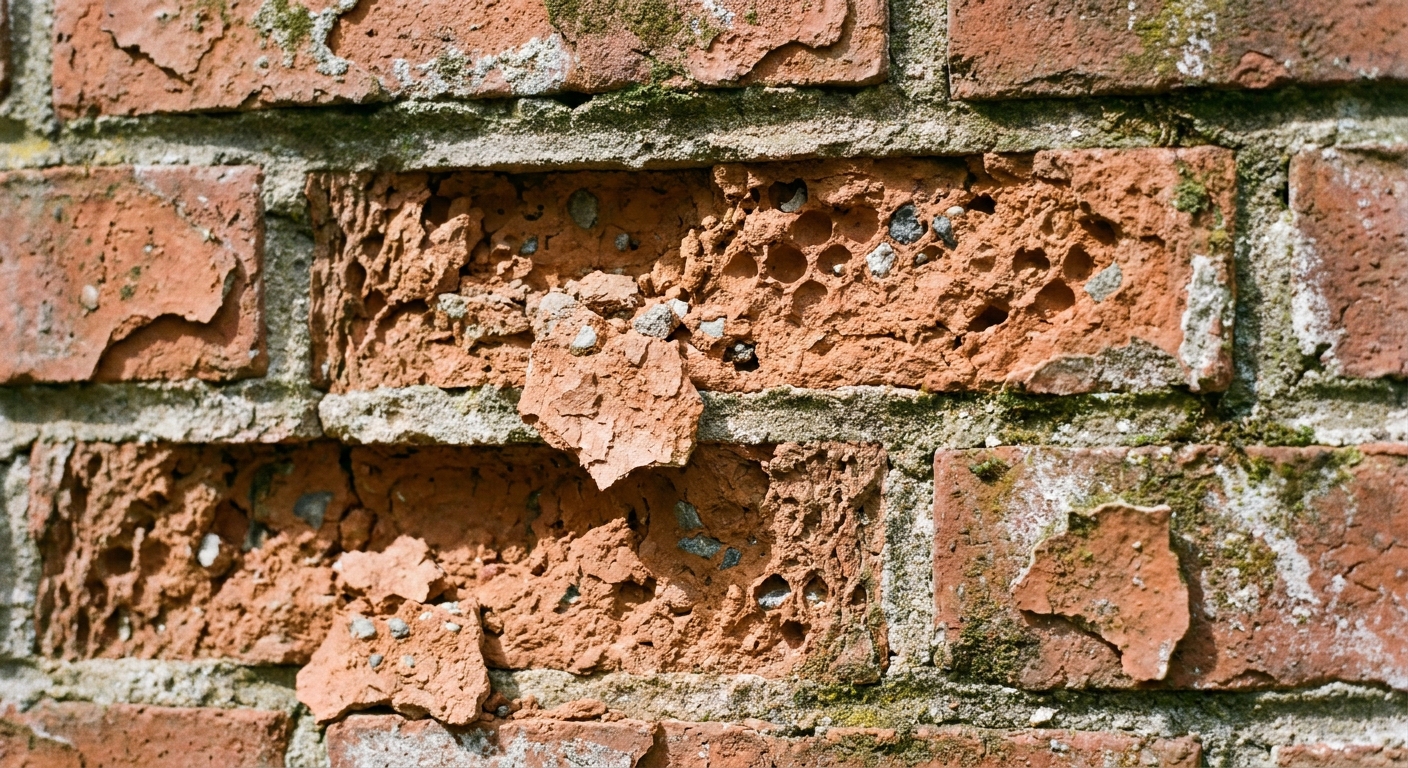
Spalling: brick faces flaking off
What it looks like: the surface of the brick breaks away in chips or flakes, sometimes exposing a rough, softer interior. You might find little piles of brick fragments after winter.
What it means: the brick is taking on water and then freezing. As ice expands, it blows the face off. Spalling can also be triggered by the wrong mortar, especially a mortar that is harder than the brick and traps stress and moisture. Paints and some sealers can also trap moisture and make spalling worse.
Why it matters: tuckpointing alone does not fix spalling. You may need brick replacement plus a plan to stop water entry.
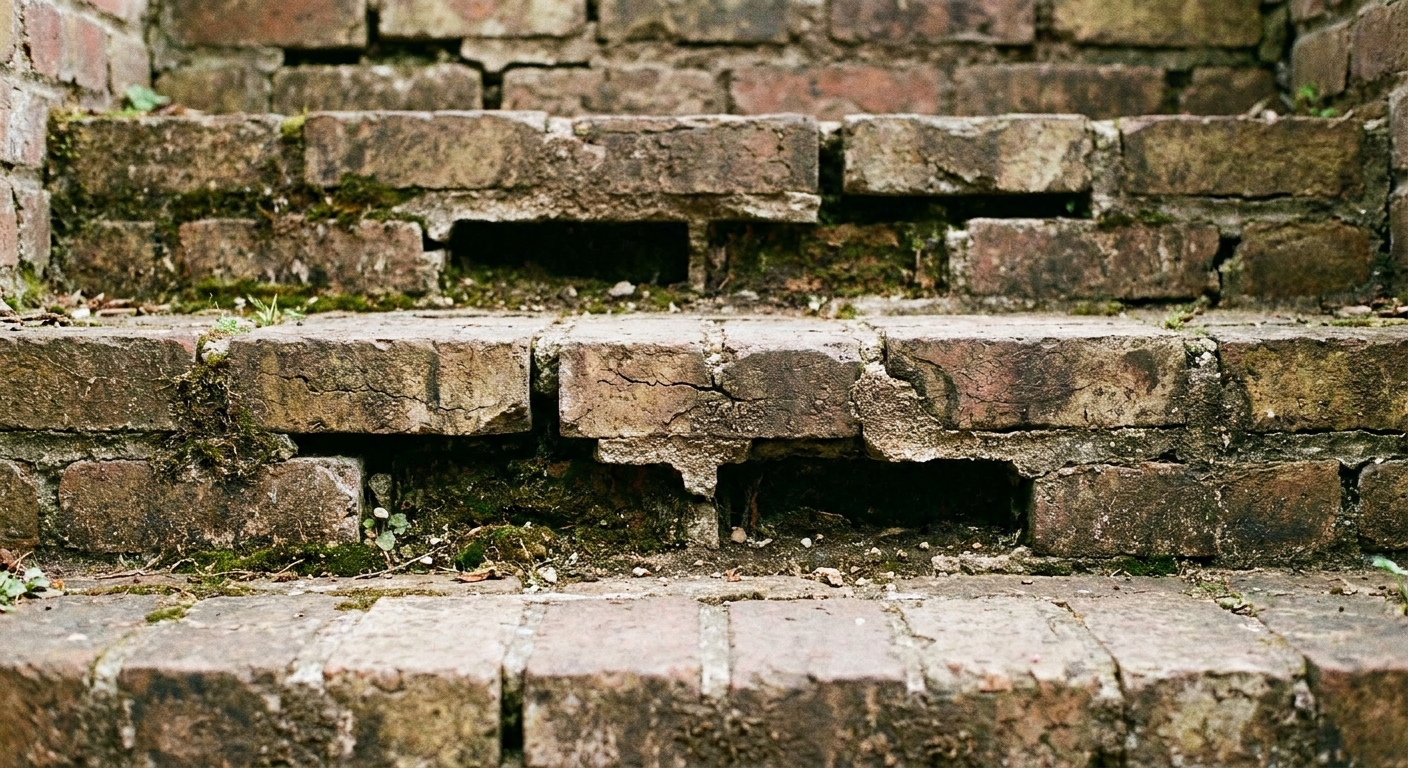
Joint erosion: mortar missing or sandy
What it looks like: recessed joints, loose sandy mortar, cracks along the joint line, or gaps where mortar used to be. On steps, you will often see open joints at the edges and corners first.
What it means: normal aging, repeated wetting and drying, freeze-thaw cycles, and water that sits on horizontal surfaces. This is the classic “tuckpointing candidate” when the brick itself is still sound and the wall is not moving.
Quick decision guide
Here is the way I triage brick problems around my own place. It keeps you from spending time and money in the wrong direction.
- Mostly efflorescence, joints intact: clean gently and focus on moisture sources like gutters, grading, sprinklers, and sealing cracks in adjacent concrete.
- Mortar joints eroded deeper than about 1/4 inch in many areas, brick faces solid: repointing or tuckpointing is likely the right repair.
- Spalling bricks or soft bricks you can scrape with a screwdriver: plan for brick replacement and moisture control. Consider a mason.
- Stair-step cracks, bulging walls, leaning, or bricks separating from corners: stop and get a pro assessment. That is often structural movement, not “bad mortar.”
What failed mortar looks like
If you are trying to decide whether it is time, grab a flashlight and a flathead screwdriver and check a few spots at eye level and near grade.
- Powdery, sandy joints: you can rub grains out with a finger. That mortar has lost its binder and will not hold up to weather.
- Cracks that run along the brick-to-mortar line: can indicate shrinkage, movement, or water expansion behind the joint.
- Hollow-sounding joints: tap lightly with a screwdriver handle. Hollow spots often mean separation.
- Gaps at the top of joints on walls: water often enters from above and works downward. Do not only repair the lowest damage if the leak is higher up.
Rule of thumb: if the mortar can be dug out easily to a consistent depth without chiseling, it is usually ready to be repointed. If you have to gouge and hammer hard everywhere, you might be dealing with a newer, harder mortar, and matching it becomes more important.
Tuckpointing vs repointing
Homeowners use “tuckpointing” as the catch-all term, and that is fine. Technically:
- Repointing means removing failed mortar and installing new mortar in the joints.
- Tuckpointing is a finishing style where a thin contrasting line is applied to imitate very fine joints. Many contractors still say tuckpointing when they mean repointing.
For brick steps and most exterior walls, what you want is a solid repointing job with good mortar selection and good water management.
Mortar matching basics
The goal is not to use the “strongest” mortar. The goal is to use mortar that is compatible with your brick and your climate.
Why hardness matters
In most traditional brickwork, mortar should be a little softer than the brick. That way, the joint takes the wear and can be replaced later without destroying the brick. If you use a mortar that is too hard, moisture and stress can transfer into the brick and increase spalling.
Mortar type basics
Many 1970s-era brick homes were built with modern mortars, but older brick and soft brick demand more caution. If your bricks are already spalling or feel soft, avoid very hard mortars.
- Type N is commonly used above grade for many residential brick walls and is a frequent safe starting point for typical modern brick.
- Type S is stronger and often used for at-grade, below-grade, or higher-load applications, but it can be too hard for some older brick.
- Type O is weaker and sometimes used for softer historic brick above grade.
Important: I am not going to pretend you can always pick mortar type from a web article. If your home is older, the brick is soft, or you have spalling, take a mortar sample to a local masonry supplier or get a mason to identify a compatible mix. That one step can save the brick.
Color matching
- Let the existing mortar dry fully before judging color.
- Bring a piece of the old mortar (a chunk, not dust) to the supplier.
- Test a small batch and let it cure a few days. Mortar lightens as it cures.
- Sand color and grain size matter as much as pigment.
How deep to remove mortar
This is where DIY jobs often fail. New mortar needs enough depth to bond and resist weather.
- General guidance: remove mortar to a depth of about 2 times the joint width.
- Typical brick joint: many joints are about 3/8 inch. That points you toward roughly 3/4 inch of removal depth.
- Practical minimum: for most exterior repointing, aim for at least 1/2 inch of sound, clean depth where possible.
Stop point: you are not trying to carve out the world. If you hit hard, sound mortar, that is your base. The goal is consistent depth and clean sides, not maximum removal.
Routing and grinding cautions
Angle grinders and mortar rakes are fast and also unforgiving. They can chip brick edges in a heartbeat, especially on steps where you are working at awkward angles.
- Use the smallest tool that gets the job done.
- Wear eye protection, hearing protection, gloves, and a real dust mask or respirator. Mortar dust is no joke.
- If you are not steady with a grinder, use hand chisels and a joint raker and accept that it takes longer.
Freeze-thaw and de-icers
Brick steps are basically a freeze-thaw stress test. They get soaked, shaded, splashed with de-icers, and they have horizontal surfaces that hold water.
- Standing water is the enemy: if the top surface does not shed water, joints will erode fast.
- De-icing salts accelerate damage: they attract moisture and can worsen scaling and spalling through salt crystallization and freeze-thaw cycles.
- Timing matters: repointing in freezing weather is risky because mortar needs time above freezing to cure properly.
DIY timing tip: aim for mild, dry weather. Many mortars want temperatures above about 40°F for a few days. Follow the bag directions for your product and your local conditions.
Follow the water
Mortar fails fastest where water is entering and staying. Before you spend a weekend grinding joints, look for the source.
Common moisture sources
- Gutters and downspouts: overflowing gutters dump roof water right onto brick and steps.
- Bad grading: soil sloping toward the house keeps masonry wet.
- Sprinklers: a sprinkler head that hits a wall daily will erase mortar over time.
- Concrete next to brick: a cracked sidewalk or stoop can funnel water into the brick edge.
- Trapped moisture: painted brick or the wrong sealer can keep water from escaping.
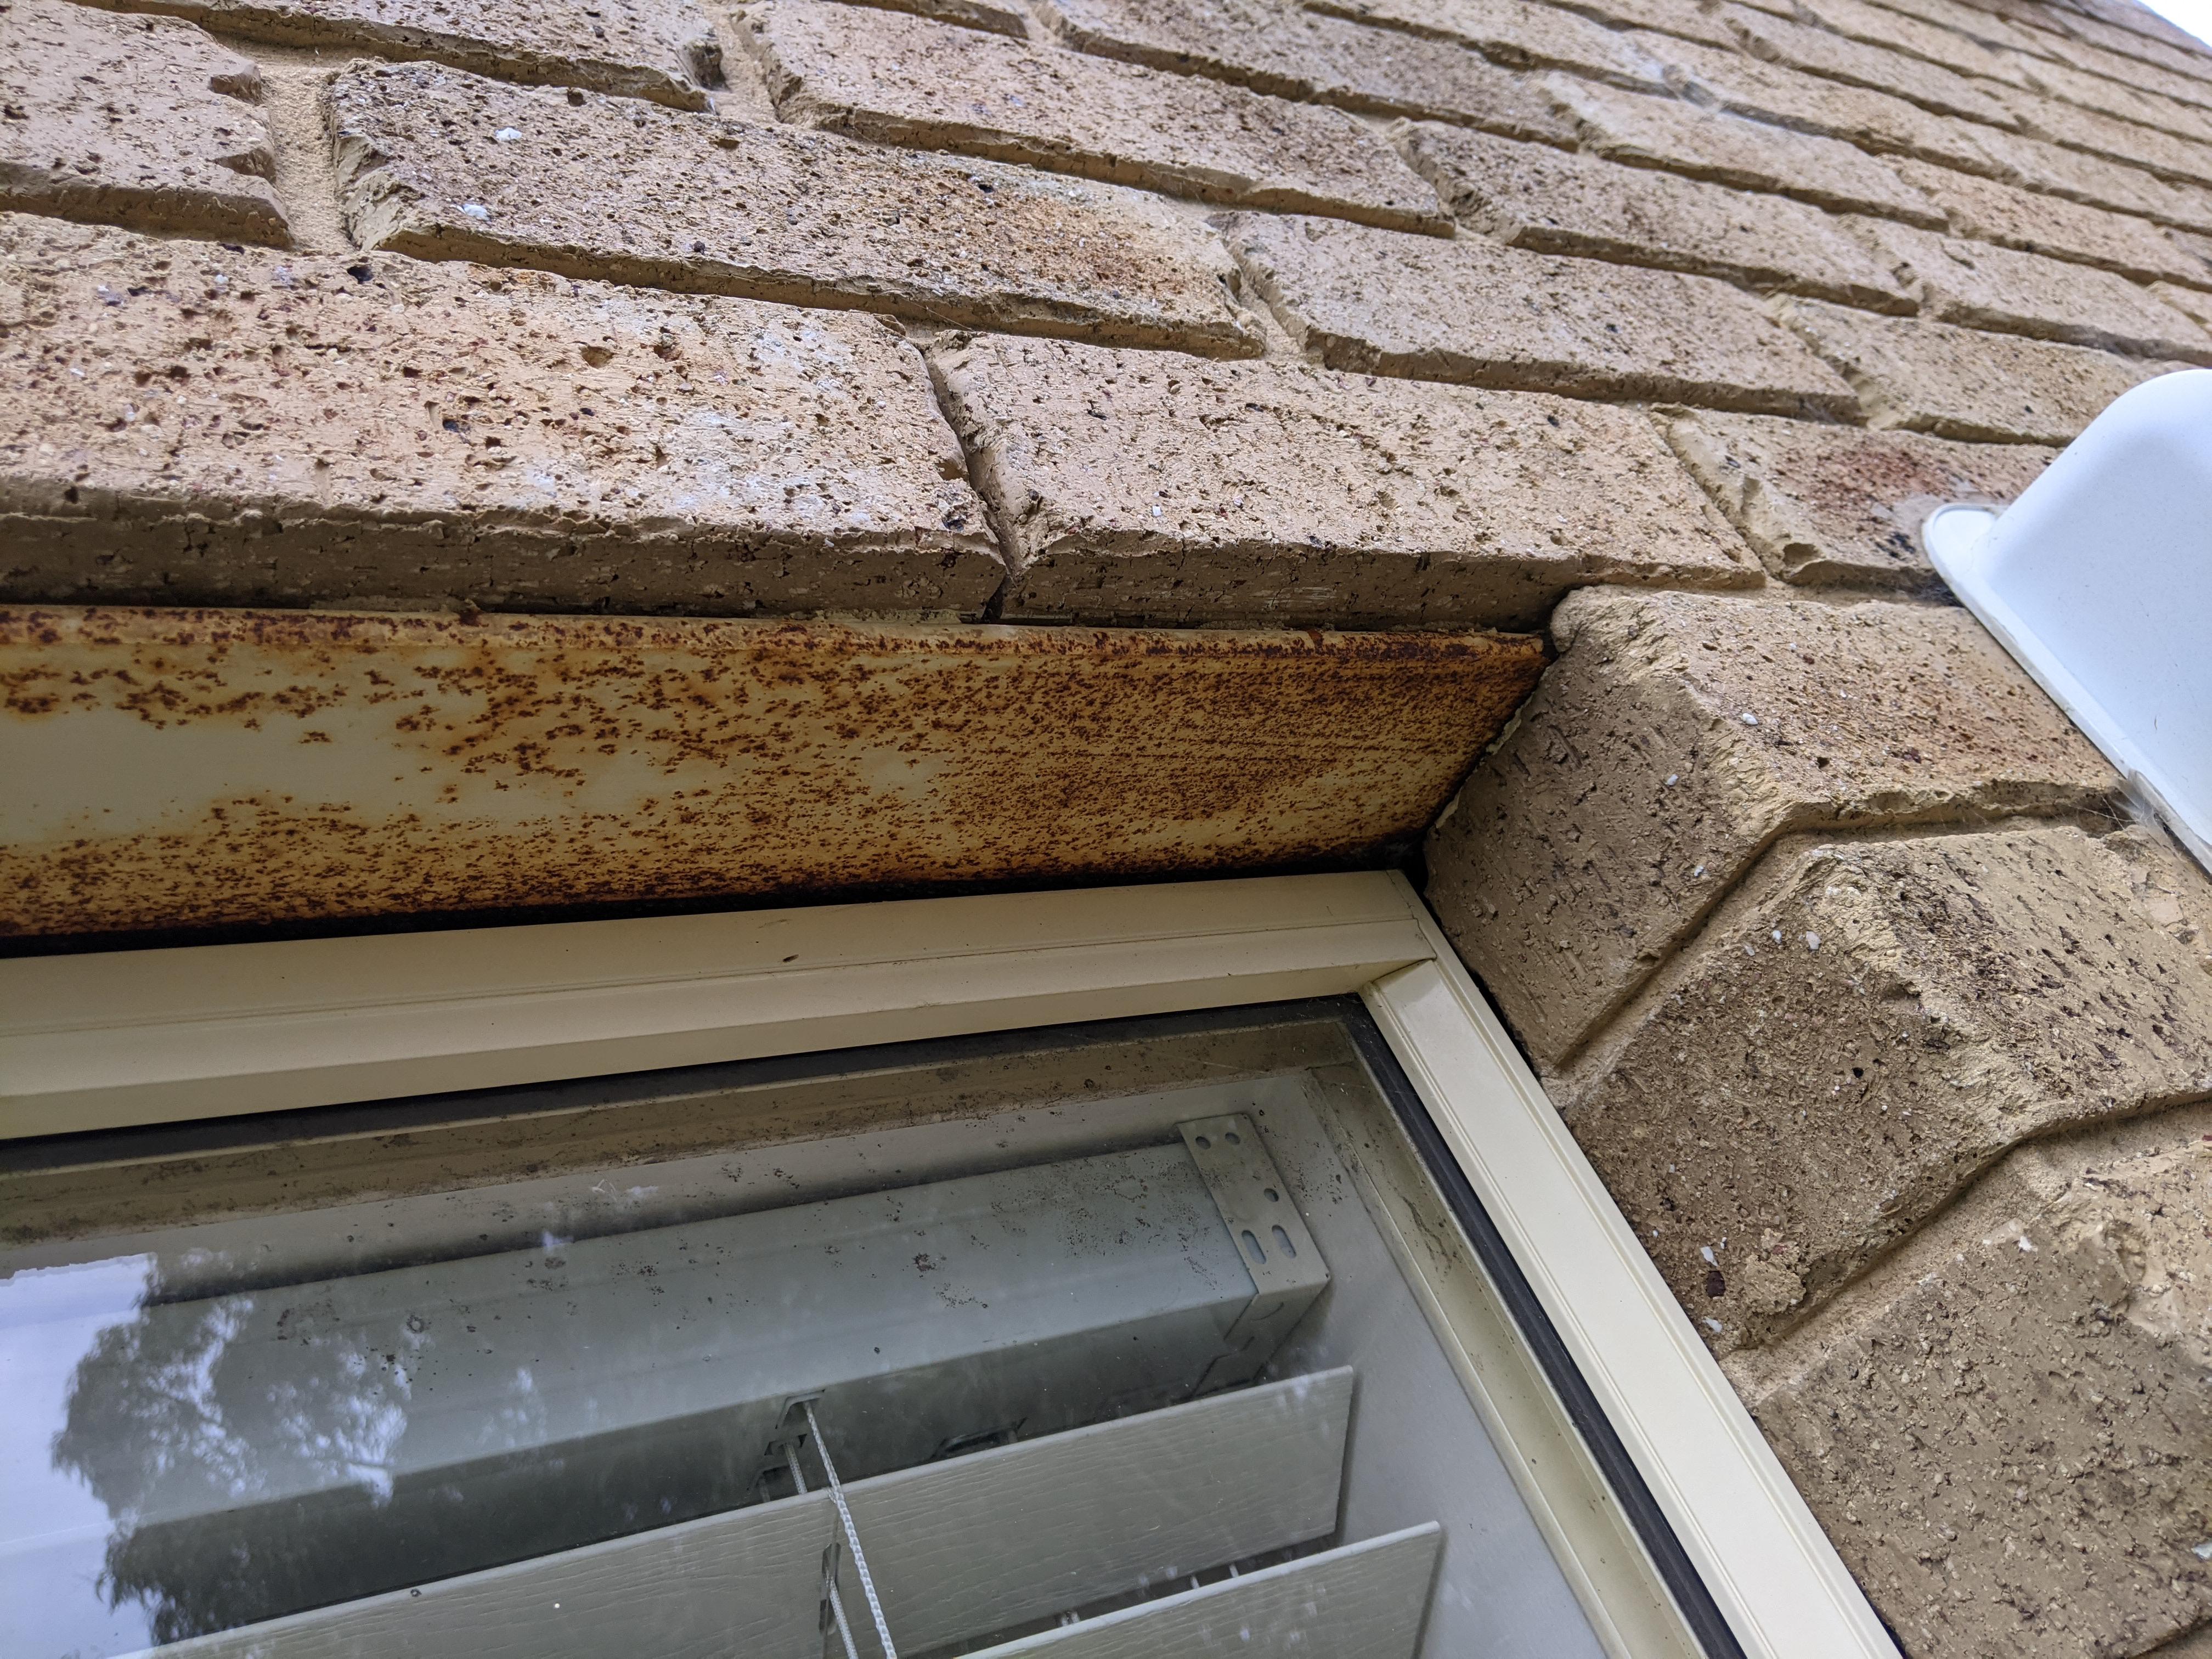
Lintels and flashing
If you have a brick wall over windows or doors, there is usually a steel angle called a lintel supporting the brick. Above that, there should be a way for water to get out, often through flashing and small open joints called weep holes.
If the lintel rusts, it expands and can crack mortar and lift bricks. If flashing is missing or failing, water can get trapped behind the brick, which shows up as efflorescence, interior stains, and mortar failure.
- Rust staining above openings plus cracking can point to a lintel issue.
- No weep holes or clogged weeps can trap moisture.
What to do next: if you see these signs, start with a mason or a qualified exterior contractor. Fixing the water exit path often matters more than making the joints look new.
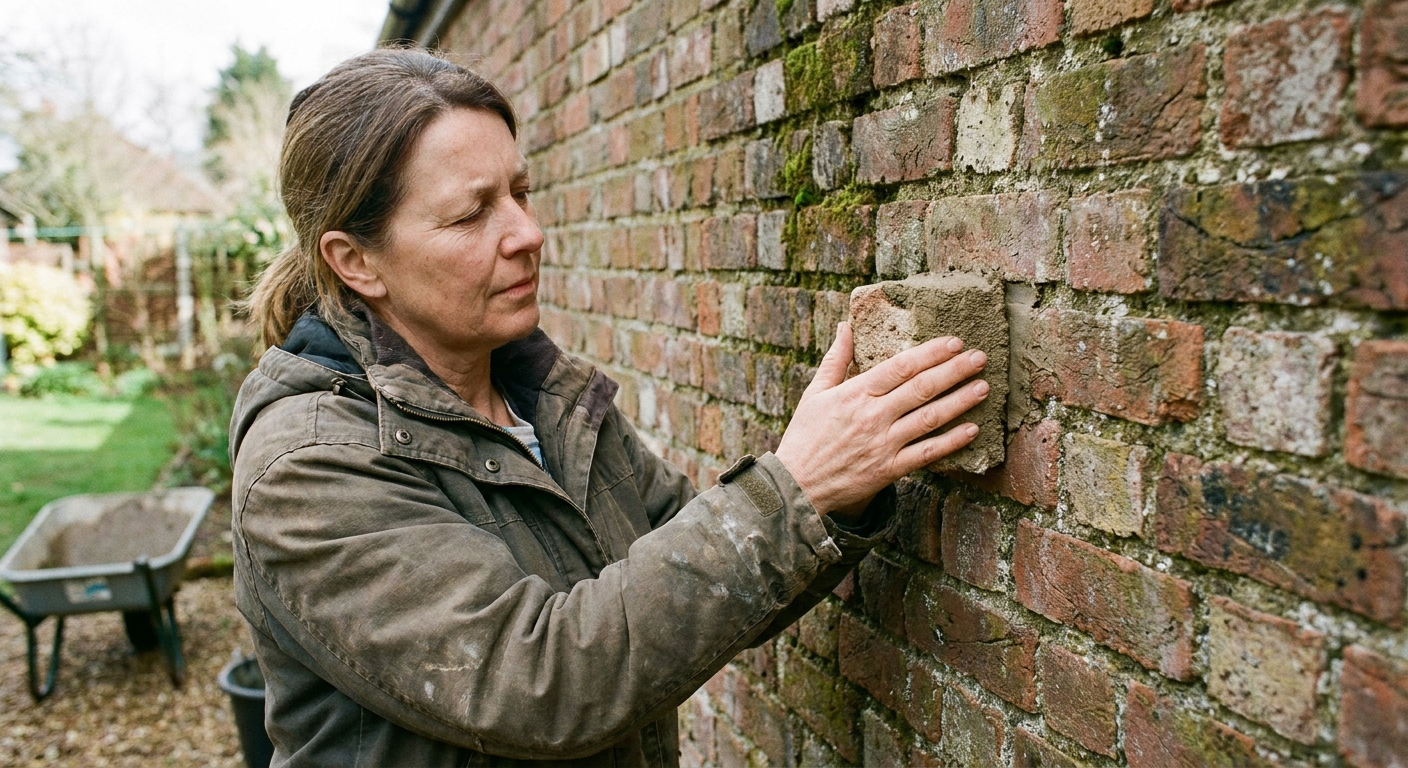
When DIY is realistic
I am a big believer in sweat equity, but masonry rewards patience and punishes rushing.
DIY fits when
- The wall or steps are stable, with no bulging or ongoing movement.
- The brick is mostly intact, with limited spalling.
- The joints are failing, but the job is a manageable area like a small stoop, a short garden wall, or a section of steps.
- You can work in good weather and keep the area protected while mortar cures.
- You have confirmed you are dealing with real brickwork, not a loose veneer issue. Some brick steps are a veneer over concrete, and if the concrete is cracked or moving, the brick and mortar may keep failing until the substrate is addressed.
DIY basics that last
- Rake out to proper depth and remove loose material.
- Clean joints thoroughly. Dust blocks bonding.
- Dampen the joints before packing mortar so dry brick does not suck the water out too fast.
- Mixing tip: aim for a stiff, peanut-butter-like consistency that stays on the trowel. Then let it slake (rest) for about 5 to 10 minutes, remix, and go. This makes it easier to pack joints cleanly and helps prevent smears all over the brick faces.
- Pack in layers if needed, then tool the joint to match the original profile.
- Joint profile tip: a concave, tooled joint (compressed) usually sheds water better than a flat or raked joint. If you are matching an existing look, match it, but know that overly recessed joints tend to hold water on exterior work.
- Keep mortar from drying too fast in hot weather by misting lightly and shading.
My most common mistake: early on, I under-prepped the joints because it felt “good enough.” The repair looked fine for a season, then started popping out. Prep is the project.
When to call a pro
Some brick problems are cosmetic and some are a symptom of something bigger. Here are the lines I use at my own house.
Call a mason when you see
- Widespread spalling or bricks that are crumbling, not just mortar.
- Lintel issues like rust jacking, lifted brick, or sagging above openings.
- Large areas of repointing, especially two stories up.
- Chimneys with deterioration. A chimney is a different risk category because of height, heat, and exposure.
- Repeated failure after previous repairs. That often means moisture management was not addressed.
Call a structural engineer when you see
- Bulging or bowing brick walls.
- Stair-step cracks running through brick and mortar, especially near corners or openings.
- Separation where a wall is pulling away from the house.
- Doors and windows sticking near the same area as the cracking.
Repointing does not stop movement. It only makes the joints look better and resist water. If the structure is shifting, you need the cause addressed first.
What a good quote includes
If you do hire it out, you will get better bids if you know what to ask for.
- Scope: which elevations or step sections, and whether brick replacement is included.
- Mortar type and color match plan.
- Removal depth target and whether they use grinders, hand tools, or both.
- Cleanup plan, dust control, and protection of windows and landscaping.
- Cure and weather plan, including cold-weather precautions if relevant.
- Water management recommendations: gutters, flashing, weeps, sealant gaps, grading.
Bottom line
If your brick looks rough, do not assume the worst. Many “crumbling brick” situations are really joint erosion and are very fixable. Identify whether you are dealing with harmless efflorescence, damaging spalling, or true mortar failure. Then pick the repair that matches the cause.
And if the wall is moving, bulging, or cracking in a stair-step pattern, take the win of stopping early and getting the right eyes on it. The best DIY decision is sometimes knowing when not to DIY.
The 30-Second Cheat Sheet
Essential takeaways for: Brick Crumbling? Spot Failed Mortar and Choose Tuckpointing or a Pro
Fast diagnosis
- White powder on brick: efflorescence. Usually cosmetic, but it means water is moving through the masonry.
- Brick faces flaking/chipping: spalling. Often freeze-thaw plus trapped moisture or incompatible mortar. Tuckpointing alone will not fix it.
- Mortar missing/sandy/cracking out: joint erosion. Classic candidate for repointing (often called tuckpointing).
DIY or pro?
- DIY is reasonable if the brick is sound, the wall is stable, and the failing mortar is localized.
- Call a mason for widespread spalling, chimney issues, rusted lintels, or large areas and high work.
- Call an engineer or structural pro for bulging walls, stair-step cracks, separation, or sticking doors/windows near the damage.
Mortar matching rules
- Do not choose “strongest mortar.” Mortar should generally be slightly softer than the brick.
- Color match depends heavily on sand color and grain size. Test and let it cure before judging.
Joint depth guidance
- Remove failed mortar to about 2x the joint width (often around 3/4 inch for typical joints).
- Aim for at least 1/2 inch of clean, sound depth where possible.
Freeze-thaw cautions
- Steps fail fast because they hold water and see de-icers.
- Do not repoint when temps will drop below freezing during cure. Follow the mortar bag directions.
Do this before repointing
- Fix water sources first: gutters, downspouts, grading, sprinklers, cracks that funnel water.
- Watch openings: rust staining and cracking above windows/doors can mean lintel and flashing issues.
💡 Tip: Scroll up to read the full article for detailed, step-by-step instructions.
⬆️ Back to topAbout Marcus Vance
Content Creator @ Grit & Home
Marcus Vance is a lifelong DIY enthusiast and self-taught home renovator who has spent the last decade transforming a dilapidated 1970s ranch into his family's dream home. He specializes in budget-friendly carpentry, room-by-room renovations, and demystifying power tools for beginners. Through his writing, Marcus shares practical tutorials and hard-learned lessons to help homeowners tackle their own projects with confidence.