🚨 In a DIY emergency or rush?
Skip the details and jump straight to our 30-second cheat sheet for the most crucial info.
Ceiling cracks have a special talent for showing up at the worst time. You paint, you tidy, and suddenly there is a new line running across the living room like your house is trying to underline something.
Here is the good news: a lot of ceiling cracks are just drywall doing normal drywall things, especially in newer homes and in rooms with big temperature swings. The less fun news: a smaller batch of crack patterns are genuine red flags, especially when they come with other clues like sticking doors, sloping floors, or cracks that “step” through masonry.
This guide helps you sort the two. We will talk patterns, what they usually mean, what you can fix yourself, and when it is time to bring in a pro.
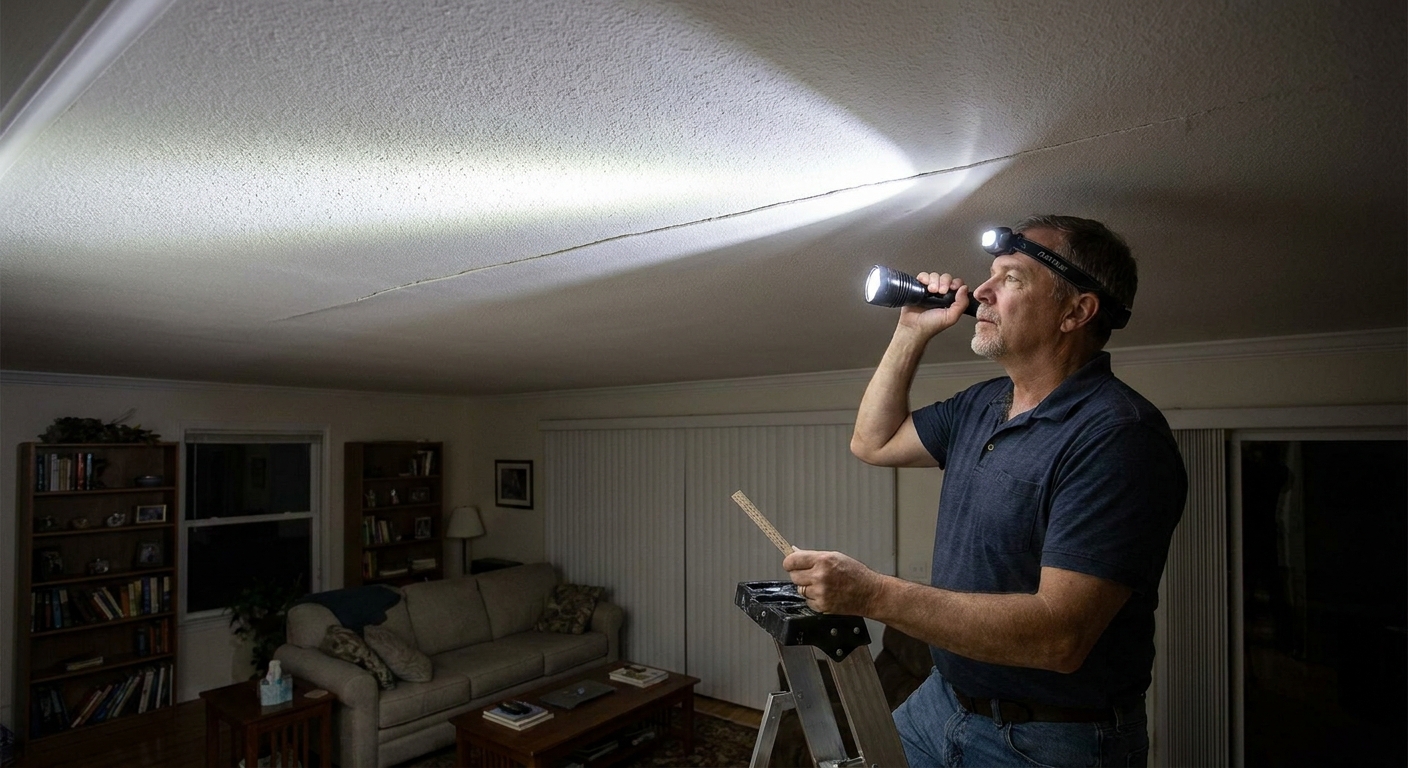
First, read the crack safely
Before you diagnose anything, do a quick, calm check. You are looking for shape, location, width, and change over time.
- Mark it: Put a small pencil tick at each end and write today’s date nearby (lightly). If you do not want marks on the ceiling, use painter’s tape as reference points.
- Measure it: If you have feeler gauges, great. If not, compare to a typical credit card thickness (about 0.03 inches or 0.76 mm) or a US dime thickness (about 0.053 inches or 1.35 mm). You are not chasing perfection here, just categories.
- Look for “friends”: Other symptoms count. Check the same area for wall cracks, trim gaps, nail pops, or a sagging line in the ceiling.
- Monitor it: Take photos from the same spot and angle (same lighting if you can) with a ruler in frame. If you suspect movement, a simple crack monitor (tell-tale gauge) can make changes obvious.
- Note conditions: After a dry winter or a humid summer, cosmetic cracks can appear or widen and then calm down later.
Rule I live by: One crack by itself often tells you “drywall.” A crack plus other house-behavior symptoms can tell you “movement.” Drywall cracks because something moved, shrank, or got wet.
Quick note: plaster vs. drywall
If your home has plaster ceilings (common in older homes), crack patterns can look a little different. Plaster is more brittle, so hairline cracks can be common, but loose, bulging, or separating plaster needs quicker attention. When in doubt, treat sagging or separation like a safety issue and get it evaluated.
Cosmetic ceiling cracks
These are the cracks that are usually about drywall joints, fasteners, and seasonal expansion and contraction. Annoying, yes. Typically not dangerous.
1) Long, straight cracks on a drywall seam
What it looks like: A fairly straight crack, often several feet long, that follows a line where two drywall sheets meet. Sometimes it runs parallel to a wall or across the middle of the room. It may open slightly in winter and tighten in summer.
Most likely causes:
- Drywall joint tape bond failing (age, movement, or poor mudding originally)
- Truss uplift (in cold climates, the bottom chord can arch slightly due to moisture and temperature differences, tugging at the ceiling near interior walls)
- Minor framing movement or vibration over time
DIY-friendly? Yes, in many cases. You typically re-tape the joint properly, feather wider than you think you need, then prime and paint.
2) Spidering cracks at inside corners
What it looks like: Fine hairline cracks radiating out from a corner or clustered near a joint. They can look like a small spider web, especially where the ceiling meets a wall.
Most likely causes:
- Corner bead or paper tape movement
- Seasonal humidity changes
- Minor house settling that happened long ago and is not ongoing
DIY-friendly? Usually. If the crack is truly hairline and stable, a quality flexible patching compound can work, but many corner cracks come back unless you re-tape and feather out.
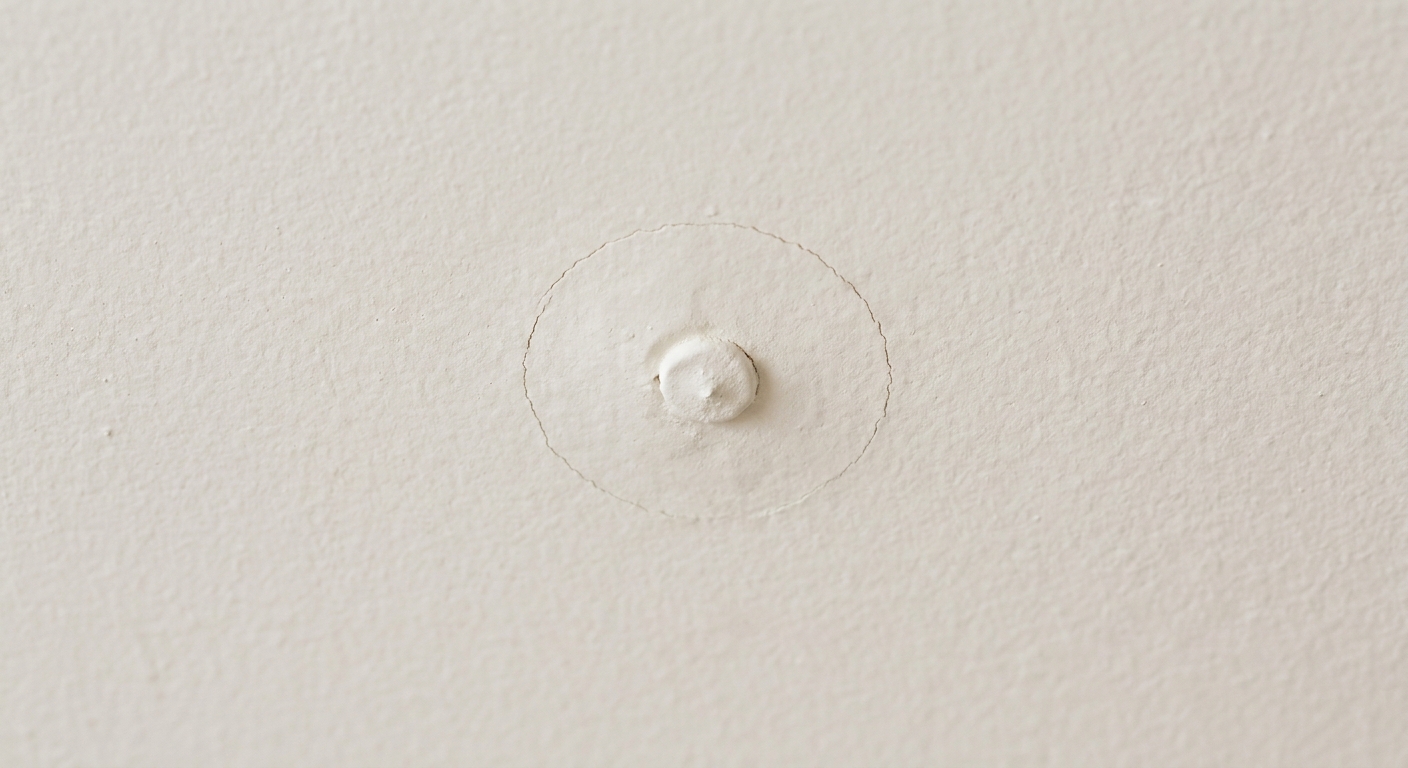
3) Nail pops and little ring cracks
What it looks like: A small bump (often the size of a dime to a nickel) with a circular crack around it, or a tiny dimple where a fastener has shifted. You will see these in lines that match framing members.
Most likely causes:
- Drywall fastener backing out slightly as lumber dries or shifts
- Missed framing or inadequate fastening
- Minor vibration over time
DIY-friendly? Yes, and it is one of the best beginner drywall repairs to learn. (If you want a walkthrough, see How to fix nail pops.)
When cosmetic cracks still deserve caution
Even “typical drywall” cracks can be worth a closer look if they are:
- Widening noticeably month to month
- Repeating after multiple proper repairs (could be ongoing movement or framing issues)
- Paired with visible ceiling sag (possible fastener failure, moisture, or undersized framing)
Structural red flags
Structural problems do not always announce themselves with one dramatic crack, but they often leave a pattern, and they often come with other symptoms.
1) Step cracks that follow masonry lines
What it looks like: A crack that “steps” like a staircase, often following mortar joints in brick, block, or stone. You might see the wall version outside or in a basement, and the ceiling may show related cracking where framing ties in.
Why it matters: Stair-step cracking in masonry can signal foundation movement or differential settlement, especially if it is widening, new, or mirrored in multiple places.
Next step: Document it with photos and dates and get a professional evaluation, typically from a structural engineer or a foundation specialist with strong references.
2) A crack that is opening, offset, or uneven
What it looks like: The crack is not just a line. It has a gap you can see, edges that feel slightly different heights (one side higher than the other), or it keeps reopening quickly after patching.
Why it matters: Drywall can crack cosmetically, but offset and rapid change can suggest real movement in framing, supports, or the foundation system.
3) Cracks plus doors sticking, trim gaps, or floor slope
What it looks like: Ceiling cracks plus any of these “house behavior” clues:
- Doors that suddenly rub, swing open by themselves, or do not latch
- New gaps between trim and wall or crown molding and ceiling
- Floors that feel sloped or bouncy in a new way
- Cracks that also appear above door and window corners
Why it matters: When multiple parts of the house are changing together, you want a qualified set of eyes on the structure.
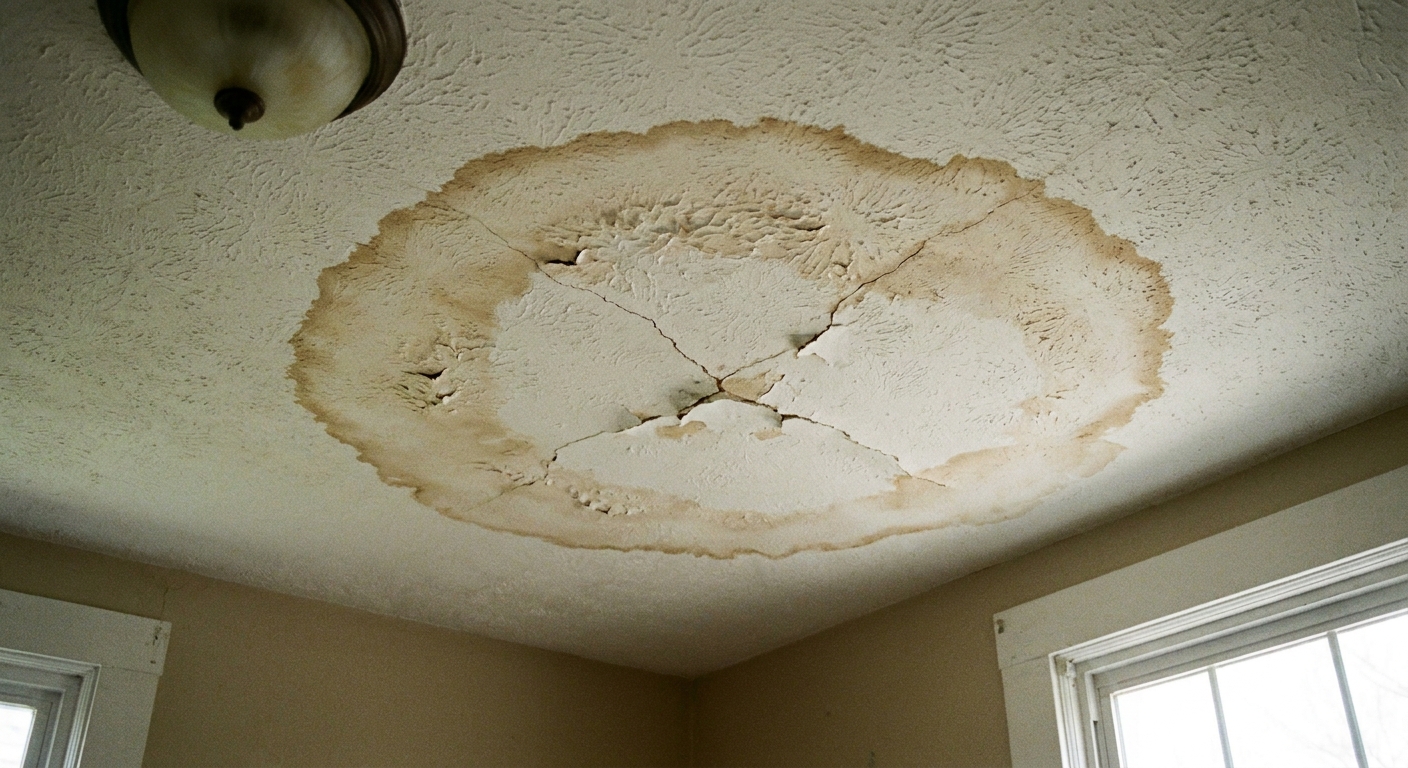
4) Moisture cracks with stains or softness
What it looks like: Cracks with yellow or brown staining, bubbling paint, or drywall that feels soft or crumbly.
Why it matters: This is less “structural settlement” and more “something is wet,” which can lead to sagging, mold, and damaged framing if ignored.
Next step: Find and stop the water first. Do not waste time patching until the source is fixed and materials are dry. Depending on the source, this is often a roofer, plumber, or HVAC tech call.
5) A crack plus sagging or bounce
What it looks like: The ceiling plane is no longer flat, especially if you can see a dip between joists, or the ceiling feels “spongy.”
Why it matters: Sagging can point to moisture damage, inadequate fastening, overloaded framing, or compromised drywall integrity. This is not a spackle-and-paint situation.
Safety note: If the ceiling is sagging significantly, especially with signs of moisture, avoid spending time under it. Wet drywall can get heavy and fail. Shut off the source of water if you can do so safely, and get help fast.
Cheat table: pattern to likely cause
- Long straight crack right on a seam: tape joint issue or minor movement, often cosmetic
- Fine spider cracks at corners: seasonal movement or corner tape, usually cosmetic
- Small bumps with rings: nail pops, cosmetic and very common
- Stair-step cracking (masonry pattern): possible structural movement, get it evaluated
- Wide crack that is changing or offset: possible movement, document and call a pro
- Cracks plus sticking doors or sloping floors: movement symptoms, treat as a red flag
- Cracks plus stains or softness: moisture issue, stop the leak first
What to do next
Step 1: Decide if you should call a pro
Call for evaluation if any of the following are true:
- The crack is around 1/8 inch or wider (rule of thumb), or it is growing quickly
- You see offset (one side higher than the other)
- You have multiple symptoms like sticking doors, floor slope, or new wall cracks
- The ceiling is sagging, feels soft, or shows water staining
Step 2: If it looks cosmetic, confirm it is stable
Give it a little time if you can. A stable hairline crack that does not change over a few weeks is a much better DIY candidate than one that is actively moving.
Step 3: Pick the right fix
- Nail pops: reset fasteners properly (often add a drywall screw near the pop), then patch, sand, prime, paint. Step-by-step: How to fix nail pops.
- Seam cracks: remove loose tape, re-tape, apply multiple thin coats, feather wide, sand, prime, paint.
- Corner cracks: re-tape if needed, consider a flexible paintable caulk at trim transitions where appropriate, then paint.
Step 4: Prime properly
Even a perfect patch can flash through paint. Use a quality primer over repairs before your finish coat, especially on ceilings where light rakes across every flaw.
My ceiling-crack lesson
In our 1970s ranch, I once patched a long seam crack three different times. I kept “fixing the crack” instead of fixing the joint. The fourth time, I cut back the loose tape, re-taped the seam, feathered it wider, and primed properly. It has held ever since.
The takeaway: if a crack keeps returning in the same spot, do not just add more mud. Figure out what is moving or failing, then repair that system the right way.
When in doubt, document it
If you are sitting there thinking, “This might be fine, but it might also be expensive,” you are not overreacting. Take clear photos, include a ruler for scale, write down dates, and watch for change.
And if you have red-flag patterns or multiple symptoms, bring in a qualified professional. Drywall is cheap. Structural surprises are not.
The 30-Second Cheat Sheet
Essential takeaways for: Ceiling Cracks: Red Flags vs. Cosmetic Fixes
Red flag vs. cosmetic in 30 seconds
- Usually cosmetic: long straight cracks along drywall seams, fine spider cracks at corners, and nail pops (little bumps with ring cracks).
- Likely needs evaluation: stair-step cracks following masonry lines, cracks that are widening fast, cracks with offset (one side higher), or any crack paired with sticking doors, sloping floors, or new wall cracks.
- Moisture clue: stains, bubbling paint, softness, or sagging means stop the leak first.
What I’d do today
- Mark and date the ends of the crack and take photos with a ruler for scale.
- Check for extra symptoms: doors sticking, trim gaps, floor slope, ceiling sag.
- If it looks cosmetic and stable, choose the repair: nail pop fix or re-tape the seam, then prime and paint.
- If you have red flags or multiple symptoms, call a structural engineer or qualified foundation pro.
Rule of thumb
If the crack is growing, wide (around 1/8 inch or more), offset, or comes with house movement symptoms, do not guess. Get a professional evaluation before cosmetic repairs.
💡 Tip: Scroll up to read the full article for detailed, step-by-step instructions.
⬆️ Back to topAbout Marcus Vance
Content Creator @ Grit & Home
Marcus Vance is a lifelong DIY enthusiast and self-taught home renovator who has spent the last decade transforming a dilapidated 1970s ranch into his family's dream home. He specializes in budget-friendly carpentry, room-by-room renovations, and demystifying power tools for beginners. Through his writing, Marcus shares practical tutorials and hard-learned lessons to help homeowners tackle their own projects with confidence.