
When a ceiling fan won’t turn on at all, it’s tempting to assume the fan is “just dead.” In my experience, the real culprit is usually something simple: a tripped breaker, a bad wall switch, or a loose wire in the canopy. The key is to troubleshoot in a calm, safe order so you do not guess, and you do not create a bigger electrical problem than the one you started with.
This guide walks you through the most common causes and the fixes most DIYers can handle, including replacing a wall switch, a pull-chain switch, and a capacitor.
Safety first (please do this part)
- Turn off power at the breaker before opening the fan canopy, switch box, or light kit.
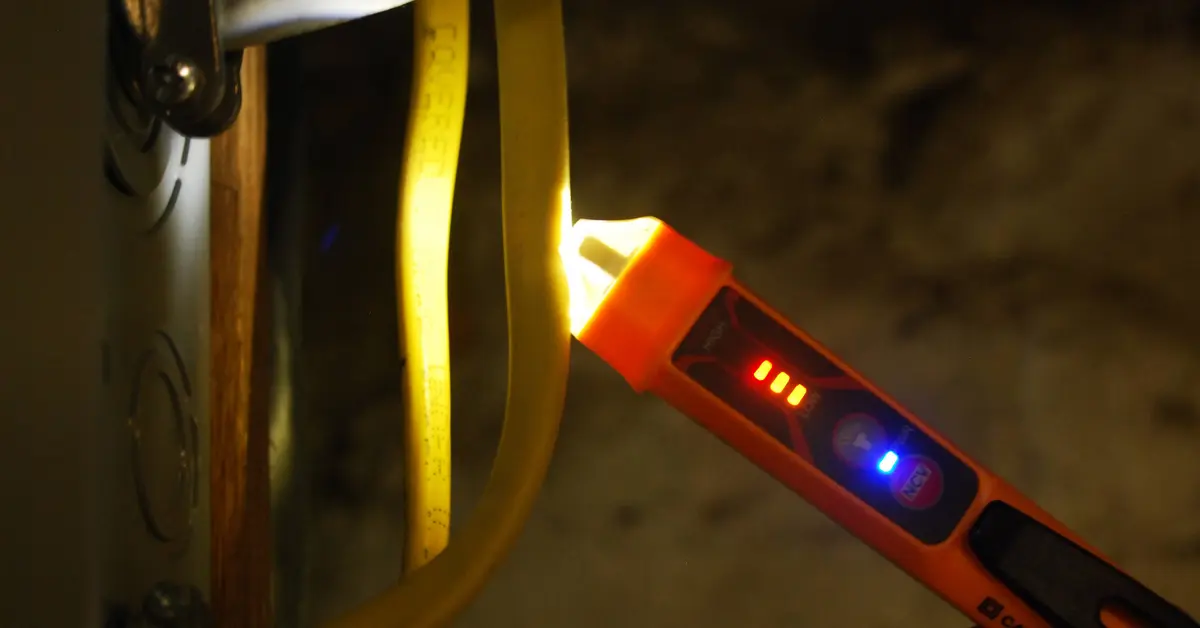
- Confirm power is off with a non-contact voltage tester on the switch wires and in the fan canopy.
- Non-contact testers can be fooled by phantom voltage. If you are unsure, verify with a multimeter or a two-pole tester before touching conductors.
- Use a stable ladder and keep one hand free when working overhead.
- If you see burned insulation, melted wire nuts, or a scorched smell, stop and call an electrician. That is a heat and fire risk.
- If your home has aluminum wiring (common in some 1960s to 1970s builds), get professional help unless you are trained and using approved connectors.
Quick note: A ceiling fan can be “dead” in two different ways: the motor does nothing, and the light does nothing. If both are dead, start with power supply and connections. If the light works but the fan does not, jump ahead to the pull-chain switch, capacitor, remote receiver, or motor sections.
Tools and parts you might need
- Non-contact voltage tester
- Phillips and flathead screwdrivers
- Needle-nose pliers
- Wire strippers
- Multimeter or two-pole tester (helpful for verification)
- Replacement wall switch (standard switch or fan control)
- Replacement pull-chain switch (if your fan uses one)
- Replacement capacitor (matched to your fan’s ratings, AC fan type)
- Wire nuts and electrical tape
Fast troubleshooting checklist (in the right order)
1) Confirm the obvious stuff
- Try the pull chain a few times (some fans land “between clicks”).
- If there is a remote, replace the batteries and verify the wall switch is on.
- If there is a reverse switch on the fan body, flip it fully to the other side, then back. A half-set reverse switch can cause non-operation or intermittent operation on some models.
- With power off, gently spin the blades by hand. They should rotate smoothly. If they feel stiff, gritty, or stuck, you may have a mechanical problem (seized bearing or rubbing) that can mimic an electrical failure.
2) Check the breaker (and GFCI/AFCI)
Head to your electrical panel and find the breaker labeled for the fan, bedroom, living room, or “lights.” Many panels are mislabeled, so if you are not sure, test a few lights or outlets in the room to confirm you have the right circuit. A tripped breaker may not look obviously off. Flip it firmly to OFF, then back to ON.
- If it trips again immediately, you may have a short, a failed component, or a wiring issue. Leave it off and call a pro.
- Also check for any upstream GFCI outlets that might feed the circuit (bath, garage, exterior, basement, kitchen) and press RESET.
3) Test the wall switch
Wall switches fail more often than people think, especially bargain fan speed controls or older dimmers that were incorrectly used for a fan.
- If you have a dimmer on a fan motor circuit, that is a red flag. Dimmers are for lights, not motors, unless specifically rated for fan control.
- If the fan is controlled by a smart switch, try power-cycling the breaker and re-checking wiring, load type, and neutral requirements.
- If you have two wall switches (one for fan, one for light), make sure both are on. A surprising number of “dead fan” calls are just the wrong switch being off.
4) Check for loose connections in the fan canopy
If the breaker and switch seem fine, the next most common failure is a loose wire nut or a connection that was never tight to begin with. Fans vibrate. Vibration finds weak connections.
5) Quick mounting check
Before you go deep, glance at the fan mounting. A loose bracket or a box that is not fan-rated can let the fan move, stress the wiring, and cause intermittent cutouts. If the box is loose, cracked, or not fan-rated, stop and fix that first or call a pro.
Cause #1: Tripped breaker or tripped GFCI
What it looks like
- Fan and light are totally dead.
- Other devices in the room may also be out.
Fix
- Reset the breaker by switching it fully off, then on.
- Check and reset any GFCI outlets that may feed the circuit.
- If the breaker trips again, stop troubleshooting and get help. Repeated trips mean the circuit is protecting you from a fault.
Cause #2: Bad wall switch (or wrong type of switch)
How to diagnose safely
Turn the breaker off. Remove the switch plate and gently pull the switch out. With the power still off, inspect:
- Loose terminal screws or backstabbed wires that wiggle
- Heat discoloration or a burnt smell
- A dimmer or light-only control used on a fan motor circuit
If you have a multimeter and you are comfortable using it, you can test continuity across the switch when it is ON. Important: for an accurate reading, disconnect the switch wires (at least one conductor, and ideally both line and load) before testing. Even with the breaker off, leaving wires connected can give misleading readings through the circuit. No continuity in the ON position usually means a failed switch.
DIY: Replace a standard wall switch
- Shut off the breaker and verify power is off with a tester.
- Take a quick photo of the wiring before disconnecting anything.
- Disconnect the wires (usually one “line” in and one “load” out, plus ground).
- Move the wires to the same positions on the new switch. Tighten terminal screws firmly.
- Attach the ground wire to the green screw.
- Reinstall the switch, plate, and restore power. Test the fan.
Thrifty tip: If the fan has separate fan and light control, consider installing a proper fan control switch rated for ceiling fan motors instead of a dimmer. It costs more than a basic toggle, but it prevents future headaches.
Cause #3: Loose wiring in the fan canopy
What it looks like
- Fan is dead after years of working fine, or it died after a wobble or vibration got worse.
- You recently installed the fan and it never worked.
DIY: Check and re-make the connections
- Turn off the breaker and confirm power is off.
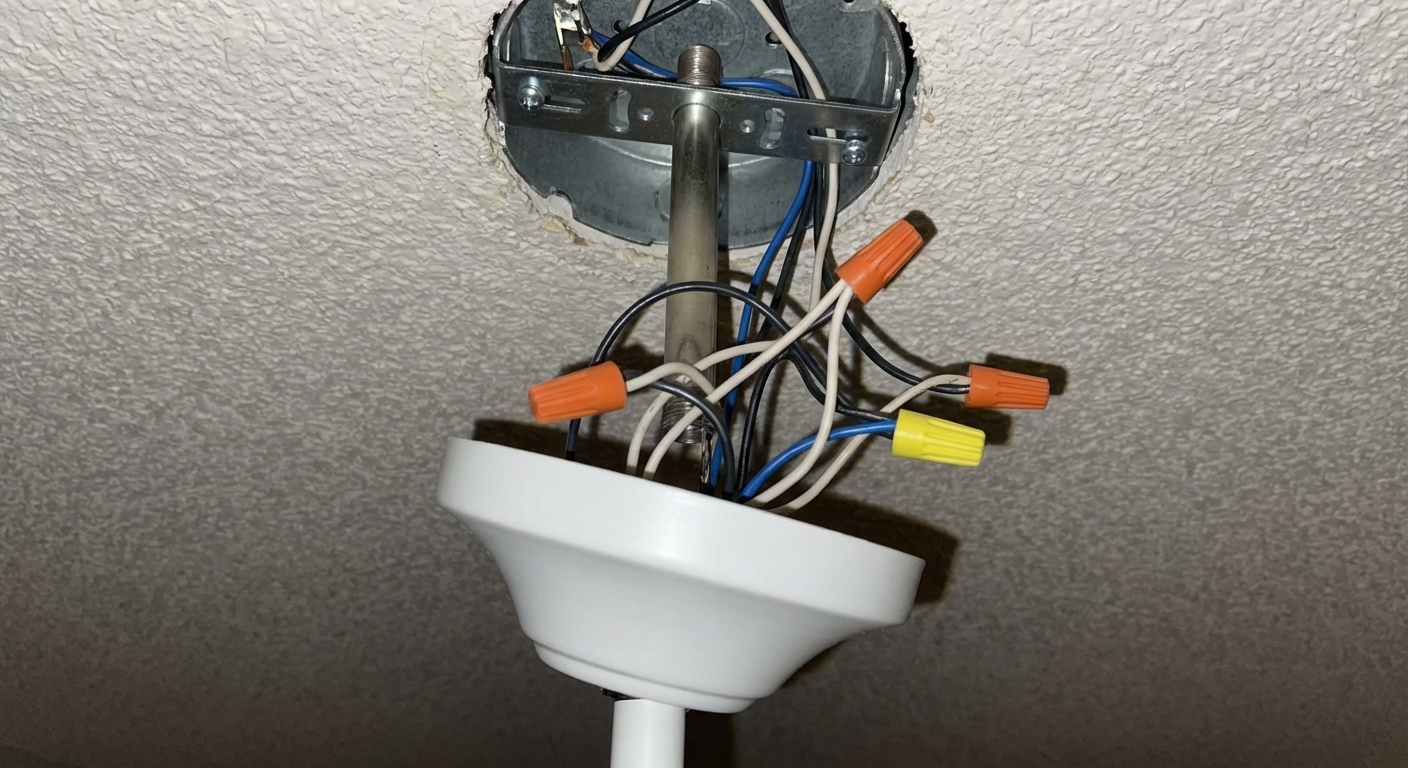
- Remove the canopy cover (the decorative cup against the ceiling) and lower it to expose wire nuts.
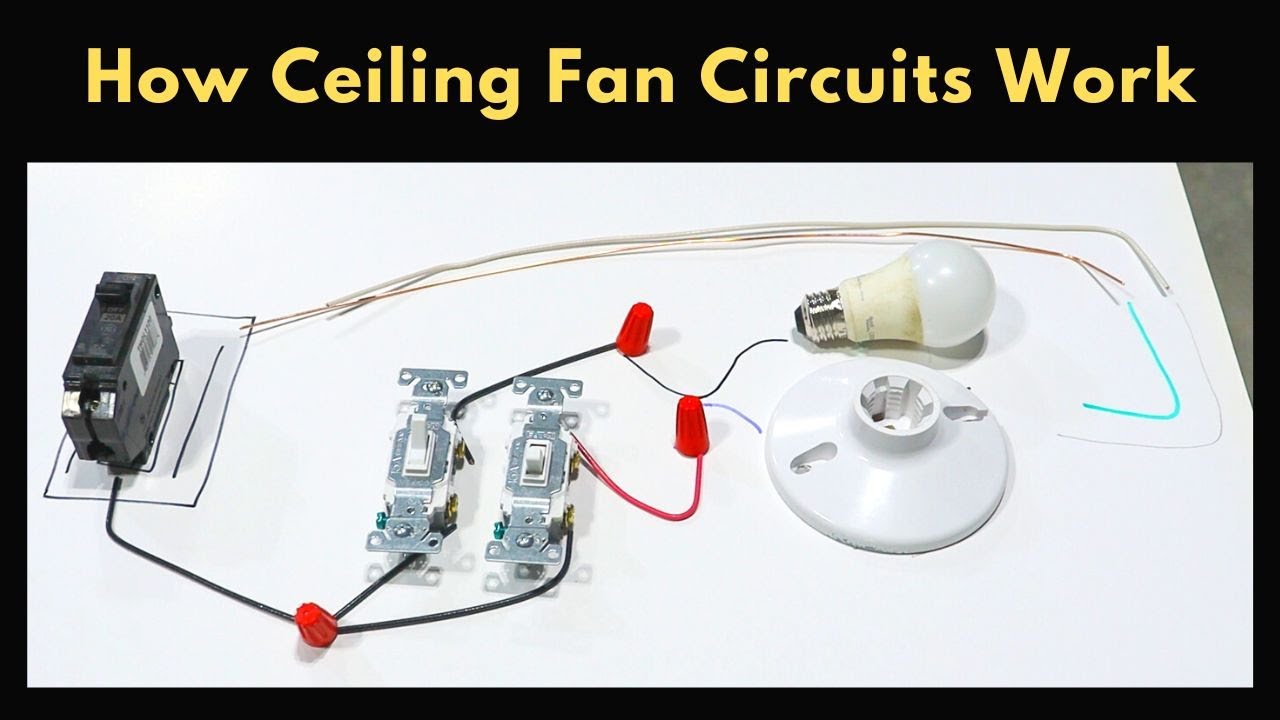
- Inspect connections: typically white to white (neutral), black to black (fan hot), and sometimes blue (light hot) to a switched hot.
- Dual-switch note: In many installs, black is switched hot for the fan and blue is switched hot for the light. If you only have one wall switch, the fan’s black and blue may be tied together to the same switched hot.
- Grounds should be tied together and bonded to the bracket and box.
- Re-make any questionable connection: remove the wire nut, straighten wires, strip to proper length, twist wires together, then install a new wire nut snugly.
- Gently tug each wire to confirm it is locked in.
- Reassemble and test.
My mistake from early days: I used to trust that a wire nut was “fine” if it looked okay. Now I always do the tug test. A loose neutral can make a fan act dead, and it can also create heat at the connection.
Quick test: Is power reaching the fan?
If you are stuck between “bad fan” and “bad wiring,” this is the fork in the road. Only do this if you are comfortable using a multimeter or two-pole tester.
- Turn the breaker on and set the wall switch to on (if it is a switched leg, you only get voltage when the switch is on).
- Carefully test at the canopy: measure hot to neutral (typically black to white). You should see around 120 V in North America.
- If you have a separate light switch and fan switch, test with each switch on and off. The blue and black conductors may be on different switched hots.
If you have correct voltage at the fan but the fan does not respond, the problem is likely in the fan (switch, capacitor, receiver, or motor). If you do not have voltage when you should, go back to the wall switch wiring and upstream connections.
Cause #4: Failed pull-chain switch
If your light works but the fan does not, the pull-chain switch is a prime suspect, especially if the chain feels “mushy,” stops clicking cleanly, or was yanked hard one too many times.
How to diagnose
- Does the fan respond on any speed? If none, and power is present, the switch, capacitor, or a control module can be the issue.
- If the fan works only on one speed, that often points to a capacitor, but it can also be a failing pull-chain switch or an electronic control or receiver.
DIY: Replace a fan pull-chain switch
- Turn off the breaker and verify power is off.
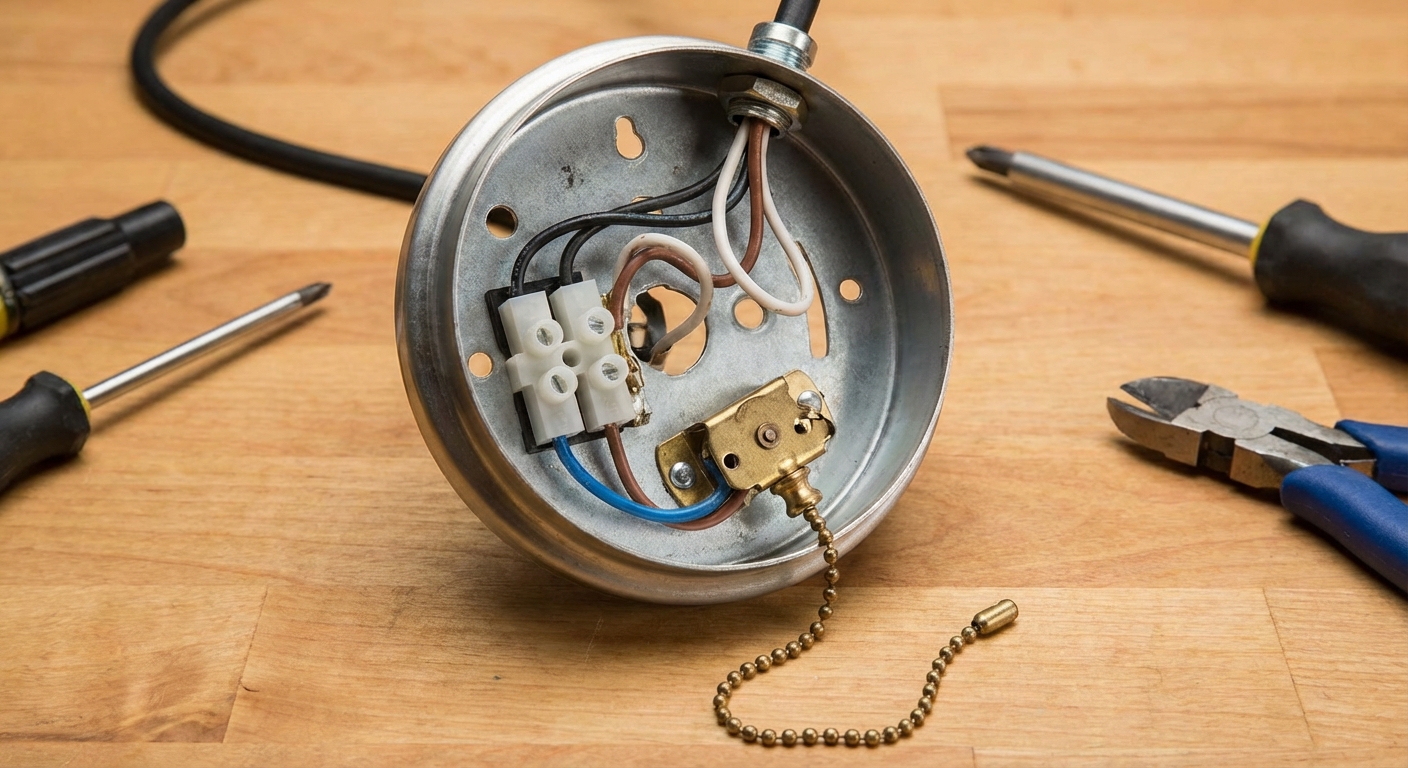
- Remove the light kit or switch housing cover to access the switch. Support the housing so it does not hang by wires.
- Take a clear photo of wire positions on the old switch. Fan pull-chain switches can be wired differently by model.
- Disconnect wires one at a time and move them to the same terminals on the new switch.
- Install the new switch, reassemble, restore power, and test.
Parts note: Pull-chain switches come in different configurations (number of wires, speed steps). Match your old switch exactly, or buy the manufacturer replacement.
Cause #5: Burned-out capacitor
The capacitor is the little component that helps start the fan and run it at different speeds. When it fails, you may get a fan that hums, starts only if you spin it by hand, runs only on one speed, or does nothing at all.
Common symptoms
- Fan hums but blades do not move.
- Fan starts only after a manual push.
- One or more speeds do not work.
- Burnt smell from the switch housing, sometimes with bulging or leaking capacitor casing.
DIY: Replace a ceiling fan capacitor
- Turn off the breaker and verify power is off.
- Open the switch housing (often under the fan motor) or light kit area where the capacitor is tucked.
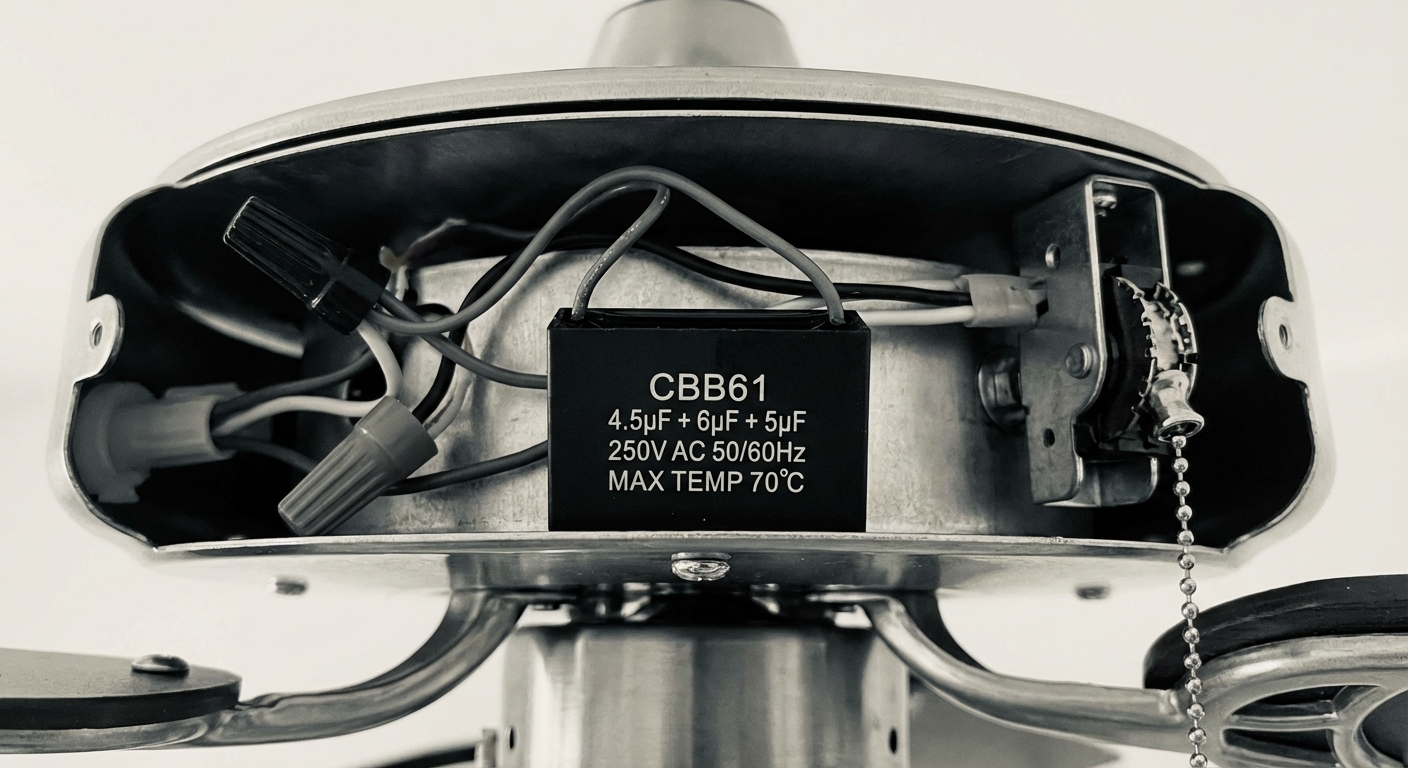
- Find the capacitor. It is commonly a small black or gray box with multiple wires. Some fans use a single capacitor, others use a dual-value or multi-wire capacitor.
- Write down the capacitor ratings printed on the side. You need to match microfarads (µF) values and voltage rating. Take a photo.
- Disconnect the old capacitor wires (usually wire nuts or quick connectors) and connect the new capacitor wires the same way.
- Neatly tuck wires back in, reinstall the cover, restore power, and test all speeds.
Choosing the right capacitor: Use an AC-rated ceiling fan capacitor (common types are CBB61 or CBB60). Match the µF values exactly. Voltage can be equal or higher than the original. If you cannot find an exact match, use the manufacturer part number from your fan’s manual or label.
Cause #6: Dead motor (or failed control module)
If you have confirmed power at the fan, verified solid wiring connections, and replaced the common failure parts (switch and capacitor), the motor itself may be done. Some newer fans also have an internal control module that can fail like a “brain” failure, especially in remote-controlled units.
Signs the motor is the problem
- Power is present, capacitor is good or replaced, switch is good, and the fan still does nothing.
- Motor makes a brief hum and then stops, even with a new capacitor (could also be internal thermal protection or seized bearings).
- Visible overheating damage, strong burnt smell, or repeated breaker trips when the fan is turned on.
What to do
- If the fan is relatively new, check the warranty. Motor replacements are often covered.
- For budget and time, replacing the entire fan is usually more practical than sourcing a motor.
- If the breaker trips when you turn the fan on, leave it off and get help.
Remote-controlled fans that won’t turn on
Remote kits add one more link in the chain. Most remote-controlled fans also require the wall switch to stay ON so the receiver has power.
- Replace remote batteries and confirm the wall switch is on.
- Verify the receiver wiring connections in the canopy are tight.
- Power-cycle at the breaker (off, then on) and re-pair the remote and receiver per the manufacturer instructions.
- If the light works from the wall switch but the fan does not respond to the remote, the receiver may be bad.
When to call an electrician
- Breaker trips repeatedly or you see arcing, melted wires, or scorching.
- You have aluminum wiring or an older, overcrowded ceiling box.
- You are not confident identifying line vs load, or your switch box has multiple circuits.
- The ceiling box is loose, cracked, or not rated for fans. Fan-rated boxes are a must.
Quick FAQs
Why does my ceiling fan hum but not spin?
Most commonly a failed capacitor. Sometimes the blades are stuck from a mechanical issue, but the capacitor is the first electrical part I check.
Can a ceiling fan stop working because of a bad light bulb?
A bad bulb will not stop the fan motor, but some remote receivers or wiring setups can make it seem like everything is dead. Troubleshoot power and connections first.
Do I need a special switch for a ceiling fan?
For the motor, use a fan-rated control if you want speed control at the wall. Do not use a standard light dimmer on a fan motor circuit.
Your next step
If I were standing at your breaker panel with you, I’d do it in this order: reset breaker, confirm the wall switch is delivering power, then open the canopy and re-make the connections. Only after that would I spend money on parts like a pull-chain switch or capacitor.
If you want, tell me what still works (light, fan, neither), whether you have a remote, and whether you hear any humming. That combo usually narrows it down fast.
About Marcus Vance
Content Creator @ Grit & Home
Marcus Vance is a lifelong DIY enthusiast and self-taught home renovator who has spent the last decade transforming a dilapidated 1970s ranch into his family's dream home. He specializes in budget-friendly carpentry, room-by-room renovations, and demystifying power tools for beginners. Through his writing, Marcus shares practical tutorials and hard-learned lessons to help homeowners tackle their own projects with confidence.