
🚨 In a DIY emergency or rush?
Skip the details and jump straight to our 30-second cheat sheet for the most crucial info.
Small courier. Big home questions.
So you’ve got a dryer with a 3-prong cord, but the wall has a 4-slot outlet. Classic move-in surprise. The good news is that many electric dryers are built to accept either cord style, as long as the wiring at the terminal block is changed correctly.
This job is mostly about two things: (1) landing the wires on the right screws, and (2) dealing with the neutral-to-cabinet bond that exists on many dryers set up for 3-prong cords. With a 4-prong cord, neutral and ground must be separated.
Before you start
Make sure it’s electric
This article is for electric dryers that use a 240V cord.
Gas dryers typically plug into a standard 120V outlet and do not use 3-prong or 4-prong 240V dryer cords.
Confirm the outlet
A modern 4-slot dryer receptacle is typically a NEMA 14-30. It has four slots: two hot slots, one neutral slot, and one round ground slot.
Quick double-check: a range outlet is often a NEMA 14-50 (50 amps) and is not the same thing as a dryer outlet. Dryers are typically on a 30-amp circuit with a matching cord and plug.
If your outlet is damaged, loose, warm to the touch, or scorched, stop and have it repaired before plugging anything in.
Tools and parts
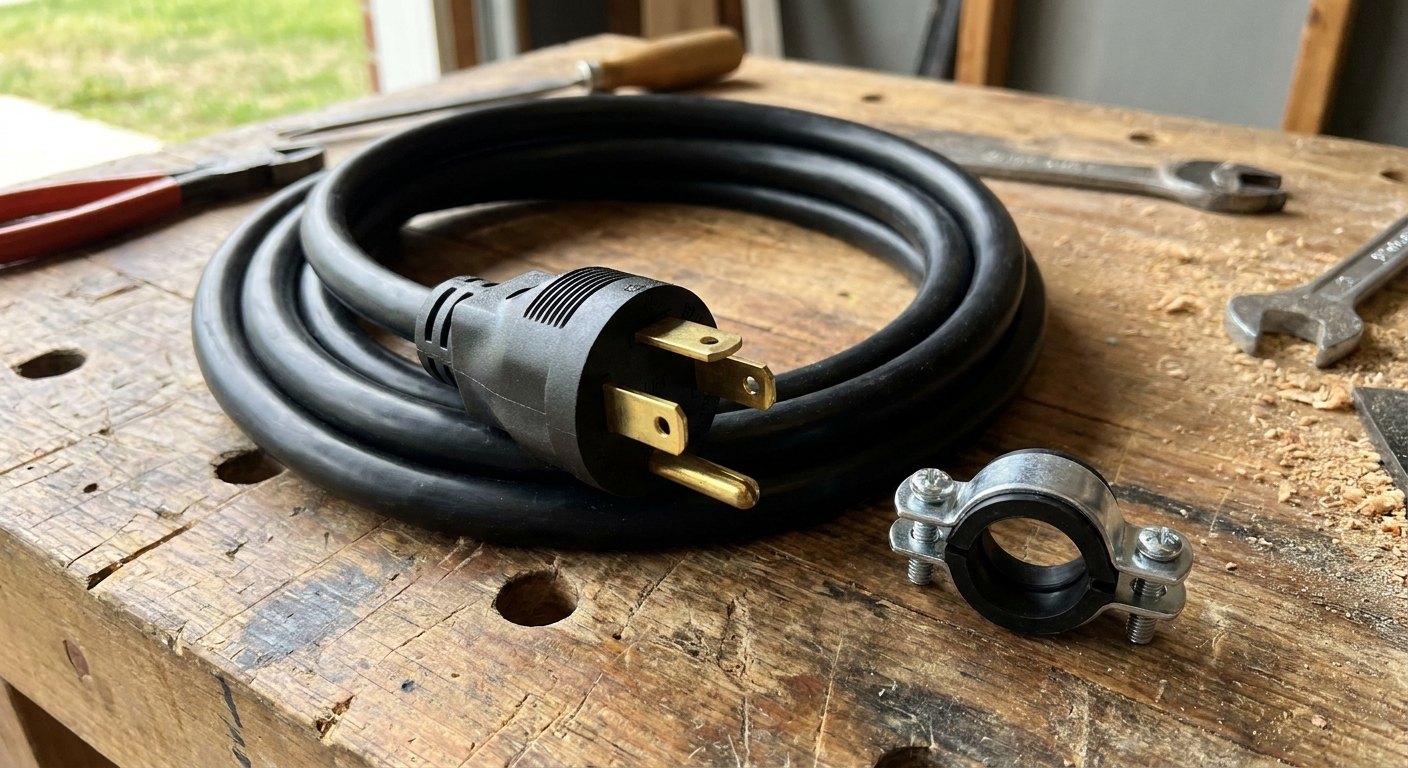
- 4-prong dryer cord (usually 30-amp, NEMA 14-30P). Buy the length you need without stretching it tight.
- Strain relief clamp sized for your cord (sometimes included with the cord, sometimes not). If yours is missing or the wrong size, replace it. Do not “make it work” with an incorrect clamp.
- Screwdriver or nut driver (commonly 1/4-inch or 5/16-inch for the terminal screws and cover plate)
- Flashlight
- Work gloves (optional, but sheet metal edges can be sharp)
Safety first
Unplug the dryer if it’s plugged in. If the cord does not match the outlet and it is already unplugged, keep hands clear of the outlet and any exposed conductors while you work.
- Do not work on the cord or terminal block with the dryer plugged in.
- Do not rely on the dryer being “off.” Unplugging is what matters.
- If you need to move the dryer, pull it out gently to avoid crushing or tearing the vent duct.
Step by step
1) Remove the cover
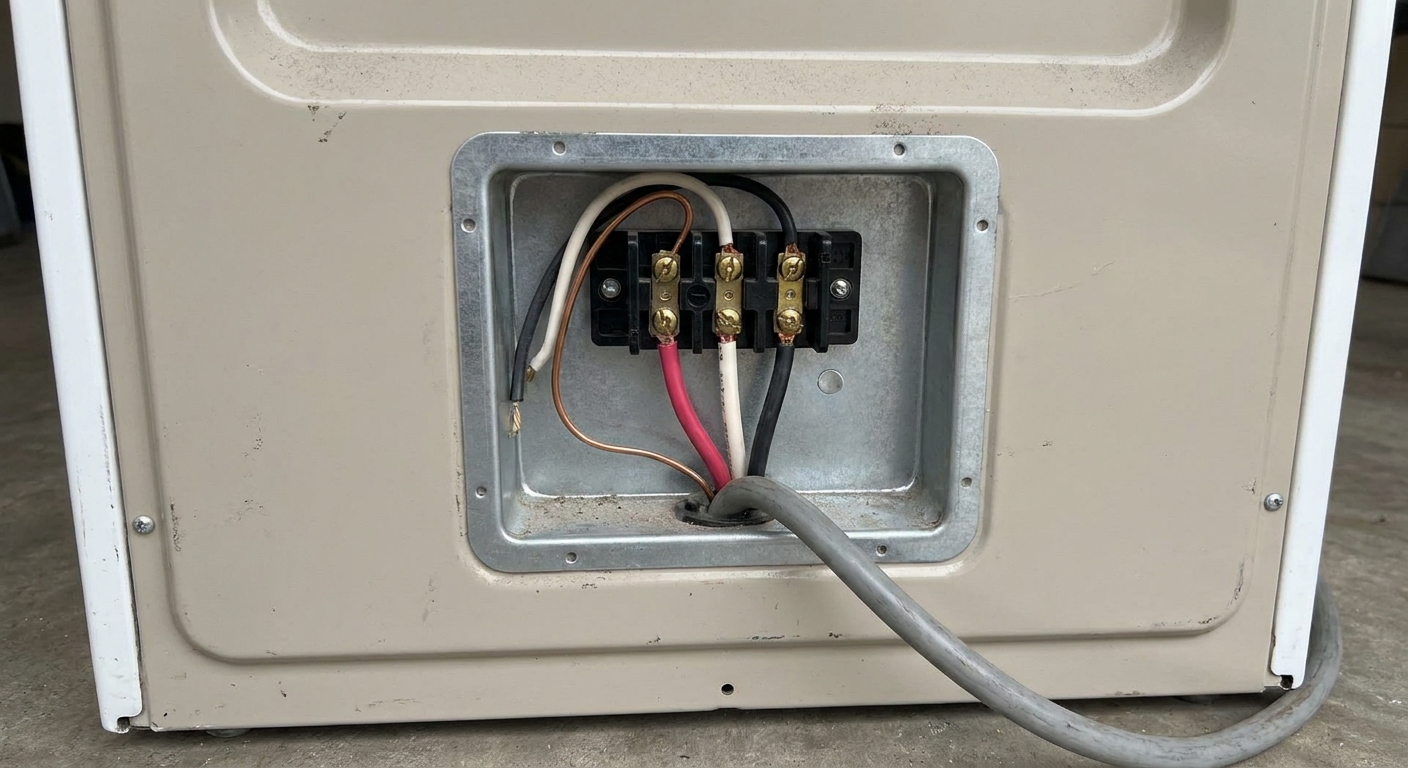
On the back of the dryer, find the small metal access cover where the power cord enters. Remove the screws and set the cover aside.
2) Take a photo
Before loosening anything, take a clear photo of the terminal block and any strap or wire connecting neutral to the dryer cabinet. That little connection is the detail people forget.
Also look for the dryer’s wiring diagram. Many models include a clear “3-wire” and “4-wire” diagram right near this access area or on the inside of the panel.
3) Remove the 3-prong cord
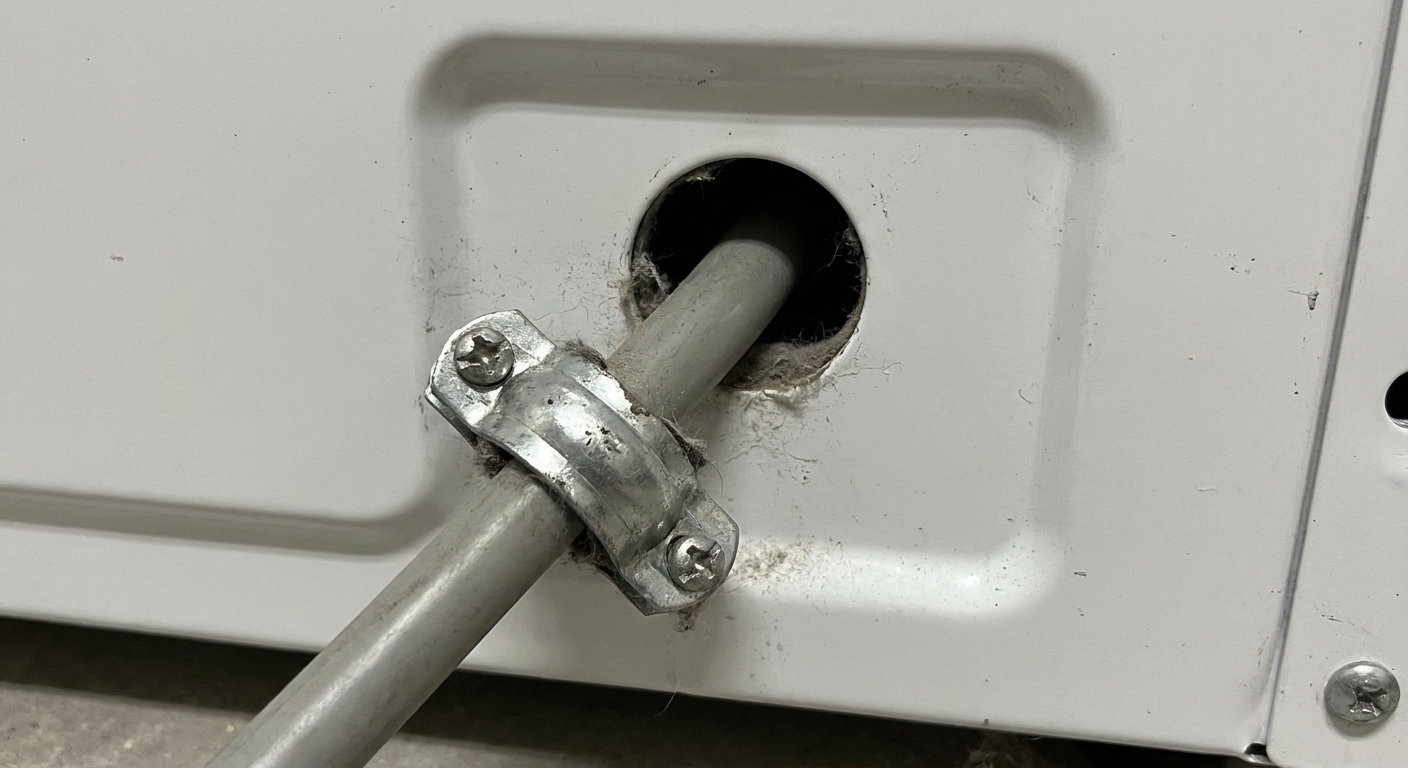
The cord should be held by a clamp where it passes through the dryer’s rear panel. Loosen the clamp screws until the cord can slide free.
Then remove the wires from the terminal block:
- The center terminal is typically neutral (often a white wire).
- The left and right terminals are the hot legs (often red and black, or two hots on a 3-wire cord).
Pull the old cord out.
4) Fix the neutral bond
This is the make-or-break step.
Many dryers configured for a 3-prong cord have a bonding strap or bonding wire that ties the neutral terminal to the dryer cabinet. With a 4-prong cord, the cabinet must be grounded through the cord’s ground wire, not through neutral.
Do this the way your dryer’s wiring diagram shows. Do not guess, and do not invent a new strap location.
- If there is a flat metal strap from the center (neutral) terminal to the dryer frame: your diagram will typically show it either moved to the cabinet ground point or removed from the neutral terminal so neutral is isolated. Follow the diagram exactly.
- If there is a short bonding wire tying neutral to the frame: disconnect it from the neutral terminal for the 4-wire setup, again following the dryer diagram.
- If there is no strap or wire: your dryer may already be set up to keep neutral and ground separate, but verify against the diagram before proceeding.
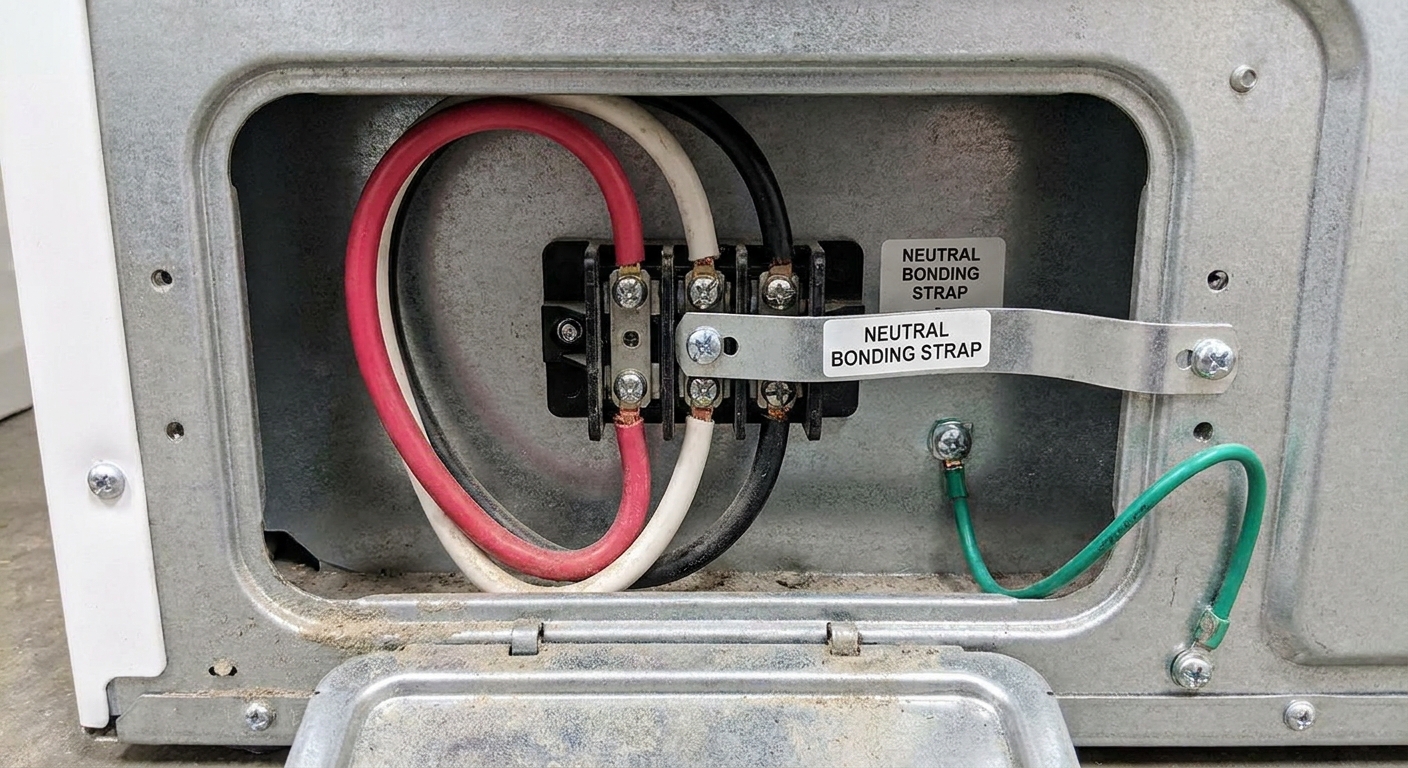
5) Install the 4-prong cord
Feed the new 4-prong cord through the opening in the back panel. Install the strain relief clamp around the cord jacket where it passes through the metal. Do not clamp onto the individual insulated wires.
Leave the clamp slightly loose for the moment so you can position the cord neatly without pinching.
6) Connect the wires
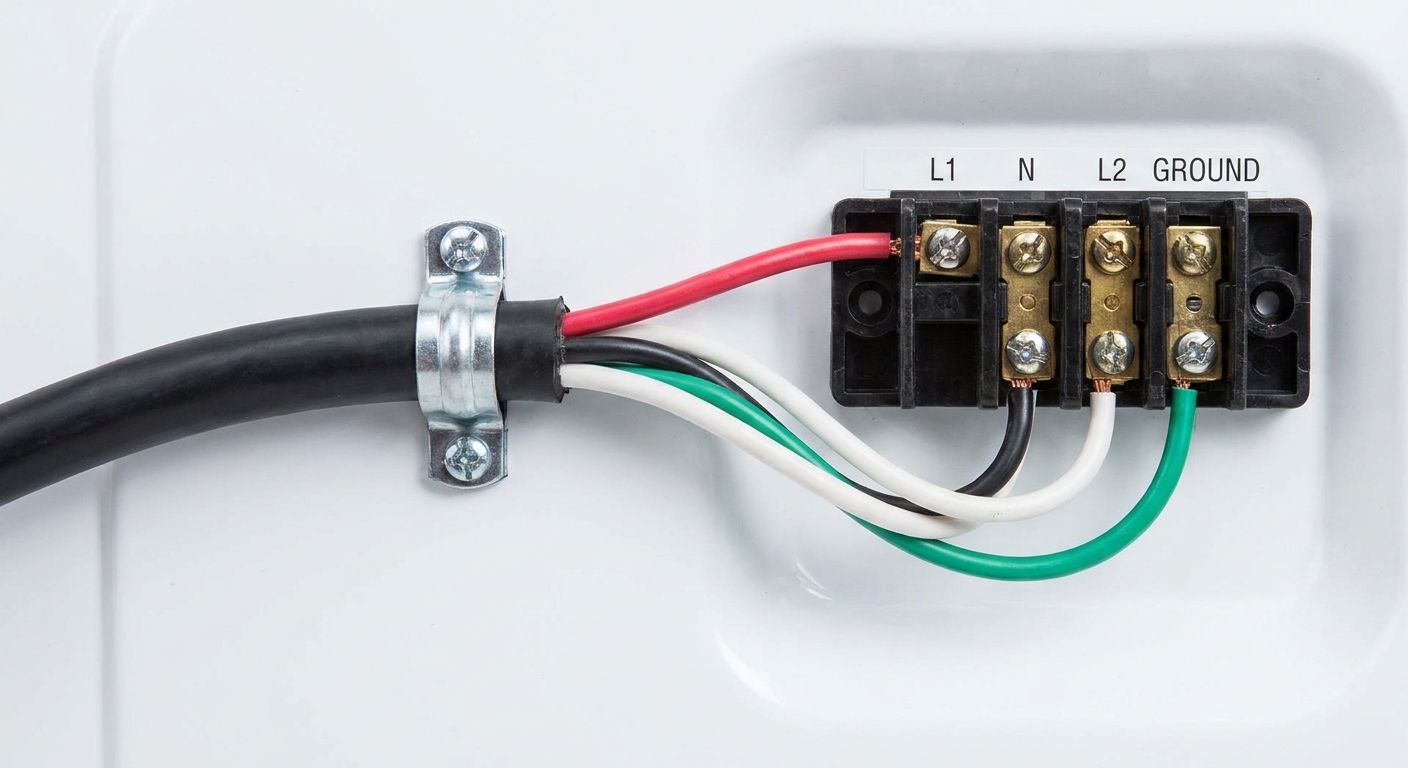
A 4-prong dryer cord typically has four wires: black, red, white, and green.
- White (neutral) goes to the center terminal.
- Black (hot) goes to one outer terminal.
- Red (hot) goes to the other outer terminal.
- Green (ground) goes to the green ground screw or the cabinet grounding point, not the center terminal.
Make sure the ring or spade connectors sit flat, then tighten the screws firmly. A loose terminal connection can overheat and damage the block.
Before you put the cover back on, route the wires so they sit flat and will not get pinched by the access plate.
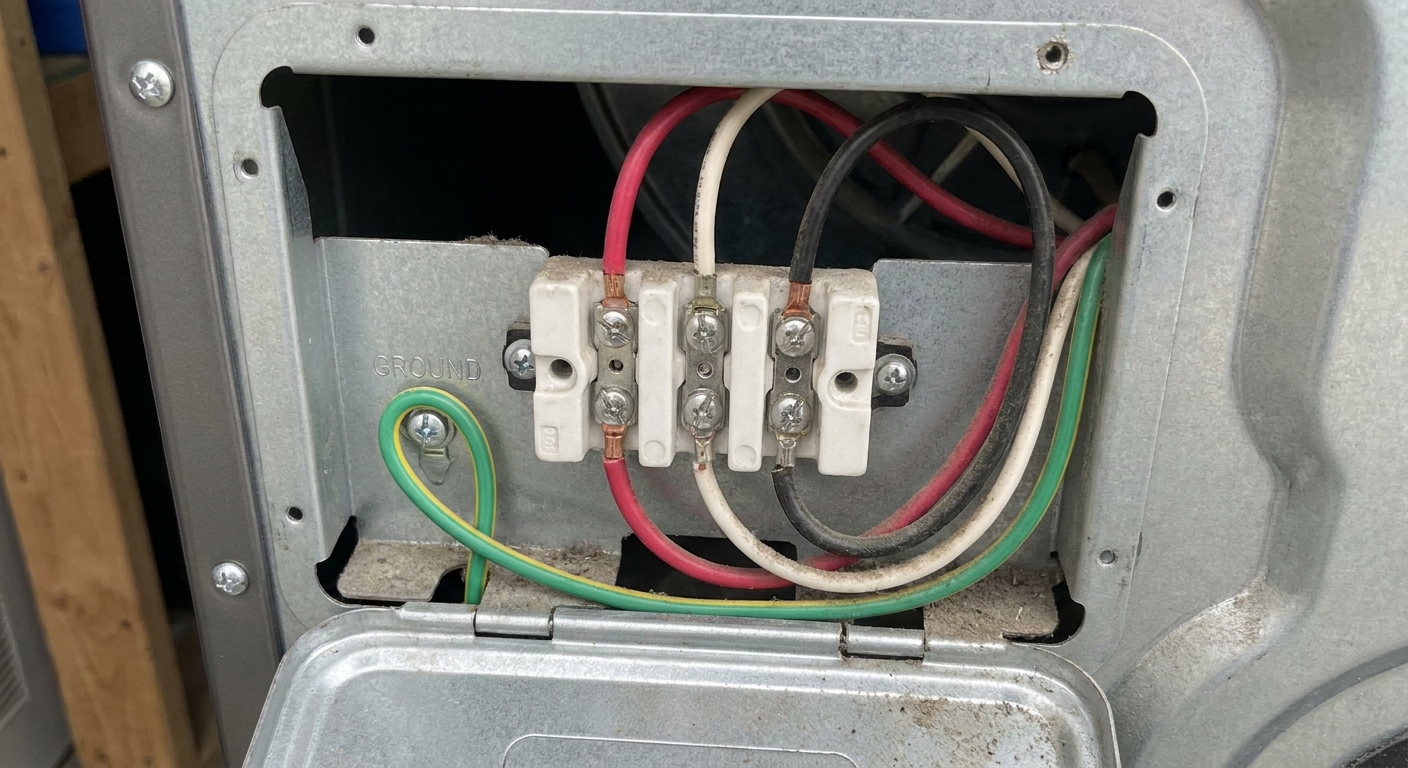
7) Tighten the clamp and reinstall the cover
Now tighten the strain relief clamp screws so the cord is held securely. Tug gently on the cord. It should not slide in and out.
Reinstall the terminal block cover.
Test safely
Plug the dryer into the 4-slot outlet. Keep the dryer pulled out so you can see and smell what’s happening.
- Set a timed dry cycle and start the dryer.
- Listen for normal drum rotation.
- After a minute, check for any unusual buzzing, arcing sounds, or hot electrical smell.
- Without touching exposed metal parts, use your hand near the terminal cover to check for unusual heat, or use an IR thermometer if you have one.
If anything seems off, unplug immediately and recheck the wiring and the neutral-bond setup.
Tip: after your first normal heat cycle, unplug the dryer and recheck that the terminal screws are still tight.
Common mistakes
- Leaving neutral bonded to the cabinet when installing a 4-prong cord. In a 4-wire setup, neutral and ground must be separated.
- Putting the green ground wire on the neutral terminal. Ground goes to the cabinet ground screw.
- Clamping the strain relief onto individual wires instead of the cord jacket.
- Overlooking a loose terminal screw. Loose connections can heat up fast.
- Mixing up the center terminal. The center is neutral.
- Using an adapter to force a 3-prong cord into a 4-slot outlet (or vice versa). Use the correct cord and the correct wiring method instead.
FAQ
Do I have to change the dryer cord, or can I change the outlet?
Either can be done, but swapping the dryer cord is often simpler and avoids electrical work in the wall. Outlet changes can involve circuit wiring and code requirements, so many households choose the cord swap.
Is it okay if my new cord colors don’t match what I expected?
On most 4-wire cords: white is neutral and green is ground. The other two are hots. If your cord is not color-coded in the standard way, follow the included manufacturer instructions and the dryer’s wiring diagram.
Where do I find the wiring diagram?
Common locations include behind the rear terminal cover, inside a side panel, along the bottom front kick area, or under the control console. It is often a folded sheet in a small envelope.
What if the terminal block is cracked or melted?
Stop and replace the terminal block and any damaged wires before using the dryer. Heat damage is a sign of a loose connection or prior arcing.
The 30-Second Cheat Sheet
Essential takeaways for: Change a Dryer Cord From 3-Prong to 4-Prong
What you’re doing
- Swap a 3-prong dryer cord for a 4-prong cord to match a 4-slot (typically NEMA 14-30) outlet.
- Key rule: with a 4-prong cord, neutral and ground must be separated.
Wire placement (typical)
- White (neutral) to the center terminal
- Black (hot) to an outer terminal
- Red (hot) to the other outer terminal
- Green (ground) to the green ground screw on the dryer frame
The crucial step
- Find the neutral-to-cabinet bonding strap or bonding wire used for 3-prong setups.
- Move or remove it per the dryer’s wiring diagram so the cabinet is grounded only by the green ground wire, not by neutral.
Do not skip
- Install a proper strain relief clamped on the cord jacket
- Tighten terminal screws firmly and keep connectors flat
- First run test: no buzzing, arcing, or hot electrical smell
If you get stuck
- Use the dryer’s internal wiring diagram for “3-wire” vs “4-wire” instructions.
- If the terminal block is melted or cracked, replace it before using the dryer.
💡 Tip: Scroll up to read the full article for detailed, step-by-step instructions.
⬆️ Back to top
About Grit
Content Creator @ Grit & Home
Grit is Grit & Home’s little blue clay courier, delivering big questions about the place you call home. Expect practical ideas, a raised eyebrow, and a satchel full of curiosity.