🚨 In a DIY emergency or rush?
Skip the details and jump straight to our 30-second cheat sheet for the most crucial info.
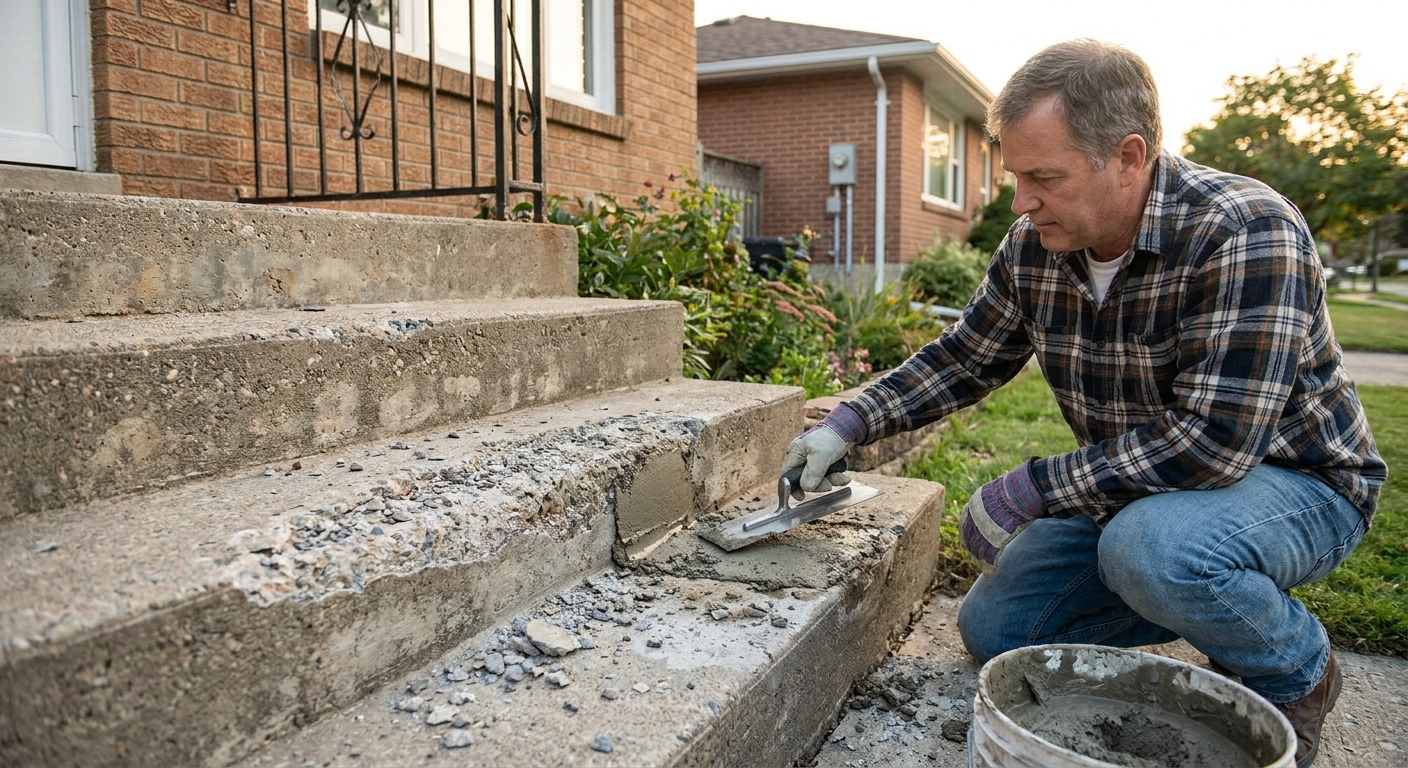
Spalling concrete steps are one of those problems that look cosmetic until somebody catches a toe on a popped-out chunk. The good news is you can patch most surface flaking yourself, and if you do the prep right, the repair can last through plenty of freeze-thaw cycles.
In this guide, I will walk you through what causes step spalling, how to tell a simple patch from a deeper rebuild, and the exact sequence I use to prep, bond, patch, and protect outdoor treads and risers.
Before you start
This is one of those repairs where timing matters as much as technique.
Temperature and weather
- Do not patch in the cold. Most repair mortars and bonding agents want temperatures above about 40 to 50°F during placement and for at least 24 to 48 hours afterward. Some products want longer. Read the label and follow the stricter requirement.
- Avoid rain or freezing nights during the early cure window. Water washing over fresh repair mortar or a surprise freeze can ruin the bond.
Quick pre-flight checklist
- Confirm the base concrete is sound (not hollow, not crumbling deep).
- Pick a repair mortar rated for exterior and freeze-thaw, and within the product’s minimum and maximum thickness for your repair.
- Plan your curing protection (plastic, shade, wind protection, foot-traffic control) before you mix.
Why concrete steps flake and spall
Concrete can tolerate getting wet. The trouble starts when it stays saturated and then freezes repeatedly, especially when de-icing products and finishing issues are involved.
Freeze-thaw damage in plain English
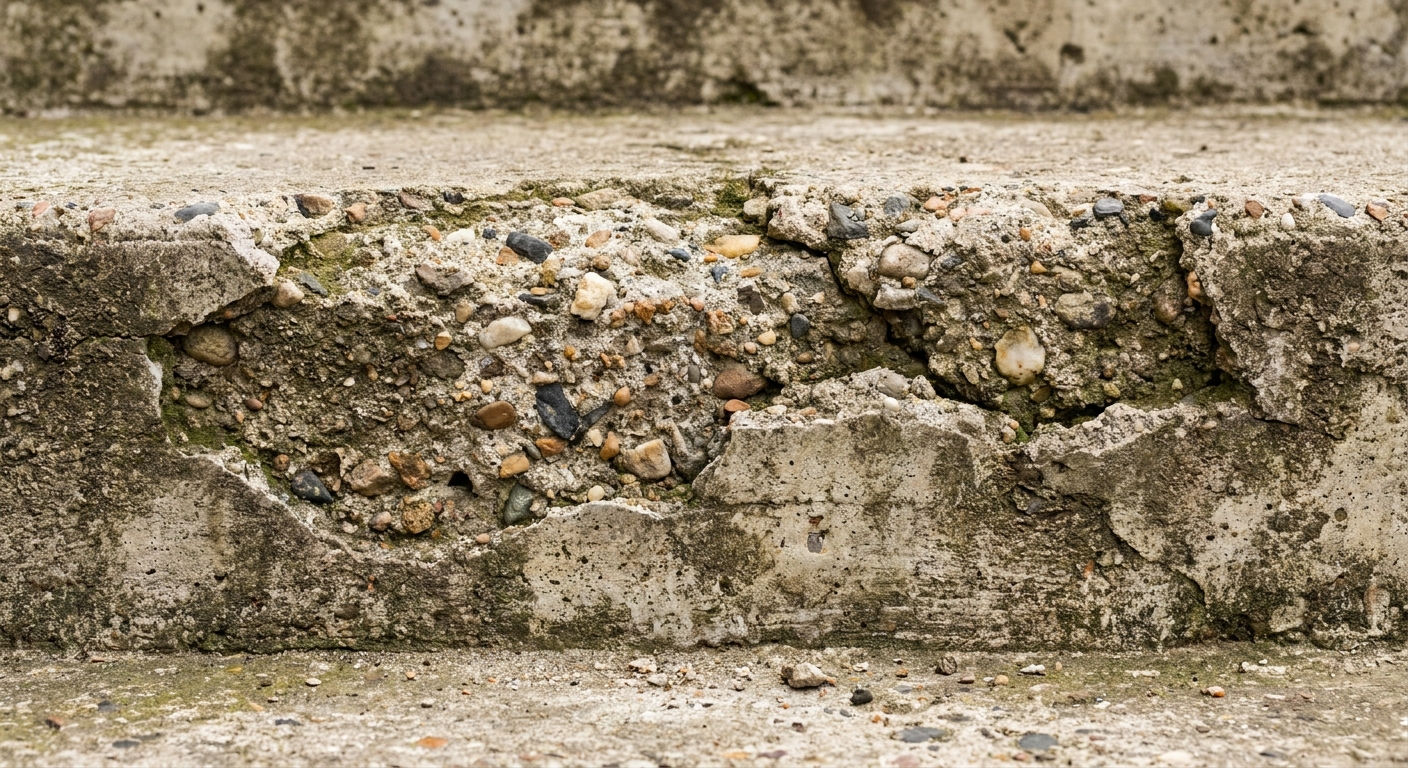
Concrete is porous. When rain or melting snow soaks in and temperatures dip below freezing, that water expands as it turns to ice. Over time, that repeated expansion can break the surface paste and loosen small pieces until you see flaking, pop-outs, and missing corners.
De-icers (and why steps take it personally)
De-icers help you walk safely, but they can make spalling more likely by keeping the surface wetter, lowering the freeze point so you get more freeze-thaw cycling near 32°F, and in some cases contributing to surface scaling. Steps take extra abuse because:
- They are constantly wet from boots, snow piles, and splashback.
- Treads often have small low spots that hold water.
- Edges are thin and vulnerable, so spalling starts there.
Other common contributors
- Weak surface layer: Over-watering a mix or finishing with water on the surface can create a soft top layer that fails early.
- Poor drainage: Gutters dumping near the steps, negative slope, or soil high against the bottom riser keeps the concrete saturated.
- Rusting rebar: If reinforcing steel is close to the surface, rust expands and can blow the face off the concrete.
- Not enough air entrainment: In freeze-thaw climates, non air-entrained concrete is more prone to surface scaling.
Patch or rebuild?
Here is the rule I use: patch when the concrete underneath is still solid. Rebuild or call a pro when the structure itself is compromised.
Patchable
- Flaking or spalling limited to a shallow layer where the base is sound.
- Small edge chips and shallow pop-outs.
- Hairline cracks that do not move season to season.
- Treads that are still level and do not wobble or sound hollow.
Note: Depth alone is not the whole story. What matters is whether you can chip back to solid concrete and then place a repair mortar that matches your thickness needs. Always stay inside the product’s listed thickness range.
Rebuild or professional help recommended
- Loose or rocking step units, or separation from the porch or landing.
- Wide cracks (about 1/4 inch or more), cracks that offset, or cracks that keep growing.
- Exposed, heavily rusted rebar or chunks coming off in thick slabs.
- Deep delamination where tapping with a hammer gives a hollow sound over large areas.
- Settling issues that create a trip hazard from one tread to the next.
If you have structural movement, a patch can turn into a repeating annual chore. At that point, it is smarter to address the base, drainage, and step structure first. Also, if step geometry changes or settlement is creating a hazard, check local requirements for handrails and safe step dimensions.
Tools and materials
You do not need a truckload of specialty stuff, but you do need the right repair product for outdoor exposure.
Tools
- Safety glasses, gloves
- Silica dust protection: a respirator rated for silica, plus good ventilation and dust control (a HEPA vac attachment is ideal)
- Hearing protection if grinding
- Cold chisel and hammer, or an angle grinder with a masonry wheel
- Wire brush
- Shop vacuum
- Stiff scrub brush and bucket
- Spray bottle or garden sprayer
- Margin trowel and finishing trowel
- Concrete edging tool (optional but great for tread noses)
Materials
- Concrete bonding agent (latex or acrylic) or a bonding slurry recommended by your repair product
- Polymer-modified repair mortar rated for exterior freeze-thaw
- Concrete cleaner or degreaser if the steps have oily stains
- Concrete sealer (penetrating silane or siloxane is my go-to for steps)
Choosing the right patching mix
For outdoor steps, I look for these phrases on the bag or data sheet:
- Polymer-modified or repair mortar
- Exterior and freeze-thaw resistant
- Approved thickness range that matches your repair
If you are patching risers (vertical faces), consider a mix labeled for vertical repairs. Some trowelable mortars are designed to hang on a wall without slumping. For small winter repairs, a rapid-set product can be useful, but only if you can meet its temperature limits and working time.
Avoid trying to “skin coat” steps with straight sand mix or leftover concrete. Most step patches fail because the product was wrong for the thickness or because it was applied to dirty, smooth concrete with no mechanical bite.
Prep work
If you take one thing from this article, take this: your patch sticks to what you leave behind. If you leave weak concrete, dust, or salty residue, that is exactly what your patch will be bonded to.
Step 1: Remove loose and weak concrete
Chip out spalled areas until you reach solid concrete that does not crumble under a chisel. Undercut the edges slightly if you can, so the patch has a mechanical lock instead of a feather edge.
- Feather edges (paper-thin) are the first place patches pop off.
- Aim for at least about 1/4 inch thickness at the perimeter if your product allows it, more is better, and always follow the product minimum.
Step 2: Roughen smooth surfaces
If your step tread is slick or has a hard finish layer, scuff it with an angle grinder or aggressive wire brush so the bonding agent and repair mortar can grab.
Safety note: Grinding concrete creates silica dust. Wear a proper respirator and use dust control. Also, be alert for embedded metal (rebar, corner bead, nosing) so you do not bind a wheel or cut into something unexpected.
Step 3: Clean like you mean it
Vacuum thoroughly, then scrub with clean water. If you suspect de-icer buildup, rinse well. If you have oily stains, use a concrete degreaser and rinse until the water no longer beads.
Then set the surface to the moisture condition your bonding method requires:
- For many liquid acrylic or latex bonding agents: the concrete usually needs to be clean, dry, and porous so the liquid can soak in properly. Applying it over SSD concrete can dilute the latex and weaken the bond.
- For a scrub coat slurry: SSD is typically ideal (damp internally, no standing water), and you place the repair mortar immediately after scrubbing.

Bonding agents
Bonding agent is cheap insurance, especially on exterior steps. It helps your patch grip the old concrete and reduces the chance of the patch delaminating in sheets. Different products want different moisture conditions, so this is a read-the-label moment.
Two common approaches
- Liquid bonding agent: Brush or roll it on over a clean surface. Many acrylic and latex agents are intended for a dry, porous substrate so they soak in. Apply the patch while it is in the proper state per the label (often tacky).
- Bonding slurry (scrub coat): Some products want a scrub coat made from the repair mortar mixed a little wetter. You scrub it into the pores, then place the mortar immediately. This method often pairs well with SSD concrete.
Do not let bonding agent dry into a glossy film unless the manufacturer says it is okay. A dried, slick layer can reduce bond.
How to patch spalling steps
This is the sequence I use to keep things organized and to avoid rushing once the mix starts to set. Your specific product may tweak the steps, so treat the bag instructions as the final word.
Step 1: Mask and protect
If you are patching near brick, siding, or painted trim, tape plastic up now. Repair mortar likes to smear where you do not want it.
Step 2: Pre-dampen (only if required)
If your repair mortar or scrub coat calls for SSD, mist the repair area. You want damp concrete, not puddles. If you are using a liquid bonding agent that wants a dry surface, skip this and let the concrete dry as required.
Step 3: Apply the bonding method
Work in manageable sections. On steps, I often do one tread at a time so I can focus on shaping.
Step 4: Mix small batches
Repair mortars have a working time. Mix what you can place and finish in that window. Too wet is a common beginner mistake and it weakens the patch and increases shrinkage cracks.
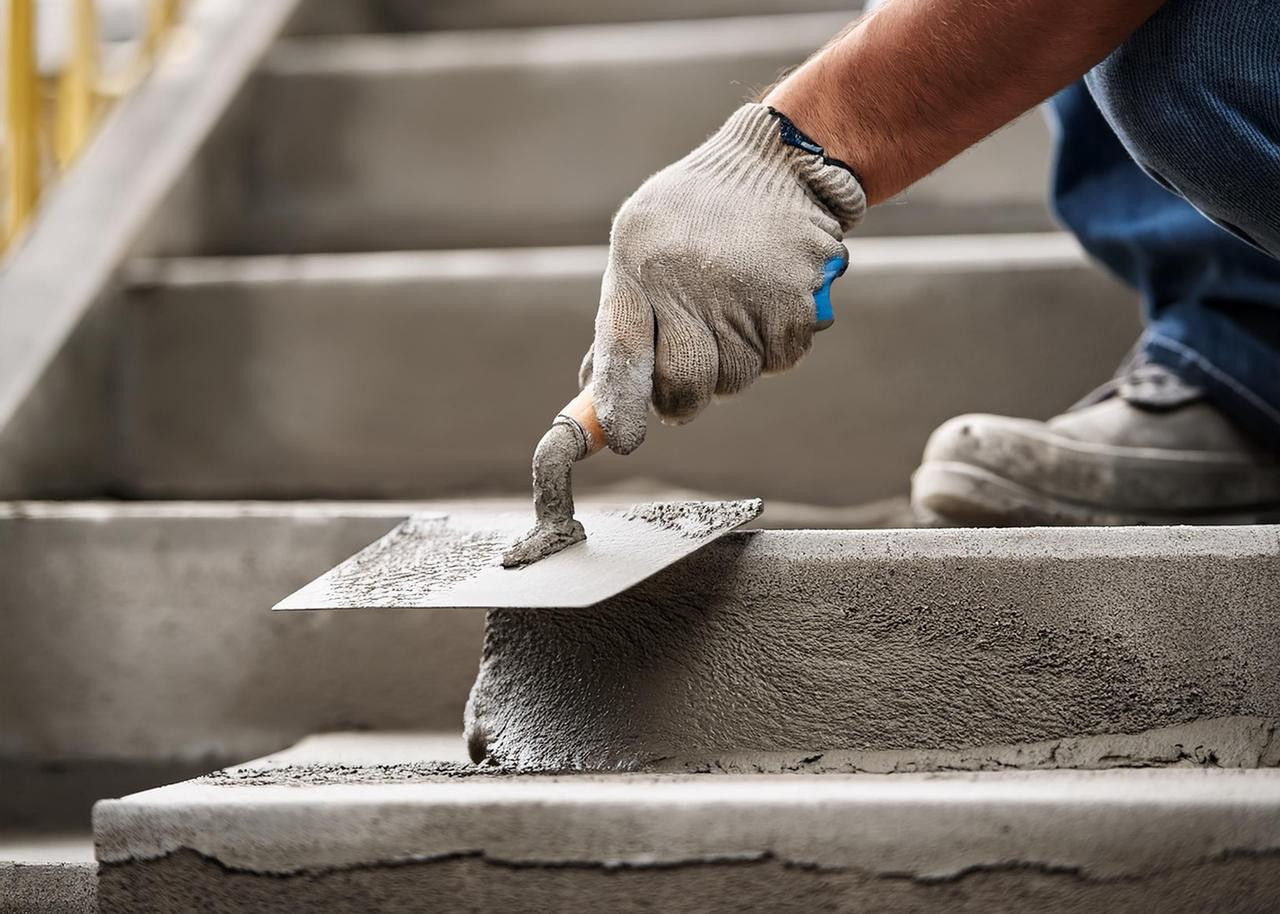
Step 5: Place and pack the mix
Press the mortar firmly into the repair area with a trowel, especially along edges. You are trying to eliminate voids that can fill with water later.
Step 6: Shape the tread edge and match the finish
For tread noses, an edging tool helps recreate a clean, slightly rounded edge that resists chipping. For the tread surface, match what you already have:
- Light broom finish: Drag a damp broom lightly across once the patch begins to firm.
- Smooth finish: Trowel lightly and stop once it looks consistent. Over-troweling can bring paste to the top and reduce durability.
Step 7: Cure and protect
Follow the bag instructions exactly. Standard cement-based mixes often benefit from moisture retention, but some heavily polymer-modified mortars specifically say do not wet cure or mist them. In those cases, covering to prevent rapid drying is usually the move, not adding water.
Either way, fast drying on a sunny, windy day is a recipe for surface cracking and weak bond. If you can choose your weather, aim for mild temps and shade. Keep foot traffic off until the product says it is ready.
A simple timeline
- Day 1: Chip, grind, clean, and patch. Protect the repair from wind, sun, and unexpected rain.
- Days 1 to 3: Cure and protect according to the repair mortar instructions (covering, traffic limits, and any do-not-mist rules).
- After full cure: Seal if desired and if the repair mortar and sealer are compatible. Many sealers want the surface dry and the concrete fully cured.
Slope and drainage
If water sits on your steps, you are feeding the next round of spalling. After you patch, take five minutes to look at how water moves around that entry.
Check for standing water
Treads should shed water. A slight slope forward is normal. If you have a low spot, you can sometimes correct it during the patch by rebuilding a broader area. Just avoid razor-thin skim edges, and stay within the product’s thickness rules.
Redirect roof and runoff
- Extend downspouts so they do not dump near the steps.
- Make sure splash blocks send water away from the stoop.
- Re-grade soil so it slopes away from the bottom riser.
Winter habit changes
- Use a plastic shovel on steps to reduce chipping.
- Use the minimum de-icer needed. Look for products labeled safe for concrete (often CMA blends) and follow the label. In spring, a good rinse helps remove residue.
- Sand for traction instead of relying only on salt.
Seal and protect
Sealing is not magic, but it is a big deal on steps because it reduces water absorption and slows salt intrusion.
Best sealer type for outdoor steps
I generally prefer a penetrating silane or siloxane sealer for exterior stairs. It soaks in and repels water without leaving a thick film that can peel. Film-forming sealers can work, but they are more likely to show wear on high-traffic treads.
Timing and compatibility
Do not seal too soon. Many repair mortars need a cure period before sealing, and many penetrating sealers perform best on a fully cured surface with the right level of dryness and porosity. Follow the repair product instructions first, then the sealer label, and confirm they are compatible.
Keep steps safe
If you use any sealer that changes surface texture, double-check slip resistance. Some products offer a grit additive. Another safe option is maintaining a light broom finish on the tread surface.
When a tread edge needs rebuilding
If the front edge of the tread is breaking away deeply, or you have large hollow areas, a patch can be temporary at best. A rebuild may involve:
- Removing loose sections back to sound concrete
- Cleaning and treating exposed rebar
- Forming the tread edge with a board form
- Placing a thicker repair mortar (sometimes one designed for deeper sections or with coarse aggregate)
This is where it often makes sense to hire a pro, especially if you need to rebuild multiple treads or correct settlement. Steps are a safety item. If you are unsure about the structure, get it evaluated.
Troubleshooting
- Patch popped off in a sheet: Surface was dusty or smooth, the wrong bonding method was used for the moisture condition, or edges were feathered too thin.
- Hairline cracks everywhere: Mix was too wet, dried too fast, or you worked it too long while finishing.
- Edges keep chipping: No rounded edge, too thin at the perimeter, product not suited for the thickness, or heavy impacts from metal shovels.
- New spalling next to the patch: Old concrete around it was already weak, or water is still sitting on the tread.
If you want the patch to blend, do not chase perfection with extra water and troweling. I have made that mistake. A durable, slightly imperfect texture beats a pretty patch that fails next winter.
The 30-Second Cheat Sheet
Essential takeaways for: Concrete Steps Flaking or Spalling? Patch and Protect Them
Fast diagnosis
- Patchable: shallow flaking and chips where the concrete underneath is solid.
- Rebuild or pro: rocking steps, deep hollow areas, big offset cracks, or rusted rebar pushing concrete off.
Before you start
- Weather window: Plan repairs when temps stay above about 40 to 50°F during placement and for the next 24 to 48 hours (or whatever your product requires). Avoid rain during the early cure window.
- Product rules: Minimum and maximum thickness, bonding, and curing are product-specific. Check the bag and data sheet before you mix.
Why it happens
- Freeze-thaw: concrete can handle getting wet, but when it stays saturated and then freezes, ice expansion can break the surface.
- De-icing salts: can keep the surface wetter and increase freeze-thaw stress near 32°F, plus some products contribute to scaling and surface breakdown, especially on tread edges.
The patch order (do not skip prep)
- Chip to sound concrete, remove everything loose.
- Roughen smooth areas so the patch can bite.
- Vacuum and scrub clean, rinse well if salts are present.
- Set moisture condition: SSD (damp, no standing water) only if the product calls for it.
- Bond correctly:
- Liquid acrylic/latex bonding agent: usually wants a clean, dry, porous surface so it can soak in.
- Scrub coat slurry: usually goes over SSD concrete, then place mortar immediately.
- Use polymer-modified exterior repair mortar rated for freeze-thaw and your thickness range.
- Shape tread edge and match finish (often a light broom).
- Cure: follow the bag. Some mortars want moisture protection only (covering), and some specifically say do not mist or wet cure.
Prevent it from coming back
- Fix drainage: extend downspouts, re-grade soil, avoid water sitting on treads.
- Use less salt, consider products labeled concrete-safe (often CMA blends) or sand.
- After full cure, apply a penetrating silane/siloxane sealer if compatible, and follow cure time and surface dryness requirements.
Biggest mistake to avoid
Feather-thin patch edges. Thin edges fail first. Cut back to a repair area where you can maintain at least about 1/4 inch thickness at the perimeter, thicker when possible, and always stay within the product's minimum thickness rules.
💡 Tip: Scroll up to read the full article for detailed, step-by-step instructions.
⬆️ Back to topAbout Marcus Vance
Content Creator @ Grit & Home
Marcus Vance is a lifelong DIY enthusiast and self-taught home renovator who has spent the last decade transforming a dilapidated 1970s ranch into his family's dream home. He specializes in budget-friendly carpentry, room-by-room renovations, and demystifying power tools for beginners. Through his writing, Marcus shares practical tutorials and hard-learned lessons to help homeowners tackle their own projects with confidence.