🚨 In a DIY emergency or rush?
Skip the details and jump straight to our 30-second cheat sheet for the most crucial info.
If you heat with a wood stove or you love a crackling fireplace, creosote is the quiet “roommate” you never invited in. It sneaks into your flue a little at a time, and if you ignore it long enough, it can turn one cozy winter night into a chimney fire.
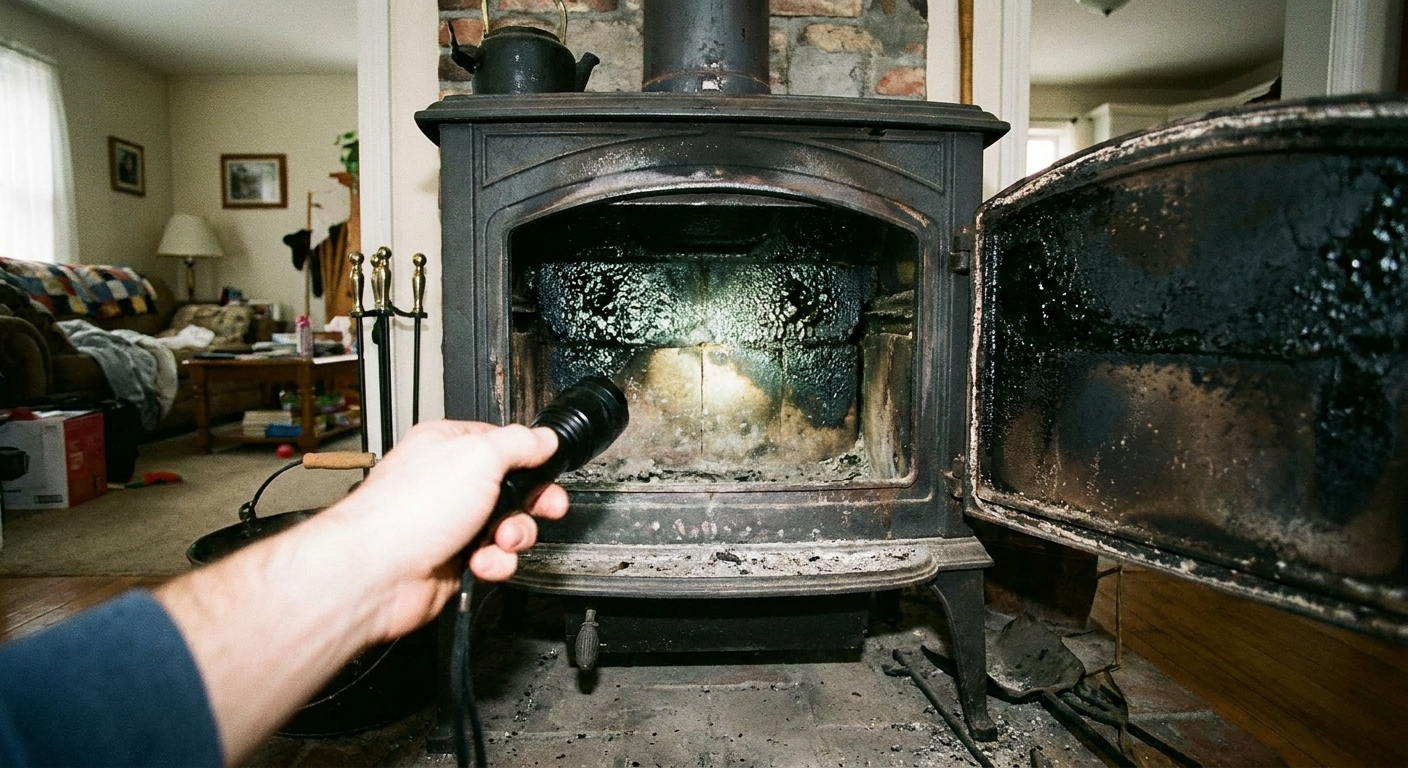
I learned this the humbling way in our 1970s ranch. The first winter after we moved in, I kept wondering why the living room smelled like an old campfire even when the damper was shut. A chimney sweep showed me a shiny black glaze up top that my flashlight-from-the-bottom inspection never would've caught. That was the day I stopped treating chimney cleaning like an optional chore.
What creosote is (and why it shows up)
Creosote is the black or brown residue that forms when wood smoke cools and condenses inside your chimney or stovepipe. Wood smoke is full of unburned gases and tiny particles. When those byproducts hit a cool flue wall, they stick.
Think of it like cooking bacon. If the pan is hot, grease stays thin and burns off more cleanly. If the pan is cool, grease congeals and clings. A cool chimney does the same thing with smoke.
Common causes of heavy creosote
- Burning wet or “green” wood (it smolders and makes cooler, dirtier smoke)
- Lots of low, slow fires with the air choked down
- Cold chimney flue (outside chimney stacks and oversized flues are famous for this)
- Poor draft from a blocked cap, wrong setup, or negative pressure in the house
- Shoulder-season burning in fall and spring when you build small, lazy fires
The 3 stages of creosote buildup
Not all creosote is created equal. In the chimney trade, it's often described informally in “stages” because the form it takes tells you how risky it is and how hard it is to remove.
Stage 1: Sooty, flaky creosote
This is the dry, dusty stuff. It brushes off relatively easily with the right-sized chimney brush. It's still flammable, but it's the most manageable stage.
Stage 2: Crunchy, tar-like creosote
This looks like thick, dull black chunks. It can be stubborn to brush and may need more aggressive sweeping tools. If you're seeing chunky buildup, your burning habits or wood moisture are usually part of the problem.
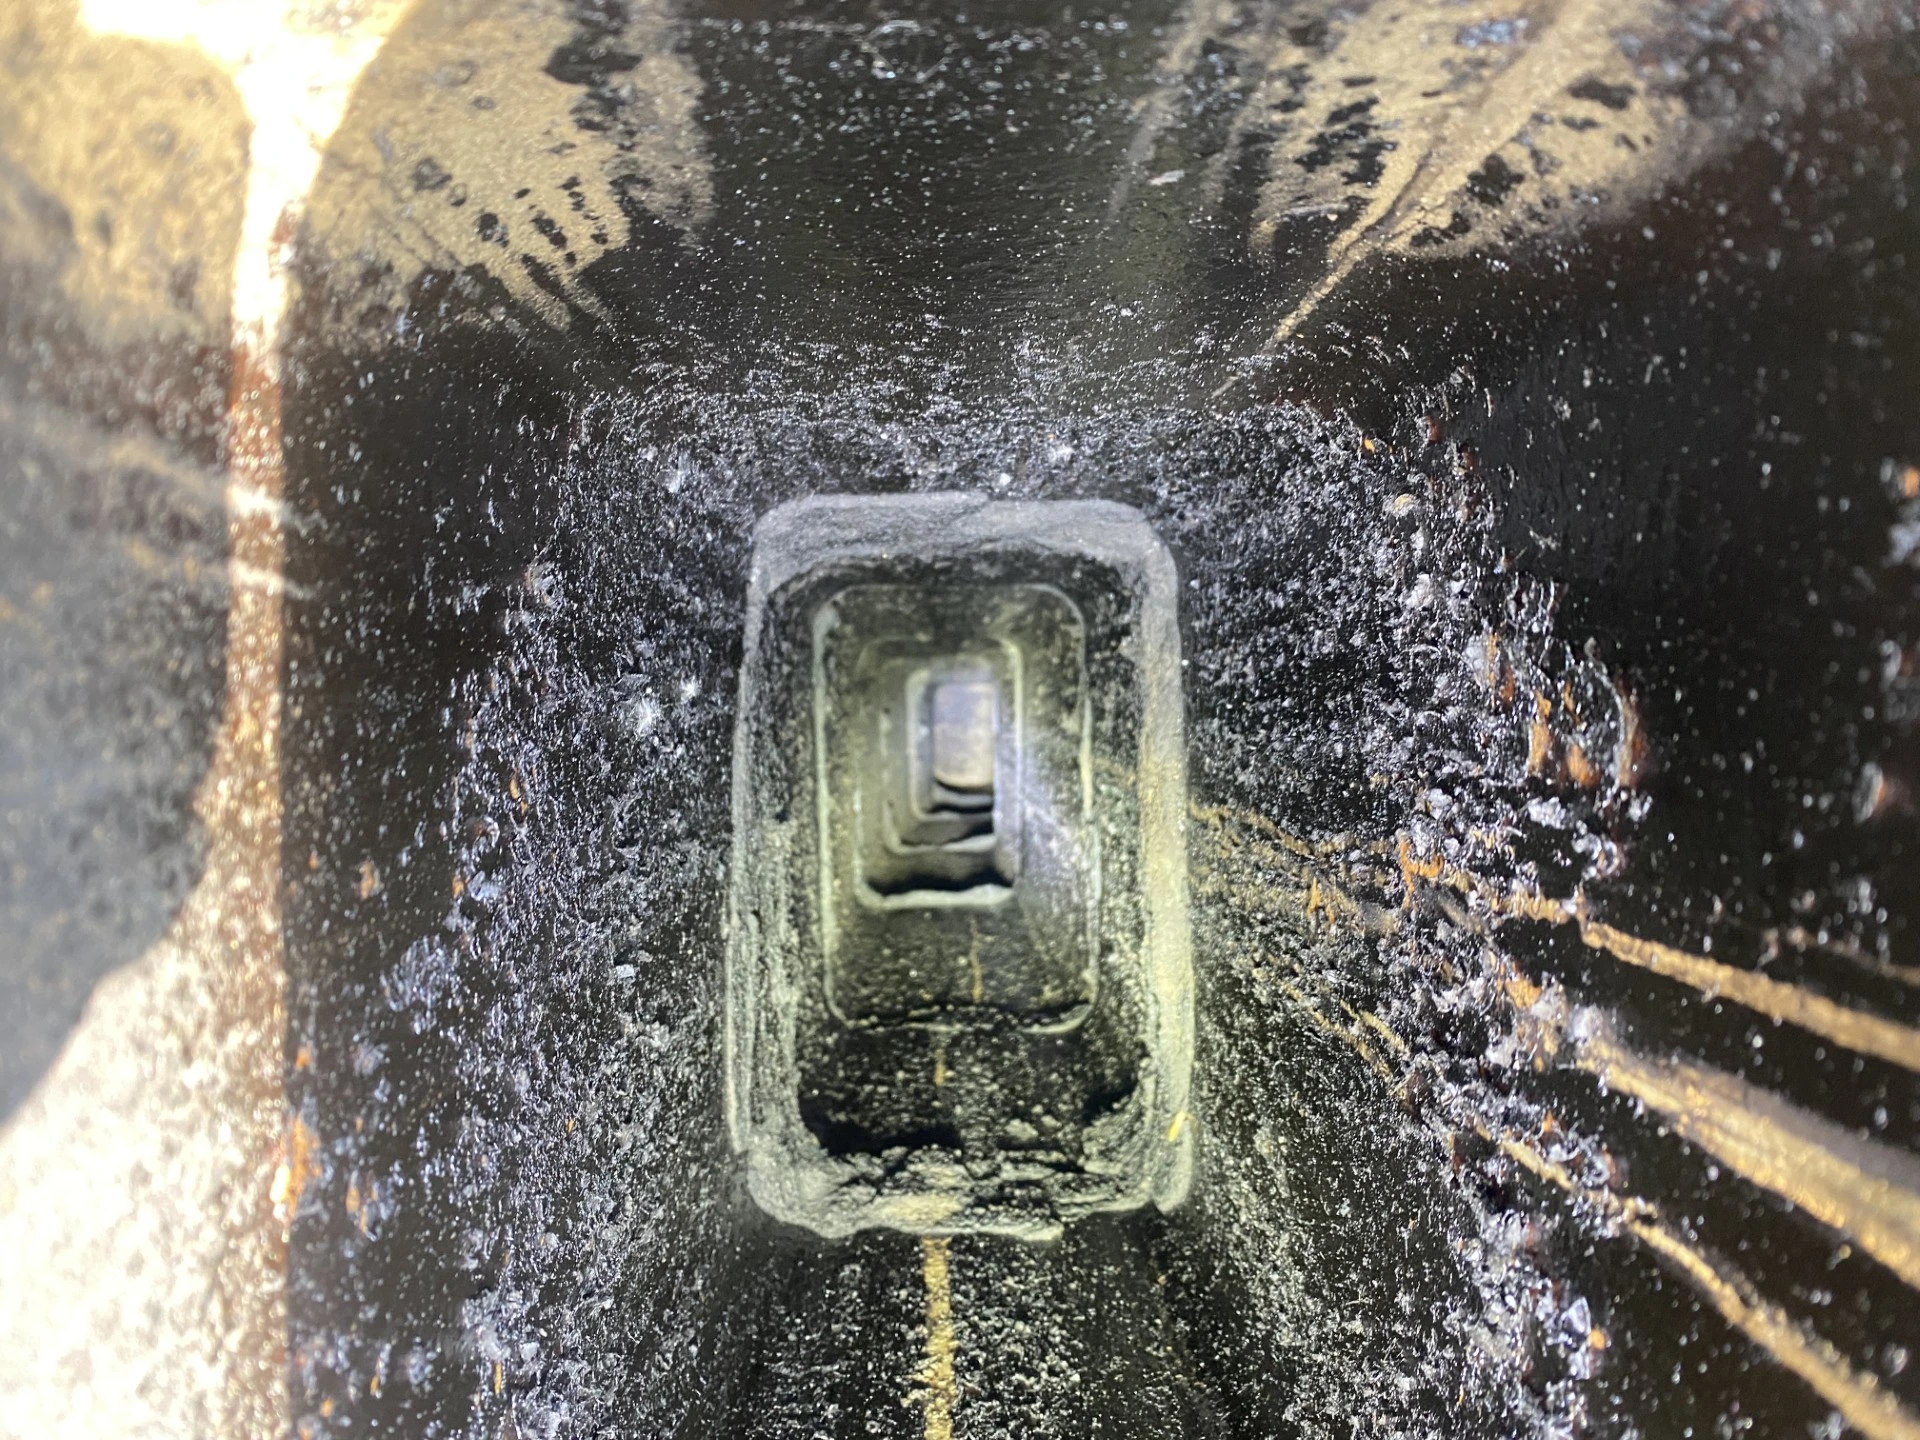
Stage 3: Shiny glazed creosote
This is the dangerous one. It looks like black glass or hardened drips. It's extremely flammable and notoriously hard to remove. Glaze often needs specialty tools and sometimes a chemical treatment to help break it up, but it still typically requires follow-up mechanical cleaning. (Those “sweeping logs” and powders can help, but they don't magically erase glaze on their own.)
Warning signs of creosote buildup
You don't need special tools to notice the behavior changes creosote can cause. Here are the signs I tell friends to watch for, especially early in the heating season. Quick note: I'm sharing homeowner experience here, not replacing a pro inspection. When in doubt, call a certified sweep.
1) Smoke backs up into the room
A little smoke spillage during startup can happen, but frequent smoking indoors can mean restricted airflow, a cold flue, or a partial blockage at the cap.
2) Strong smoky odor when the fireplace isn't in use
A stale campfire smell can be creosote and soot holding odor, especially in humid weather. It can also point to a draft issue that's pulling chimney air down into the house.
3) Sluggish, weak draft
If your stove used to take off after you opened the air and now it struggles, creosote narrowing the flue is one possible culprit.
4) More buildup than you expected in the firebox
Extra black soot around the damper area, on the smoke shelf, or inside stovepipe joints often means there's similar or worse buildup higher up.
5) You can see creosote flakes or shiny black coating with a flashlight
If you can see it from below, there's usually more you can't see. A quick look is a great habit, but it isn't a full inspection.
Chimney fire red flags
If you ever hear a loud roaring sound, feel intense heat around the fireplace or stove, or see sparks and flames from the chimney top, treat it as an emergency. Get everyone outside and call 911.
Why creosote is risky
Creosote isn't just dirty chimney stuff. It's fuel. When enough of it ignites, it can burn violently in a confined vertical tube, which is exactly what a chimney is.
- Chimney fire risk: Creosote can ignite from a hot flue, a stray ember, or an overfiring event. (Overfiring is running your stove hotter than it's designed for, often with the air wide open and a large load, which can spike flue temps.)
- Damage to the chimney: Chimney fires can crack clay liners, warp metal, and damage masonry and crowns.
- Hidden heat transfer: Even if flames stay inside the flue, the heat can ignite nearby framing if clearances are compromised or if the chimney is already damaged.
- Smoke and carbon monoxide concerns: Creosote doesn't “make” carbon monoxide by itself, but a restricted flue and poor draft can keep exhaust gases from venting properly. Combined with incomplete combustion, that can increase the risk of smoke and CO in the home.
How often to schedule a chimney sweep
The best rule of thumb is simple: inspect yearly, and sweep as needed. That's consistent with NFPA 211 guidance and what you'll hear from CSIA-certified chimney sweeps. Some households can go a season with minimal buildup. Others create a brush-full every month.
Also, the 1/8-inch rule you hear quoted a lot is best treated as a common industry rule of thumb. It's a practical trigger for cleaning, not a magic number that guarantees safety.
Fireplaces
- Light use (occasional ambiance fires): Inspect yearly, sweep when buildup is around 1/8 inch or if you see stage 2 or 3 deposits.
- Regular use (weekly fires in winter): Plan on a sweep during the season or at least annually.
Wood stoves and inserts
- Primary heat source: Inspect and often sweep 1 to 2 times per season, especially your first year in a new-to-you stove setup.
- Supplemental heat: Usually annual inspection, sweep as needed.
My practical homeowner tip: If you run a wood stove hard, check the connector pipe and the first section of flue about a month into the season. That first look tells you a lot about whether your wood is truly dry and whether you're burning hot enough.
DIY cleaning: what you can do
I'm all for doing your own maintenance, but chimneys are one of those places where almost good enough can bite you. Here's the line I use.
DIY is reasonable when
- You have a straight-shot flue with easy access
- You're dealing with stage 1 (dry, flaky deposits)
- You have the correct size brush for your liner (clay tile, stainless steel, etc.)
- You can safely work on the roof or from the cleanout without sketchy ladder moves
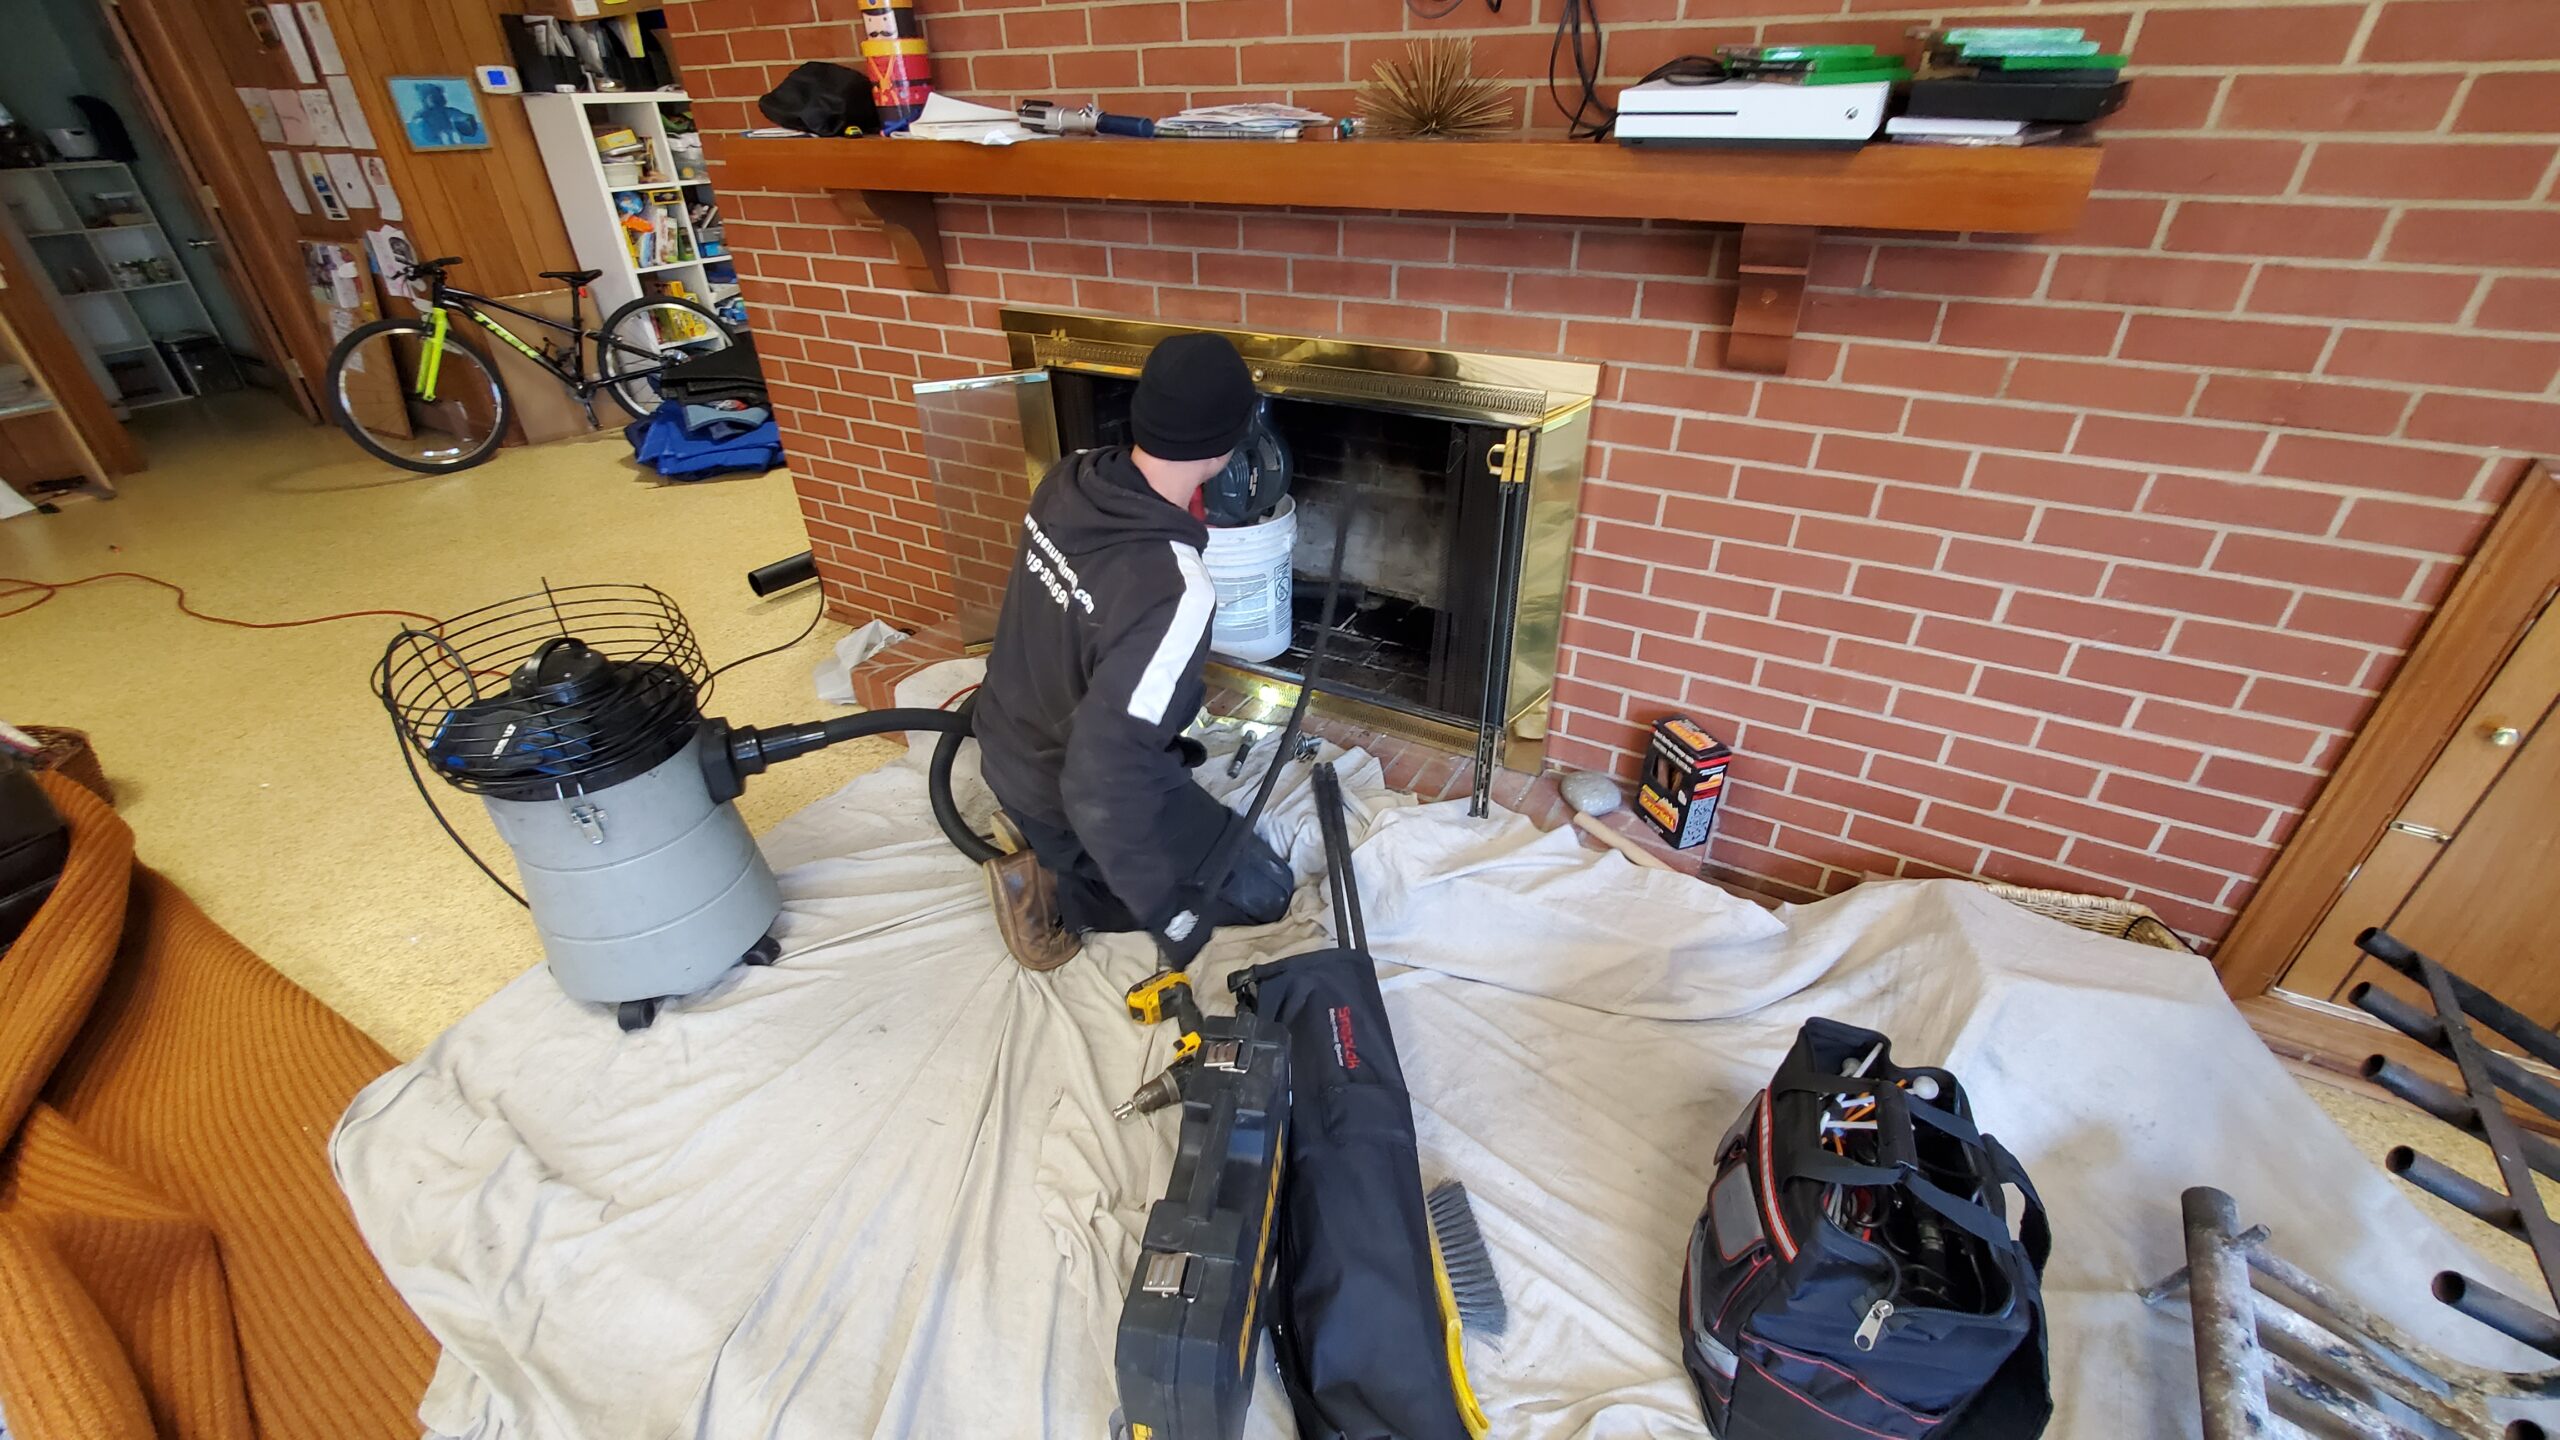
Call a pro when
- You suspect glazed creosote or thick stage 2 buildup
- Smoke problems started suddenly (possible blockage, cap issue, animal nest)
- You have a complex system: offsets, multiple flues, older masonry, or an insert with a liner you can't fully see
- You've had a chimney fire, even a small one
- You're buying a house or moved in and don't know the history
DIY safety basics
- Contain the mess: Lay plastic, seal off the fireplace opening, and use a HEPA-rated shop vac if you have one. Soot goes everywhere.
- Wear PPE: Gloves, eye protection, and at minimum a good dust mask or respirator. Creosote dust isn't something you want in your lungs.
- Use chimney tools, not improvisations: Avoid power tools or “creative” scrapers that can damage liners.
- Let ashes cool: Use a metal ash bucket with a lid and assume coals can stay hot longer than you think.
DIY basics that actually help
- Check your wood moisture: Split a log and test the fresh face with a moisture meter. Aim for 20 percent or less.
- Burn hotter (safely): Give the fire enough air to burn clean. Smoldering equals creosote.
- Warm the flue before startup: On cold days, a quick kindling preheat helps draft and reduces early condensation.
- Keep the cap clear: A clogged screen can act like a cork. Check it periodically.
Prevention that really works
If you want the most bang for your buck on creosote prevention, focus on two habits. They solve more creosote problems than fancy additives ever will.
1) Burn truly dry wood
“Seasoned” on a firewood ad doesn't mean much. The only thing that matters is moisture content. Wet wood wastes heat boiling off water, cools your flue, and makes smoky exhaust that sticks.
- Stack wood off the ground, top-covered, with the sides open to airflow
- Split to size sooner rather than later
- Plan ahead: many species need a year or more to dry in real-world conditions
2) Burn clean, hot fires
This doesn't mean overfiring your stove. It means running it within the manufacturer's recommended range, with enough air to avoid a lazy, rolling smolder. A bright, active fire with minimal visible smoke outside is what you're aiming for.
Quick reality check: If you love overnight burns with the air dialed down hard, expect more creosote. You can still do it, but budget time and money for more frequent inspections and sweeps.
Modern stoves help a lot
If you're thinking long-term, this is worth knowing: modern EPA-certified wood stoves generally produce significantly less creosote than older stoves when they're installed correctly and operated the way they're designed.
- Secondary burn tubes (non-catalytic stoves): Re-burn smoke in the firebox, which means less smoke heading up the flue.
- Catalytic combustors (catalytic stoves): Help burn smoke at lower temperatures and can reduce buildup during longer burns when used correctly.
It's not a free pass. Wet wood, smoldering, or a cold exterior chimney can still create creosote. But if you're running an older, smoky setup, an upgrade can be one of the biggest prevention moves you can make.
When to schedule a sweep
If you're on the fence, use this homeowner-friendly checklist. Schedule a sweep if any of these are true:
- It's been over a year since your last inspection
- You see 1/8 inch or more of buildup anywhere you can view safely
- You smell strong creosote odor regularly
- Your stove or fireplace draft has gotten worse
- You're burning more often than last season
- You changed something: new stove, new liner, new cap, new wood source, or home air sealing work
And if you're heading into winter with a new-to-you home, my advice is boring but solid: schedule an inspection before your first fire. It's a small cost compared to repairing a damaged liner or dealing with smoke in the house.
After a chimney fire
Once the emergency is over, don't just go back to burning. Even a “small” chimney fire can damage liners and clearances in ways you can't see.
- Stop using the stove or fireplace until it's checked
- Schedule a Level 2 inspection with a qualified chimney professional (this is commonly recommended after a chimney fire or suspected damage)
- Fix the cause before you burn again: cap blockage, wet wood, draft issues, cracked liner, wrong connector setup, and so on
My first-winter routine
When I don't know the chimney's history, I follow a tight routine until I learn how that system behaves.
- Before the season: Professional inspection and sweep, plus a look at the cap and crown.
- One month in: Quick flashlight check of accessible pipe or firebox area and note how much soot I see.
- Mid-season (if we're burning daily): Second check and sweep if buildup is trending fast.
- After the season: Clean-out and quick check so odors and moisture don't sit all summer.
It's not glamorous, but it keeps the cozy part of wood heat and cuts way down on the “why does my house smell smoky?” mysteries.
FAQ
Can I use creosote sweeping logs instead of a chimney sweep?
They can help loosen some deposits, especially light, stage 1 buildup. But they don't replace a real inspection and mechanical brushing. And for stage 2 or stage 3 glaze, they should be treated as a helper at best, not the solution. Always follow the product instructions and make sure it's appropriate for your appliance.
Is creosote worse in an exterior chimney?
Often, yes. Exterior chimneys tend to stay colder, and cooler flue walls encourage condensation and buildup, especially during startup and low burns.
What's the fastest way to reduce creosote starting today?
Switch to drier wood and stop smoldering the fire. Those two changes reduce smoke and keep flue temperatures higher, which slows new deposits dramatically.
The 30-Second Cheat Sheet
Essential takeaways for: Creosote Buildup in Your Chimney
What creosote is
Creosote is a flammable residue that forms when wood smoke cools and sticks to the inside of your chimney or stovepipe. Cool, smoky fires and wet wood make it build up faster.
Stages of buildup (risk level)
- Stage 1: Dry, dusty soot. Usually brushes out easily.
- Stage 2: Thick, crunchy tar. Harder to remove and more dangerous.
- Stage 3: Shiny glazed coating. Highest chimney fire risk and often needs a pro.
Warning signs
- Smoke spilling into the room
- Strong smoky odor when you are not burning
- Poor draft or a sluggish stove
- Visible flakes or shiny black coating in the flue
When to schedule a sweep
- At least a yearly inspection for any wood-burning system (NFPA 211 and CSIA guidance)
- Sweep when deposits reach about 1/8 inch (common industry rule of thumb) or if you see stage 2 or 3
- Wood stove used as primary heat: often 1 to 2 sweeps per season
DIY limits
- DIY can be OK for straight, accessible flues with stage 1 buildup and the right brush.
- Call a pro for glaze, heavy tar, offsets, unknown history, sudden draft changes, or after any chimney fire.
Best prevention
- Burn dry wood: aim for 20% moisture or less (test a freshly split face).
- Burn hot, clean fires: avoid long smoldering burns with the air choked down.
- Keep the chimney cap screen clear and warm the flue on cold startups.
- Long-term: Modern EPA-certified stoves (secondary burn or catalytic) generally produce far less creosote when run correctly.
💡 Tip: Scroll up to read the full article for detailed, step-by-step instructions.
⬆️ Back to topAbout Marcus Vance
Content Creator @ Grit & Home
Marcus Vance is a lifelong DIY enthusiast and self-taught home renovator who has spent the last decade transforming a dilapidated 1970s ranch into his family's dream home. He specializes in budget-friendly carpentry, room-by-room renovations, and demystifying power tools for beginners. Through his writing, Marcus shares practical tutorials and hard-learned lessons to help homeowners tackle their own projects with confidence.