🚨 In a DIY emergency or rush?
Skip the details and jump straight to our 30-second cheat sheet for the most crucial info.
If you have built a simple ground-level floating deck on blocks, you already understand the basic idea: a sturdy rectangle with joists inside it. A raised deck or an attached deck is the next level up, because now the frame has to safely carry loads down into posts, footings, and sometimes your house itself.
This guide focuses on the structural framing pieces DIYers usually mean when they search “deck framing guide”: ledger boards, beams, joists, rims, blocking, and fasteners. I will keep things approachable, but I am going to be honest too: local code rules vary, and decks are one of the most inspected outdoor projects for a reason. When in doubt, pull a permit and match your jurisdiction’s details.

Start with a simple plan and a layout you can measure
Before you buy lumber, sketch your deck with three things clearly labeled:
- Ledger line (if attached): the board mounted to the house.
- Beam line(s): where the deck is supported by posts and footings.
- Joist direction: which way the joists run.
The moment your sketch has those, you can answer most framing questions like spacing, hardware, and where loads go.
Two framing “families” you should recognize
- Attached deck: joists hang off a ledger on the house, and the outside edge is supported by one or more beams on posts.
- Raised freestanding deck: no ledger. The deck is supported by beams on posts on both sides, and the deck stands independent of the house.
If your house has brick veneer, stone veneer, or questionable rim-joist access, a freestanding design is often the safer and simpler route. It costs more in footings, but it avoids a lot of ledger headaches.
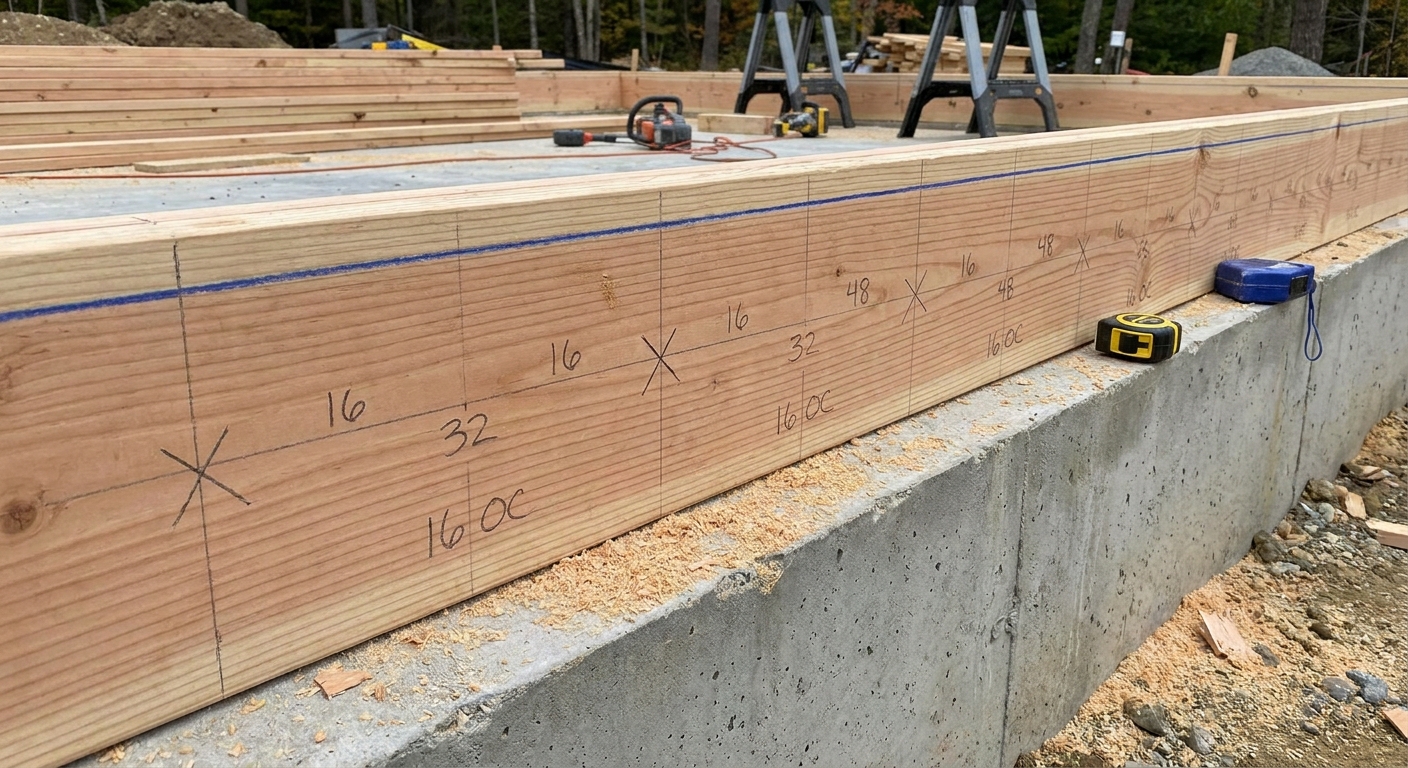
Joist spacing basics: 16 inch vs 12 inch vs 24 inch
Joist spacing is center-to-center. Marking “X”s on your layout line makes it hard to forget which side of the mark the joist lands on.
- 16 inches on center: the most common for residential decks. Works for most decking boards and gives a solid feel underfoot.
- 12 inches on center: stiffer feel, good for composite decking that needs tighter spacing, and a smart choice for diagonal decking layouts.
- 24 inches on center: sometimes allowed with thicker decking and short spans, but it often feels bouncy and is less forgiving. Many decking products do not allow it.
My neighbor-over-the-fence advice: If you are unsure, default to 16 inches on center, or 12 inches if you are using composite and the manufacturer calls for it. The little extra lumber cost is cheaper than a deck that feels like a trampoline.
Joist sizing and span: the idea that matters most
Joist size is not picked by “deck size.” It is picked by joist span, which is the distance a joist travels between supports.
In an attached deck, the joists typically span from the ledger to the beam. In a freestanding design, the joists might span from one beam to another, or from a beam to a rim that is supported another way.
What span tables do, in plain English
Span tables tell you the maximum distance a specific joist can span based on:
- wood species and grade
- joist size (2x8, 2x10, etc.)
- joist spacing (12, 16, 24 inches on center)
- design loads (your local code assumptions)
Because those variables change, I cannot responsibly give one “universal” joist size. But here is the practical workflow I use:
- Decide joist spacing based on decking requirements (often 16 or 12 inches on center).
- Set your beam location (which sets your joist span).
- Use your local deck span table to pick joist size for that span.
If you want a stiffer deck, you can either increase joist depth or reduce the span by moving the beam closer to the house. Moving a beam is often cheaper than upgrading every joist.
Ledger board basics (attached decks)
The ledger is where DIY decks go from “carpentry project” to “structural connection.” A ledger failure is a catastrophic failure, so treat this part with respect.
Ledger board must attach to structure, not cosmetic layers
- Never bolt a ledger through brick veneer or stone veneer and call it good. Veneer is not structural.
- Do not attach to foam insulation, stucco without a proper detail, or cantilevered bay bump-outs unless your local authority approves a specific method.
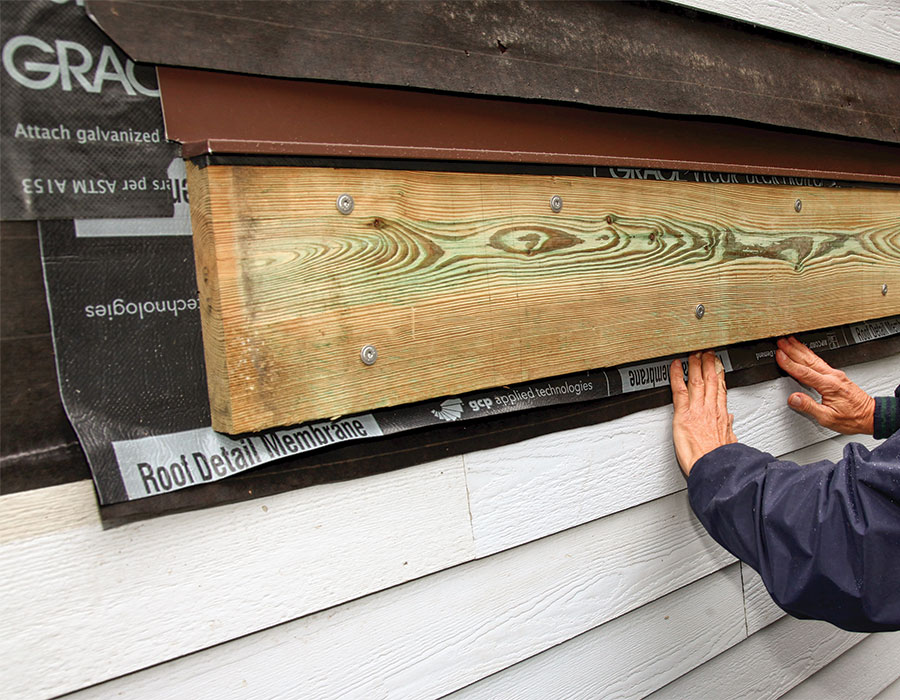
Flashing and water management is not optional
Your house will tolerate a lot of things. Persistent water behind a ledger is not one of them. Plan for:
- Ledger flashing that kicks water out and over the siding or water-resistive barrier
- Proper fasteners (more below) that are rated for pressure-treated lumber
- End-grain sealing on cuts, especially if you are trimming a ledger to length
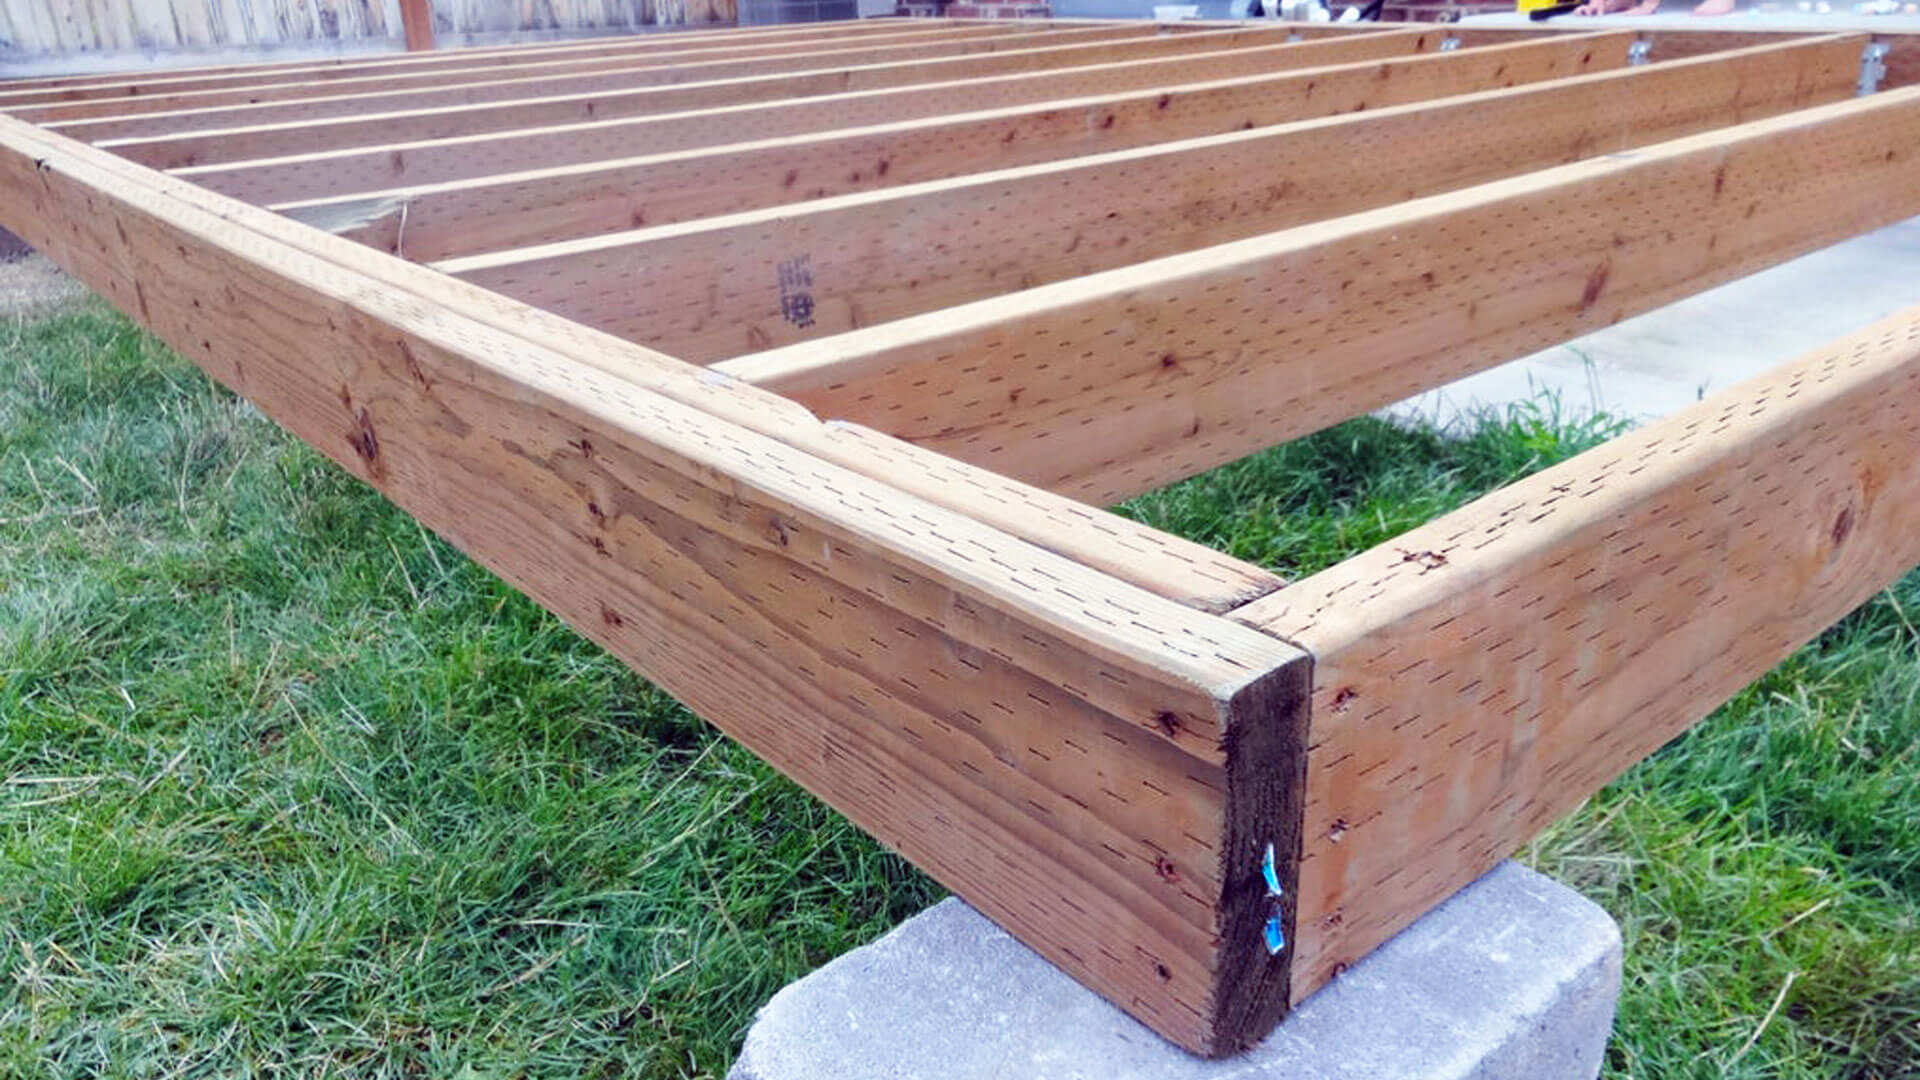
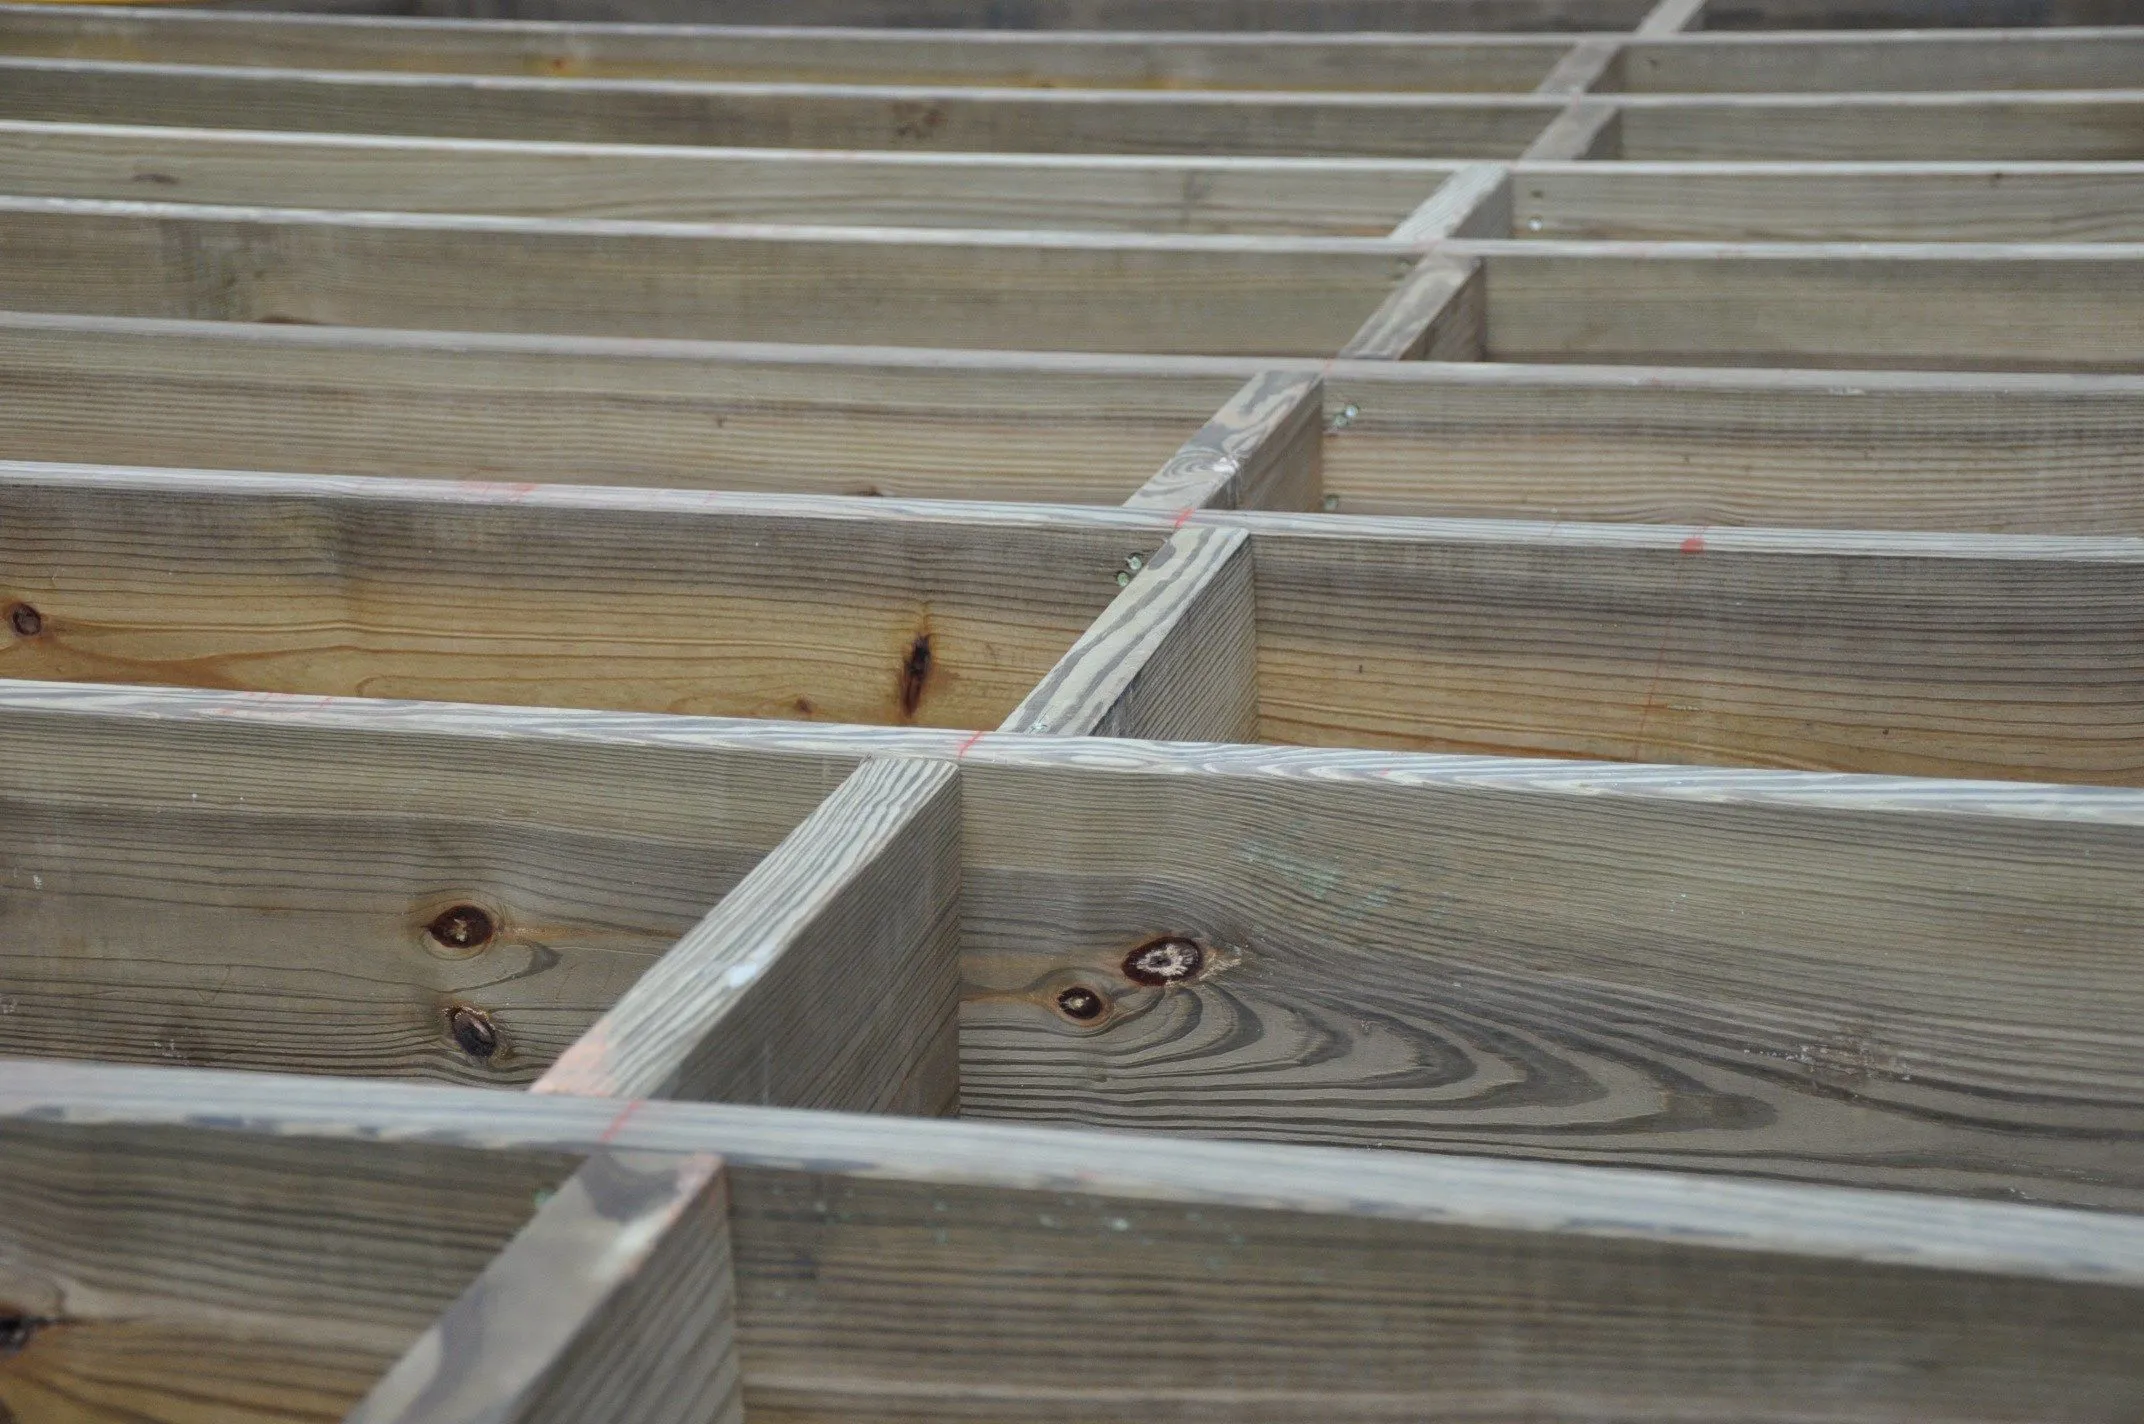
Rim board and end joists: make the box strong first
Most deck frames start life as a rectangle: rim board(s) and end joists that define the perimeter. That rectangle needs to be:
- Straight (crowned boards oriented consistently)
- Square (diagonals match)
- Secure (fasteners and hardware suited for load and exterior use)
Square the frame the simple way
Measure corner to corner across the rectangle. Adjust until both diagonal measurements match. It is one of those boring steps that saves hours later when you install decking, railing posts, and stairs.
If you want a fast, foolproof check on a smaller section of framing, use the 3-4-5 rule: measure 3 feet along one side from a corner, 4 feet along the adjacent side, and the diagonal between those marks should be 5 feet. Scale it up (6-8-10, 9-12-15) for larger frames.
Beam placement: the lever that controls strength and bounce
Your beam placement drives three big outcomes:
- how far the joists have to span
- how many posts and footings you need
- how bouncy the deck feels
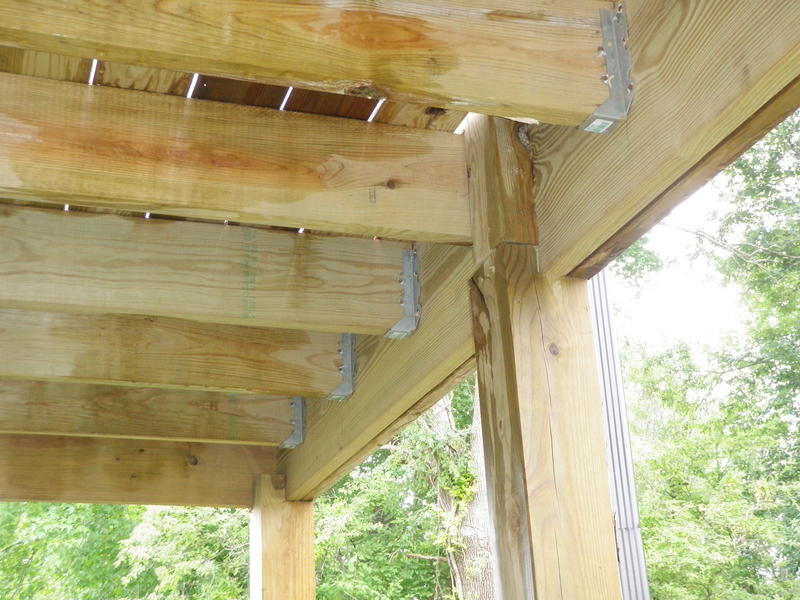
Flush beam vs drop beam
- Flush beam: beam sits level with joists, joists attach to the side of the beam using hangers. This can keep the deck profile thinner and cleaner.
- Drop beam: beam sits below the joists, and joists sit on top of it. Often easier for DIYers to build, and it can be very strong when properly notched and connected to posts.
Your local code and hardware details will dictate how posts connect and whether notching is allowed. Do not wing it here. The beam-to-post connection is a major structural joint.
Blocking and bridging: the small wood that makes a big difference
Blocking helps with three things: keeping joists upright, reducing twist, and supporting seams or heavy points like rail posts.
Where blocking earns its keep
- Midspan blocking on deeper joists can reduce rotation and make the deck feel tighter.
- Edge blocking where picture framing or fascia needs backing.
- Butt-joint blocking under decking seams, especially with composite or when the seam falls between joists.
- Hardware zones like stair stringer connections and railing post reinforcement, per your railing plan and code requirements.
I used to skip blocking because it felt like “extra.” Then I walked on a deck that had none and listened to the squeaks and felt the wiggle. Blocking is cheap stiffness.
Joist tape: cheap insurance for long life
If you want a modern best-practice upgrade that actually pays off, add butyl joist tape (sometimes called joist flashing tape) before the deck boards go on. It seals the tops of joists and beams where water sits and fastener holes happen.
Where to use it
- On top of joists, especially in shady or damp yards.
- On top of beams, because beams catch water and debris too.
- Over blocking where it will sit under a seam or picture frame border.
Press it down firmly, wrap it over the top edges if the product allows, and cut it clean at ends. It is a small cost compared to replacing framing later.
Fasteners and connectors: exterior-rated and compatible matters
Modern pressure-treated lumber can be hard on metal. The rule of thumb is simple: use connectors and fasteners rated for pressure-treated lumber and for the specific hanger or bracket you are installing.
What to use (and what not to)
- Joist hangers: install with the manufacturer-specified nails or structural fasteners. Do not substitute drywall screws. Ever.
- Ledger fasteners: typically structural screws or through-bolts, spaced per code and manufacturer tables.
- Beam connections: use approved post caps, straps, or brackets. Toenails alone are not a connection method.
- Exterior screws: great for blocking and some framing tasks, but they do not automatically replace required nails in connectors.
Also watch for mixing metals. If you are using stainless connectors near the coast, match the fasteners to the connector requirements so you do not create corrosion issues.

Common code-aware framing mistakes I see all the time
I have made a couple of these myself. Most happen because we get excited and start cutting before we have a clear load path.
1) Putting the beam in the wrong place
If the beam ends up farther out than planned, the joist span increases, and suddenly your joist size is wrong. Fixing it later is miserable. Lay out beam lines carefully before digging footings.
2) Treating the ledger like a “board on the wall”
The ledger needs proper structural attachment to the house framing and correct flashing. Skipping either can lead to rot, water intrusion, or failure.
3) Forgetting deck board requirements when choosing joist spacing
Composite and some PVC products require tighter spacing, especially for diagonal installs. Read the manufacturer’s span guidance before you frame.
4) Not squaring the frame early
Out-of-square framing shows up later as weird deck board gaps, a crooked picture frame border, and railing posts that do not line up.
5) Using the wrong fasteners in connectors
Drywall screws, random deck screws, or roofing nails in hangers are not a “good enough” substitute. Connectors are engineered systems. Follow the instructions.
6) Missing blocking at seams and edges
Decking seams without support will cup, squeak, and flex. Add blocking now while you have access.
7) Skipping joist tape on a long-lasting deck
Water sits on the tops of joists. Fastener holes multiply it. Joist tape helps protect the exact surface that rots first.
A framing sequence that keeps you out of trouble
If you like checklists, this order keeps things logical and reduces do-overs:
- Confirm permit, setbacks, and footing requirements.
- Pick joist spacing based on decking and desired stiffness.
- Set beam line(s) to control joist span.
- Choose joist size using local span tables.
- Install ledger (attached decks) with flashing and correct fasteners.
- Build and square the perimeter (rim and end joists). Check diagonals, and use the 3-4-5 rule if you want a quick verification.
- Set posts and beam, then verify height and level.
- Install joists with hangers or bearing on the beam, per your design.
- Add blocking at midspan and wherever decking seams or edges need it.
- Apply joist tape over joists and beams before decking goes down.
- Recheck square and level before decking goes on.
That last step is the one I wish I did more consistently when I was learning. Fixing a problem is always easier before the deck boards hide everything.
When to call in help
DIY framing is doable, but there are a few moments where a pro or an engineer is worth every penny:
- your deck is high off the ground
- you are attaching to brick veneer or complicated siding assemblies
- you need a flush beam with tight headroom constraints
- you are unsure about load paths, lateral bracing, or hardware
A safe deck is not just about passing inspection. It is about having friends over, loading it up with people and furniture, and never once thinking about what is happening underneath your feet.
The 30-Second Cheat Sheet
Essential takeaways for: Deck Framing Guide
Deck framing, in the right order
- Decide joist spacing: usually 16 inches on center, or 12 inches on center for many composite boards or diagonal decking.
- Set beam line(s): beam placement controls joist span and how bouncy the deck feels.
- Pick joist size from local span tables: joist span is the distance between supports (often ledger to beam).
- Ledger (if attached): attach only to structural framing, flash it correctly, and use approved ledger fasteners.
- Build perimeter and square it: rim boards and end joists first, then measure diagonals until they match (or use the 3-4-5 method).
- Install beam and posts: use approved post caps, brackets, and connections.
- Hang joists or bear on beam: use proper hangers and the correct nails or structural fasteners.
- Add blocking: midspan (stiffness), under decking seams, and at edges or hardware zones.
- Tape joists and beams: apply butyl joist tape over framing tops to reduce water intrusion and extend life.
Quick spacing reminders
- 16 inches on center is the default for many wood decks.
- 12 inches on center often required for composite or diagonal layouts.
- 24 inches on center is frequently too flexible and not allowed by many decking products.
Fastener rules that prevent failures
- No drywall screws anywhere in structural framing.
- Joist hangers need the manufacturer-specified nails or fasteners in required holes.
- Use hardware rated for pressure-treated lumber and match fasteners to the connector.
Mistakes to avoid
- Beam ends up too far out, increasing joist span and making joist sizing wrong.
- Ledger attached through veneer or without proper flashing.
- Frame not squared early, causing ugly decking gaps and crooked rails.
- Missing blocking under seams and edges, leading to bounce and squeaks.
- Skipping joist tape, which can shorten framing life in wet or debris-prone conditions.
💡 Tip: Scroll up to read the full article for detailed, step-by-step instructions.
⬆️ Back to topAbout Marcus Vance
Content Creator @ Grit & Home
Marcus Vance is a lifelong DIY enthusiast and self-taught home renovator who has spent the last decade transforming a dilapidated 1970s ranch into his family's dream home. He specializes in budget-friendly carpentry, room-by-room renovations, and demystifying power tools for beginners. Through his writing, Marcus shares practical tutorials and hard-learned lessons to help homeowners tackle their own projects with confidence.