🚨 In a DIY emergency or rush?
Skip the details and jump straight to our 30-second cheat sheet for the most crucial info.
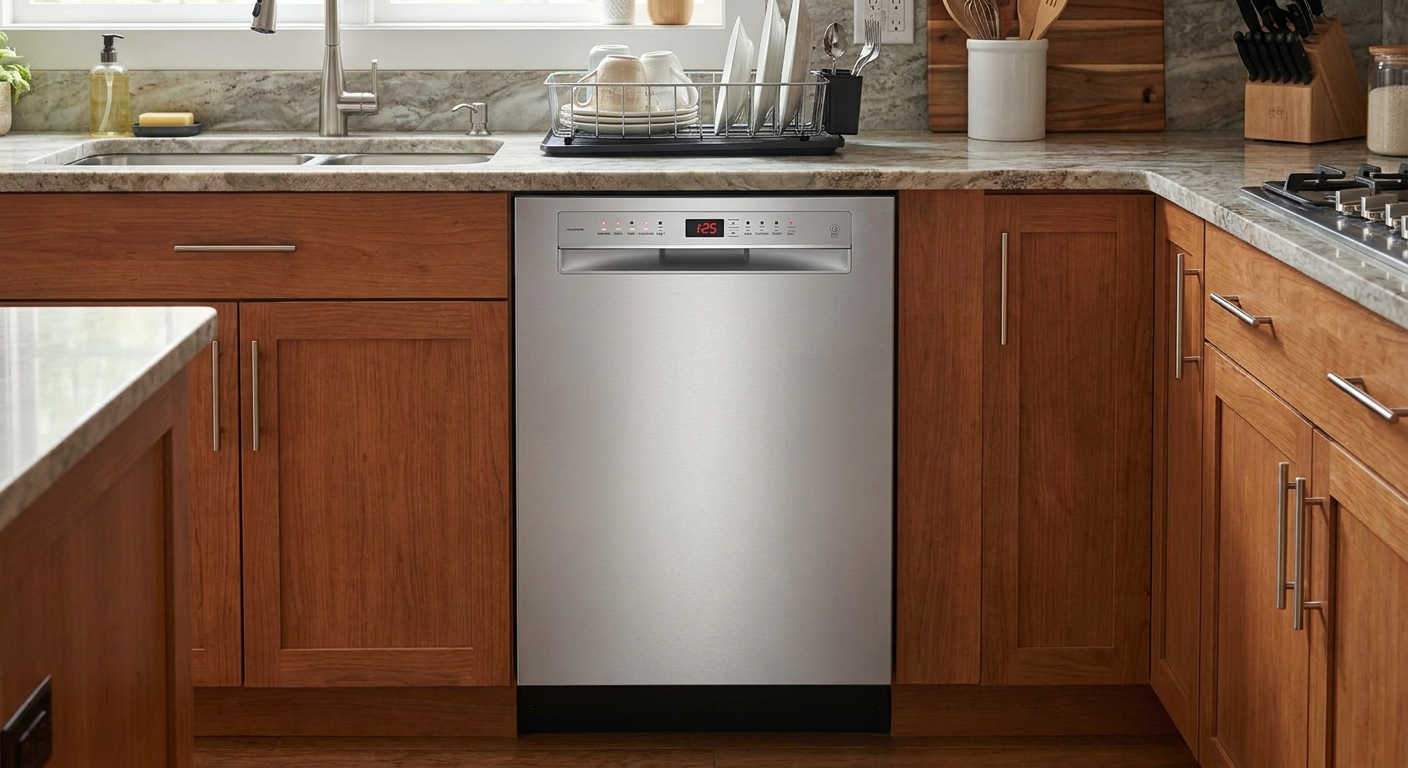
If your dishwasher suddenly starts blinking like it is trying to talk to you in Morse code, you are not alone. The first time mine did it, I stood there with a wet plate in one hand and my phone in the other, thinking, “How is this thing both broken and dramatic?”
The good news is that most blinking lights and error codes fall into a handful of categories: the machine thinks the door is not shut, it cannot fill, it cannot drain, it is not heating the way it expects, the controls are locked, or the controls have simply gotten confused. This guide is brand-agnostic on purpose, so you can use it whether you have a budget model in a rental or a fancy stainless unit you saved up for.
What the lights are telling you
Dishwashers do not have many ways to communicate. Many brands use similar indicator patterns, but the exact meanings can vary. Here is how to think about it:
- Blinking Start or Start/Resume: the cycle is paused, interrupted, or the door is not registering as fully latched.
- Lock light on or buttons do nothing: Control Lock or Child Lock is enabled. This is one of the most common false alarms.
- Clean light blinking at the end: on many brands, this is a “cycle fault” indicator, commonly related to heating or water not reaching the expected temperature in time. On some brands it can indicate other faults, so confirm with your tech sheet or manual.
- Multiple lights blinking together: frequently a stored fault condition, sometimes paired with an audible beep pattern.
- Alphanumeric code (E1, E4, F2, etc.): a more specific fault category like fill, drain, leak detection, heating, or sensor issues.
One important mindset shift: the code is rarely telling you “replace part X.” It is telling you what the dishwasher failed to achieve (fill to level, drain in time, heat as expected), and your job is to work backwards to the cause.
What you need
You can do most checks with basic stuff you already have:
- Towel or a few paper towels
- Flashlight
- Gloves (optional, but nice for the filter area)
- Cup, sponge, or turkey baster for standing water
- Small screwdriver (for the kickplate or air gap cap on some setups)
Quick safety checks
I love a good reset, but I also love not getting shocked or flooding the kitchen. Do these quick checks first:
- Check the obvious: Is the door fully shut? Are dishes or a utensil blocking the door from closing?
- Check Control Lock: If the panel is unresponsive or a lock icon is lit or flashing, hold the button labeled Lock or Control Lock for about 3 seconds. Some models use Heated Dry or Sanitize as the lock button, so look for tiny “Control Lock” text near a button.
- Look for standing water: If the tub is full, do not keep restarting. You might be forcing the same drain issue to repeat.
- Sniff test: A burnt smell is a stop sign. Cancel the cycle, shut off power at the breaker, and investigate or call for service.
- Water on the floor: Do not ignore it. Shut off the dishwasher and address a leak first.
Tip from my own mistakes: if you are going to pull the dishwasher out, take a quick photo of the power cord (if it has one), drain hose routing, and water line. You will thank yourself during re-installation.
How to reset safely
Most dishwashers have two “reset” levels: a soft reset (control reboot) and a cancel-drain reset (stops the cycle and pumps out water). Try them in this order.
Option 1: soft reset
- Open the door and press Power to turn it off (if your model has a Power button).
- Wait 30 seconds.
- Turn it back on and try starting a short cycle.
If the unit does not have a Power button or it seems frozen, do a power-cycle reboot. Many units are hardwired and cannot be unplugged, so the breaker is usually the easiest option.
- Turn the dishwasher breaker off (or unplug it from under the sink if yours actually has a plug and it is accessible).
- Wait 2 to 5 minutes to allow the controls to reset.
- Turn power back on and try a cycle.
Option 2: cancel and drain
If there is water in the tub, you want a cancel-drain style reset.
- Close the door fully.
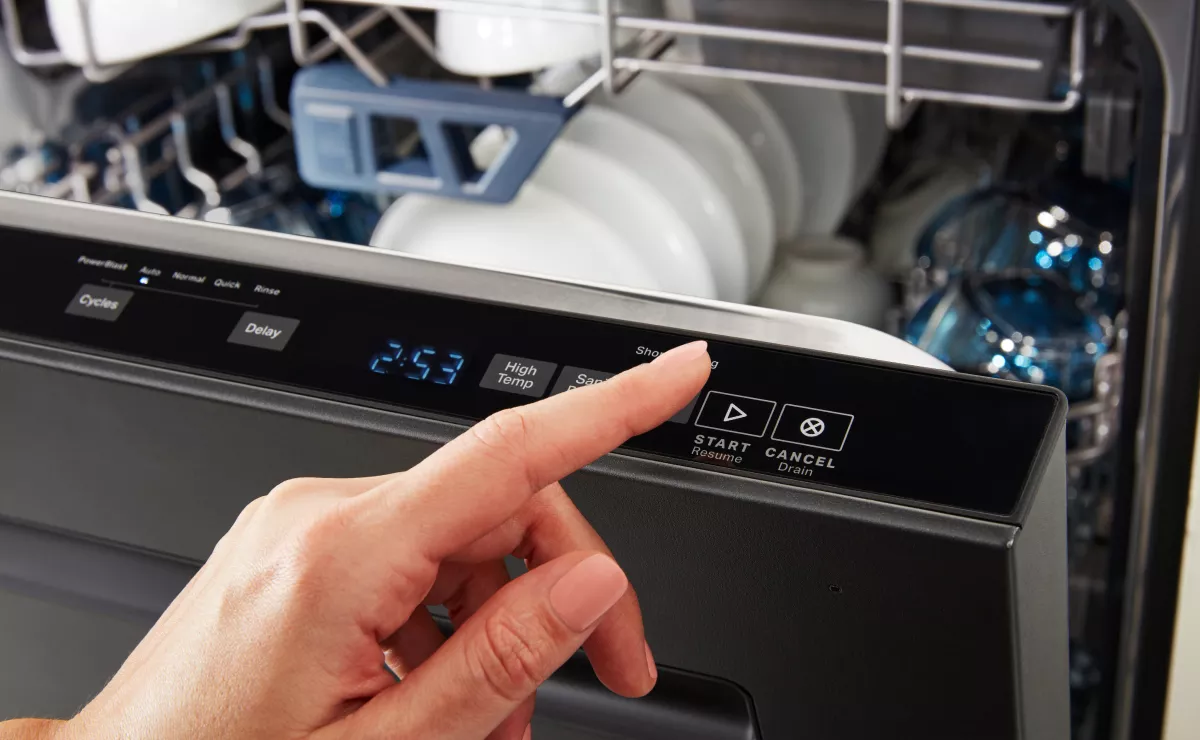
- Press Cancel or Cancel/Drain if your panel has it.
- If there is no dedicated Cancel button, many models use a press-and-hold on a labeled button (often Start) for 3 to 5 seconds. Follow the button labels on your panel when possible.
- Listen for the drain pump. Let it run until it stops, usually 1 to 2 minutes.
If the cancel-drain does nothing and the tub stays full, stop repeating resets and jump down to the drain section. At that point, repeating attempts can stress the pump or keep it trying to run without moving water.
Common patterns to check
Exact meanings vary by brand, but these patterns are common enough that you can often troubleshoot without a manual.
Lock light on or panel unresponsive
This is the easiest “fix,” and it saves a lot of unnecessary panic.
- Find the button labeled Lock or Control Lock, or look for small printed text that says “Control Lock” near a button.
- Press and hold that button for about 3 seconds.
- Try starting a cycle again.
Start light blinking
This usually means one of three things: the door is not latched, the cycle was interrupted, or the dishwasher is waiting for you to close the door after selecting options.
- Re-latch the door: Open it, push racks in fully, then close firmly. Do not slam, but do not baby it either.
- Check for interference: A long cutting board handle or sheet pan can keep the door from closing enough to click.
- Inspect the latch area: Food gunk or a bent strike plate can prevent a clean latch.
Clean light blinking
On many models, this points to a heating or temperature-rise problem. Translation: the unit ran, but the water did not warm up the way it expected within a set time. On other models, a blinking Clean indicator can mean something else, so treat this as a strong hint, not a universal diagnosis.
- Start with hot water at the sink first (more on that below) and run a normal cycle with heat enabled.
- Check that the dishwasher is not set to a no-heat or energy saver mode that reduces temperature during troubleshooting.
- If the issue repeats, you may be looking at a failing heating element, thermostatic sensor, or control relay.
Multiple lights blinking
When several indicators flash, it is often the machine telling you it stopped to prevent damage, like running dry, detecting a leak, or sensing water where it should not be.
- Look under the unit for water, especially at the front corners.
- Check the float (usually a small plastic dome in the tub floor). If it is stuck “up,” the dishwasher may think it is overfilled.
- Try a power-cycle reset once. If it immediately returns, treat it as an active fault, not a glitch.
Door and latch issues
If I had to bet lunch money on one “blinking lights” cause across all brands, it is the door not registering as closed.
Common causes
- Racks not seated: the top rack is slightly off its track, or a tall item pushes the rack forward.
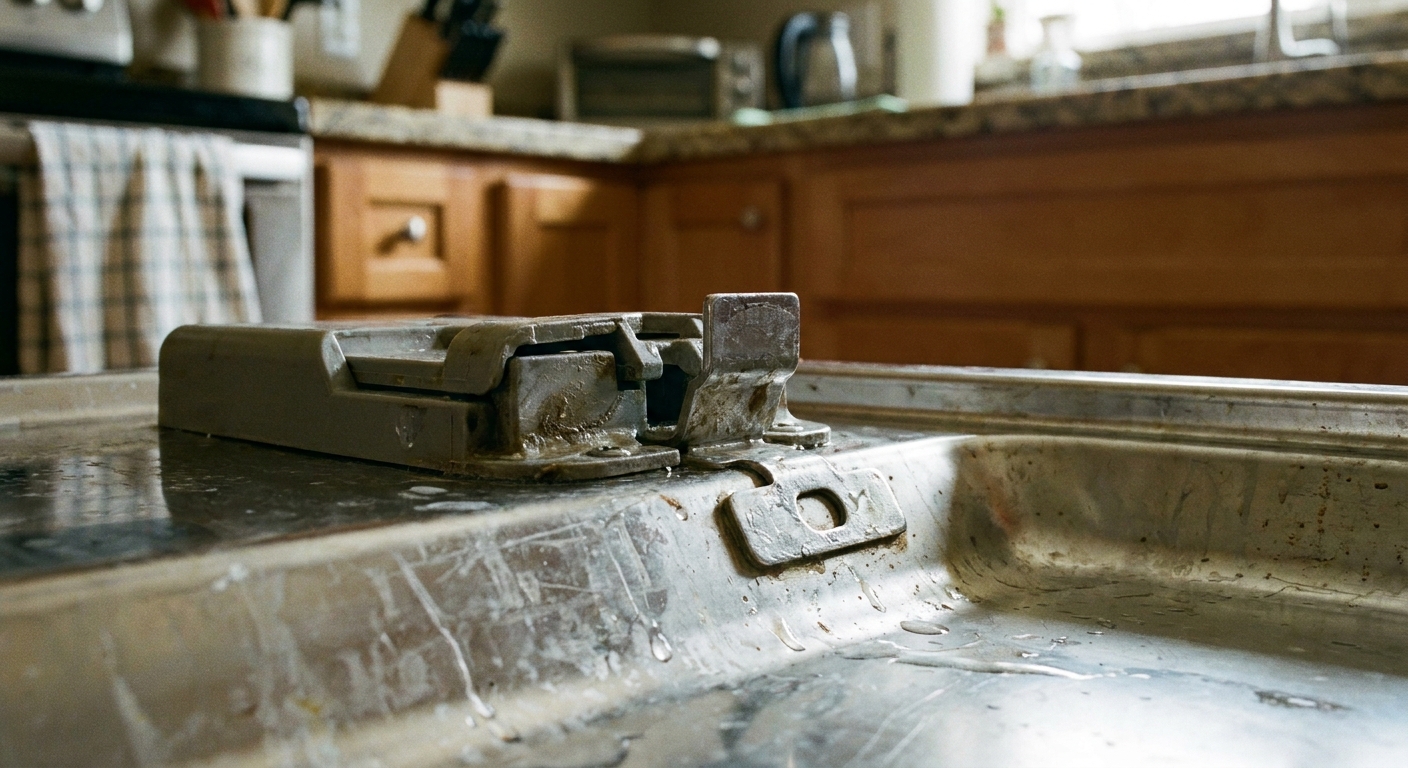
- Latch strike misalignment: the metal catch on the tub is bent or loose, so the latch does not grab consistently.
- Worn latch switch: inside the latch assembly is a small safety switch. If it fails, the machine will refuse to run.
- Door seal debris: a twisted gasket or food buildup prevents full closure.
5-minute checks
- Push both racks all the way in and re-close the door.
- Wipe the gasket and latch area with warm soapy water.
- With the door open, gently tug on the latch strike plate. If it moves, tighten screws if accessible.
When to stop: If the door only “works” when you lift or press on it, the hinge alignment or latch assembly may be failing. That is a real repair, not a reset problem.
Drain faults
Drain-related errors usually mean the dishwasher tried to pump water out, but the water level did not drop fast enough. The most common causes are clogs, sink-side backups, and hose routing issues, not a dead pump.
Signs it is a drain problem
- Standing water in the bottom after cancel-drain
- Gurgling at the sink or disposer when the dishwasher drains
- Intermittent draining, then a blinking light fault
What to check
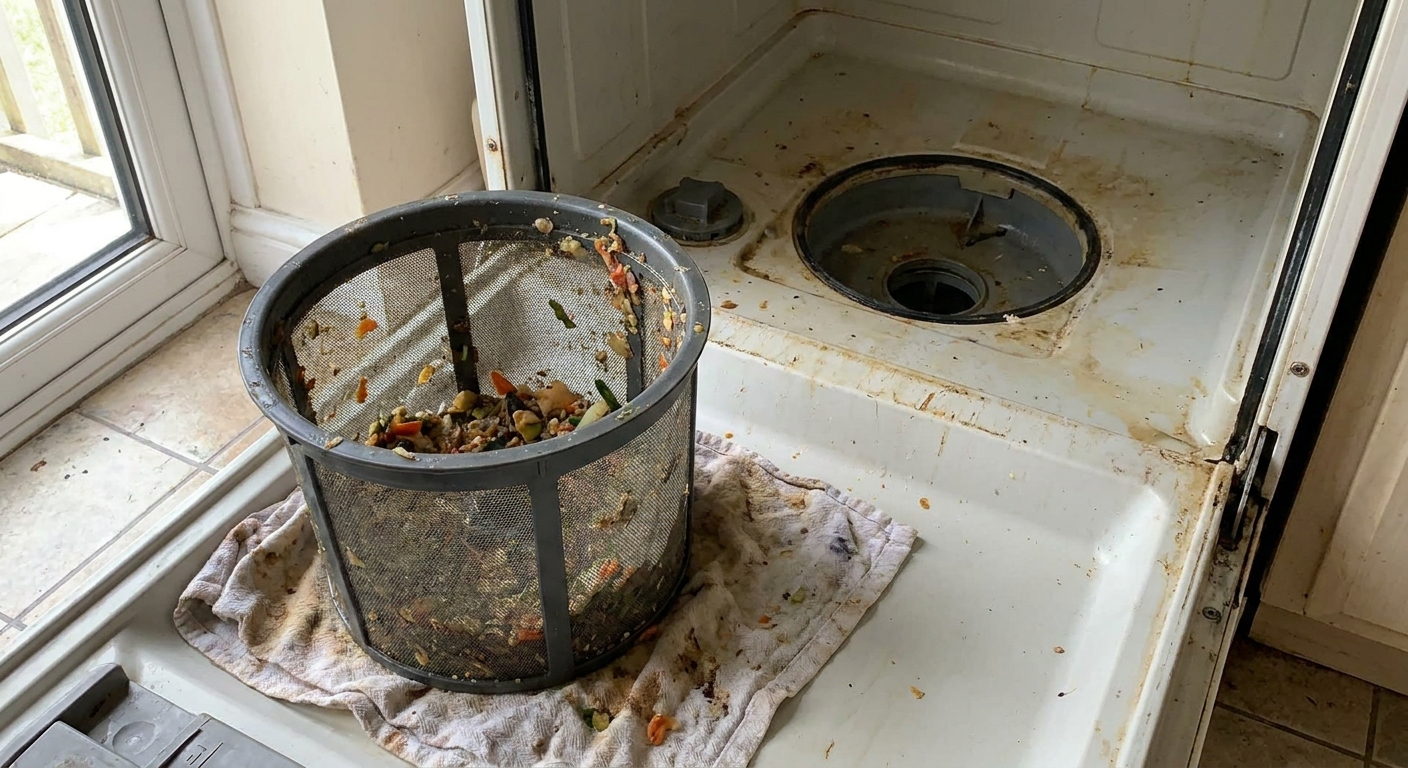
- Filter and sump area: Remove and clean the filter. Check for glass bits, labels, popcorn kernels, and twist ties.
- Sink and disposer: If your sink is slow to drain or the disposer is clogged, the dishwasher can back up too. Clear that first.
- Air gap (if you have one): That little chrome cap by the sink can clog. Pop the cap, clear debris, and re-seat it.
- Disposer knock-out plug: If the dishwasher was recently installed and drains into a garbage disposal, confirm the disposer inlet plug was removed.
- Drain hose loop: The hose should have a high loop under the counter to prevent backflow. A sagging hose can cause dirty water to return and trigger repeat drain issues.
- Drain connection: Check the dishwasher drain hose connection under the sink for gunk buildup or a kink right at the clamp.
My thrifty rule: clean the filter before you buy anything. I have seen “pump failures” that were really just a spoon of bacon grease and a citrus sticker.
Fill faults
Fill errors usually mean the dishwasher opened its inlet valve but did not see the expected water level. Sometimes it is a supply issue. Sometimes it is a sensor issue. Start with the supply and the float.
Common causes
- Shutoff valve partially closed: under the sink, the dishwasher valve might be turned down.
- Kinked water line: especially after someone stuffed cleaning supplies behind the dishwasher or the unit was moved.
- Clogged inlet screen: mineral buildup can block the tiny screen at the inlet valve.
- Low water pressure: can cause slow filling and timeouts.
- Float stuck up: if the float is stuck, the dishwasher may refuse to fill because it thinks it is already full.
Quick checks
- Verify the shutoff valve is fully open.
- Look for kinks in the supply line under the sink.
- Run the kitchen faucet and confirm you have strong flow.
- Find the float inside the tub and make sure it moves freely up and down (it should not be jammed by debris).
Worth knowing: Many dishwashers “time out” on fill. They do not measure gallons, they measure time and expected level. So anything that slows filling can throw a fill code.
Heating faults
Heating errors are common repeat offenders because the dishwasher is watching temperature changes throughout the cycle. Also, some cycles (especially Eco) intentionally run cooler and longer, which can make “is it heating?” feel confusing. For troubleshooting, use a normal cycle with heat enabled.
What to do first
- Preheat the supply: Run the hot tap at the sink until it is hot, then start the dishwasher. Many units begin filling right away.
- Check settings: Avoid stacking multiple eco options while testing. You want predictable heat behavior.
- Water heater temp: Many homes are set around 120°F for scald prevention and efficiency. Follow local guidance and household needs.
When it is likely a component
If you reset and the same heating-related fault returns within 1 to 3 cycles, the issue is often hardware:
- Heating element
- Thermistor or temperature sensor
- High-limit thermostat
- Control board relay or wiring to the heater
This is the point where I recommend looking up your model’s service sheet if available, because some tests involve a multimeter and safe access to components.
Leak and overflow signals
Some dishwashers use a base pan sensor. If it detects water underneath, the machine may lock into a drain mode, beep, or flash multiple lights.
What to do
- Cancel the cycle.
- Turn off power at the breaker.
- Check under the unit for water and dry what you can reach.
- Look under the sink for drips from the drain connection, air gap, disposer inlet, or supply line.
Important: Do not keep resetting a leak fault. If the base pan is filling, the dishwasher is trying to protect your floor and cabinets.
Repeat errors and failing parts
A one-off error after a power flicker happens. What matters is repeatability.
Clues it is not a glitch
- The same error returns immediately after a power-cycle reset.
- The same error returns within one or two cycles even after you cleaned filters and confirmed water supply.
- The dishwasher works only when you jiggle the door, press on the panel, or re-close repeatedly.
- You hear unusual sounds: grinding (pump), loud buzzing (inlet valve), or repeated clicking (relay).
Common “repeat fault” parts
- Door or latch: latch switch, latch assembly, hinge alignment
- Drain: drain pump, drain impeller jam, check valve issues
- Fill: inlet valve, clogged inlet screen, float switch stuck
- Heating: heater, thermistor, high-limit thermostat, control board heater relay
- Random lights and odd behavior: control board, user interface, moisture intrusion in the panel
Find your tech sheet
If you are ready to go beyond guessing, look for your dishwasher’s “tech sheet” or “service sheet.” Many brands hide it in one of these places:
- Behind the bottom kickplate or toe-kick (often taped to the frame)
- In a side panel pocket
- Behind the control panel (less common)
It often includes diagnostic mode steps and the brand’s exact meaning for blinking patterns. If you find it, take a photo so you do not have to crawl back down there later.
My troubleshooting order
When you are staring at blinking lights, it is tempting to start replacing parts. Here is the order I use to keep things organized and budget-friendly:
- Write down the pattern: which lights blink, how many times, and when it happens in the cycle.
- Check Control Lock: lock icon on, or buttons not responding.
- Reset once: power-cycle or cancel-drain, depending on whether water is standing.
- Door checks: racks, latch area, close firmly.
- Drain path: clean filter, check sink and disposer, check air gap, confirm hose loop.
- Fill checks: shutoff valve open, no kinks, float moves freely, good faucet pressure.
- Run a normal cycle: preheat hot water at the sink first, heat enabled.
- If the same fault repeats: now you are in “component likely” territory and the tech sheet becomes your best friend.
Skimmer summary
- Panel dead or lock light on: disable Control Lock (hold the lock button about 3 seconds).
- Start blinking: re-seat racks, clear obstructions, re-latch door.
- Standing water: clean filter, check sink and drain hose routing, then try cancel-drain.
- Clean blinking or heat-related fault: run hot water first, use normal cycle with heat enabled, then confirm meaning in your tech sheet.
- Leak signals: stop, power off, check for water underneath.
When to call a pro
I am all for DIY, but there are a few moments where a service call is the smart move:
- Repeated leak or overflow signals
- Burnt smell, visible scorch marks, or tripped breaker that will not stay on
- Heating errors that return after basic checks (testing involves electrical components)
- You find broken glass in the pump area and cannot clear it safely
If you do call, hand the technician your notes on the blink pattern and what you already checked. You will save time and, often, money.
The 30-Second Cheat Sheet
Essential takeaways for: Dishwasher Blinking Lights and Error Codes: What They Mean and How to Reset
What blinking lights usually mean
- Start/Resume blinking: door not registering closed, cycle paused, or waiting for the door to be closed.
- Lock light on or panel seems dead: Control Lock or Child Lock is on (often cleared by holding a labeled button for about 3 seconds).
- Clean light blinking: on many brands, a “cycle fault” often tied to heating or water not warming as expected. On others it can mean different faults, so confirm with your model’s tech sheet or manual.
- Standing water + blinking: drain problem or drain timeout.
- Multiple lights blinking: active fault like leak detection, overflow, or a stored error.
Safe, brand-agnostic reset steps
- Cancel-drain first if there is water in the tub: press Cancel/Drain if your panel has it, or hold a clearly labeled Start or Cancel button for 3 to 5 seconds (varies by model, follow the labels).
- Power-cycle reset: turn breaker off for 2 to 5 minutes, then back on (this allows the controls to reset).
- Try one short cycle. If the same fault returns quickly, it is likely not a one-time glitch.
Fast checks by problem type
- Control lock: look for a lock icon. Hold the lock button (or the button labeled Lock or Control Lock) for about 3 seconds.
- Door/latch: push racks in, clear obstructions, wipe gasket, close firmly.
- Drain: clean filter, check air gap, check sink or disposer for clogs, confirm drain hose has a high loop.
- Fill: confirm shutoff valve is fully open, supply line not kinked, float moves freely, good faucet pressure.
- Heating: run hot tap before starting, ensure heat is enabled, avoid eco-only settings while testing.
When repeated codes point to a failing part
- Error returns immediately after reset or within 1 to 3 cycles.
- Machine only runs if you jiggle the door or re-close it multiple times.
- Unusual sounds: grinding (pump), buzzing (inlet valve), clicking (relay).
- Common repeat-fault parts: latch switch, drain pump, inlet valve, heater, thermistor, or control board.
Stop and get help if
- You see water underneath the unit or keep getting leak signals.
- You smell burning or the breaker will not stay on.
💡 Tip: Scroll up to read the full article for detailed, step-by-step instructions.
⬆️ Back to topAbout Marcus Vance
Content Creator @ Grit & Home
Marcus Vance is a lifelong DIY enthusiast and self-taught home renovator who has spent the last decade transforming a dilapidated 1970s ranch into his family's dream home. He specializes in budget-friendly carpentry, room-by-room renovations, and demystifying power tools for beginners. Through his writing, Marcus shares practical tutorials and hard-learned lessons to help homeowners tackle their own projects with confidence.