If your dishwasher is cleaning fine but everything comes out damp, you are not alone. Drying is its own system, and it is surprisingly easy for one small thing to knock it off track. The good news is most “not drying” complaints come from simple stuff like rinse aid, loading, or settings, not an expensive breakdown.
Below is the order I use at my own house: quick checks first, then deeper diagnostics if the easy wins do not change anything.
How dishwasher drying works
Most dishwashers dry using one main approach, or a combination of a few. Common setups include:
- Heated dry: a heating element (visible or hidden) warms the air and helps evaporate water off dishes.
- Condensation dry: the final rinse runs hot, then moisture condenses on cooler tub walls and drains away. This is often more effective in stainless tubs and “heat exchanger” style designs, but even plastic tubs condense to some extent. Plastic items still tend to stay wetter.
- Fan assisted dry: a small fan and vent move moist air out and pull drier air in.
- Auto-open or auto-release door: some models automatically pop the door at the end of the cycle, basically doing the “door-crack” trick for you.
- Specialty systems: some higher-end units use heat-pump drying or mineral systems (often marketed as zeolite or crystal dry) to improve drying without a big exposed heater.
No matter which style you have, the basics are the same: you need heat, airflow, and a way for water to sheet off surfaces instead of clinging in droplets.
Also normal: on many condensation-dry machines, dishes can look wet right when the cycle ends but improve a lot if you wait 10 to 30 minutes (or crack the door). Plastics are the holdouts.
Safety first
- Electric shock risk: If you remove panels or test parts, shut off power at the breaker, not just the control panel.
- Sharp edges: Dishwasher frames and inner panels can be razor sharp. Wear gloves.
- Water: If you pull the unit out, turn off the water supply valve under the sink first.
- Hot steam: Cracking the door can release a blast of steam. Keep kids and pets back, and open it slowly.
Quick checklist (start here)
If you do nothing else, run through these six in order. They solve the majority of wet dish complaints.
- Fill the rinse aid dispenser
- Pick the right options: Heated Dry, High Temp, or Sanitize
- Load for airflow: stop blocking the vent and stop nesting items
- Confirm hot water is actually hot
- Check the vent and fan (if equipped)
- Look for standing water after the cycle
Fixes from easy to involved
1) Empty rinse aid dispenser (very common)
Rinse aid is not just for spot-free glasses. It helps water sheet off dishes instead of beading up. When it is empty, everything looks clean but stays wet, especially plastics and glass.

What to do
- Open the rinse aid cap on the inside of the dishwasher door.
- Fill to the indicated line and close the cap firmly.
- Set the rinse aid dial (if your model has one) to the middle setting to start.
How to confirm
Run one normal cycle with Heated Dry on (or the closest equivalent). If you see a noticeable improvement, you found your culprit.
2) Settings not selected (Heated Dry, High Temp, Sanitize)
It sounds obvious, but it gets people all the time. Many machines default to eco behavior, which often reduces final rinse temperature and may reduce or disable active drying features.
What to do
- For the next load, choose Heated Dry (or Dry Boost, Extra Dry, etc.).
- Also enable High Temp or Sanitize if available.
- Avoid Eco modes while troubleshooting.
Note: Condensation-dry models may not have a classic “heated dry,” but they still rely on a hot final rinse. High Temp and Sanitize can make a big difference.
3) Incorrect loading blocks airflow or traps water
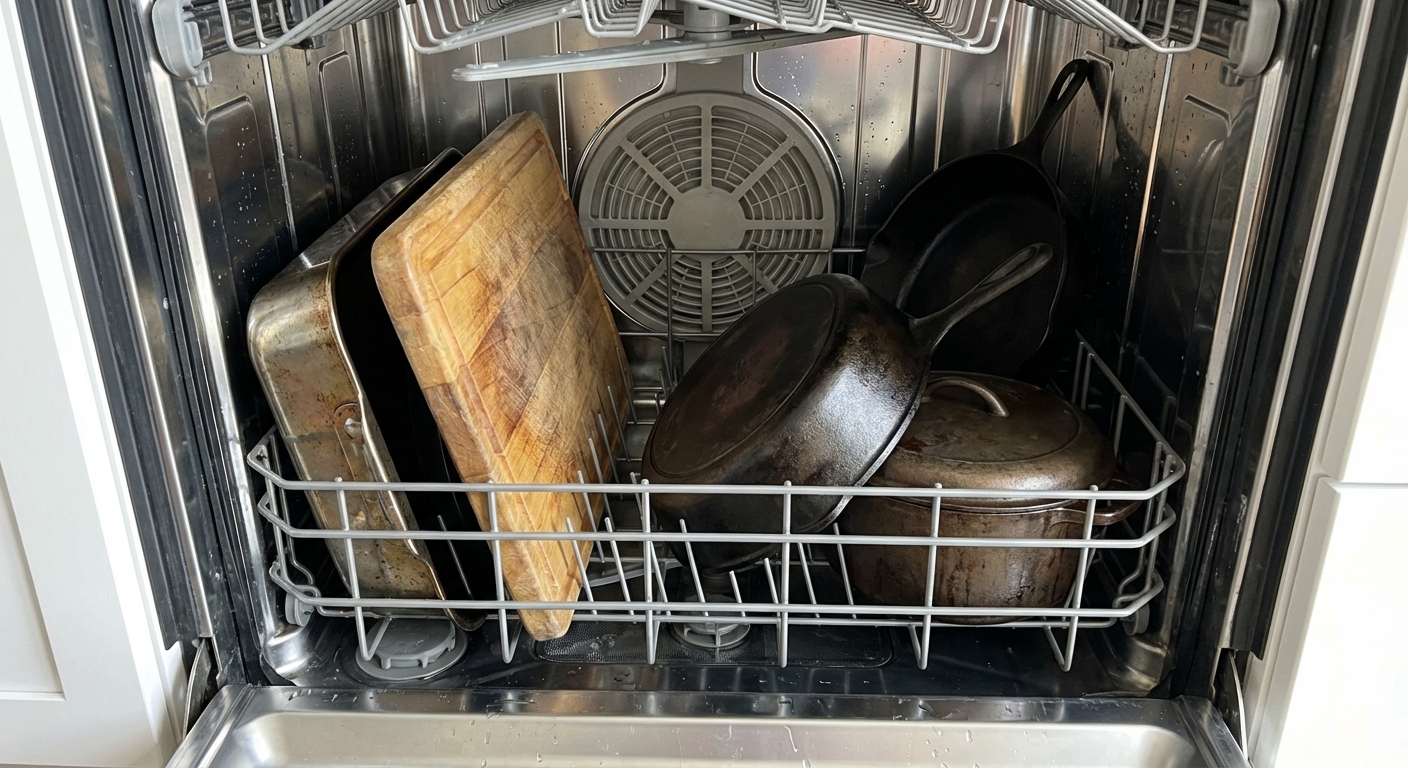
I have done this to myself more times than I want to admit: one big cutting board or cookie sheet accidentally covers the vent, and suddenly nothing dries. The cause and effect is simple. If the vent path is blocked, moisture cannot escape, humidity stays high, and the water just sits there.
What to check
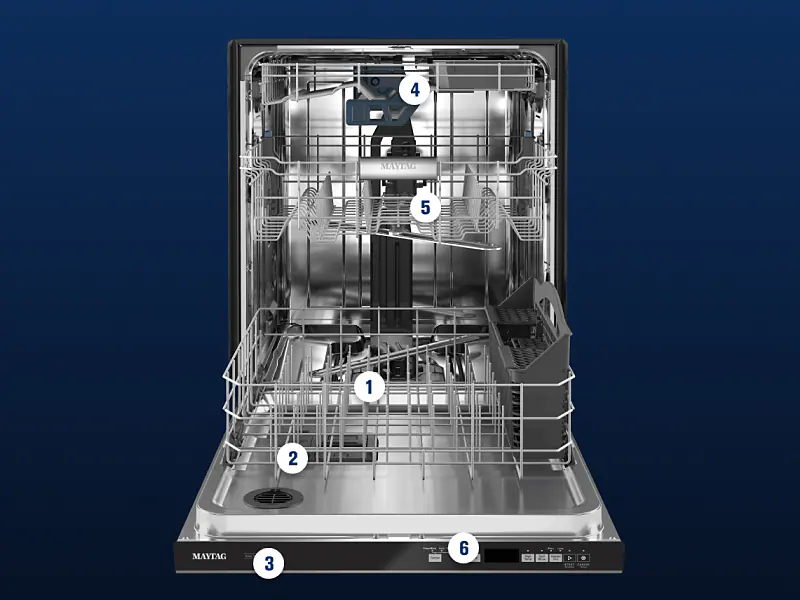
- Find the vent: typically on the inside of the door or at the back wall of the tub.
- Do not block it: keep tall items, baking sheets, and cutting boards away from the vent path.
- Stop nesting: bowls stacked too close and measuring cups nested together hold water.
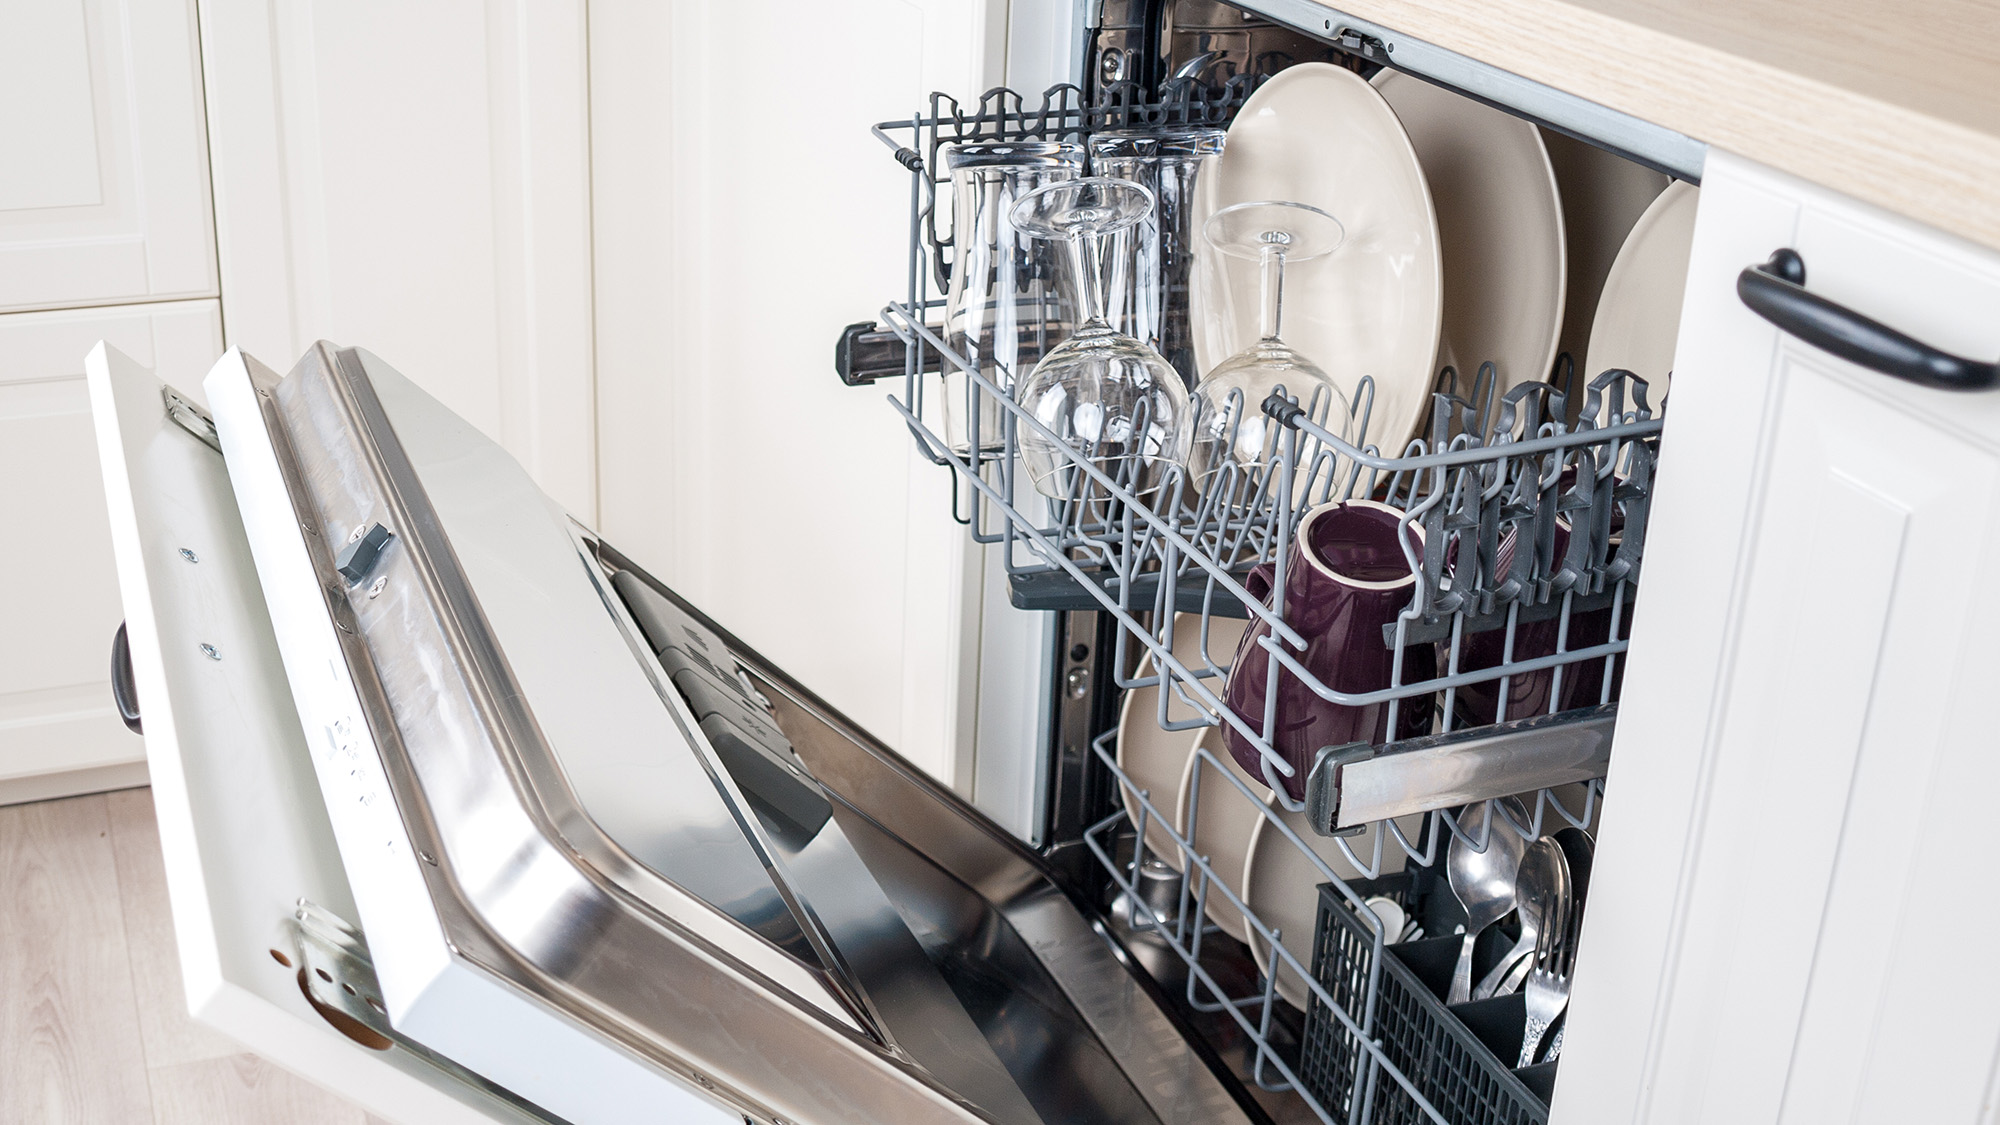
- Angle items: load cups and containers at an angle so water can drain.
- Plastics up top: plastics can warp on the bottom rack and they tend to hold and pool water, so keep them on the top rack.
Pro move
When the cycle ends, crack the door open 2 to 3 inches for 10 minutes (slowly, watch the steam). If everything dries quickly after that, your main issue is airflow and venting, not cleaning.
4) Hot water starts lukewarm
Your dishwasher cannot dry well if the final rinse never gets truly hot. Some units heat water internally, but many still benefit from starting with hot water from the tap.
What to do
- Before starting the dishwasher, run your kitchen hot water until it is hot to the touch.
- If your water heater is set very low, consider raising it. Many homes run 120°F as a common target, but follow local guidance and household safety needs.
One helpful detail: Sanitize cycles often boost to higher internal temperatures using the dishwasher’s own heater, regardless of your water-heater setpoint. A hot start still helps overall performance and timing.
Clue you found it
If drying improves when you pre-run the hot water, the dishwasher was starting with a cold slug of water.
5) Standing water after the cycle
If there is water pooled in the bottom when the cycle ends, the interior stays humid and items stay wet. This is a drain problem first, and a drying problem second.
What to check
- Look for standing water in the sump area under the filter (a small amount can be normal on some models, but a noticeable pool is not).
- Clean the filter and check for food debris, labels, or broken glass that could be restricting flow.
- Check the sink disposal knockout plug (common on new installs) and make sure the drain hose is not kinked.
- If you have a high loop or air gap, confirm it is installed correctly and not clogged.
6) Vent not opening, vent fan not running, or vent is clogged
On vented and fan-assisted models, a stuck vent door or dead fan keeps steam trapped inside. When the cycle ends, the interior stays humid, so everything stays wet.
Easy checks
- Look for gunk: wipe the vent area and any grille openings with a damp cloth.
- Listen near the end: some machines run a fan during drying. If yours used to make a soft whir and now it is silent, that is a hint.
- Door test: if cracking the door helps a lot, suspect venting.
- Auto-open check: if your model has auto-release and it is not popping open anymore, look for that setting being turned off first.
DIY fix level
Cleaning is easy. Accessing the vent fan or vent actuator can range from moderate to involved depending on your model. If you are comfortable removing the inner door panel, you can inspect wiring connections and the fan for obstruction. If not, this is a good point to stop and call for service.
7) Clogged filter or spray arms (reduces heat and rinse performance)
This one is sneaky. If circulation is restricted, you may still get “clean enough” dishes, but the final hot rinse might not distribute heat as well, and water may not drain off surfaces as cleanly.
What to do
- Remove and rinse the filter (follow your manual for the twist-lock steps).
- Check spray arm holes for debris. A toothpick or soft brush can clear stubborn bits.
- Re-seat everything firmly so the unit maintains proper pressure.
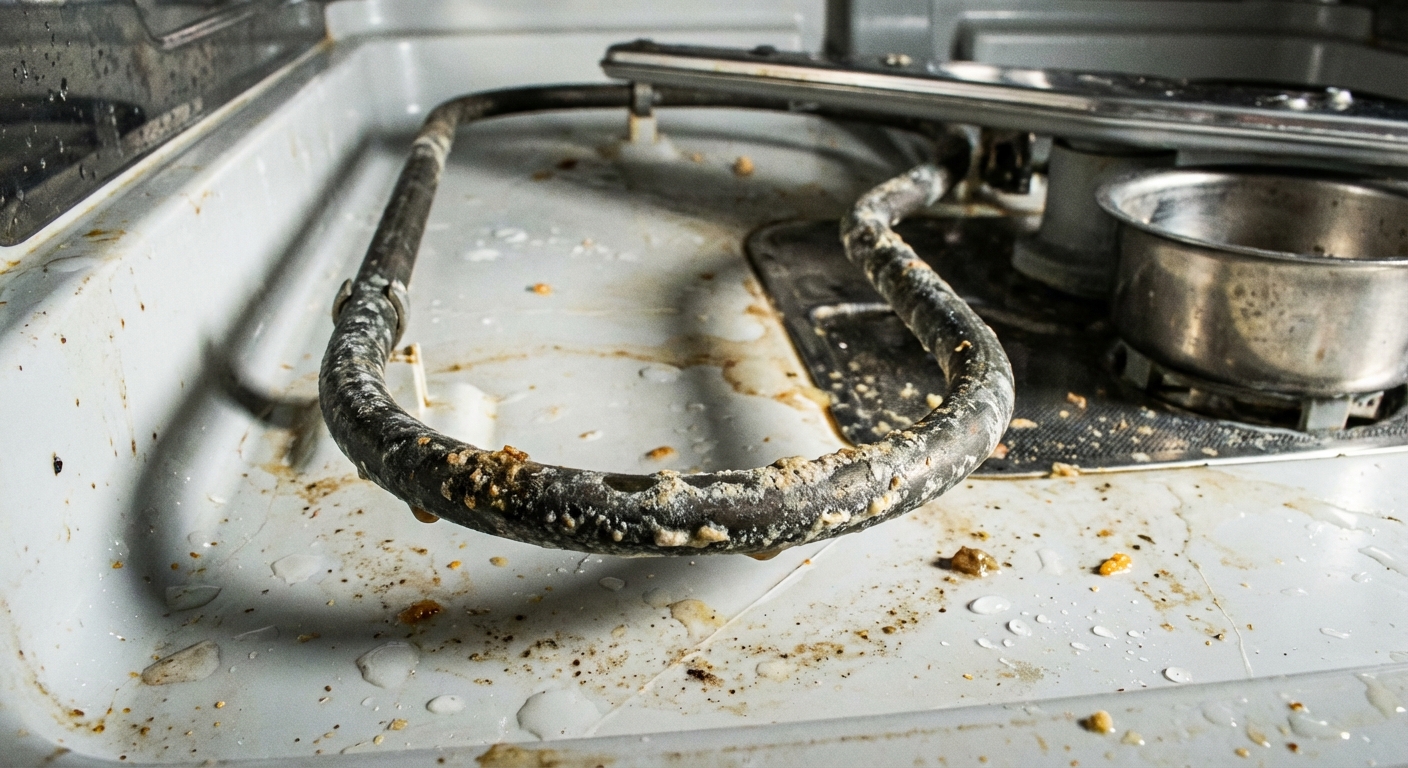
8) Heating element failure (or heater circuit problem)
If you have a visible heating element (often a thick loop at the bottom of the tub) and it is not heating, drying will be poor and the final rinse might not get hot enough either.
Signs the heater is the problem
- Dishes are cool at the end of the cycle, not warm.
- Heated Dry is selected but makes no difference.
- Plastic and glass are equally wet, not just plastics.
DIY diagnostic steps (basic)
- Kill power at the breaker.
- Remove the lower rack and inspect the element for obvious breaks, blisters, or burn marks.
- If you own a multimeter and are comfortable using it, test the element for continuity. No continuity usually means the element is failed.
What the fix looks like
Element replacement is usually a moderate DIY: you typically access mounting nuts and wiring from under the dishwasher. Depending on the model, you may need to pull the unit out. Take photos of wire locations, and match the replacement part to your exact model number.
Important: Some dishwashers use a hidden heater, a heat pump, mineral drying, or rely more on condensation drying. In those designs, “heating element replacement” may not apply, and the failed part could be a heater assembly, thermistor, control board, or wiring. Use your model number to confirm the drying system before ordering parts.
9) Temperature sensor or high-limit thermostat issues
If your dishwasher seems to get warm but not warm enough, or it heats sometimes and not others, a thermistor (temperature sensor) or high-limit thermostat can be part of the story. These parts help the machine decide when to heat and when to stop for safety.
Clues
- Drying is inconsistent from load to load with the same settings.
- You see heating-related error codes.
- Water is warm but never gets truly hot during the final rinse.
Diagnosing these usually moves into service-manual territory, so if you are not already comfortable with meter testing and safe disassembly, it may be time for a pro.
Simple at-home tests
The door-crack test
When the cycle ends, open the door a few inches and leave it for 10 minutes. Open slowly and keep your face back from the steam.
- If drying improves a lot: airflow or venting is your likely issue (loading, vent stuck, fan, auto-open not working).
- If drying barely improves: suspect lack of heat (settings, incoming water temp, heater problem).
The “warm dishes” check
Right at the end of the cycle, carefully touch a ceramic plate.
- Warm to hot: heat is present, look at rinse aid, loading, and venting.
- Cool: heat is not happening as expected, look at settings, incoming water temp, and the heater circuit.
The plastics reality check
If only plastics are wet and everything else is fine, that can be normal. Plastic does not hold heat like ceramic and glass, so condensation drying struggles with it.
- Use rinse aid.
- Put plastics on the top rack.
- Angle containers so they drain.
- Consider cracking the door at the end of the cycle (or enabling auto-open if your model has it).
When to call a pro
I am all for DIY, but I also like people keeping all their eyebrows. Consider a service call if:
- You confirm the heater has no continuity and the replacement requires pulling the dishwasher, rewiring, or dealing with tight cabinetry you cannot safely manage.
- The dishwasher trips the breaker, shows error codes related to heating, or smells like hot electrical plastic.
- You suspect a control board issue and you are not comfortable diagnosing live voltage (you should not be).
- There is persistent standing water and you cannot identify a simple hose, air gap, or filter restriction.
Prevent wet dishes long-term
- Keep rinse aid topped off: it is the cheapest drying upgrade you can buy.
- Do not block the vent: especially with cutting boards and sheet pans.
- Run the sink hot first: helps the first fill start hot.
- Clean filters regularly: better circulation helps the final rinse and drying.
- Use the right cycle: Eco can be great, but it is not always great at drying.
- Use built-in features: if you have auto-open, make sure it is enabled and not blocked by cabinets.
FAQ
Why are my dishes clean but still wet?
Cleaning is mostly water pressure, detergent, and spray arm coverage. Drying depends on heat, airflow, and rinse aid. It is very common for cleaning to be fine while drying is not.
Is it normal for plastic to be wet after the dishwasher?
Yes, especially on condensation-dry machines. Plastics cool quickly, so water does not evaporate as easily. Rinse aid, proper loading, and cracking the door after the cycle help a lot.
Do I really need rinse aid if I use detergent pods?
In many homes, yes. Many all-in-one pods and tablets include rinse agents, but not all do. Even when they do, the dedicated rinse aid dispenser releases it at the right time in the cycle and often works better for drying.
My dishwasher has Heated Dry on, but it still does not dry. What is next?
Check that hot water is reaching the machine, then focus on venting and airflow. If dishes are cool at the end and you have a heating element, a failed heater or heater circuit is high on the list. If heat seems inconsistent, a temperature sensor or safety thermostat may be involved.
About Marcus Vance
Content Creator @ Grit & Home
Marcus Vance is a lifelong DIY enthusiast and self-taught home renovator who has spent the last decade transforming a dilapidated 1970s ranch into his family's dream home. He specializes in budget-friendly carpentry, room-by-room renovations, and demystifying power tools for beginners. Through his writing, Marcus shares practical tutorials and hard-learned lessons to help homeowners tackle their own projects with confidence.