If your dryer is tumbling like normal but your clothes come out cold and damp, you are not alone. A no-heat dryer is one of the most common appliance headaches, and the good news is that the first few fixes are often cheap, fast, and totally DIY-friendly.
I learned this the hard way: the dryer can look like it is “working” and still be unsafe or ineffective if airflow or power is off. So we are going to troubleshoot in order of likelihood, starting with the stuff that fixes the most dryers with the least effort.
Before you touch anything: quick safety checks
- Unplug the dryer before removing panels or testing parts. Electric dryers are typically 240V, which is not forgiving.
- Shut off gas (gas dryers) at the valve if you will be opening the cabinet.
- Let it cool. Heating parts and the burner area can stay hot for a while.
- Know when to stop: If you smell gas, see scorched wiring, or find melted plastic, stop and call a pro.
Tools that help: Phillips screwdriver, 1/4-inch nut driver, vacuum with hose, a dryer vent brush, and a basic multimeter.
Quick meter translation: “OL” usually means open circuit (no connection), which is what you see with a blown fuse or broken element.
Fix #0: Check settings and power (do this first)
Before you pull the dryer away from the wall, knock out these two high-payoff checks. They solve a surprising number of “no heat” calls.
Confirm you are not on a no-heat cycle
- Make sure the cycle is not Air Fluff, Air Dry, or No Heat.
- Double-check the temp setting is not set to low or off.
Electric dryers: reset the double breaker
Electric dryers use two 120V legs to make 240V for heat, but the motor can still run on just one leg. That means you can get a dryer that tumbles normally but has zero heat if a dual-pole breaker is half-tripped.
- Find the dryer breaker (usually a double-pole breaker).
- Flip it fully OFF, then back ON. Some breakers do not look tripped when they are.
- If it trips again, stop and call an electrician or appliance pro.
Quick cord and terminal block check (electric)
If you are comfortable pulling the small access cover where the cord connects (with the dryer unplugged), look for burnt lugs, melted plastic, or a loose connection. A cooked terminal block can drop one hot leg and leave you with tumble and no heat.
How dryers make heat (30-second version)
Electric dryer: A heating element warms air, and a blower pushes that air through the drum and out the vent. If airflow is poor, safety parts can shut the heat off.
Gas dryer: A burner assembly lights via an igniter, then flame heats the air. Sensors and thermostats control when it ignites and when it shuts off.
In both types, airflow is everything. A clog does not always cause instant “no heat,” but it often leads to overheating and a blown thermal fuse or high-limit shutdown. That is why we start with lint and venting.
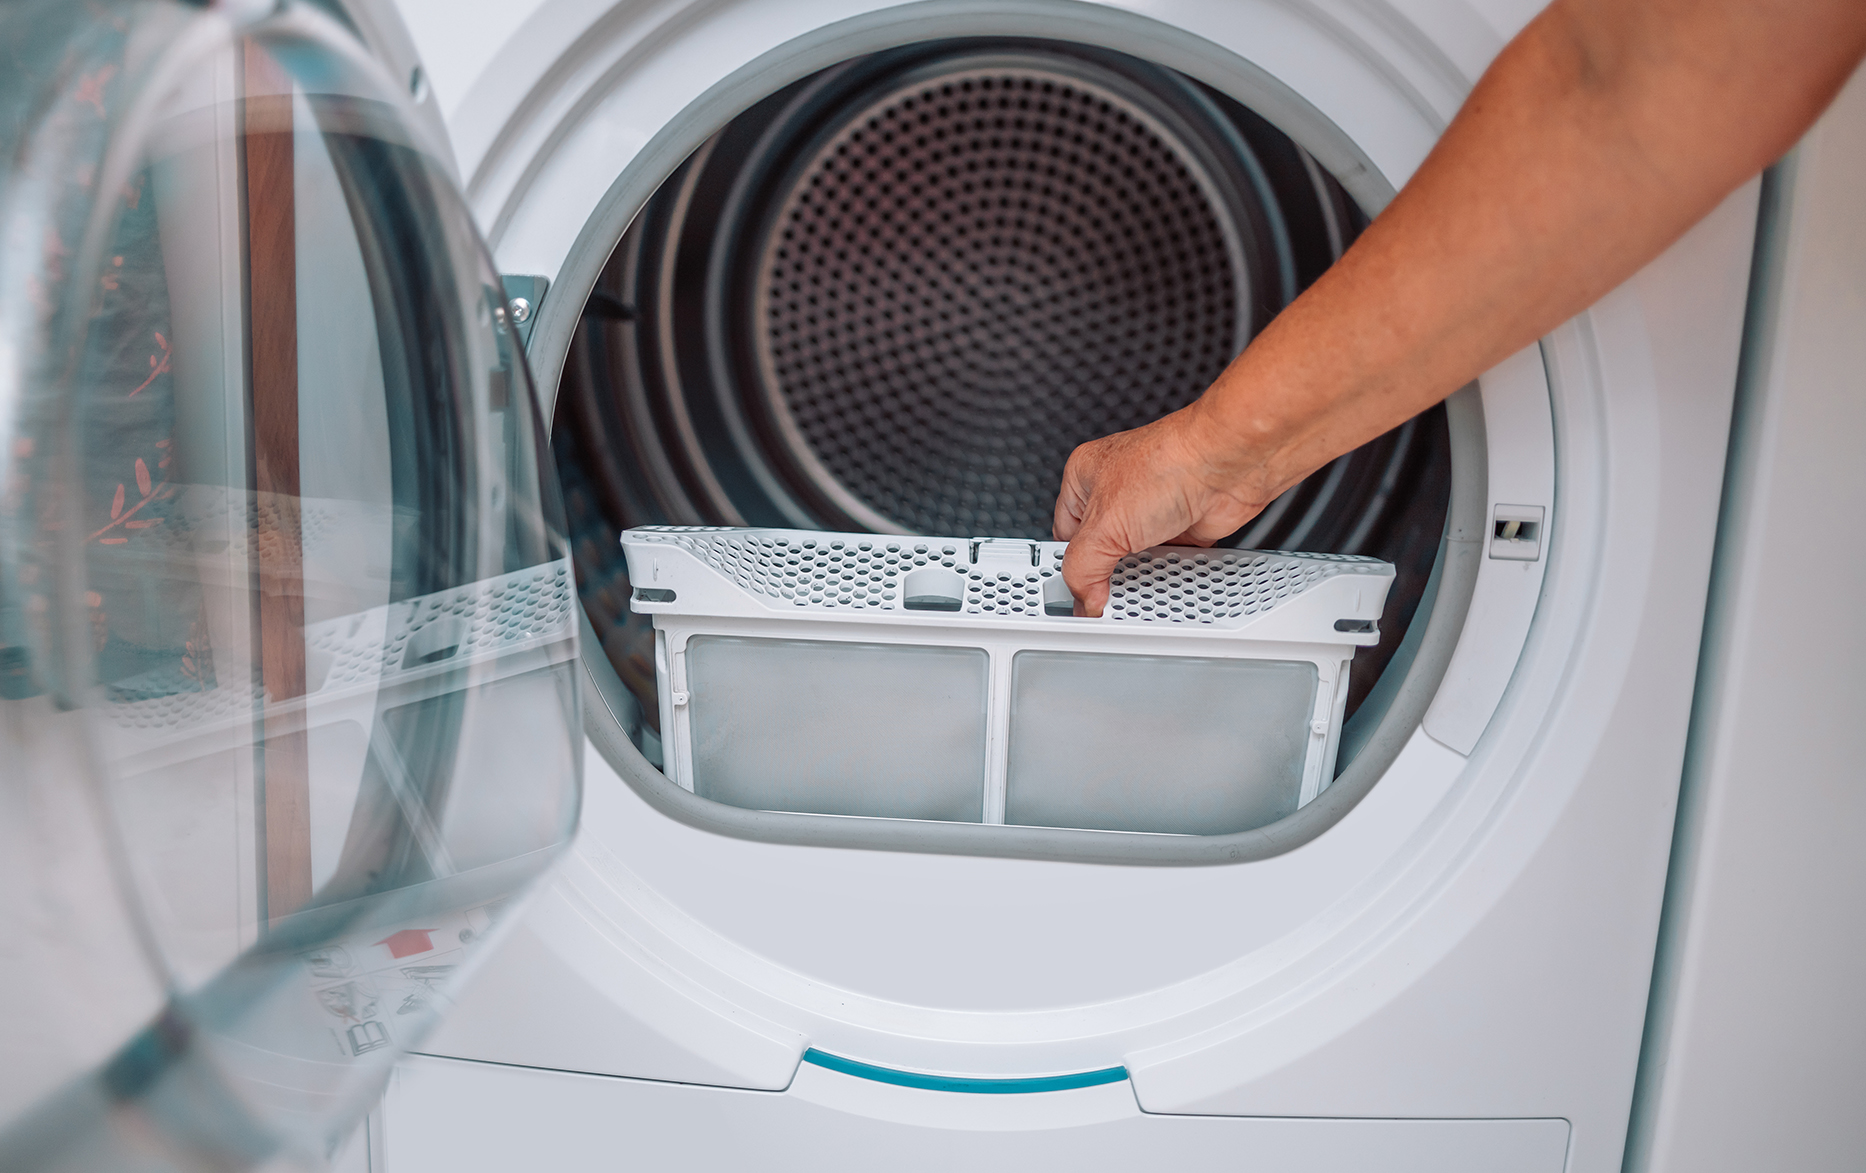
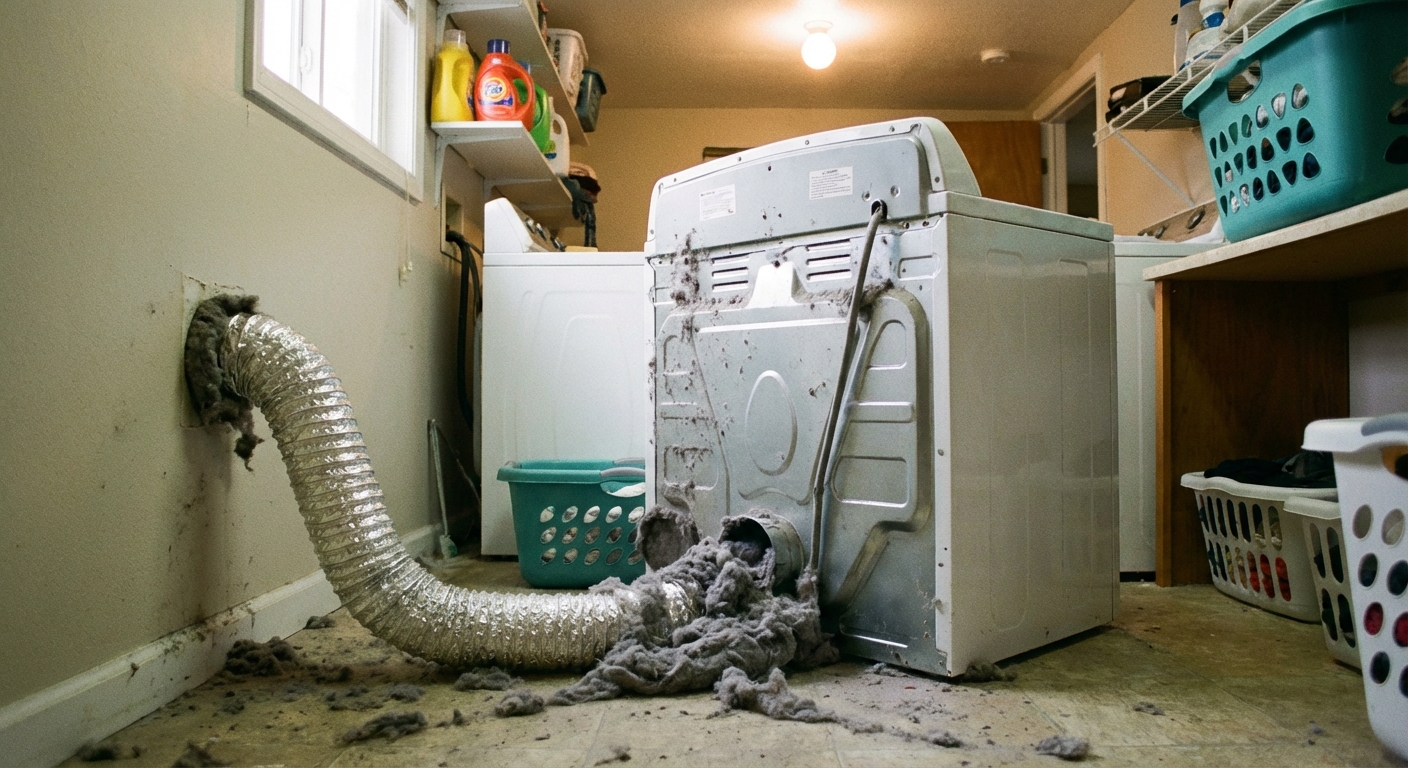
Fix #1: Clean the lint trap and vent system
If your dryer runs but does not heat, restricted airflow is the first thing to rule out. A clogged vent more commonly causes long dry times and overheating, and that overheating can blow a thermal fuse and turn into permanent no-heat.
What to do
- Clean the lint screen with soap and warm water if you use dryer sheets. The waxy residue can block airflow even if it looks clean.
- Vacuum the lint screen housing with a crevice tool. Lint loves to pile up down in there.
- Pull the dryer out and disconnect the vent duct from the back.
- Clean the duct. Vacuum what you can reach, then use a vent brush to clean deeper.
- Go outside and make sure the exterior vent flap opens freely when the dryer runs.
What to look for
- Crushed or kinked flex duct behind the dryer.
- Foil accordion duct that traps lint. Semi-rigid metal is usually the better choice.
- Weak airflow from the dryer outlet with the vent disconnected. If the dryer itself barely blows, lint may be packed in the lint chute or blower housing.
DIY note from my own mistake pile: I once replaced a perfectly good heating element because I did not check the exterior vent. A bird nest was blocking the flap. Ten minutes of cleaning would have saved me an afternoon.
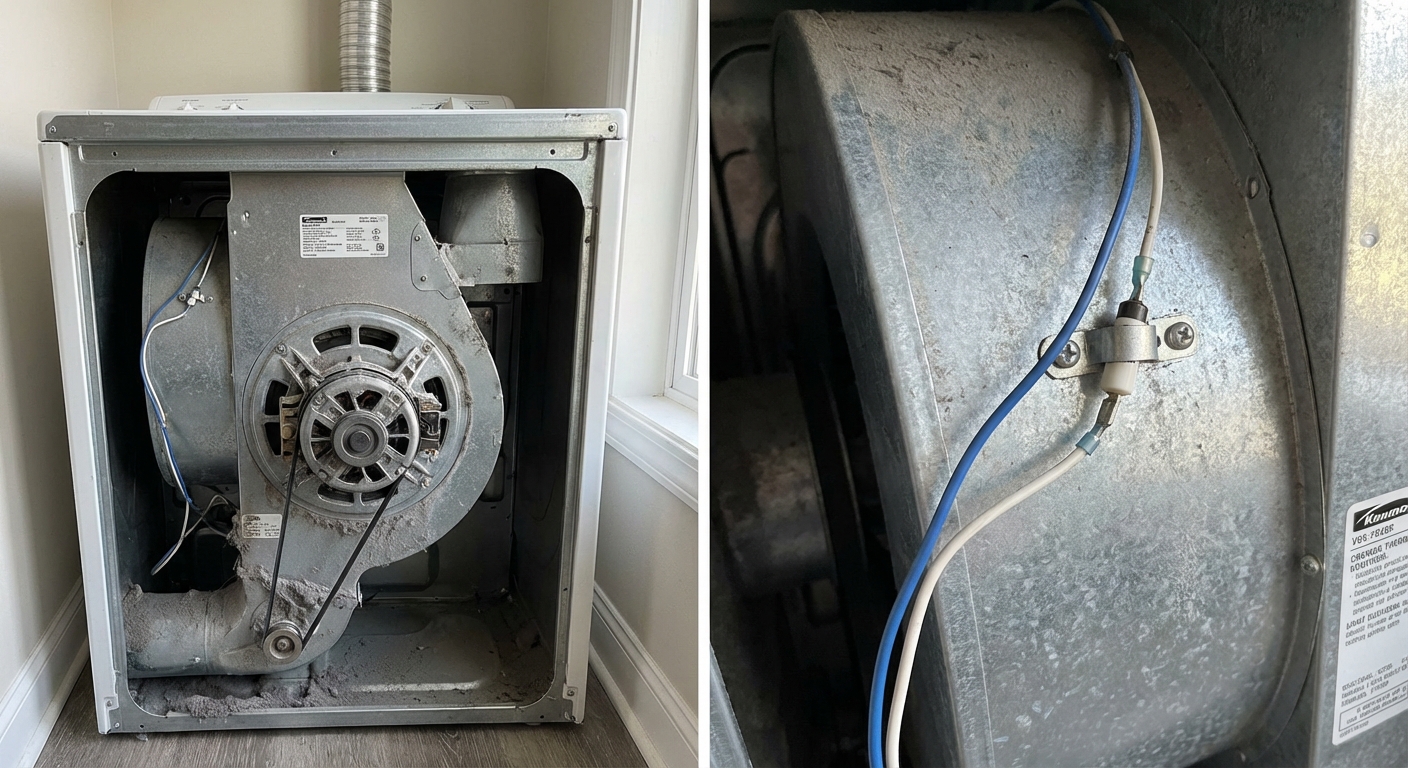
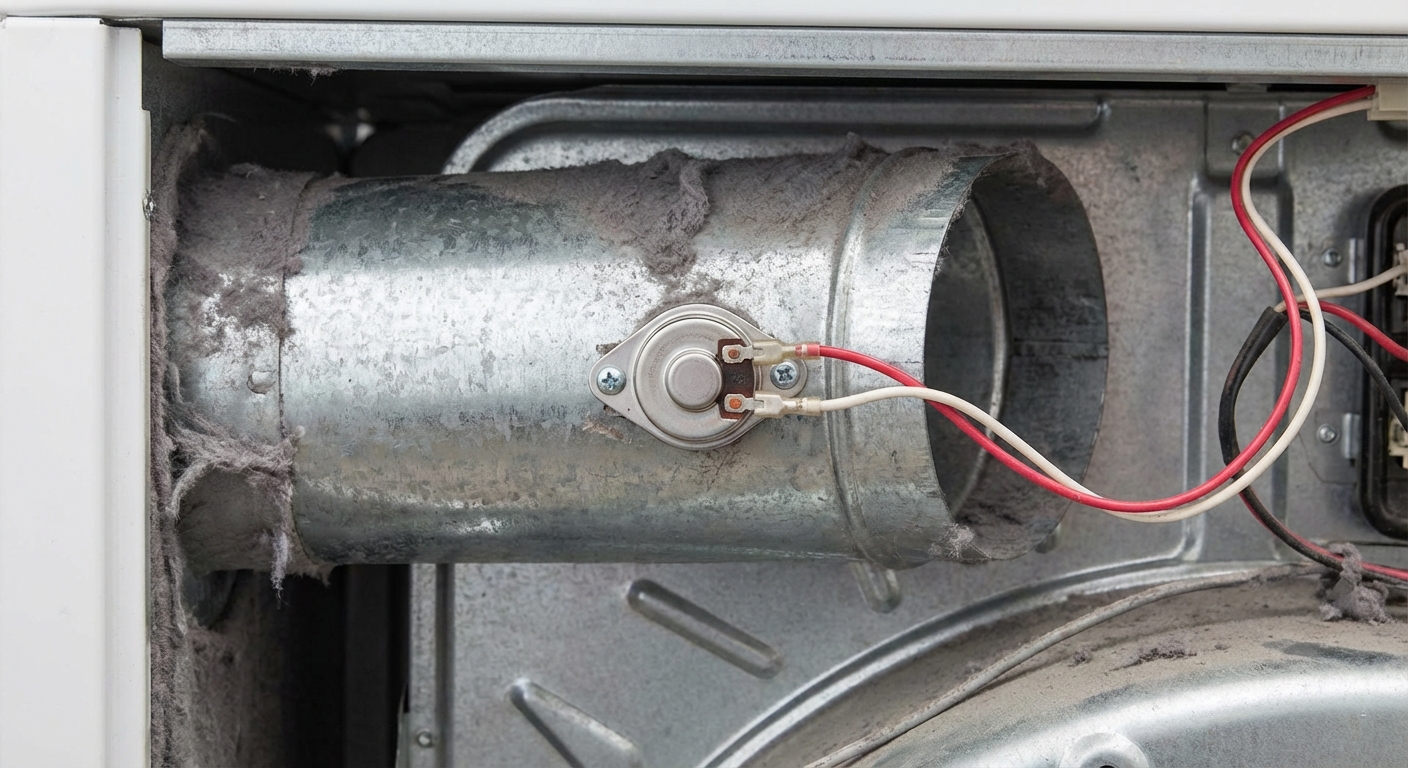
Fix #2: Test the thermal fuse
The thermal fuse is a one-time safety device designed to blow if the dryer overheats, often due to poor airflow. When it blows, many dryers will still tumble but the heat will not come on.
Do not bypass a thermal fuse for normal use. It is there to prevent overheating and fires. If a pro temporarily bypasses it for diagnosis, that is different. For DIY, replace it and fix the airflow issue.
Where it is
Common locations include:
- On the blower housing (lots of models)
- On the exhaust duct inside the back panel
How to test it with a multimeter (continuity)
- Unplug the dryer.
- Remove the access panel (back or front, depending on model).
- Pull the two wires off the fuse terminals (take a quick photo first so you can put them back correctly).
- Set your multimeter to continuity (often a sound icon) or the lowest ohms setting.
- Touch one probe to each terminal.
Reading guide:
- Good fuse: continuity beep or near 0 ohms
- Blown fuse: no beep or “OL” / very high resistance
Important: If the thermal fuse is blown, replace it, but also fix the airflow issue that caused overheating. Otherwise, you may be back in here next month.
Fix #3: Check the heating element (electric dryers)
If your venting is clear and the thermal fuse is good, the next suspect on an electric dryer is the heating element. It can break, short to the housing, or simply wear out over time.
Symptoms that fit
- Dryer runs normally, no heat at all
- Clothes stay cold and damp even on a heat cycle
- Sometimes you can see a broken coil if you can access the heater box
How to test the heating element
- Unplug the dryer.
- Access the heater housing (often behind the back panel, sometimes from the front).
- Disconnect at least one wire from the element terminal so you are not reading the rest of the circuit.
- Set meter to ohms and test across the element terminals.
Typical reading: Many elements land roughly in the 8 to 15 ohms range, but it varies by wattage and model. If you can, use your service manual specs. A reading of “OL” (open) usually means the element is broken.
Extra check for shorts: Place one probe on an element terminal and the other on the metal heater housing. You should get no continuity. If it shows continuity, the element may be shorted to ground.

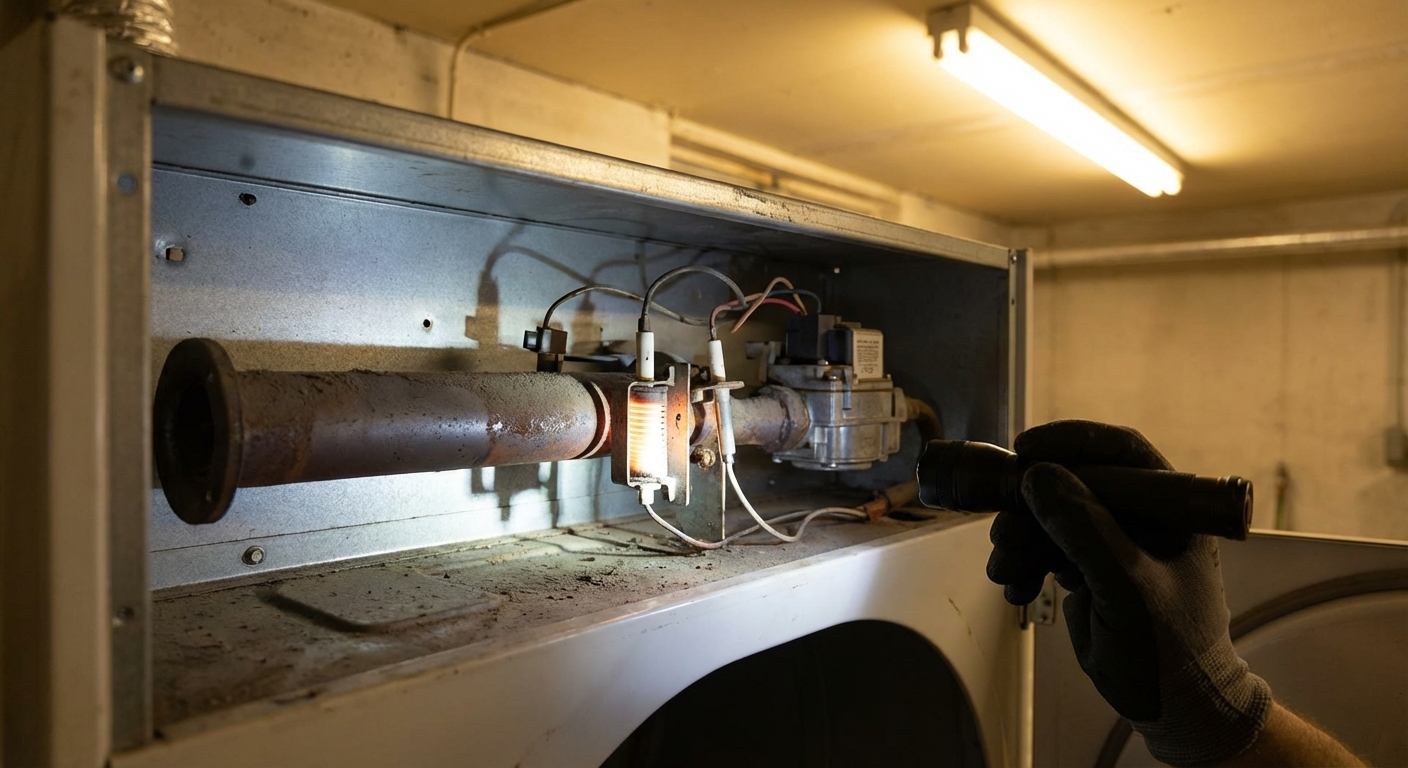
Fix #4: Check the igniter (gas dryers)
On a gas dryer, the igniter heats up to light the gas. If it is cracked, burnt out, or not receiving power, the burner will not ignite and you will get no heat.
What you might notice
- Drum turns, but no heat
- You do not see the igniter glow (some models have a small viewing port)
- Dryer may try to heat, then stop repeatedly
Basic test
- Unplug the dryer and shut off the gas.
- Access the burner assembly (often behind the lower front panel).
- Inspect the igniter for visible cracks or white spots.
- Disconnect the igniter plug and test resistance across the igniter leads.
Reading guide: A healthy igniter typically shows some resistance (not “OL”). Many common hot-surface igniters fall somewhere around 50 to 400 ohms, depending on style. Also, a cracked igniter can sometimes still show resistance but fail when it heats up, so the visual check matters.
Fix #5: Check flame sensor and gas coils (gas dryers)
If the igniter glows but you still get no flame, or it lights once and then quits heating, these two parts are extremely common culprits.
Flame sensor
- Common symptom: igniter glows, then shuts off, and the burner never lights.
- Basic test idea: many flame sensors show continuity when cool and open when hot, but designs vary. Use your service manual if you can.
Gas valve coils
- Common symptom: dryer heats for a few minutes, then stops heating and will not re-ignite until it cools.
- Coils can test “okay” cold and still fail hot, so symptoms matter a lot here.
If this is where you land, and you do not feel confident, it is a fair time to call a pro. Gas dryers are very fixable, but you want the diagnosis to be right.
Fix #6: Test thermostats and thermistors
Dryers use thermostats, thermistors, or a combination to regulate temperature and prevent overheating. If a control fails open, the dryer may never energize the heater or burner.
Common parts involved
- Cycling thermostat (controls normal on and off heating cycles)
- High-limit thermostat (safety cutoff if temps spike)
- Thermistor (temperature sensor on many newer models)
How to test (basic approach)
- Unplug the dryer.
- Locate the thermostat on the exhaust duct or blower housing (often a small round or oval part with two wires).
- Remove wires and test continuity across the thermostat terminals.
Reading guide: Most cycling and high-limit thermostats show continuity at room temperature, but not every design behaves the same. If it is open at room temp, that is often a strong sign it has failed, but a service manual removes the guesswork.
Thermistors are different: you usually check resistance and compare to a chart in the service manual. If you cannot find a spec, you can still look for obviously wild readings, like “OL” or a dead short, but a manual makes this much more confident.
Multimeter basics
If you have never used a multimeter, you can still troubleshoot a no-heat dryer safely with two settings: continuity and resistance (ohms).
Continuity
- Used for fuses and many thermostats.
- Means “is this path unbroken?”
- Most meters beep when continuity is present.
Resistance (ohms)
- Used for heating elements, igniters, and thermistors.
- “OL” typically means open circuit (broken).
- Near 0 ohms can mean a short (not always, but often suspicious on sensors and elements).
Two tips that save frustration:
- Disconnect at least one wire from the part you are testing, or you may read the whole circuit and get confusing results.
- If your meter has auto-ranging, great. If not, choose the lowest ohms range that still captures the number you expect.
When to call a repairman
If you have confirmed the correct cycle, verified power, cleaned venting, and tested the common safety and heating parts, it may be time to bring in help. Control boards, wiring faults, motor centrifugal switches, and intermittent connection issues can take more experience to diagnose.
What to write down before you call
- Dryer brand and model number (usually inside the door frame)
- Electric or gas
- What you tested and the results (for example: “thermal fuse has continuity”)
- Any error codes or flashing lights
- Whether airflow at the exterior vent feels strong
- Electric: whether the breaker was reset and whether you saw any burnt wiring at the terminal block
That little bit of info can shorten the service call and sometimes reduce the cost.
Quick no-heat checklist
- Confirm heat cycle and temp setting (not Air Fluff)
- Electric: reset the double-pole breaker fully off and back on
- Electric: inspect cord and terminal block for burned connections (unplugged)
- Clean lint screen and lint screen chute
- Confirm strong airflow outside, clean vent line
- Test thermal fuse (replace if open)
- Electric: test heating element for continuity and shorts
- Gas: inspect igniter, test for resistance
- Gas: if igniter glows but no flame, suspect flame sensor or gas coils
- Test thermostats for continuity at room temperature (most models)
If you work through those in order, you will either fix the problem or you will have real, solid troubleshooting notes that make the next step much easier.
About Marcus Vance
Content Creator @ Grit & Home
Marcus Vance is a lifelong DIY enthusiast and self-taught home renovator who has spent the last decade transforming a dilapidated 1970s ranch into his family's dream home. He specializes in budget-friendly carpentry, room-by-room renovations, and demystifying power tools for beginners. Through his writing, Marcus shares practical tutorials and hard-learned lessons to help homeowners tackle their own projects with confidence.