If your dryer is running, tumbling, and sounding normal but it takes two cycles to get towels dry, you are most often dealing with one (or a mix) of these issues: restricted airflow (anywhere in the system), weak or inconsistent heating, or a cycle/sensor problem. The good news is that the most common causes are cheap to fix and very DIY-friendly.
I have been there. Early on, I blamed my old dryer for being "slow" when the real culprit was a vent hose that looked fine from the outside but was packed with lint where it bent behind the machine.
Before you start: 3 quick checks
- Confirm the load is actually damp, not just warm and steamy. Heavy fabrics can feel dry on the outside but hold moisture inside.
- Try timed dry once. If timed dry works better than auto or sensor dry, the moisture sensor may be dirty, the settings may be too "eco," or the sensor may be failing.
- Check the outside vent hood while the dryer runs. You should feel a strong, steady blast of warm air. Make sure the flap opens freely and that any pest screen is not packed with lint.
Tools that help (optional)
- Vacuum with hose and crevice tool
- Dryer vent brush kit
- Screwdriver or nut driver (for clamps/panels)
- Gloves and a flashlight
- Foil HVAC tape (not cloth duct tape) if you need to seal joints
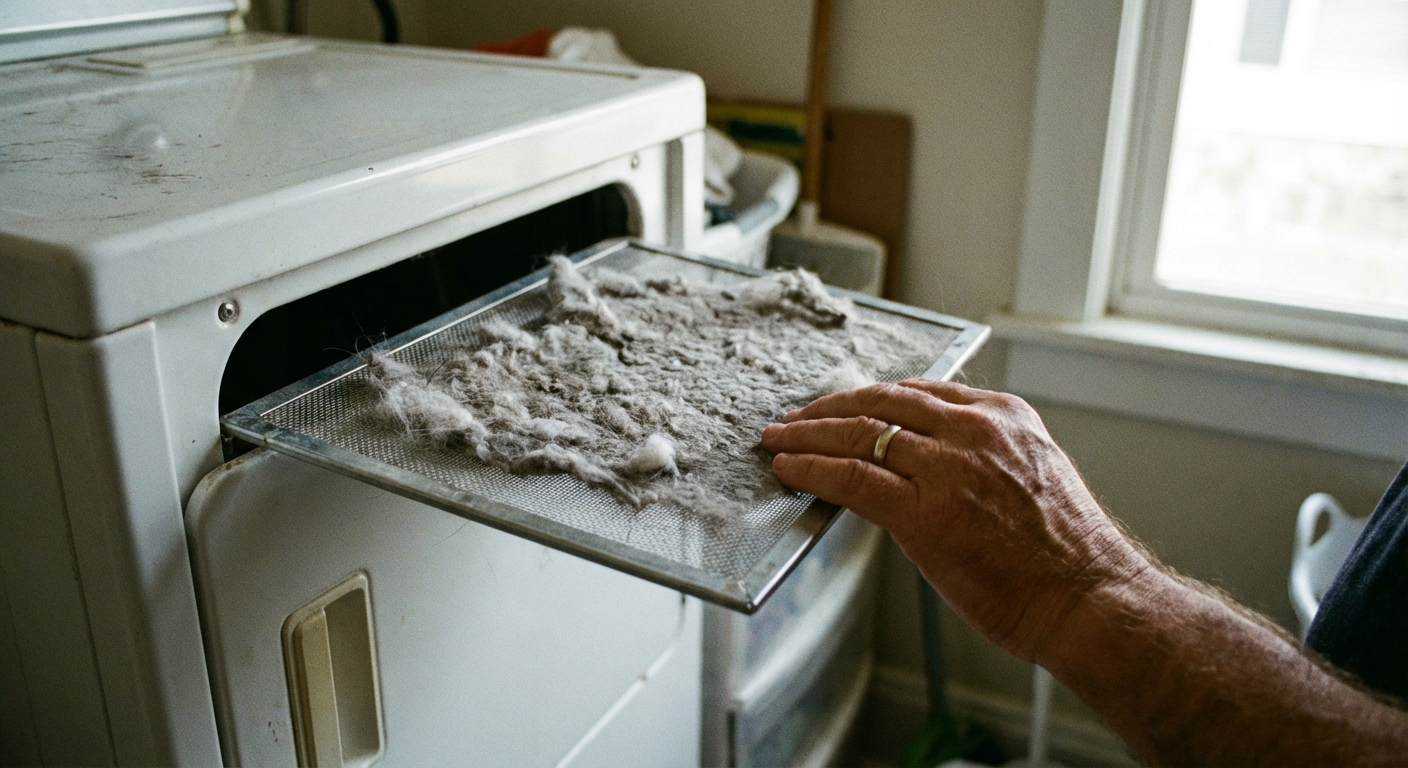
Fix 1: Clean the lint screen the right way
Yes, you clean it. But if dryer sheets or fabric softener are part of your routine, the lint screen can develop a nearly invisible waxy film that blocks airflow like a windshield coated in grease.
What to do
- Remove the lint screen and peel off lint.
- Wash the screen with hot water, a few drops of dish soap, and a soft brush (an old toothbrush works).
- Rinse well and let it dry completely before reinstalling.
DIY test: Run a little water over the mesh. If it beads up or pools instead of flowing through, it is coated and needs washing.
Fix 2: Clear a blocked vent duct (most common)
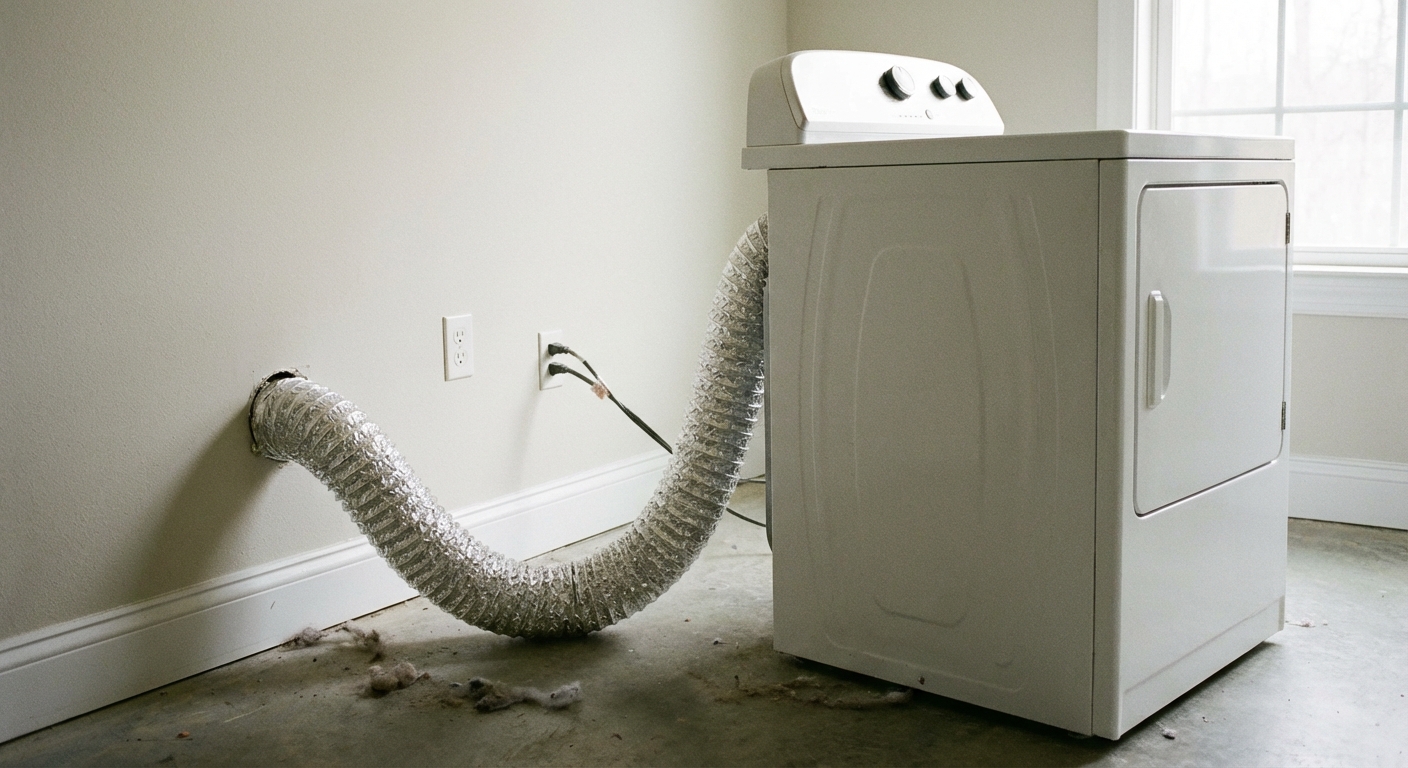
A dryer is basically a hot-air blower. If the vent is restricted, moist air cannot escape, so clothes just keep tumbling in a humid sauna.
Signs your vent is restricted
- Clothes take much longer than they used to
- The dryer feels hotter than normal on the outside
- The laundry room feels humid, even with the vent connected
- Little or no airflow at the exterior vent hood
What to do (safe DIY steps)
- Unplug the dryer. If it is gas, also turn off the gas valve.
- Pull the dryer out carefully and disconnect the vent from the back.
- Vacuum lint from the dryer outlet and the vent hose.
- Check for crushed sections, hard kinks, low spots that collect lint, and a stuck exterior flap.
- Clean from the dryer to the outside termination using a vent brush kit, or hire a vent cleaning service if the run is long or goes through the roof.
Best practice: If you can, use rigid or semi-rigid metal ducting with smooth interior walls. Flexible foil ducts trap lint and kink easily, and plastic or vinyl ducts are discouraged by many building codes because they can be a fire risk.
Safety note: A clogged dryer vent is a common cause of laundry-room fires. If you only do one thing from this list, do this one.
Do not do this
- Do not use screws that protrude into the duct (they snag lint). Use clamps and foil HVAC tape instead.
- Do not run the dryer long-term with the vent disconnected. It dumps moisture and lint into your home and can create a lint hazard.
Fix 3: Stop overloading (or underloading)
Dryers need room for clothes to tumble and for hot air to move through the fabric. When the drum is stuffed, items stay clumped, airflow drops, and the moisture has nowhere to go.
A simple loading rule
- For mixed laundry, aim to fill the drum about 1/2 to 2/3 full.
- For bulky items (towels, hoodies, bedding), go lighter. Two bath towels and a few hand towels can be plenty in a smaller dryer.
Also watch for underloading: One or two items in an auto-dry cycle can confuse moisture sensors and end early. For small loads, add a couple of clean, dry towels or use timed dry.
Fix 4: Check for worn drum seals or lint leaks
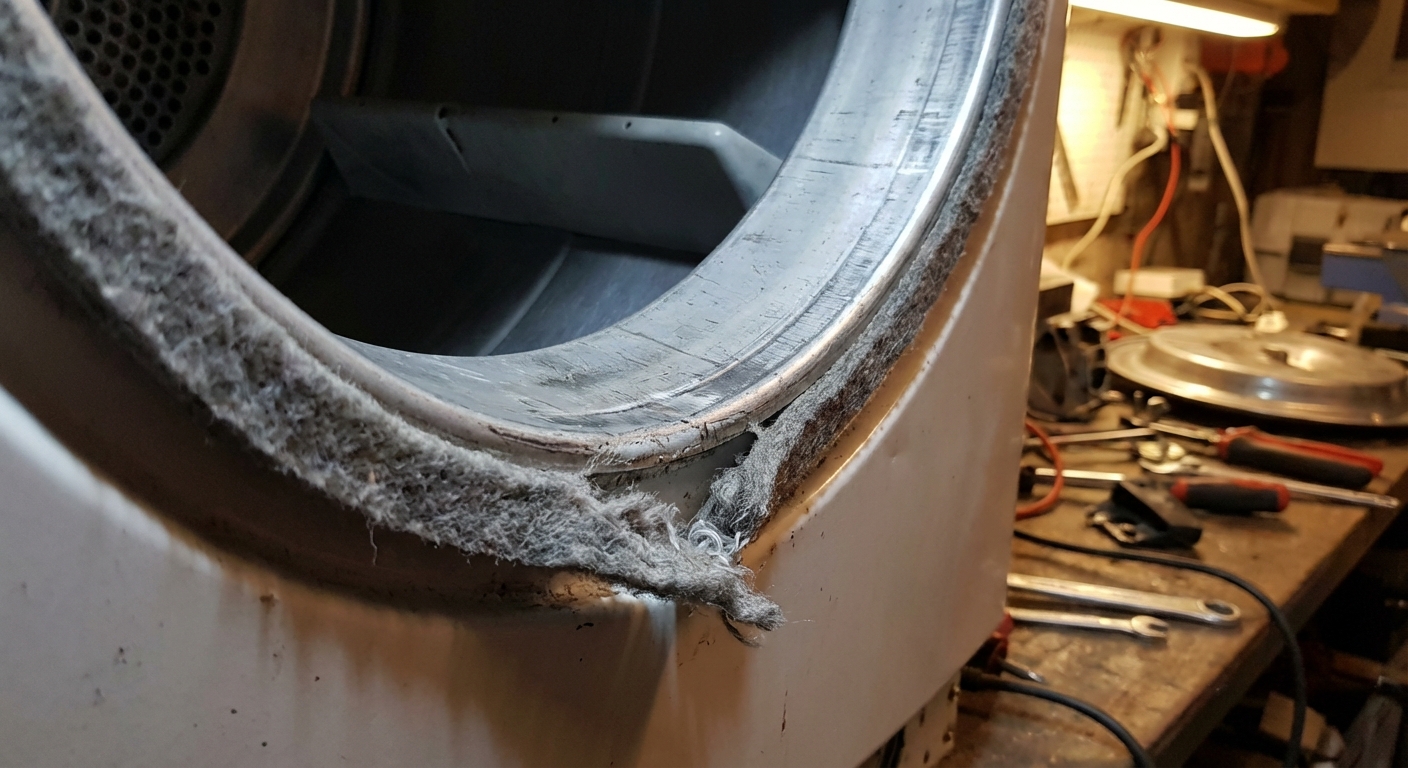
Most dryers use felt seals around the drum (front and sometimes rear). When those seals wear out, some air leaks out of the drum instead of being forced through the clothes and out the vent. This is usually less common than a vent restriction or heating fault, but it is worth checking if the basics look good.
Clues your seals are leaking
- Lint collecting around the dryer door opening or inside the cabinet
- Clothes snagging or small items slipping into gaps
- A scraping sound as the drum turns
- Drying times getting worse even after vent cleaning
Replacing seals is a moderate DIY job. You usually remove the top or front panel, release belt tension, and lift the drum slightly to access the seal. If you are not comfortable opening the cabinet, this is a good handoff point for an appliance tech.
Fix 5: Clean or test the moisture sensor
If your dryer uses an automatic cycle, it relies on a moisture sensor to decide when clothes are dry. On many models, this is two metal strips inside the drum near the lint screen housing. Dryer sheet residue can coat the strips so they stop "seeing" moisture accurately.
What to do
- Locate the sensor bars inside the drum (often near the front).
- Wipe them with rubbing alcohol on a rag or cotton pad.
- Run a normal load on auto dry and see if the cycle length improves.
If it still dries poorly on auto but timed dry works: The sensor wiring or control board could be failing, or the cycle settings may be too low-heat for the load. At that point, look up your model number and check the sensor with a multimeter, or call a pro.
Fix 6: Confirm it is heating strongly
A dryer can "heat a little" and still take forever. Weak heat often comes from a failing heating component, poor electrical supply (electric dryers), or burner issues (gas dryers). High household humidity can also add time because the dryer is fighting moist incoming air.
Quick heat check
- Run the dryer on high heat for 3 to 5 minutes.
- Go outside and hold your hand near the airflow at the vent hood (do not touch metal louvers). It should feel noticeably warm and steady.
- If airflow is strong but air is barely warm, move to the gas vs electric section below.
Vented vs ventless dryers
Most tips above assume a standard vented dryer. If you have a ventless condenser or heat-pump dryer, slow drying is often caused by a clogged condenser filter, lint filters you missed, or restricted intake airflow. Check your manual for the exact filter locations and cleaning schedule. The "outside vent hood" step does not apply because there may be no external vent.
Internal airflow: do not forget inside lint
If your outside vent is clear and airflow still feels weak, lint may be building up in the internal ducting, the lint screen housing, or the blower wheel housing. That can restrict airflow even when the vent hose looks clean.
DIY boundary: Basic vacuuming around the lint screen chute is fair game. If you need to open the cabinet to access the blower area, unplug the dryer (and shut off gas if applicable) and consider calling a pro if you are not comfortable working around wiring and sharp sheet metal.
Gas vs electric: what to check
The airflow fixes above apply to both. The difference is how each dryer makes heat, and what tends to fail.
Electric dryer checks
Electric dryers typically use a 240V heating element. A common failure mode is that the dryer still runs on 120V, but the heater is weak or dead, so it tumbles forever with little heat.
- Check your breaker: Electric dryers usually have a double breaker. One side can trip and the dryer may still run but not heat properly. Reset the breaker fully (off, then on).
- Heating element: If airflow is good and power is correct, a worn element can produce reduced heat or intermittent heat.
- Thermal fuse and thermostats: Some failures cause no heat at all, but others can cause cycling that is too cool, especially if airflow has been restricted for a while.
- Thermistor or cycling control: A sensor that reads wrong can make the dryer run cooler than it should.
DIY comfort level: Testing an element, fuse, thermostat, or thermistor requires unplugging the dryer and using a multimeter. If you are new to electrical testing, this is a solid time to call an appliance tech.
Gas dryer checks
Gas dryers use an igniter and a burner assembly. Many gas dryers will ignite at first, then stop reheating mid-cycle due to a failing part. That creates the classic complaint: the first 10 minutes feel hot, then it takes forever to finish.
- Listen for burner cycling: After starting, you may hear a whoosh as it ignites. It should cycle on and off during the load.
- Igniter and flame sensor: If the igniter glows but the burner does not light, the flame sensor or gas valve coils may be suspect.
- Gas valve coils: These often fail when warm. The burner lights once, then will not relight later, stretching drying times.
Safety note: If you smell gas at any point, shut off the gas valve, ventilate the area, and stop troubleshooting until the issue is resolved.
When to stop DIY and call a pro
- You have good airflow, a clean vent path (including internal lint areas you can safely reach), correct loading, and drying is still slow
- The dryer shows error codes, overheats, or shuts down mid-cycle
- You suspect a gas ignition problem and are not comfortable testing components
- Your vent run is long, goes through a crawlspace or attic, or terminates on the roof and you cannot access it safely
- You have a ventless or heat-pump dryer and are not sure how to access the condenser system
Order of operations
- Wash the lint screen with soap and water
- Check settings (avoid low-heat eco modes for heavy towels) and try timed dry once
- Check airflow at the exterior vent hood and confirm the flap opens
- Disconnect and inspect the vent hose for kinks, crushed spots, and lint
- Clean the full vent run
- Adjust load size
- Clean the moisture sensor
- Check for internal lint restrictions (lint chute, blower housing if accessible)
- If needed, move into electric or gas heating diagnostics
Most slow-drying dryers I have helped friends troubleshoot were fixed by steps 1 through 5. Start there, and you may save yourself the cost of an unnecessary service call and a long weekend of re-washing laundry.
About Marcus Vance
Content Creator @ Grit & Home
Marcus Vance is a lifelong DIY enthusiast and self-taught home renovator who has spent the last decade transforming a dilapidated 1970s ranch into his family's dream home. He specializes in budget-friendly carpentry, room-by-room renovations, and demystifying power tools for beginners. Through his writing, Marcus shares practical tutorials and hard-learned lessons to help homeowners tackle their own projects with confidence.