🚨 In a DIY emergency or rush?
Skip the details and jump straight to our 30-second cheat sheet for the most crucial info.
That white, dusty stuff on a basement wall has spooked more homeowners than a creak at midnight. I have been there. The first time it showed up in our 1970s ranch basement, I grabbed a bleach bottle and a scrub brush like I was about to go to war with “mold.”
Good news: a lot of the time, it is efflorescence, not mold. But a quick reality check: you cannot always confirm that with a glance alone. Efflorescence is a symptom of moisture moving through masonry. It is a helpful clue, and it means you have water behavior to manage.
At a glance
- Looks like: white, chalky powder or crystalline streaks on concrete or block.
- What it means: moisture is moving through masonry and leaving minerals behind.
- Do first: fix roof water and grading, then manage basement humidity.
- Clean second: dry brush and HEPA-vac. Avoid turning it into airborne dust.
- If unsure: treat it like “unknown” and consider inspection or testing, especially near finished materials.
What it is
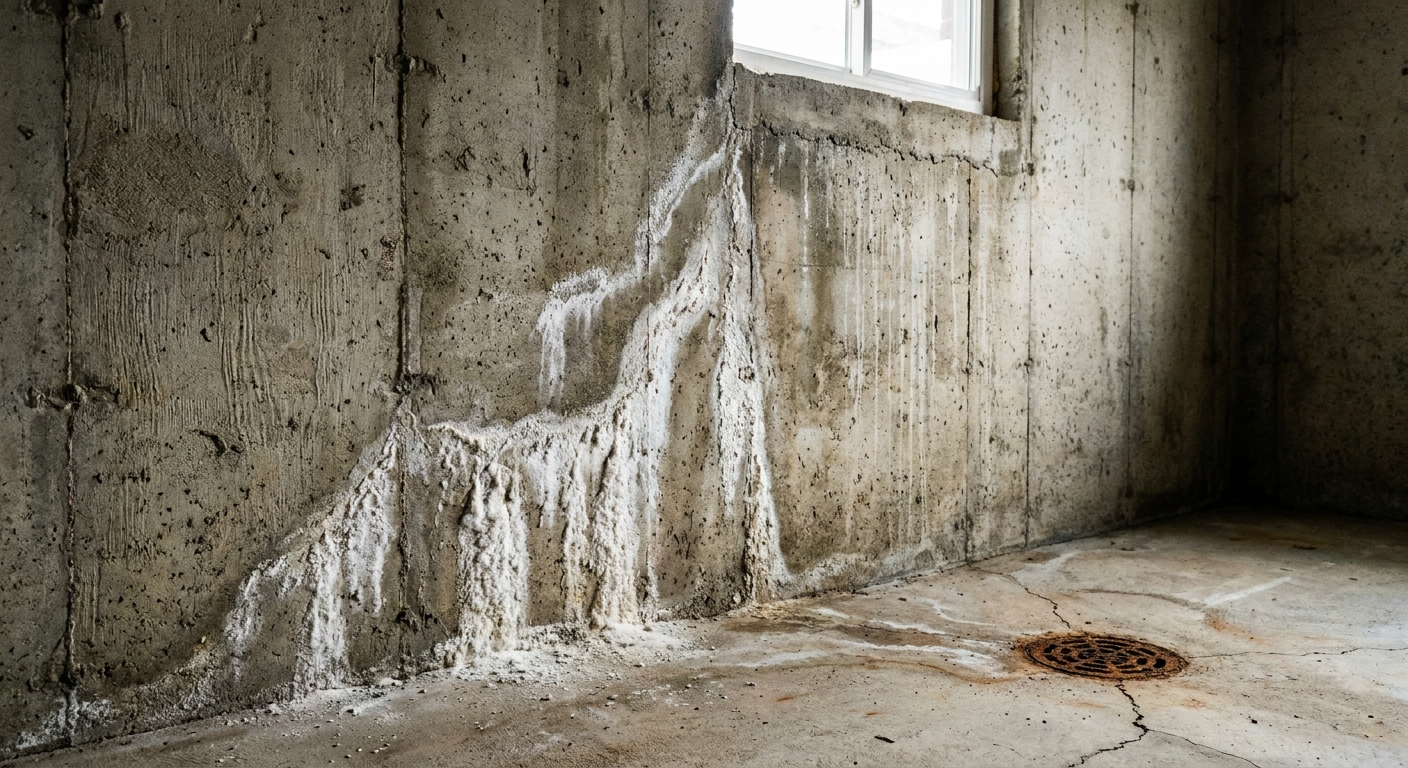
Efflorescence is a salt deposit that forms when water travels through concrete, block, brick, or mortar and then evaporates at the surface. The water carries dissolved minerals and salts. When the water leaves, the minerals stay behind as a white, gray, or sometimes slightly yellow powdery crust.
Efflorescence vs lime deposits
Some basements also get hard, crusty white buildup that is more like lime leaching (calcium deposits) than fluffy salt. Homeowners call it all “efflorescence,” and the fix still starts the same way: reduce the moisture that is moving through the wall.
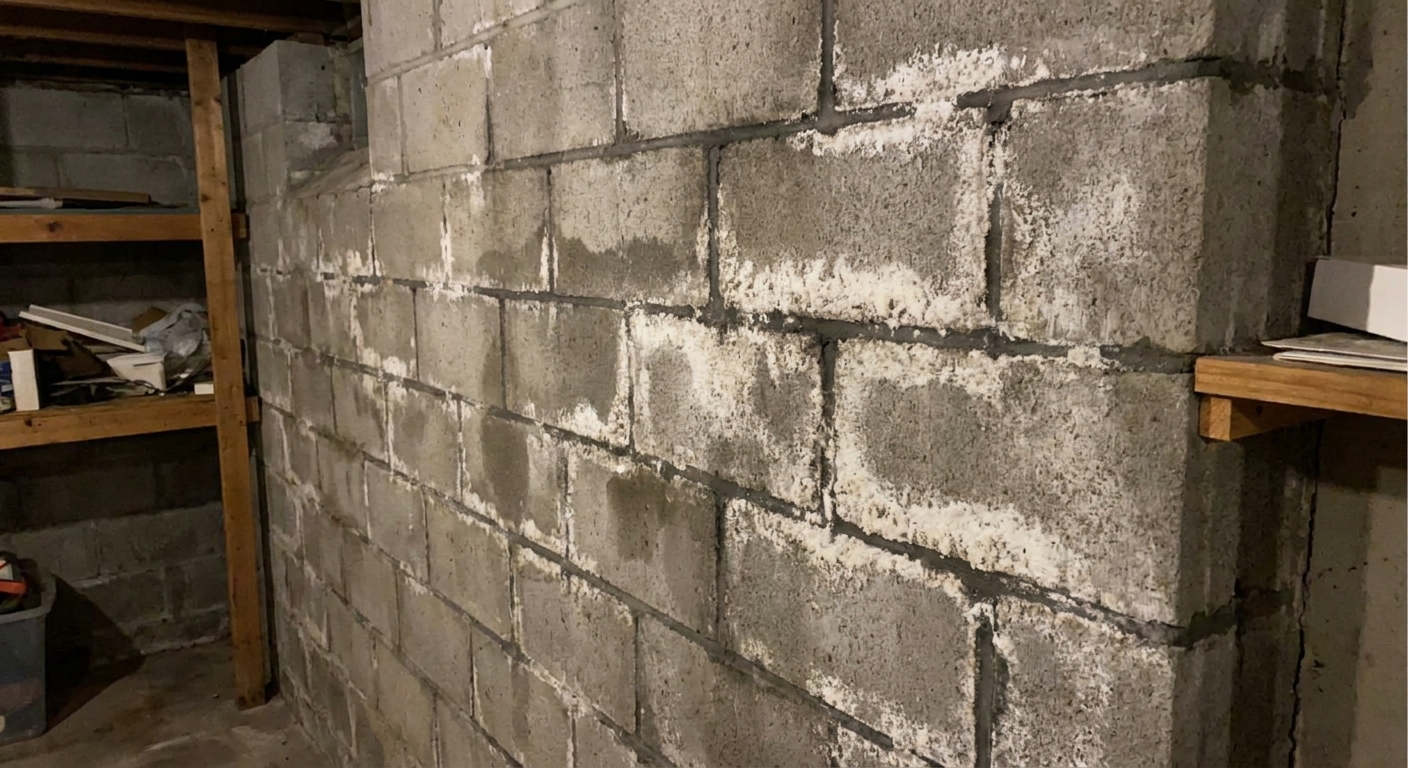
Where you will see it
- Basement walls, especially along the bottom 6 to 18 inches
- Mortar joints on concrete block foundations
- Basement floors, especially near cracks, control joints, or the perimeter
- Behind stored items where airflow is poor and evaporation is slow
Think of it like a mineral tide line left behind by water movement.
Efflorescence vs mold
Efflorescence and mold can both look like “something” on a wall, but they behave differently.
Clues it is efflorescence
- Color and texture: often white and chalky, sometimes crystalline
- Location: commonly near the floor, at the wall-floor joint, or along mortar joints
- Brushes off as dust: a dry brush often removes it easily
- Returns in the same patterns: comes back after wet weather or seasonal humidity changes
Clues it might be mold
- Fuzzy or slimy texture
- Green, black, brown, or mixed colors
- Musty odor
- Growth on wood, paper-facing drywall, carpet, or stored cardboard rather than just masonry
A simple DIY check (no lab coat required)
This is a screening check, not a final diagnosis. Put on gloves and a dust mask. Rub a small spot with a damp paper towel.
- If it dissolves and smears like salt, that leans toward efflorescence.
- If it stays attached or looks like it has structure (specks, fuzz), treat it as potential mold until you know otherwise.
Two important caveats: chalking paint, concrete dust, and some coatings can also smear. And some mold can wipe too. If you are unsure, or the area is large, or you have respiratory issues, do not disturb it more than necessary. Consider a professional inspection or testing.
Also true: efflorescence can coexist with mold. If you have finished walls, wood framing, or insulation that has been wet, do not assume “it is just salts.”
Is it dangerous?
Efflorescence is generally a low-hazard nuisance, but it can still irritate your lungs and eyes when disturbed. The bigger issue is what it represents: moisture.
Risks to watch
- Moisture means potential mold elsewhere: even if salts are not the problem, the water feeding them can also feed mold on organic materials.
- Paint and coatings fail: efflorescence can push paint off masonry or cause bubbling and peeling.
- Surface deterioration: repeated wetting and drying can weaken mortar joints or spall concrete surfaces over time.
- Basement air quality: damp basements often come with musty odors and elevated humidity.
When to take it seriously
- You see active water (drips, puddles, running water)
- The wall feels wet to the touch for long periods
- Deposits are heavy and crusty and the surface is flaking or soft
- There are finished basement materials nearby (drywall, baseboards, carpet)
- Anyone in the home has persistent symptoms that improve when away from the basement
Why it happens
Efflorescence needs one thing: water movement through masonry. That water can come from outside, inside, or both.
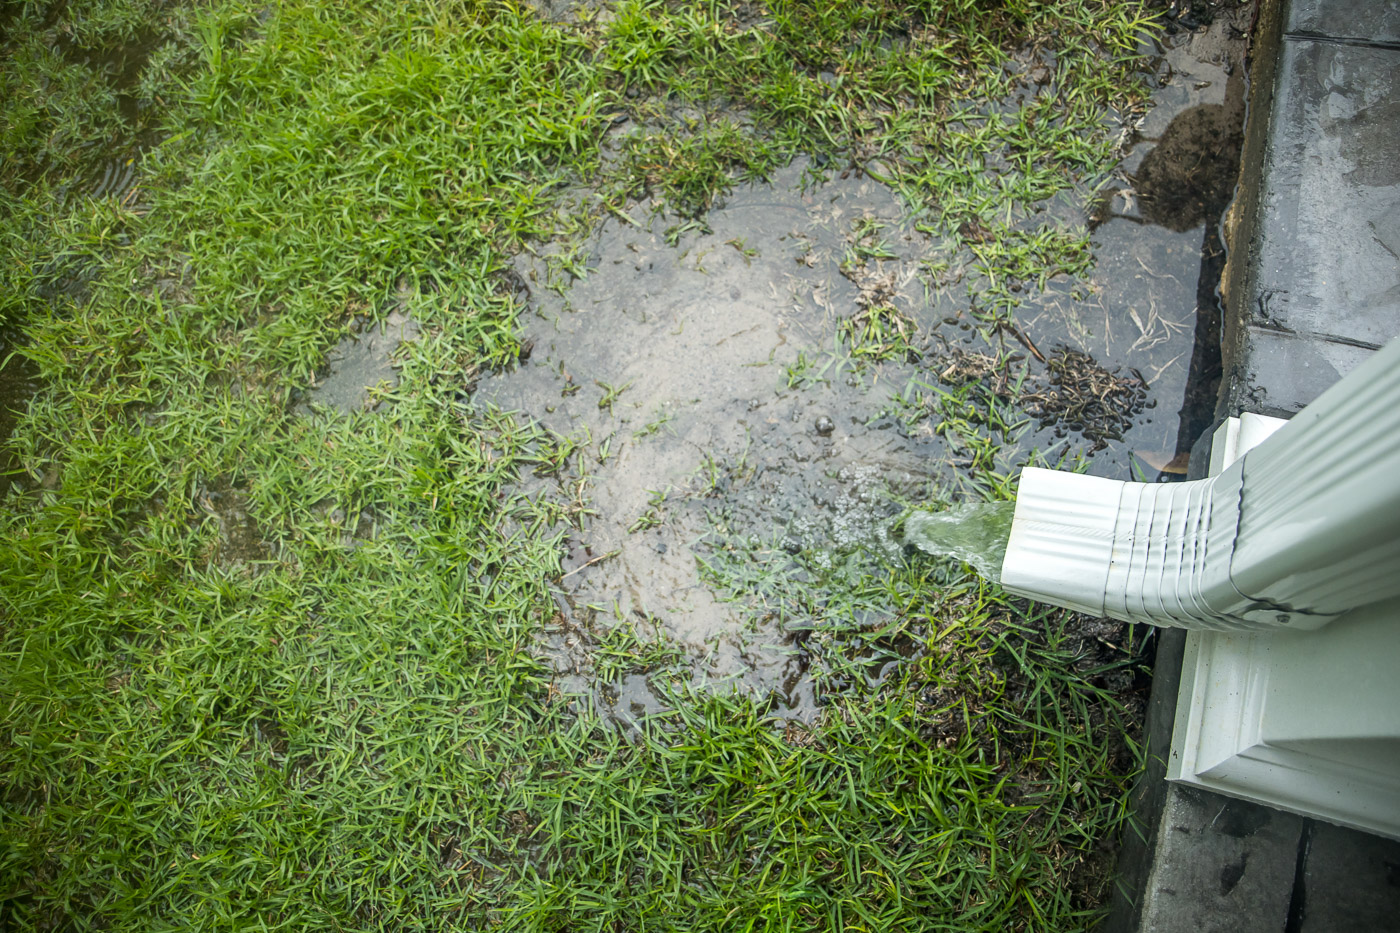
Common exterior sources
- Rainwater collecting at the foundation due to poor grading
- Gutters and downspouts dumping water too close to the house
- Hydrostatic pressure from saturated soil pushing moisture through the wall or slab
- High water table or seasonal groundwater
- Sprinklers soaking the foundation repeatedly
Common interior sources
- High indoor humidity condensing on cool basement walls and floors
- Dryer vent issues or unvented appliances adding moisture
- Plumbing leaks that keep concrete damp (even small, slow ones)
- Newer concrete that is still curing and releasing moisture
Here is the homeowner reality: if you only scrub the white stuff off, but you do not change the moisture pattern, it will likely come back.
Outside vs inside fixes
One of the biggest basement misconceptions is that you must pick one approach: either “seal it from the inside” or “dig up the yard.” In the real world, the best fix is usually layered.
Start outside (cheap wins first)
- Extend downspouts: aim for 6 to 10 feet away from the foundation when possible.
- Clean gutters: overflowing gutters can soak the foundation wall like a slow waterfall.
- Fix grading: a common target is about 6 inches of fall over the first 10 feet, but your lot, hardscaping, and local rules may limit what is realistic.
- Check hardscaping: patios and walkways that slope toward the house can funnel water directly to the basement.
Then manage water inside
- Sump pump: helps manage groundwater in many homes, especially when paired with an interior drain system or when the slab area is collecting water.
- Interior perimeter drain: captures water at the wall-floor joint and routes it to the sump.
- Dehumidifier: reduces condensation and general dampness that can feed recurring deposits.
My rule of thumb: if your basement gets worse right after rain, start with exterior drainage and gutter work. If it gets worse in summer with no rain, suspect humidity and condensation.
Quick condensation check
If you are not sure whether you are dealing with seepage through masonry or summer condensation, try this simple check:
- Tape a square of plastic sheet (or a freezer bag) tightly to the wall or floor.
- Wait 24 to 48 hours.
- Moisture behind the plastic can point to moisture coming through the masonry.
- Moisture on the room side can point to condensation from humid air.
This is not perfect, but it can help you choose what to tackle first.
How to clean it safely
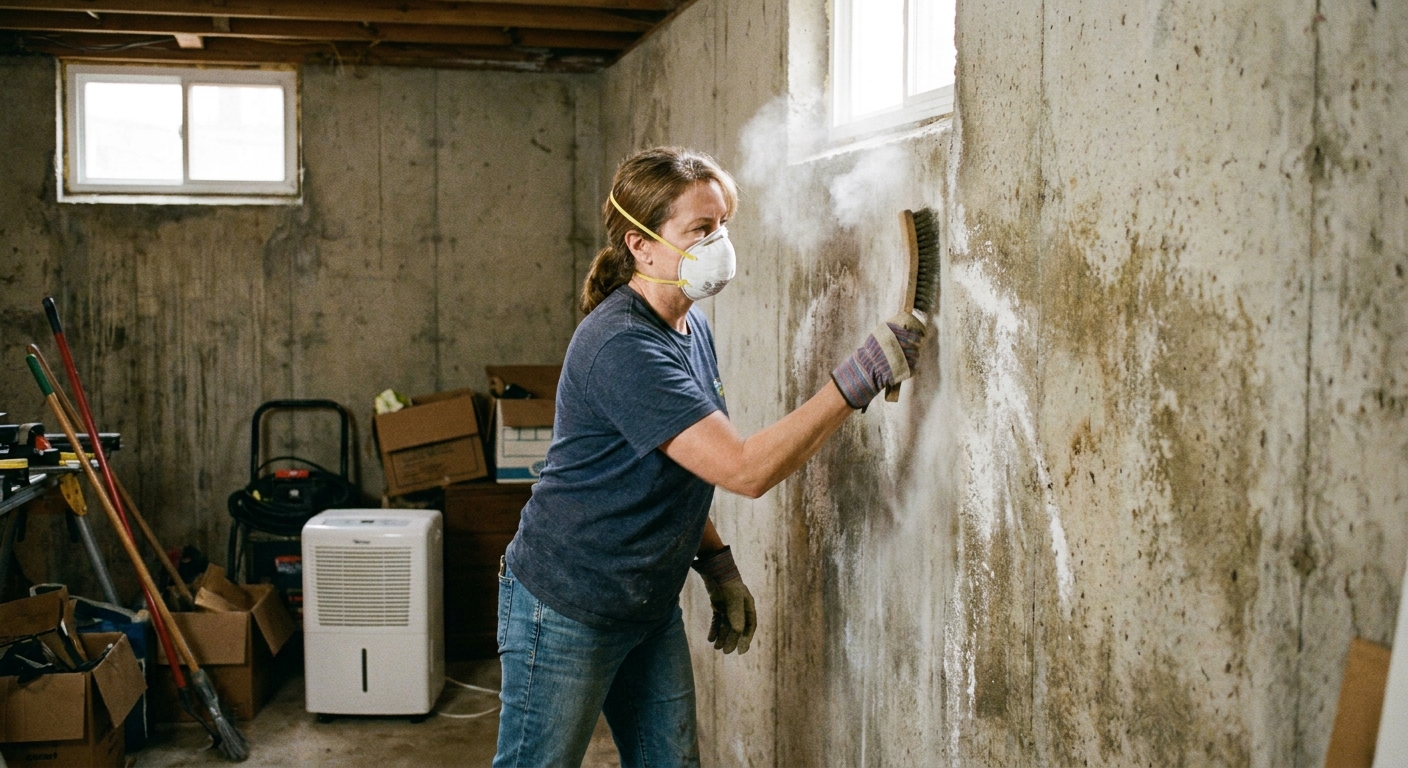
Cleaning is fine, but treat it like sawdust: you want to remove it without grinding it into the surface or sending it into your lungs.
Do
- Wear PPE: gloves, safety glasses, and at least an N95-style mask.
- Dry brush first: use a stiff nylon brush to loosen deposits.
- Vacuum with a HEPA shop vac if you have one to capture fine powder. Bag and dispose of the vacuum contents carefully.
- Avoid sweeping: it aerosolizes the dust.
- Use mild cleaners first: warm water and a little dish soap can help on light residue.
- Rinse and dry: after wet cleaning, get the area dry again with airflow and a dehumidifier.
Don’t
- Do not lead with bleach: bleach does not “kill” efflorescence because it is not alive. It also adds moisture and fumes in a tight space.
- Do not wire brush aggressively on soft masonry: you can damage mortar joints and create more surface for salts to cling to.
- Do not paint over it: paint tends to fail if salts are still migrating through the wall.
- Do not use acids casually: vinegar or muriatic acid can etch concrete, damage mortar, and create safety hazards.
About acid-based cleaners
Acid-based masonry cleaners can remove mineral deposits effectively, including some stubborn crusts. The catch is that they can also damage surfaces and create safety issues if used incorrectly. If you go this route, do it only after you have addressed moisture as best you can, ventilate well, follow the product instructions, and test a small spot first.
Safety note: never mix cleaners, and do not use harsh chemicals in a poorly ventilated basement.
How to keep it from coming back
Efflorescence is stubborn because it is not a stain. It is a delivery system: water carries minerals to the surface. Stop the delivery and the problem fades.
Step-by-step plan
- Confirm the pattern: take a quick photo now, then compare after heavy rain and after a week of dry weather.
- Fix roof water first: gutters clean, downspouts extended, splash blocks or drain lines working.
- Improve grading: add soil and compact it so water does not run toward the foundation.
- Lower basement humidity: run a dehumidifier with a drain hose to a sump, floor drain, or condensate pump. Aim for under 50% RH, adjusting for comfort and season.
- Increase airflow: do not store bins and cardboard tight against foundation walls.
- Address persistent seepage: consider sump and/or perimeter drainage if water is entering at the wall-floor joint or through the slab.
What about waterproofing paint?
Interior masonry coatings can reduce moisture vapor coming into the basement, but they are not magic. If you have active water pressure from outside, coatings often blister and peel. If you want to coat the wall, do it only after cleaning, drying, and improving drainage so you are not trapping moisture in the wall.
Efflorescence and cracks
Efflorescence often shows up along cracks, seams, or joints because those are easy pathways for moisture. That does not automatically mean the crack is structurally serious, but it does mean water is using it.
What it can tell you
- The crack is wet sometimes, even if you never see dripping.
- Water is moving through the wall or slab and evaporating at the surface.
- The timing matters: if deposits increase after storms, exterior drainage is likely part of the story.
When to call in help
- Cracks that are growing or changing quickly
- Stair-step cracks in block or brick that widen over time
- Walls that are bowing, bulging, or leaning
- Any crack paired with significant water entry you cannot control with basic drainage and humidity steps
If you want a deeper crack-specific walkthrough, check the foundation crack content on Grit & Home. This article is focused on what the white deposits mean and how to get ahead of the moisture cycle that causes them.
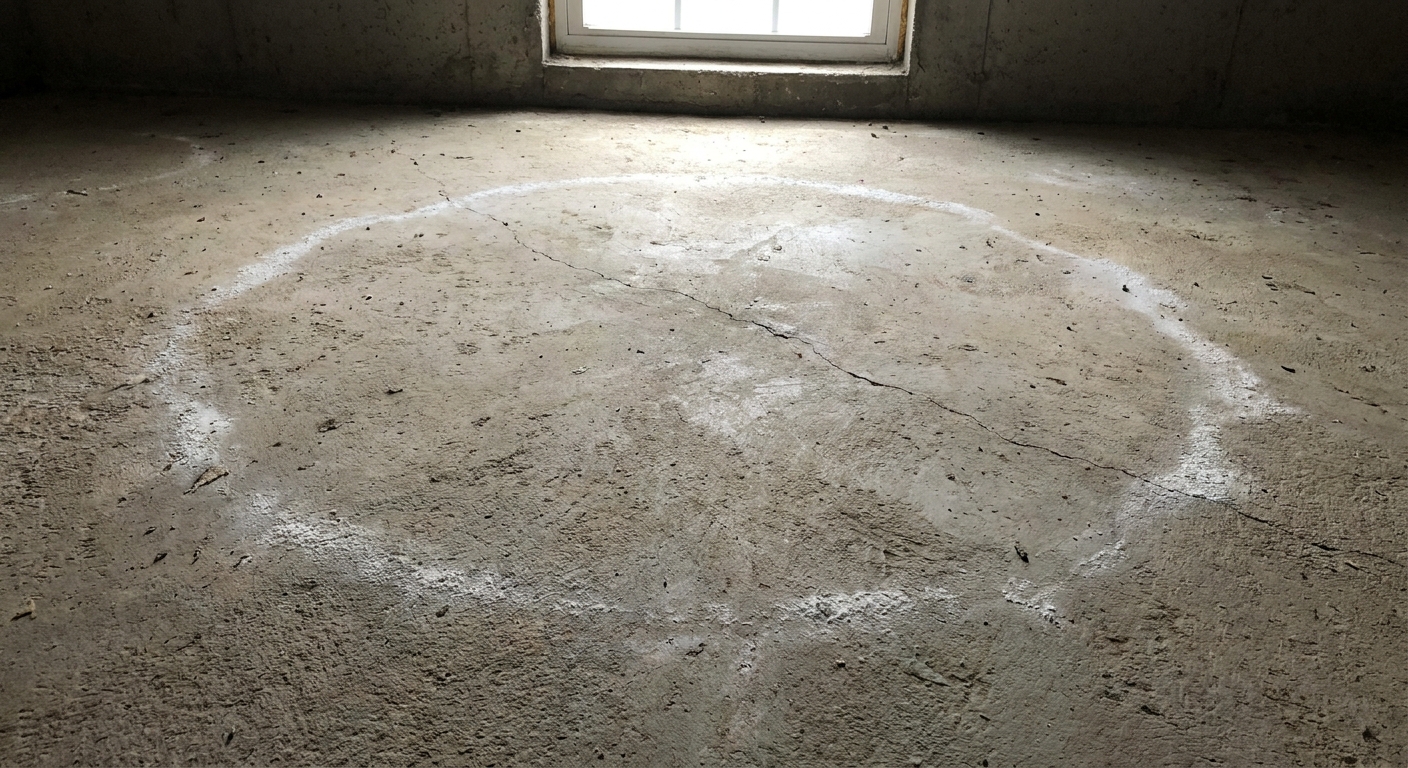
Basement floor notes
When efflorescence appears on a basement floor, it commonly shows up as a white haze, a powdery ring around a crack, or a crystalline crust at the perimeter.
What it usually points to
- Moisture vapor coming up through the slab (common in older homes without a vapor barrier)
- Water entering at the wall-floor joint
- Condensation if the floor is cooler than the humid air above it
If you are planning flooring
Do not rush into carpet or click-lock vinyl on a slab that is producing efflorescence. Do the moisture checks your flooring manufacturer requires. Depending on the product, that might include standard tests like calcium chloride kits or in-slab RH testing. If you are not sure, ask the flooring retailer or installer what is required in writing.
When to call a pro
- Standing water, frequent puddles, or repeated wet carpet or drywall
- Large areas of growth on finished materials or a persistent musty odor you cannot control
- Health concerns that seem linked to the basement environment
- Structural red flags like bowing walls or rapidly changing cracks
- Waterproofing quotes that only focus on coatings without talking about drainage, gutters, and where the water goes
FAQ
Will it go away on its own?
Sometimes it slows down in drier seasons, but it usually returns until the moisture movement is reduced. Cleaning is temporary if the cause remains.
Can I seal the wall from the inside?
You can seal for cosmetic reasons, but sealing without managing water can trap moisture and lead to peeling coatings or hidden dampness. Drainage and humidity control come first.
Does it mean I have a leak?
It means water is moving through masonry at some point. That could be rain-driven seepage, groundwater pressure, or interior humidity condensing. Your job is to identify which pattern fits your house.
Is it okay to scrape it off and vacuum it?
Yes. Dry brush and HEPA-vac is the best first approach. Wear a mask and avoid spreading dust through the house.
The 30-Second Cheat Sheet
Essential takeaways for: Efflorescence in Basements
What it is: Efflorescence is a white, chalky salt deposit left behind when moisture travels through concrete, block, brick, or mortar and evaporates at the surface.
Efflorescence vs mold: Efflorescence is often white and powdery and brushes off like dust. Mold is often darker, fuzzy or slimy, and grows on organic materials like wood, paper, and drywall.
Main risk: The salts are usually a nuisance. The moisture that creates them is the real problem and can lead to paint failure, masonry wear, and mold in finished materials.
Clean it safely:
- Wear gloves, eye protection, and an N95-style mask.
- Dry brush first, then HEPA-vac the powder. Avoid sweeping.
- Use mild soap and water only if needed, then dry the area well.
- Avoid bleach as a “fix.” Avoid acids unless you understand the risks and follow directions.
Stop it from coming back:
- Extend downspouts 6 to 10 feet, clean gutters, and improve grading so water slopes away (as lot and local rules allow).
- Run a dehumidifier and improve airflow along foundation walls. Aim for under 50% RH.
- If water persists at the wall-floor joint or through the slab, consider a sump and/or interior perimeter drain.
If it shows up along cracks: It often means water is using that path. Monitor changes and get professional help if cracks grow, walls bow, or you have heavy water entry.
💡 Tip: Scroll up to read the full article for detailed, step-by-step instructions.
⬆️ Back to topAbout Marcus Vance
Content Creator @ Grit & Home
Marcus Vance is a lifelong DIY enthusiast and self-taught home renovator who has spent the last decade transforming a dilapidated 1970s ranch into his family's dream home. He specializes in budget-friendly carpentry, room-by-room renovations, and demystifying power tools for beginners. Through his writing, Marcus shares practical tutorials and hard-learned lessons to help homeowners tackle their own projects with confidence.