🚨 In a DIY emergency or rush?
Skip the details and jump straight to our 30-second cheat sheet for the most crucial info.
When an electric water heater acts up, most homeowners jump straight to “bad elements.” Sometimes that is true. But a huge chunk of no hot water and not enough hot water calls come down to two smaller parts hiding behind the access panels: the upper thermostat, the lower thermostat, and the high-limit safety switch (often called the ECO, for Energy Cut Off).
I have chased my tail on this before, swapping an element only to realize the thermostat was not sending power where it should. So in this guide, I am going to walk you through a safe, beginner-friendly way to:
- Cut power the right way (and verify it is truly off)
- Reset the high-limit ECO
- Use a multimeter for basic checks
- Diagnose typical upper vs lower thermostat symptoms
- Replace a thermostat and match the correct part
Quick note: This article is for electric tank-style water heaters, not gas units and not tankless. If you are unsure which you have, electric tanks usually have two rectangular access panels on the side and no flue pipe going up the top.
Safety first: power off and verify
Electric water heaters run on 240 volts. That can seriously hurt or kill you. The good news is the safety routine is simple and repeatable.
Step 1: Turn off the correct breaker
- Find the breaker labeled Water Heater (usually a double-pole 30A breaker).
- Switch it fully OFF.
Step 2: Confirm power is actually off
Do not trust the label. Verify at the heater.
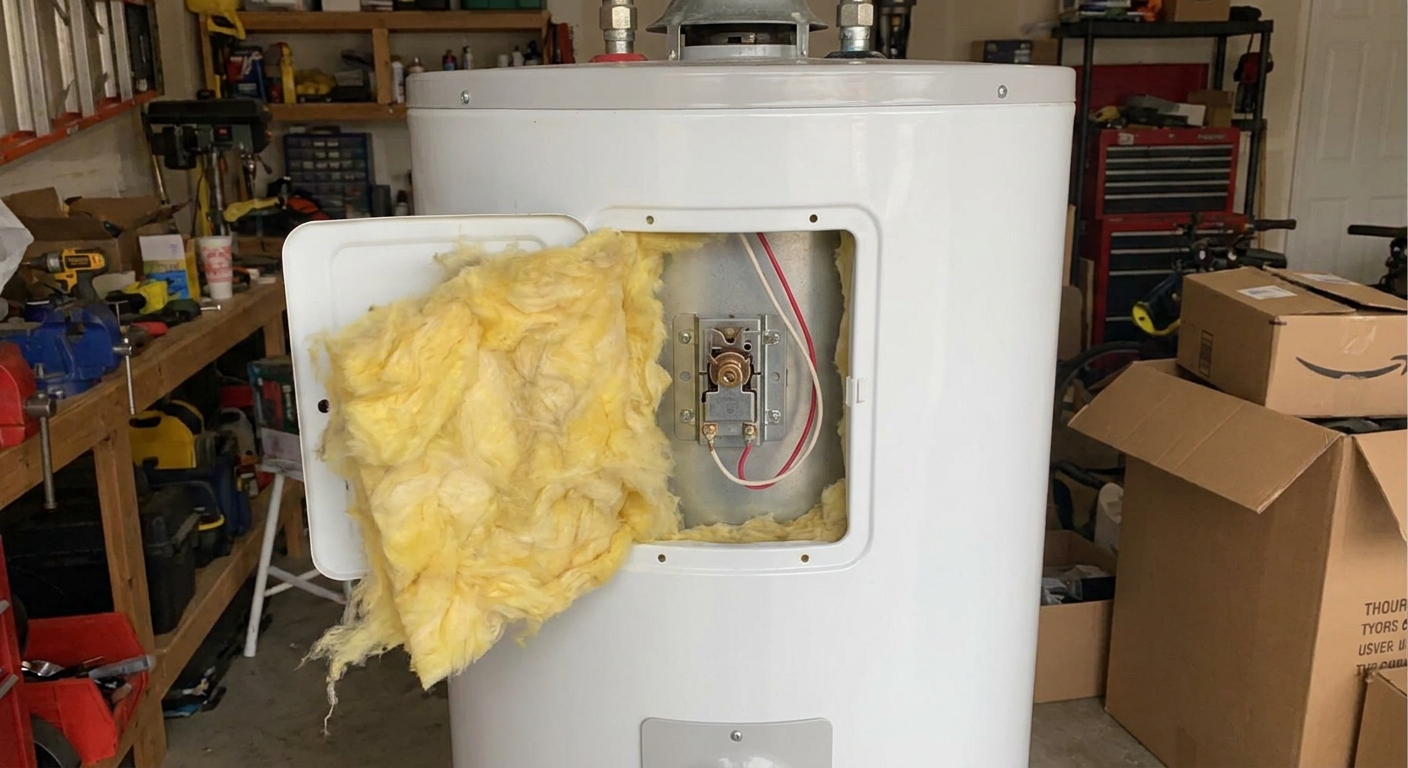
- Remove the upper access panel cover (usually 2 screws).
- Peel back insulation and the plastic safety shield if present.
- Use a non-contact voltage tester first for a quick check.
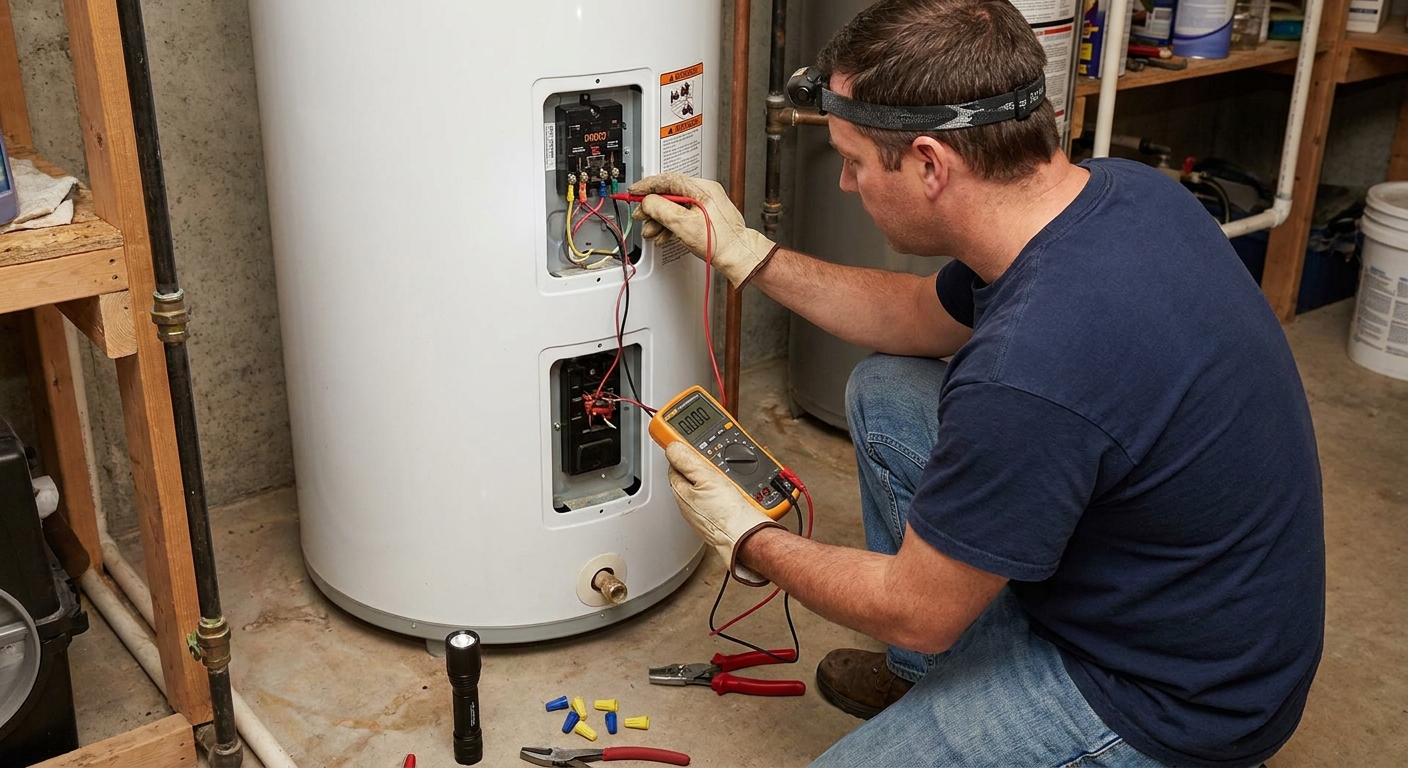
- Then use a multimeter to confirm.
Multimeter check (recommended): Set to AC volts (VAC). Carefully test the incoming power three ways:
- L1 to L2 (hot to hot): should read 0 volts.
- L1 to ground (hot to tank ground): should read 0 volts.
- L2 to ground (hot to tank ground): should read 0 volts.
This matters because a faulty double-pole breaker or wiring issue can leave one leg still live. In that case, reading only hot to hot can fool you into seeing 0V even though one wire can still shock you at around 120V when you touch ground.
If you read voltage on any of these tests, stop and go back to the breaker panel. If you are not comfortable doing voltage checks, call a pro. It is not worth guessing around 240V.
Meet the parts: upper thermostat, lower thermostat, and ECO
An electric water heater typically has:
- Upper thermostat: Controls the top element and also decides when to hand off power to the lower thermostat.
- Lower thermostat: Controls the bottom element and maintains most of your usable hot water during normal operation.
- ECO high-limit reset: A safety switch mounted on the upper thermostat assembly that trips if the water gets too hot (or if the thermostat misbehaves).
Important: On most standard residential units, the heater does not heat both elements at the same time. It alternates. The upper section heats first, then the upper thermostat sends power down to the lower thermostat.
Common symptoms: upper vs lower thermostat
If the upper thermostat or ECO is the problem
- No hot water at all
- Water gets a little warm at the very top, then goes cold fast
- Breaker trips soon after resetting
- ECO button is tripped (clicks when reset)
The upper thermostat is the “traffic cop.” If it fails, the lower thermostat may never get power.
If the lower thermostat is the problem
- Not enough hot water (you get a short shower, then lukewarm)
- Hot water starts fine, then temperature drops as the tank draws down
- Upper area feels hot, but overall capacity is low
When the lower thermostat fails open or fails to call for heat, you often get “some” hot water, just not the amount you are used to.
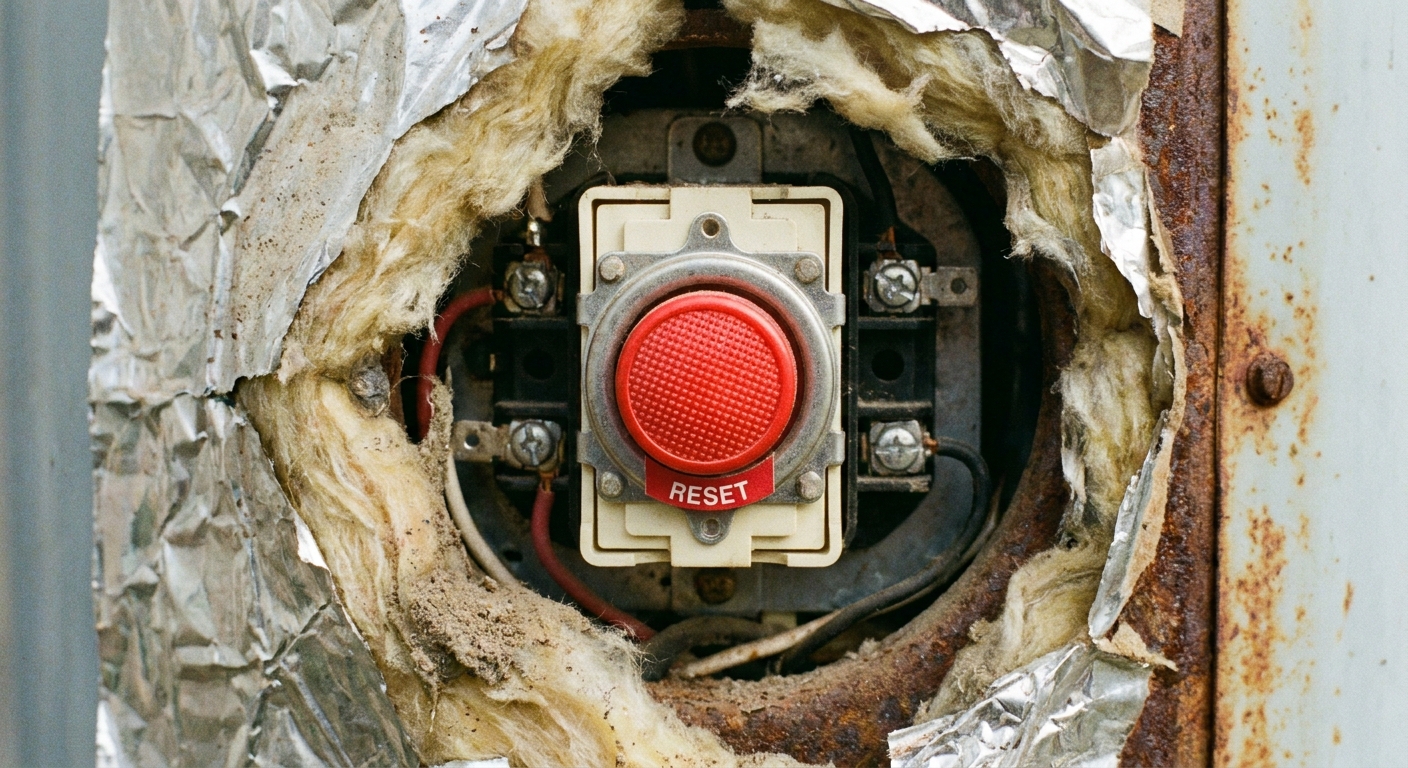
Resetting the ECO high-limit switch
This is the first thing I check when a homeowner says, “Suddenly, no hot water.” The ECO is designed to shut the heater down if it senses overheating.
How to reset it
- Confirm the breaker is OFF.
- Open the upper access panel and pull back insulation.
- Find the small red button on the upper thermostat assembly (often labeled reset).
- Press firmly. If it was tripped, you will usually feel or hear a click.
- Reinstall the plastic shield, insulation, and access cover.
- Turn the breaker back ON and wait 30 to 60 minutes.
If it trips again, do not keep resetting it. Repeated trips usually mean a failing thermostat, a wiring issue, or an element problem. The ECO is a safety device. Treat repeat trips as a real fault that needs diagnosis.
Multimeter basics: continuity in plain English
For thermostat checks, you will commonly use continuity or ohms mode with power OFF.
- Continuity means the path is unbroken. The meter beeps or shows near-zero resistance.
- No continuity means an open circuit. The meter shows OL or very high resistance.
Two big tips:
- Remove at least one wire from the terminal you are testing so you do not read through other components.
- Take a clear photo of wiring before pulling anything off. I have saved myself with that habit more times than I can count.
Before you blame the thermostat: quick visual checks
With power OFF and the upper panel open, look for the obvious stuff first:
- Melted wire insulation or browned terminals
- Loose spade connectors or loose screw terminals
- Burn marks on the thermostat body
- Water leaks dripping onto electrical parts
If you see heat damage, plan on replacing the damaged connector or wire end as well, not just the thermostat.
How to test an electric water heater thermostat
There are a few ways to test, and different heater brands route terminals slightly differently. What I am giving you here is the practical homeowner approach that catches the most common failures.
What you are checking
A thermostat is basically a temperature-controlled switch. When it is calling for heat, it should “close” and pass power onward. When the water is hot enough, it “opens” and stops sending power.
Tools
- Multimeter (continuity and AC volts)
- Phillips or nut driver for access panels
- Small flathead for thermostat dial, if needed
- Phone camera for wiring photos
Test method A: live voltage check (most decisive, but advanced)
Only do this if you are comfortable working around live 240V. Otherwise skip to Method B and consider a pro.
- Put covers back in place enough to be safe and prevent accidental contact. Keep probes controlled.
- Turn breaker ON.
- Set multimeter to AC volts.
- When the heater should be heating, check for ~240V at the thermostat input and whether voltage is being sent out to the element or down to the lower thermostat (upper unit).
What results mean (general):
- Voltage in but not out when calling for heat often points to a bad thermostat or tripped ECO.
- Voltage out to an element but the water is not heating points more toward a bad element or wiring.
Test method B: continuity check (power OFF, safer for beginners)
- Turn breaker OFF and verify power is off. Use all three voltage checks: hot to hot, and each hot to ground.
- Remove the panel (upper or lower) and pull back insulation.
- Set the thermostat temperature above current water temp so it should be calling for heat. If you just ran hot water, wait a bit or turn the dial up temporarily.
- Pull one wire off the thermostat terminal you are testing.
- With the thermostat calling for heat, you should see continuity across the switched terminals.
Interpreting continuity:
- If the thermostat should be calling for heat but you get no continuity, the thermostat is likely bad.
- If you get continuity when it should be heating and it still does not heat, the issue may be the element or the power supply.
Reality check: Because thermostats are part of a larger circuit, continuity testing can get confusing fast. If your readings do not make sense, it is okay to move to replacement based on symptoms and age, especially if the heater is older and you already have the panels open.
Replacing a thermostat: matching parts and doing it clean
The good news is thermostats are relatively inexpensive. The key is buying the right style and wiring it exactly as the original.
How to match the correct thermostat
- Check the heater label: brand and model number on the side of the tank.
- Buy OEM if possible: use the model number to order the exact part.
- Match voltage and type: most residential electric units are 240V and use a common style thermostat.
- Upper vs lower matters: the upper thermostat is often part of a combo assembly with the ECO. The lower thermostat is usually simpler.
- Consider a tune-up kit: many kits include both thermostats and both elements. If your unit is older, replacing both thermostats at once can save another teardown later.
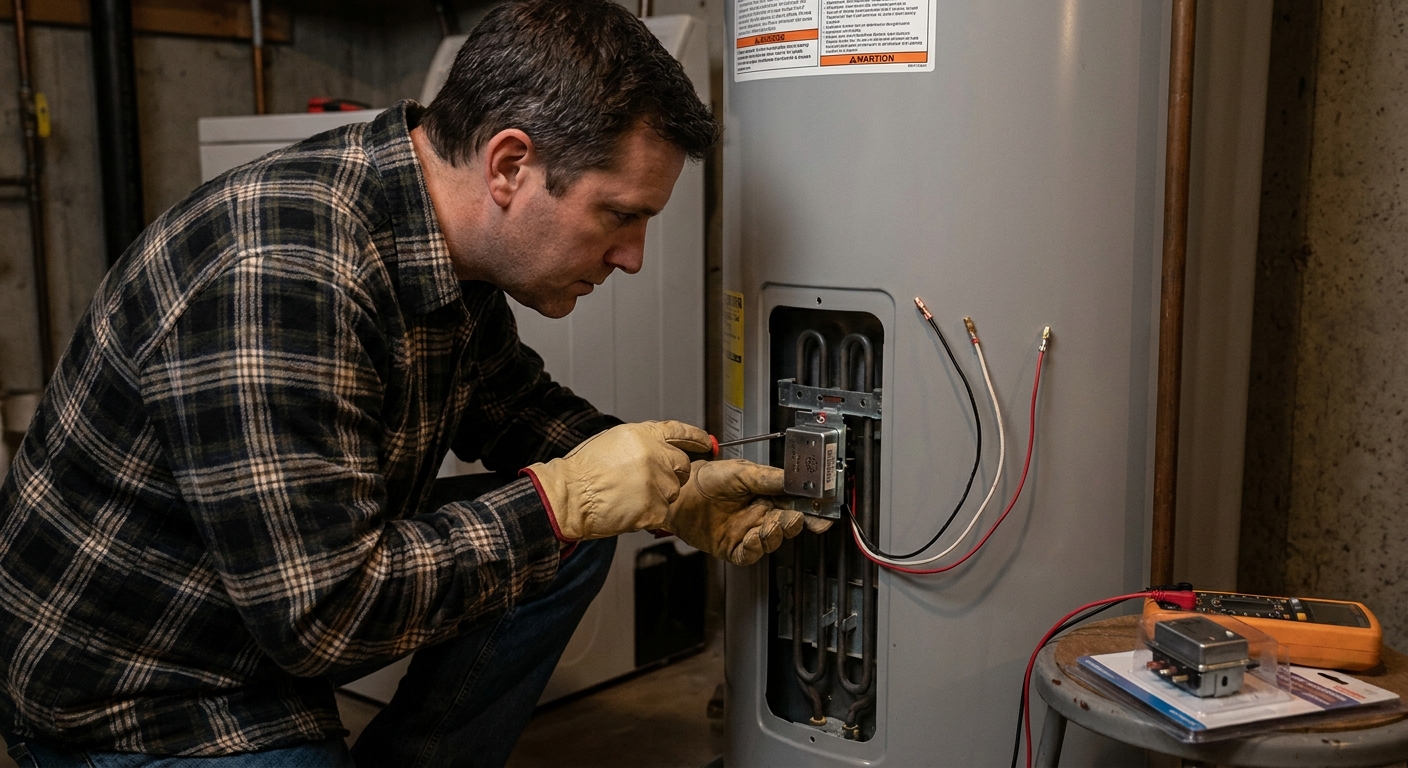
Step-by-step: replace upper thermostat (with ECO)
- Turn breaker OFF and verify power is off using hot to hot, and each hot to ground.
- Remove upper access cover, insulation, and plastic shield.
- Take a clear photo of the wiring.
- Label wires with tape if you want extra insurance.
- Remove wires from the old thermostat.
- Release the thermostat from its retaining bracket.
- Install the new thermostat in the same position so it sits flat against the tank. This matters for accurate temperature sensing.
- Reconnect wires exactly as before.
- Reinstall plastic shield, insulation, and access cover.
Step-by-step: replace lower thermostat
- Turn breaker OFF and verify power is off using hot to hot, and each hot to ground.
- Remove lower access cover, insulation, and plastic shield.
- Photo the wiring.
- Disconnect wires, remove thermostat from bracket, install the new one flat to the tank.
- Reconnect wires, then reinstall shield, insulation, and cover.
Set the temperature safely
Most manufacturers recommend around 120°F for a balance of comfort, energy savings, and scald prevention.
- Set upper and lower thermostats to the same temperature.
- If you set one higher than the other, the heater can behave strangely, and you may get inconsistent hot water.
My thrifty homeowner tip: If you are chasing “not enough hot water,” do not crank to max as the first move. First, confirm the lower thermostat and element are working. A small bump from 120°F to 125°F can help some households, but higher settings raise scald risk and energy use.
After replacement: what to expect
Once everything is reassembled:
- Turn breaker ON.
- Give the heater 30 to 60 minutes to recover, longer if the tank was fully cold.
- Test hot water at a faucet.
If you still have problems, the next most likely culprits are:
- A burned-out heating element
- Sediment buildup in the tank (especially affecting the lower element)
- A wiring issue or failing breaker
- A dip tube failure (less common, but can mimic thermostat issues)
When to call a pro
I am all for DIY, but I also like everyone going to bed with all their eyebrows intact.
Call an electrician or plumber if:
- You are not comfortable verifying power is off with a multimeter
- Wiring is melted, scorched, or brittle
- The breaker keeps tripping after thermostat replacement
- You suspect the tank is leaking near electrical components
- The heater is very old and you are debating whether to replace the whole unit
FAQ
Can I replace just the upper or lower thermostat?
Yes. If symptoms clearly point to one thermostat, replacing that one is fine. If the heater is older, replacing both thermostats at the same time is often a smart, low-cost preventative move.
Why do I have some hot water but not enough?
That often points to the lower thermostat not heating the bottom portion of the tank. It can also be a lower element issue or heavy sediment.
What causes the ECO to trip?
Common causes include a stuck thermostat, loose wiring creating heat at terminals, or rare cases of overheating due to control failure. Repeated trips mean something is wrong and needs diagnosis.
Do I need to drain the tank to replace a thermostat?
No. Thermostats mount externally to the tank under the access panels. You do not need to drain water for thermostat replacement. You do need to drain (at least below the element) when replacing an element.
The 30-Second Cheat Sheet
Essential takeaways for: Electric Water Heater Thermostats: Test, Reset, and Replace
Shut power off safely (do this first)
- Turn OFF the double-pole water heater breaker (usually 30A).
- Open the upper access panel and pull back insulation.
- Verify power is off with a multimeter (AC volts) using three checks: L1 to L2, L1 to ground, and L2 to ground. You want 0V on all three.
Reset the ECO high-limit switch
- With power OFF, press the red reset button on the upper thermostat assembly.
- If it clicks, it was tripped. Reassemble covers, turn breaker ON, and wait 30 to 60 minutes.
- If it trips again, stop resetting and troubleshoot (thermostat, wiring, element).
Upper vs lower thermostat symptoms
- Upper thermostat/ECO: often causes no hot water at all.
- Lower thermostat: often causes not enough hot water, short showers, water turns lukewarm fast.
Multimeter continuity basics (power OFF)
- Continuity beep or near 0 ohms means the switch is closed.
- No beep or OL means open circuit.
- Pull at least one wire off the terminal you are testing so you do not read through other parts.
Replace a thermostat correctly
- Match parts by water heater model number or use OEM replacement.
- Upper and lower thermostats are not always the same. Upper often includes the ECO.
- Take a photo of wiring before disconnecting.
- Install the new thermostat flat against the tank, then reconnect wires exactly as before.
Temperature setting
- Set both thermostats to about 120°F and keep them the same for consistent performance.
💡 Tip: Scroll up to read the full article for detailed, step-by-step instructions.
⬆️ Back to topAbout Marcus Vance
Content Creator @ Grit & Home
Marcus Vance is a lifelong DIY enthusiast and self-taught home renovator who has spent the last decade transforming a dilapidated 1970s ranch into his family's dream home. He specializes in budget-friendly carpentry, room-by-room renovations, and demystifying power tools for beginners. Through his writing, Marcus shares practical tutorials and hard-learned lessons to help homeowners tackle their own projects with confidence.