
🚨 In a DIY emergency or rush?
Skip the details and jump straight to our 30-second cheat sheet for the most crucial info.
When the roof starts leaking during a storm, you do not need a perfect repair. You need a safe, temporary cover that buys you time without making the leak worse. I have been there, standing in a hallway with a trash can catching drips, trying to decide if I should even go outside. The good news is a well-placed tarp can keep water out for days or weeks if you do it right.
This guide is about emergency roof tarping for homeowners, plus what to do inside the house while you line up permanent repairs. Roofs, local weather, and materials vary, so treat this as damage control, not a substitute for a roofer’s inspection.
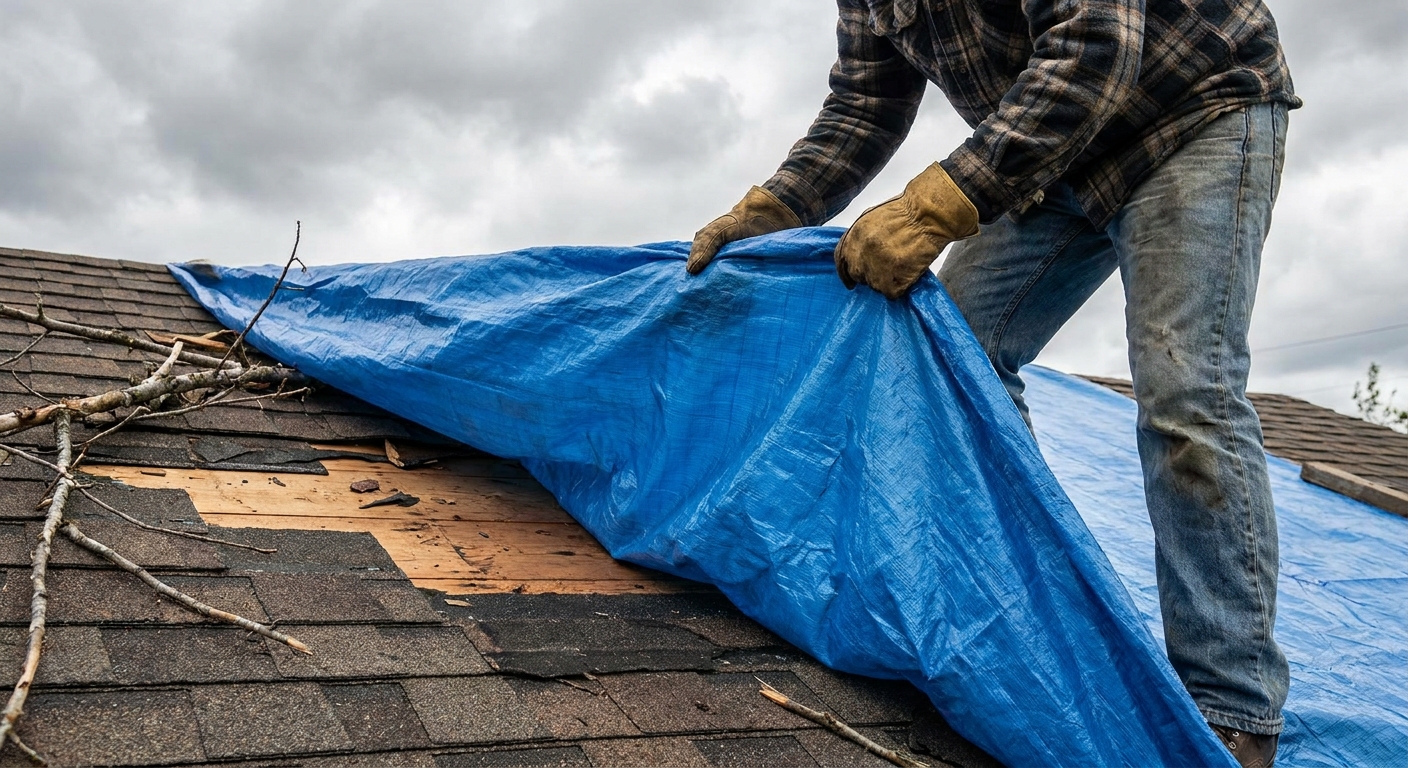
First: stay safe
I know the urge. Water is coming in and you want to stop it now. But roofs are one of the easiest places to get seriously hurt, especially when they are wet or windy.
- Do not get on the roof if it is actively raining, snowing, icy, or wind gusts are strong enough to tug at your clothes.
- Check daylight and weather. Do not rush this at dusk with a headlamp if you can help it.
- Stay away from downed lines. If a storm took out power, assume any line is live and call the utility company.
- Watch for electrical hazards inside: if water is dripping near light fixtures, outlets, or your breaker panel, shut off power to that area at the main panel and call an electrician if you are unsure.
- Use a ladder safely: level ground, three points of contact, and tie off if you can. Have a spotter when possible.
- Basic PPE helps: gloves, eye protection, and non-slip footwear.
Call a pro immediately for steep roofs, very high roofs, widespread damage, sagging ceilings, unknown structural damage, or any time you feel rushed and unsafe. A tarp is not worth a hospital trip.
Stop the water inside
Before you even think about tarping, buy yourself a little breathing room indoors. This limits ceiling collapse risk and helps with documentation.
Bucket and funnel setup
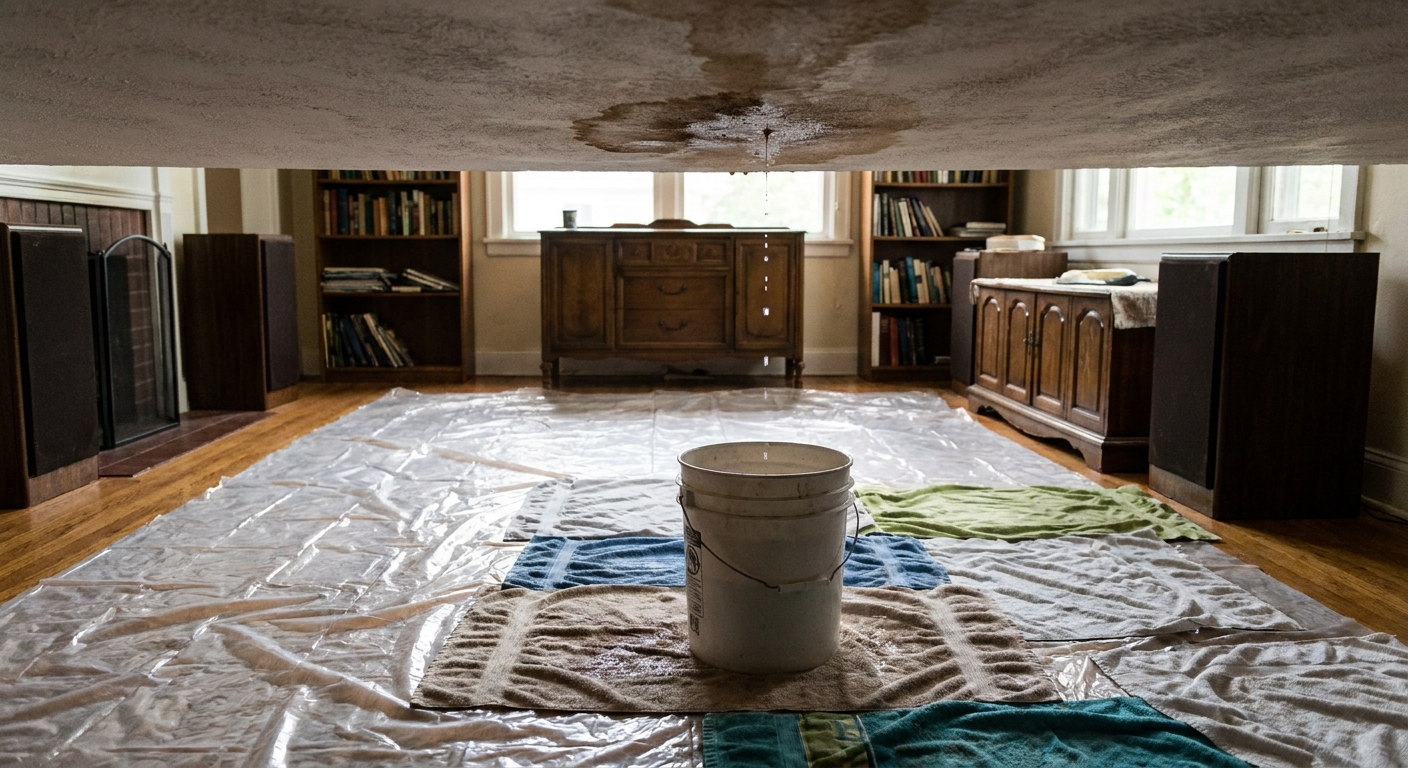
- Put a bucket or tote under the drip. Line it with an old towel to reduce splashing noise.
- If the leak is spreading across drywall, tape up plastic sheeting to guide water into a single container.
- If you have a bulging ceiling bubble, do not ignore it. It can let go all at once.
If you choose to drain a ceiling bubble: only do this if you have shut off power to the area, there is no water near fixtures, and you can safely control the mess. Use an awl or utility knife to make a tiny pilot hole and be ready for more water than you think. Stop and call a pro if you are unsure, especially in older homes where some ceiling textures and materials can be hazardous when disturbed.
Protect floors and furniture
- Move furniture and electronics out of the room if possible.
- Put down plastic, then towels, then a sacrificial rug if you have one. Plastic alone can be slippery.
- Start gentle drying once active dripping slows: fans, dehumidifier, and open closet doors nearby.
What to buy
A cheap tarp and a few nails sounds good until wind turns it into a sail. The goal is a tarp that is big enough, thick enough, and anchored without shredding.
Tarp basics
- Type: Heavy-duty poly tarp. Retail labels vary a lot, so do not overthink the exact number.
- Thickness: Look for 10 to 12 mil or a tarp clearly labeled heavy duty. If it may be up for weeks, choose UV resistant if available.
- Condition: New is best. Old tarps often have pinholes that only show up when water is pooling.
Boards and fasteners
- Two to four 1x3 or 1x4 boards (8 ft lengths are common)
- Deck screws (1-5/8 in or 2 in) and a driver
- Optional: screws with washers to spread load
- Optional: roofing cement or a tarp patch for temporarily bedding fasteners
- Work gloves and a utility knife
Why boards matter: If you only use grommets, wind loads can tear them out. Wrapping tarp edges around boards spreads the force and helps keep the tarp from walking downhill.
Placement: cover the source
This part trips people up: the water stain inside is rarely directly below the roof entry point. Water can travel along rafters, under underlayment, and around vents.
Quick ways to locate entry points
- Look above the stain in the attic (if safe): follow wet wood, dark trails, or daylight.
- Outside, check the uphill side of where the stain is located. Leaks often start higher than you think.
- Common culprits: flashing at chimneys and walls, plumbing vent boots, valleys, skylights, and missing or creased shingles.
Highest point rule
In general, you want the tarp to run past the highest point above the suspected leak so wind-driven water cannot push under the top edge. Going over the ridge is often the best version of that, but it is not always practical on hip roofs, complex rooflines, or when the damage is far from a ridge. Choose the safest setup that still gets you above the leak.
Step-by-step tarp setup
If the roof is safe to access and conditions are calm enough, this is a reliable approach for asphalt shingle roofs. If you are unsure, stop and call a roofer for emergency service.
1) Prep the surface
- Clear loose debris like branches. Do not scrape aggressively and damage shingles.
- If there are torn shingles flapping, gently lay them flat. Do not add new holes unless a pro tells you to.
2) Dry-fit the tarp
- Unfold the tarp and position it so water will flow over it like a big shingle.
- Avoid creating a bowl where water can pool. Pull it smooth and downhill.
3) Run it high
- Extend the tarp at least 3 to 4 feet upslope above the suspected entry point.
- If the ridge is close and safe to reach, carry the tarp over the ridge by 12 to 24 inches and anchor it on the other side.
- If you cannot safely reach the ridge, go as high as you safely can and plan to have a roofer reset it properly soon.
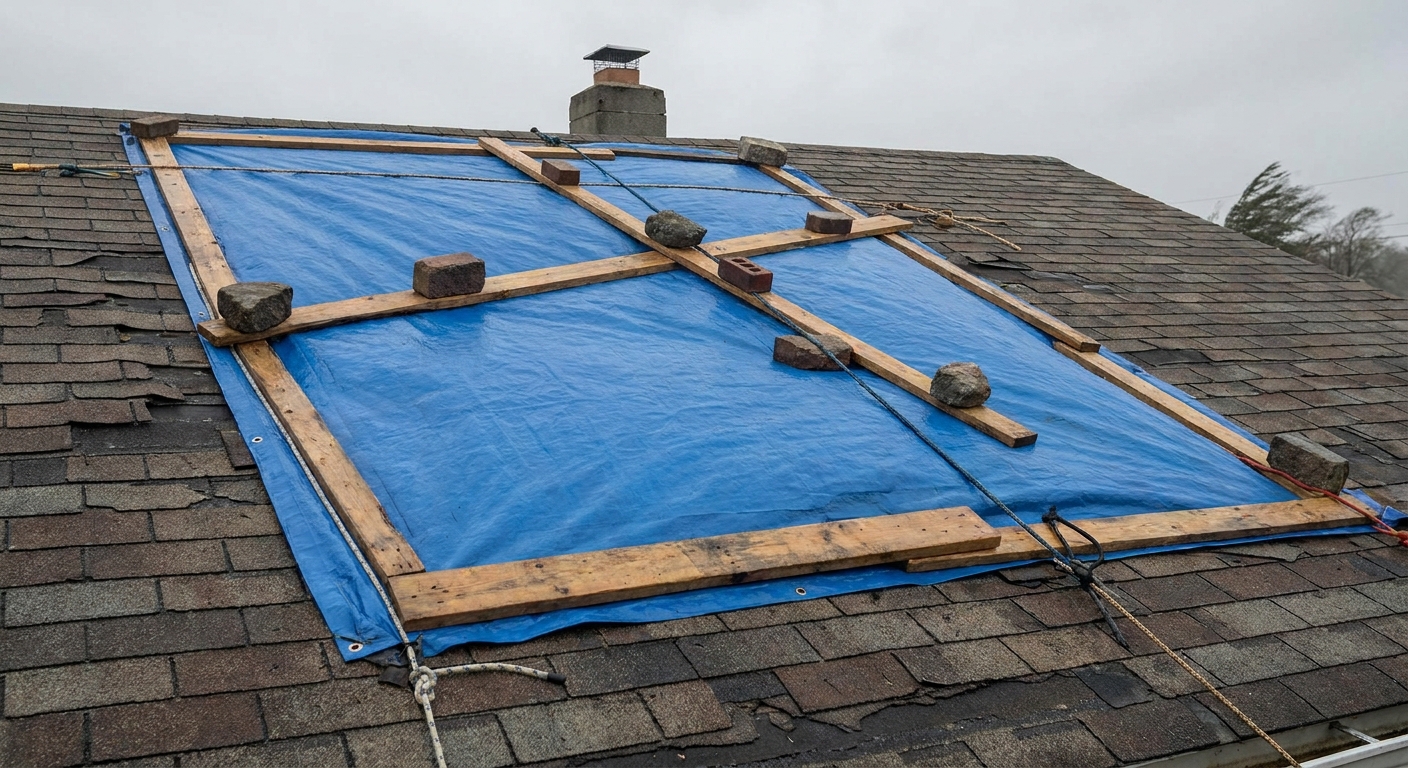
4) Reinforce edges with boards
- Lay a board along the tarp edge.
- Wrap the tarp around the board and fasten through the tarp into the board to clamp it.
- Repeat on the bottom edge and the sides if needed.
5) Anchor into decking
Yes, this method uses screws. The trick is to place them in safer locations and into solid material.
- Anchor boards with screws into roof decking (not just shingles).
- Use washers if you have them to reduce tear-out.
- Keep fasteners high and covered by overlapping tarp layers when possible.
- Avoid fasteners in valleys where water concentrates.
- Avoid screwing into or near ridge vents, ridge caps, or other ventilation details that you can compromise.
- If conditions are calm and you have it, a small dab of roofing cement over fastener heads can add temporary sealing. Do not treat it as a permanent fix.
If you are thinking, “Wait, screws make holes”: you are right. But in an emergency, a few well-placed fasteners under covered edges is often less risky than a tarp that tears loose and funnels gallons into your attic. A roofer can address these points during permanent repair.
Avoid these mistakes
- Do not nail through the middle of the tarp across the damaged area. Every hole is a potential entry point.
- Do not rely on grommets alone in windy conditions.
- Do not tuck the tarp under shingles unless you really know what you are doing. It is easy to break shingle seals and create more pathways for wind-driven rain.
- Do not sandbag a steep roof. Bags slide, and they can rip shingles on the way down.
Tarp size rules
Tarp sizing is less about the visible damage and more about water behavior. Think like rain, not like a patch.
- Upslope coverage: go at least 3 to 4 feet above the suspected entry point.
- Side and downslope coverage: add 2 to 3 feet to each side and below (more is fine).
- Prefer a single tarp over multiple overlapped tarps. Seams are weak points.
If you are between sizes, buy the larger tarp. You can trim excess, but you cannot stretch short coverage during a downpour.
Special situations
Vents and roof boots
If the leak is near a vent, your tarp should extend well above it. Try not to tent around the vent, which can channel water under the tarp. A smoother lay usually sheds better.
Chimneys and sidewalls
Chimney leaks are often flashing failures. A tarp can help, but placement must extend above the chimney, and sometimes over the nearest high point. Water can run down the chimney face and behind flashing, so give yourself generous overlap.
Branch impact holes
If a limb punched a hole, do not step near the impact area. The decking can be cracked and soft. This is a good moment to call a roofer for emergency stabilization.
Other roof types
This article is written with asphalt shingles in mind. If you have a different roof type, tarping and fastening details can change fast.
- Metal roofs: they can be slick, and the wrong fastener choice can create long-term leak points. Consider calling a pro.
- Tile or slate: fragile and expensive to break. Walking on it can cause more damage than the storm did.
- Flat or low-slope roofs: pooling is a bigger deal, and tarps can trap water instead of shedding it if not set up carefully.
If you are not sure what you have, that is also a good reason to hand this one to a roofer.
Documentation tips
Even if you are not sure you will file a claim, document like you will. It is much easier to throw away extra photos than to recreate them later.
- Take wide shots of the roof from the ground and closer shots of the damage.
- Photograph interior stains, wet insulation, and any damaged belongings.
- Save receipts for tarps, lumber, screws, fans, and dehumidifier rentals.
- Write down a simple timeline: when the storm hit, when you noticed the leak, and what you did to mitigate damage.
If you can, contact your insurer and a roofer early. Many policies expect reasonable mitigation, but you also want the damage documented before permanent work begins. When in doubt, take more photos.

How long a tarp can stay
A properly anchored heavy-duty tarp can last a few weeks, sometimes longer, but it is still temporary. UV exposure, wind, and flapping will wear it out.
- Check it after the next windy day and after heavy rain.
- Look for rubbing at edges, loosening screws, and new pooling areas.
- If it starts flapping, tighten it. Flapping is what turns temporary protection into shredded plastic.
If your tarp is your only protection for more than a month, get permanent repairs scheduled. The longer you wait, the more likely you are dealing with mold, rotten decking, and insulation replacement.
When to move to real repair
A tarp is a bandage, not a cure. You need permanent repair when:
- The leak returns even with the tarp in place.
- There is damaged or missing flashing at chimneys, skylights, or sidewalls.
- Shingles are missing, creased, or lifted across a large area.
- The roof decking feels soft (from the attic) or you see sagging.
- You have repeated ice dam leaks in winter.
Common permanent fixes
- Flashing repair or replacement (step flashing, chimney counterflashing, drip edge)
- Vent boot replacement
- Valley repair
- Shingle replacement plus underlayment patching
- Decking replacement if rot is present
Next steps: schedule the repair and plan for the tarp to come off. Do not leave boards and screws indefinitely. The roof needs to be inspected under the tarp so hidden moisture damage does not linger.
If you are hiring it out, tell the roofer you have an emergency tarp installed, describe how it is fastened, and ask them to inspect the decking for moisture damage when they remove it.
Quick checklist
- Water is contained indoors, and ceilings are handled safely if bulging.
- Photos taken inside and out, receipts saved, timeline noted.
- Tarp is large enough with proper upslope, side, and downslope coverage.
- Tarp is pulled smooth, runs past the highest point above the leak, and goes over the ridge when that is the safest, simplest option.
- Edges are reinforced with boards, not just grommets.
- Permanent repair is scheduled, even if the tarp looks great.
That last one is the mindset shift. The tarp is you buying time. Use that time to get the roof fixed right.
The 30-Second Cheat Sheet
Essential takeaways for: Emergency Roof Tarp After a Leak or Storm
Do this first (inside)
- Put a bucket under the drip, line with a towel to stop splashing.
- If the ceiling is bulging, only drain it if power is off to that area and you are sure there are no electrical hazards. Make a tiny pilot hole (awl or utility knife) and be ready for more water than expected. If you are unsure, call a pro.
- Move electronics and furniture, then run fans and a dehumidifier once dripping slows.
When not to tarp
- Active rain, strong wind, icy roof, steep or high roof, poor daylight, downed lines nearby, or you cannot get stable ladder footing.
- If you feel rushed or unsure: call a roofer for emergency tarping.
What to buy
- Heavy-duty poly tarp: often labeled 10 to 12 mil (labels vary). If it may be up for weeks, choose UV resistant if available.
- Tarp size: cover the suspected entry point plus 3 to 4 ft extra upslope, and 2 to 3 ft extra to the sides and downslope (more is fine).
- 1x3 or 1x4 boards, deck screws (1-5/8 in to 2 in), driver, gloves, eye protection.
- Optional: screws with washers, roofing cement/patch for temporary sealing.
Fast tarp setup (most reliable)
- Pull tarp smooth so water sheds downhill, no bowls or pooling.
- Preferably run the tarp past the highest point above the leak. Going over the ridge is great when it is the safest and simplest way.
- Wrap tarp edges around boards, then screw boards down into roof decking to anchor. Avoid fasteners in valleys and near ridge vents/caps.
- Do not nail through the middle of the tarp or rely on grommets alone in wind.
Document for insurance
- Wide and close photos of roof damage, plus interior stains and wet materials.
- Save receipts for tarp, lumber, screws, fans, dehumidifier.
- If you can, contact your insurer and a roofer first. You still need to mitigate damage, but do not block a future inspection if you can avoid it.
When to switch to permanent repair
- Leak returns, flashing is damaged, shingles are missing or lifted, decking is soft, or ceiling keeps getting wet.
- Schedule real repairs ASAP. A tarp is temporary, and it should be removed during repair so the decking can be inspected.
💡 Tip: Scroll up to read the full article for detailed, step-by-step instructions.
⬆️ Back to top
About Marcus Vance
Content Creator @ Grit & Home
Marcus Vance is a lifelong DIY enthusiast and self-taught home renovator who has spent the last decade transforming a dilapidated 1970s ranch into his family's dream home. He specializes in budget-friendly carpentry, room-by-room renovations, and demystifying power tools for beginners. Through his writing, Marcus shares practical tutorials and hard-learned lessons to help homeowners tackle their own projects with confidence.