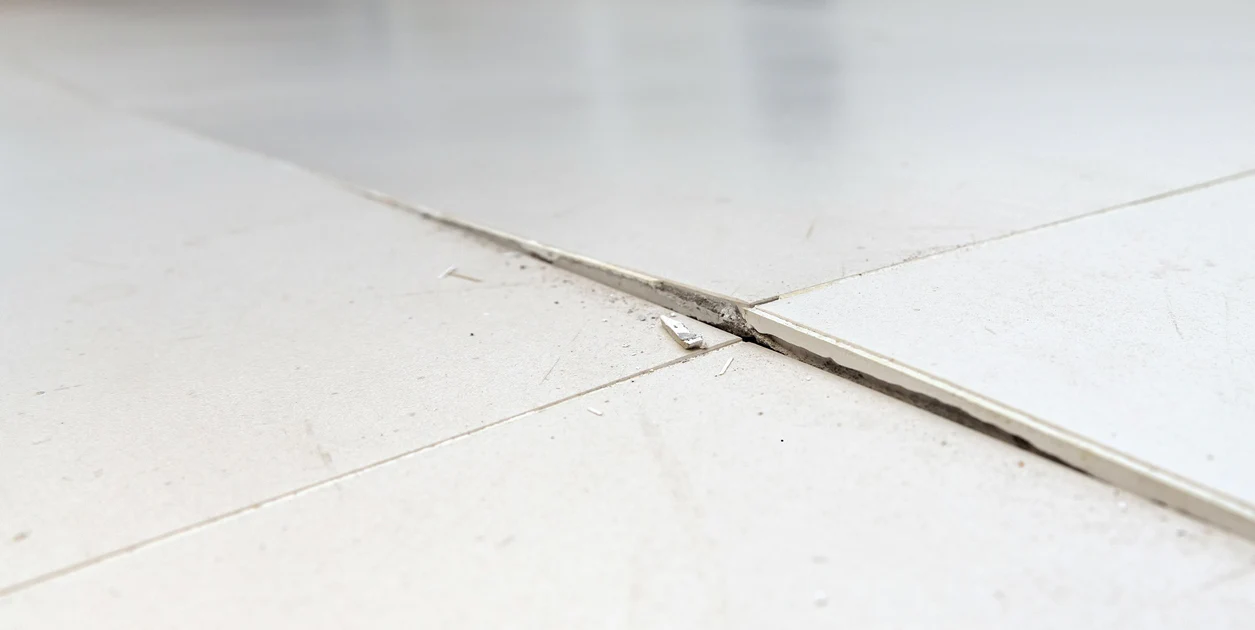
A cracked floor tile can feel like the start of a full remodel. Most of the time, it is not. If the surrounding tiles are solid and the crack is isolated, you can fix one tile, blend the grout, and move on with your weekend.
I have replaced more single tiles than I can count in my own 1970s ranch. The key is controlling the demolition so you do not chip the neighbors, then setting the new tile on a clean, flat bed so it does not crack again.
First, fill the crack or replace the tile?
There are two legitimate “no full-floor replacement” repairs:
- Color-matched epoxy fill for small, tight cracks where the tile is still firmly bonded and level.
- Tile replacement when the tile is loose, hollow, lifted, badly chipped, or the crack keeps spreading.
Epoxy fill works if:
- The tile is not rocking and sits level with its neighbors.
- The crack is hairline to about 1/16 inch and edges are not crumbling.
- You tap around the tile and it sounds solid, not hollow.
Replace the tile if:
- The tile sounds hollow (often a sign of poor thinset coverage).
- The tile moves or grout around it is breaking out.
- The crack has a height difference you can feel with your shoe or fingertip.
- You see multiple cracked tiles or a crack line repeating. That can point to a subfloor or movement-joint issue.
Quick reality check: Epoxy is mostly a cosmetic repair. If the tile or substrate is moving, epoxy can fail and the crack can come back. If several tiles are cracking in a line, or you have a bouncy floor, patching a single tile may not last. You can still do it, but consider addressing the cause (subfloor stiffness, underlayment failure, missing movement joints) sooner rather than later.
Tools and materials
You do not need a truckload of specialty gear. You do need patience and basic safety protection.
Quick safety notes
- Silica dust is real: Grout and thinset dust can contain silica. Avoid dry grinding indoors. Use a HEPA shop vac, keep dust down, and wear a properly fitted respirator if you are making dust.
- Solvents: Rubbing alcohol is usually safe. Acetone can damage some finishes or soften some sealers. Ventilate well, keep away from flames, and spot-test first.
For epoxy crack repair
- Color-matched tile repair epoxy kit (or two-part epoxy + pigment)
- Rubbing alcohol (or acetone with caution and spot-test)
- Razor blade or plastic scraper
- Painters tape
- Nitrile gloves
For replacing one tile
- Safety glasses, gloves, hearing protection (and a respirator if you are creating dust)
- Painters tape and a drop cloth
- Grout saw (manual) or oscillating multi-tool with grout removal blade
- Cold chisel and small hammer (or a punch)
- Putty knife or stiff scraper
- Shop vacuum (HEPA if possible)
- Replacement tile (same thickness matters)
- Thinset mortar (match what your floor uses when possible)
- Notched trowel (size depends on tile size and flatness)
- Margin trowel or putty knife for small batches
- Tile spacers (if needed)
- Grout to match (sanded vs unsanded based on joint width, or epoxy grout if that is what you have)
- Grout float, sponge, bucket
- Sealer (only if your grout requires it)
Option A: Fill a hairline crack with epoxy
This is the “good enough and looks good” fix for a stable tile. Done neatly, it disappears from standing height. Just remember, it will not solve movement underneath the tile.
1) Clean and mask
- Clean the tile with a degreaser, then wipe the crack area with rubbing alcohol.
- Run painters tape along both sides of the crack to keep epoxy off the tile face and grout.
2) Mix and tint
- Mix the epoxy exactly as directed. Two-part epoxies can be picky about ratios.
- Tint a small amount to match your tile color. Start lighter. You can always darken.
3) Pack the crack
- Use a razor blade edge, plastic scraper, or included applicator to press epoxy into the crack.
- Scrape flush. You want epoxy in the crack, not smeared across the tile.
4) Peel tape and clean up
- Pull tape while epoxy is still workable for a crisp edge.
- Wipe any residue carefully with the recommended solvent and good ventilation.
- Let it cure fully before foot traffic.
My tip: If the crack runs through a high-gloss tile, do not sand the epoxy flush unless the kit specifically allows it. Sanding can dull the surrounding sheen and make the repair more obvious.
Option B: Replace one cracked floor tile
This is the “do it once, do it right” repair. The goal is to remove only the bad tile, leave the surrounding ones untouched, then rebuild the same height so the new tile sits perfectly flush.
Step 0: Match the tile
- Check leftover boxes from the original install, attic, basement, or garage shelves.
- If you cannot find an exact match, consider pulling a tile from a hidden spot (closet corner, behind the toilet) and putting the “close match” tile in the hidden spot.
- Confirm thickness. Even a small thickness difference can create a toe-stubber lip.
Step 0.5: Know what tile you have
- Ceramic: usually easier to cut and chip. Go gentle.
- Porcelain: harder and denser. It can take more effort to break and remove.
- Natural stone: chips more easily and can stain. If matching matters, slow down and consider calling a pro.

1) Protect the neighbors
- Lay a drop cloth and keep a shop vac nearby.
- Put painters tape around the cracked tile on the surrounding tile faces. This helps prevent accidental chips and scuffs.
- Wear eye protection and gloves.
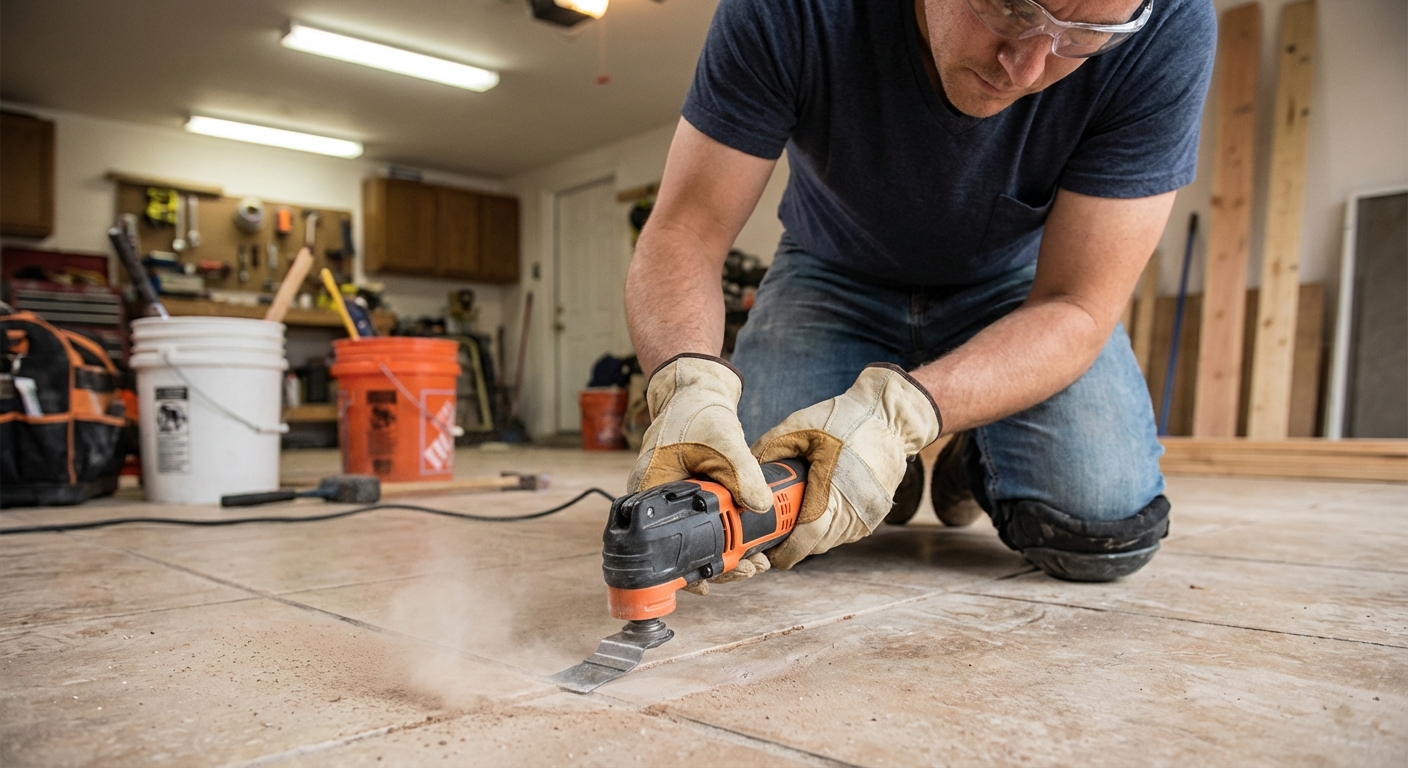
2) Remove grout around the tile
This is the part most people rush, then regret. If you isolate the tile by removing grout around its perimeter, you massively reduce the chance of damaging neighboring tiles.
- Use a manual grout saw or an oscillating tool to remove grout all the way around the tile.
- Go deep enough to fully clear the joint so the tile is isolated, typically down to the setting bed or underlayment, not just the surface grout.
- Vacuum dust as you go so you can see what you are doing.
Checkpoint: You should see a clean “moat” around the tile, with no grout bridging to the neighbors.
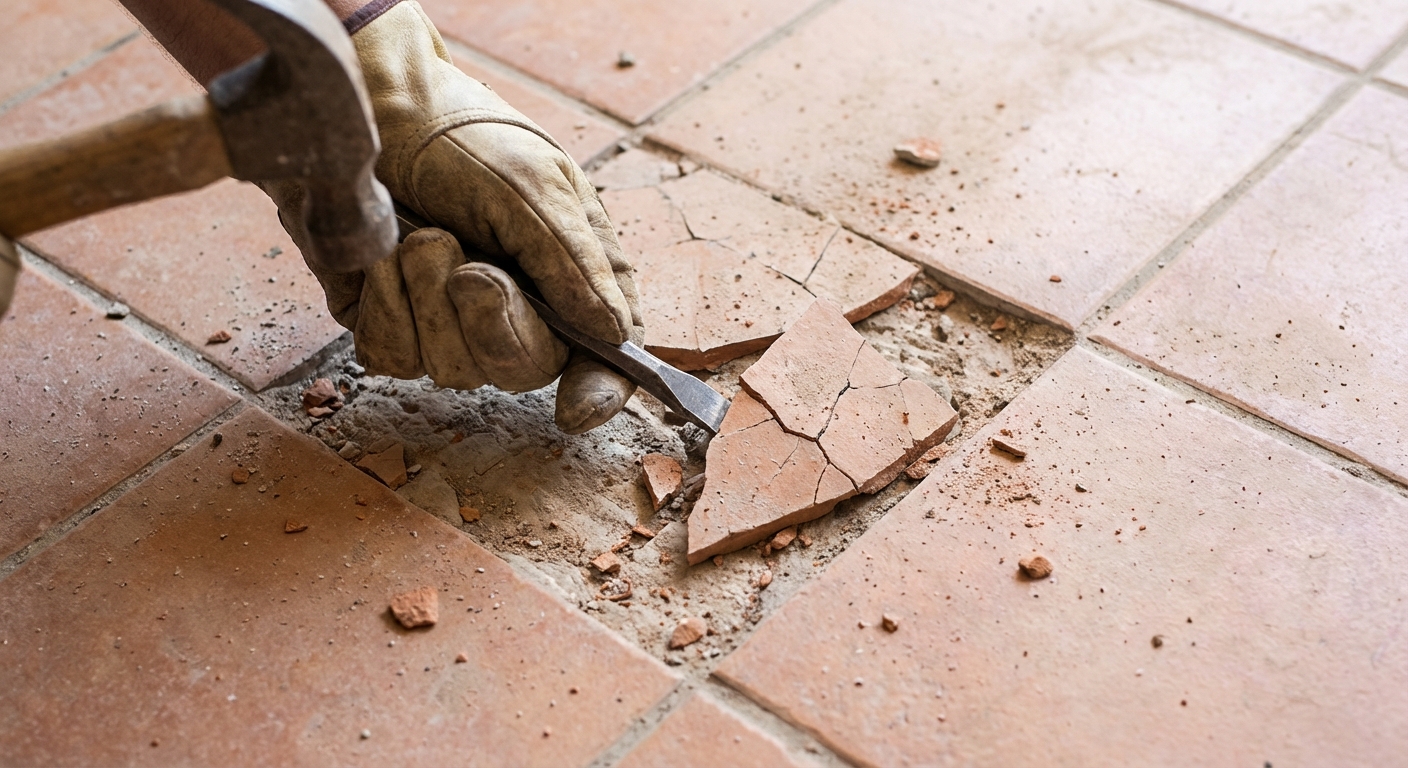
3) Break the tile inward
You want the broken pieces to collapse toward the center of the tile, away from the surrounding edges.
- Put a strip of tape across the tile to help contain shards.
- Set a cold chisel or punch near the center and tap with a hammer to crack the tile.
- Work from the center outward, removing small pieces at a time.
4) Remove old thinset and clean the base
Once the tile is out, you will see the adhesive bed. Your job is to make the surface clean, solid, and flat.
- Scrape down ridges of old thinset with a stiff putty knife or scraper.
- If thinset is stubborn, use the oscillating tool with a scraper blade carefully.
- Vacuum thoroughly. Dust is the enemy of good bond.
Underlayment warning: If you have cement board, an uncoupling membrane (like Ditra), or a waterproofing membrane, do not chew it up while scraping. If you nick or tear a membrane, patch it per the manufacturer before setting the replacement tile.
Target: A flat surface that allows the new tile to sit at the same height as the others with a normal thinset layer. If you leave a high hump, the replacement tile will sit proud. If you gouge too deep, it will sit low.
5) Check the “why”
If the tile cracked because something moved underneath, the replacement can crack too. Do a quick evaluation:
- Hollow sound? That can mean poor thinset coverage. When you set the replacement, aim for excellent coverage and solid support at edges and corners.
- Cracks repeating in a line? That can point to movement in the floor or missing movement accommodation. Sometimes the real fix is adding or restoring a movement joint, not just swapping tiles.
- Moisture or soft underlayment? Stop and investigate before re-tiling.
6) Dry fit the replacement
- Test the tile in the opening with spacers if needed.
- Confirm alignment with the grout joints.
- Make sure it sits flush without rocking.
7) Set the tile with thinset
- Mix a small batch of thinset to peanut-butter consistency (follow the bag directions).
- Key a thin coat into the base with the flat side of the trowel, then comb with the notched side.
- For better support, “back butter” the tile with a thin coat of thinset.
- Set the tile and press it in. Twist slightly to collapse ridges.
- Check that it is level with surrounding tiles. Adjust while thinset is fresh.
- Clean thinset out of joints before it hardens.
Trowel size tip: A 1/4 x 1/4 inch trowel is common for many floor tiles, but it is not universal. Bigger tiles and less-flat surfaces often need a larger notch. The best way to know is to set the tile, then lift it and check coverage, then adjust trowel size or technique.
Coverage targets: As a rule of thumb, aim for about 80% minimum coverage in dry interior floors and closer to 95% in wet areas, with good support at edges and corners. If your old tile sounded hollow, this is where you fix that mistake.
Checkpoint: When you lift a test-set tile, you should see thinset transferred across most of the back, not just stripes.
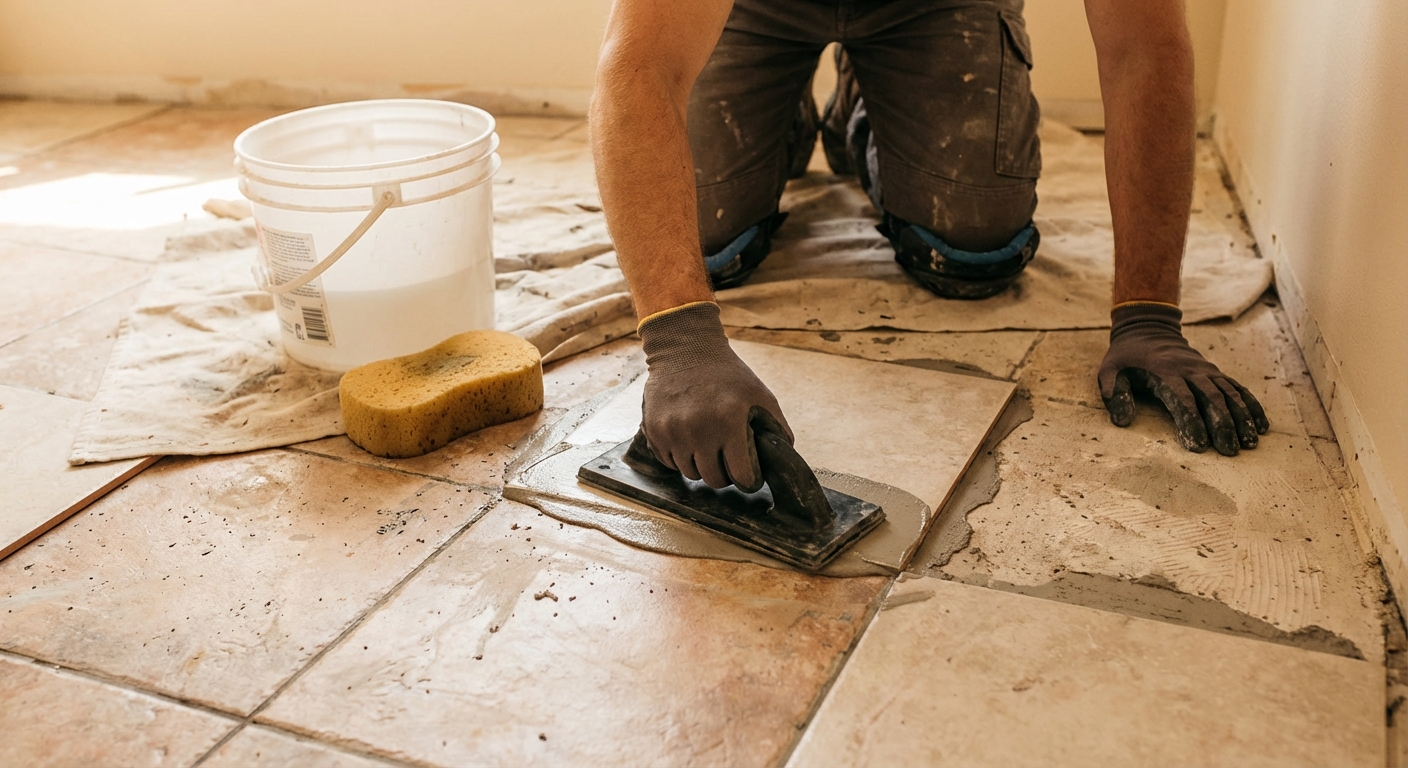
8) Let it cure, then grout
- Wait the thinset cure time on the bag. 24 hours is common, but longer is normal in cool or damp conditions.
- Mix grout and pack it into joints with a float.
- Wipe with a damp sponge in light passes. Rinse often.
- Buff haze after it firms up with a dry microfiber cloth.
9) Match grout color
Even if you buy the same grout color name, new grout can look brighter than old grout. A few ways to blend it:
- Clean surrounding grout first. Sometimes the “old color” is just dirt.
- Use the same grout type and follow water ratios carefully. Too much water can lighten grout.
- Consider grout colorant if the mismatch bothers you. It can unify old and new.
10) Seal and return to service
- If your grout requires sealer, apply it after the grout has cured (check the product timing). This is typically for cementitious grout. Most epoxy grouts do not get sealed.
- Keep foot traffic light for the first day or two, especially on fresh grout.
Common mistakes (I have made most of these)
- Skipping grout removal and prying up the tile. That is how you chip the neighbors.
- Leaving thinset lumps so the new tile sits higher than the rest.
- Not cleaning dust before thinset. Poor bond equals future cracks.
- Walking on it too soon. Thinset needs time to harden, and cure time changes with temperature and humidity.
- Forgetting movement. If a floor flexes or has no movement joints, tile will complain. Loudly.
When to call a pro
Single-tile repairs are very DIY-friendly, but you should bring in help if:
- Cracks are repeating in a pattern across the room.
- You suspect a structural issue, water damage, a failing underlayment, or missing movement accommodation.
- The tile is stone or specialty material and replacement matching is critical.
- You have radiant heat and are not sure where the heating elements run.
Quick FAQ
Can I just grout over a cracked tile?
Not for long. Grout is not a structural repair and will re-crack. Epoxy is the better “fill” option for a stable tile, and replacement is best if there is movement.
What if I do not have a spare tile?
Try the manufacturer name on the box or the back of a loose tile (if you can find one). If it is discontinued, swap a tile from a hidden area and put the closest match in the hidden spot.
How do I avoid cracking the new tile?
Make the base flat, get good thinset coverage, and address any movement problems you discover while the tile is out.
My thrifty takeaway
If the tile is solid and the crack is tiny, a color-matched epoxy fill is a fast, budget-friendly cosmetic fix. If the tile is loose, hollow, or uneven, replace it. The job is mostly careful grout removal, gentle demolition inward, and a clean, flat reset with solid thinset coverage.
Do that, and you can stop staring at that crack every time you walk through the room.
About Marcus Vance
Content Creator @ Grit & Home
Marcus Vance is a lifelong DIY enthusiast and self-taught home renovator who has spent the last decade transforming a dilapidated 1970s ranch into his family's dream home. He specializes in budget-friendly carpentry, room-by-room renovations, and demystifying power tools for beginners. Through his writing, Marcus shares practical tutorials and hard-learned lessons to help homeowners tackle their own projects with confidence.