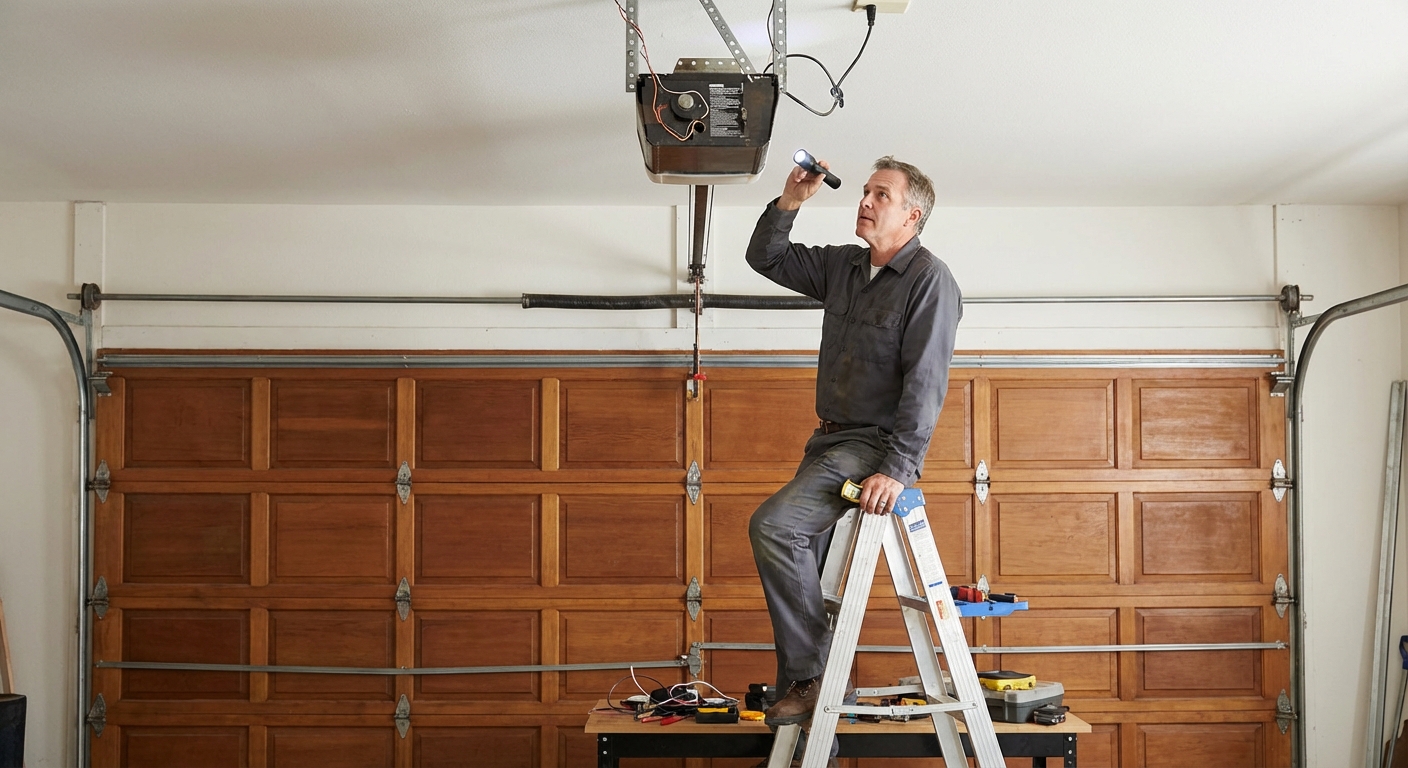
When a garage door refuses to move, it feels like your whole day gets stuck with it. I have been there, standing in the driveway clicking the remote like it owes me money. The good news: a lot of “dead door” problems are simple, safe fixes you can handle in under 10 minutes.
This guide walks you through the most common failures in the order I troubleshoot them. We’ll start with easy checks (power, batteries, sensors), then move to mechanical issues (tracks, rollers), and we’ll clearly flag the stuff you should not DIY, especially anything involving springs and cables.
Before you touch anything: quick safety rules
- Keep fingers out of hinges and roller brackets. Those pinch points are no joke.
- Do not loosen hardware tied to springs, lift cables, or bottom brackets. Some manufacturers mark high-tension parts with red paint, but not all do. When in doubt, stop.
- If the door is crooked, hanging, or cables look slack, stop. That is typically a spring or cable issue and can hurt you fast.
- Unplug the opener before working near the chain/belt or trolley.
- Never cut or remove spring hardware. Torsion and extension springs store enough energy to cause serious injury.
Fast triage: what is the door doing?
Pick the symptom that matches what you are seeing. This helps you skip right to the likely cause.
- Nothing happens at all (no light, no sound).
- Opener hums or clicks but the door does not move.
- Door starts down then reverses (or won’t close fully).
- Door opens a few inches then stops.
- Door moves, but it is loud, jerky, or crooked.
- Remote does not work but the wall button does.
Step 1: Check the simple stuff (safe DIY)
1) Replace the remote batteries
This is the classic “it was fine yesterday” failure. If the wall button works but the remote does not, start here.
- Swap in a fresh battery (match the number printed on the old one).
- Clean the battery contacts if you see corrosion.
- Test from a few feet away first, then from your normal distance.
2) Make sure the opener has power
If the opener light is off and nothing responds, treat it like any other appliance.
- Confirm the opener is plugged in.
- Check the breaker or GFCI that feeds the garage outlets. A GFCI outlet or breaker can trip without being obvious.
- Plug a lamp or phone charger into the same outlet to confirm power.
3) Check the wall console lock
Some wall buttons have a “Lock” feature that disables remotes. If your remote suddenly stopped but the wall button still works (or beeps), this is a prime suspect.
- Look for a Lock or Vacation button and toggle it off.
- On some models you hold the lock button for 2 to 3 seconds.
4) Check the manual slide lock
Some doors have a manual slide lock (usually a bar you slide into the track from the inside). It is easy to bump into the locked position. If it’s engaged, the opener may hum, strain, or stop without moving the door.
- Look for handles with two horizontal bars or a small latch assembly on the inside of the door.
- Make sure any bars are fully retracted and the latch is not seated into the track.
Step 2: Photo-eye sensors (a common “won’t close” issue)
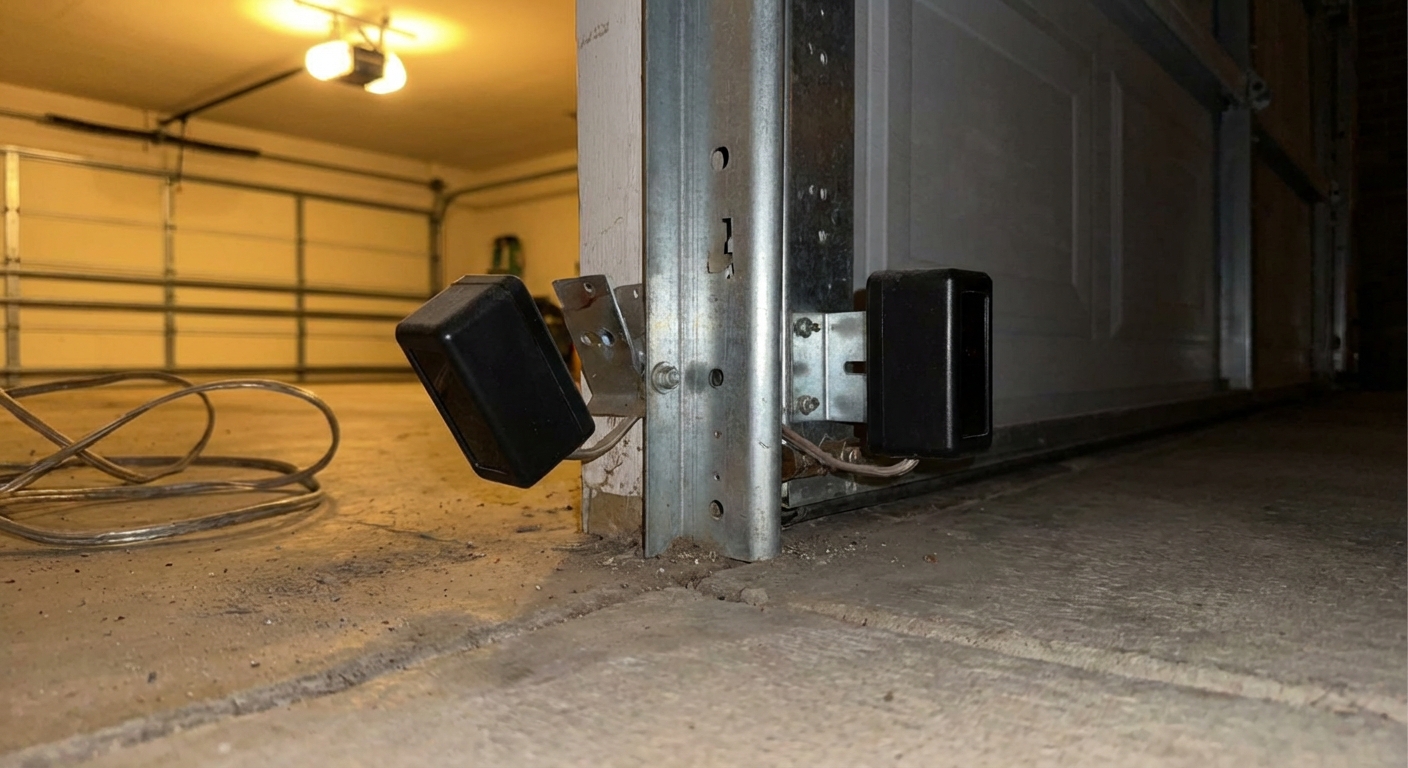
If the door closes partway then reverses, or it won’t close unless you hold the wall button, your safety sensors are the first place to look. This is one of the most common causes.
What to look for
- Misalignment: one sensor got bumped by a trash can, broom, bike tire, or a kid’s soccer ball.
- Dirty lenses: cobwebs, dust, or moisture on the little glass “eyes.”
- Blocked beam: storage bins, rakes, or even a dangling cord in the doorway.
- Indicator lights: many sensors show a steady light when aligned. Blinking often means misaligned or blocked (check your brand manual if you can).
Fix it
- Gently wipe each lens with a clean microfiber cloth.
- Check both sensor brackets and wing nuts. Snug them, but do not crush plastic housings.
- Align them so they face each other straight across. A quick trick: measure from the floor to each sensor and match heights.
- Clear anything that could interrupt the beam, including loose weatherstripping hanging in the opening.
DIY line in the sand: If the sensor wires are cut, chewed, or shorting, it is still DIY-friendly if you are comfortable with low-voltage wiring. If you are not, a garage door tech can re-run sensor wire quickly.
Step 3: Frozen or weather-stuck (do not force it)
If it is cold out and the door tries to open but stops, or you hear the opener strain, the bottom seal may be frozen to the floor. This is common after snow, slush, or a wet garage floor that refreezes overnight.
- Stop and do not keep hitting the button. Forcing it can strip gears or burn out the opener.
- Look at the bottom seal. If it is stuck, gently break the ice bond along the edge (a plastic scraper helps).
- Use mild heat if needed. A hair dryer on low aimed at the bottom seal can help. Avoid open flame.
Step 4: The door is stuck, heavy, or won’t lift (spring warning)
If you hit the button and the opener strains, the door barely moves, or it lifts a few inches then slams back down, the door may be effectively “dead weight.” That usually points to a spring issue.
How to spot a broken spring
- Torsion spring (above the door): look for a visible gap in the coil (often around 1 to 3 inches).
- Extension springs (along the tracks): one side may be dangling or stretched out oddly.
- Sound: many homeowners report a loud bang in the garage when the spring snaps.
Quick test (only if the door is closed)
- Pull the red emergency release cord to disconnect the opener.
- Try lifting the door by hand a few feet.
- If it feels extremely heavy or won’t stay up, assume a spring problem.
Extra caution: If the door is already partly open, crooked, or looks unstable, do not pull the release. That is a “call a pro” situation.
Call a pro: Replacing or adjusting springs is not a beginner DIY task. Springs are under high tension and can cause severe injury. A reputable garage door company can replace the spring, set correct tension, and inspect cables and bearings at the same time.
Step 5: Door off-track or crooked (stop and assess)
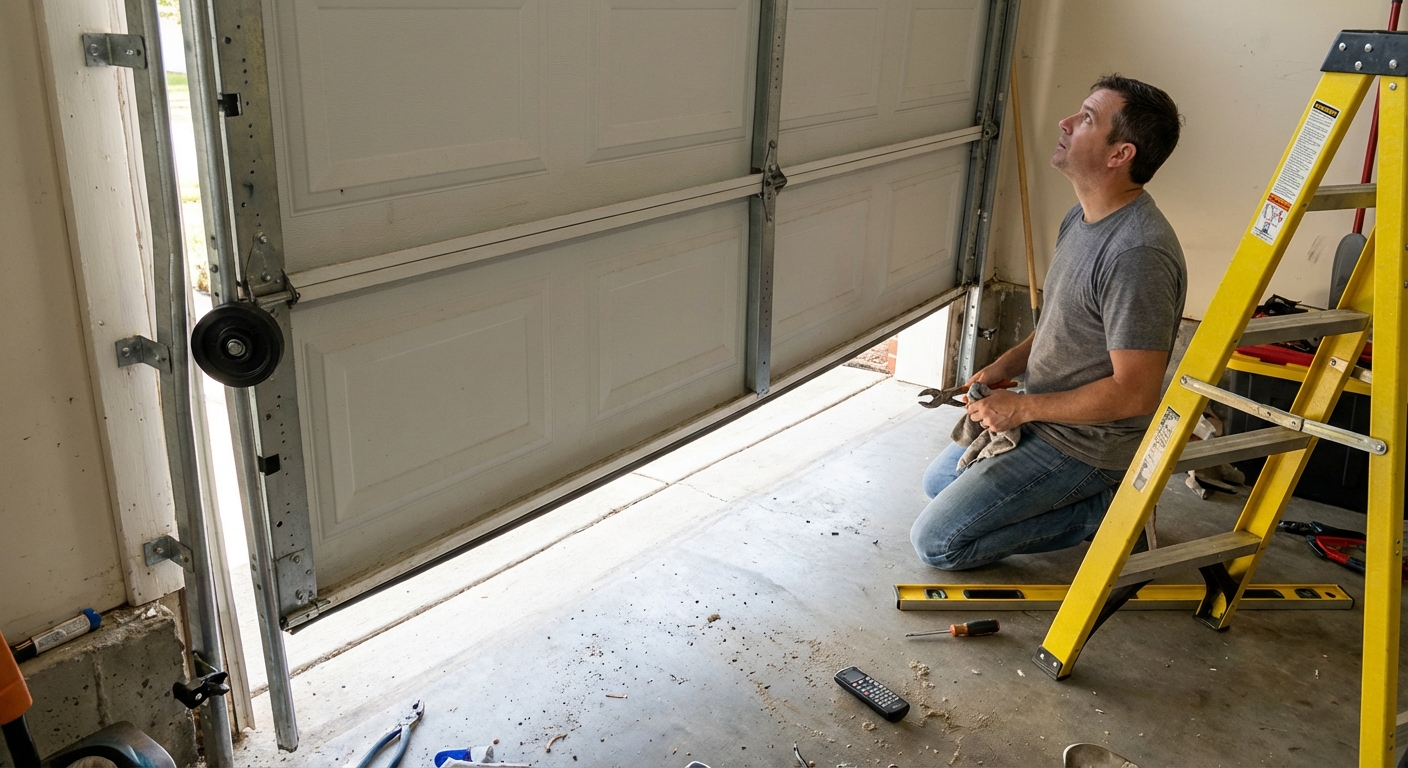
If the door looks crooked, one side is higher than the other, or you see a roller outside the track, treat it like a stability problem first, not an opener problem.
What you can do safely
- Stop using the opener. Continued operation can bend tracks, tear panels, or snap cables.
- Look for obvious obstructions like a rock, hardened mud, or a screw sticking into the track.
- Check track brackets for visibly loose lag screws into framing. If a bracket is dangling, do not run the door.
When to call a pro immediately
- Cables are loose, frayed, or wrapped wrong on the drum.
- The bottom of the door is out of the track or the door is bowing.
- You need to lift or “wrestle” the door back in place.
My honest take: I am comfortable fixing plenty of things around the house, but when a garage door is off-track, it is very easy to turn a small problem into a dangerous one. This is usually money well spent on a service call.
Step 6: It closes then reverses (tracks, limits, force)
If your sensors are clean and aligned but the door still reverses, the opener may be sensing resistance or it may be set to travel too far.
DIY checks
- Track and rollers: look for dents, bent sections, or sticky rollers. Clean debris from the track with a rag.
- Door seal: an old bottom seal can grab the floor and trigger reversal, especially in cold weather.
- Binding: watch the door move and look for a spot where it rubs or shudders.
Adjusting limits and force (DIY if you are careful)
Most openers have travel limit and force adjustments. If the down travel is set too far, the door hits the floor hard and reverses. If force is set too low, normal friction can trigger reversal.
- Find your opener model and look up the manual. It is usually a quick PDF search.
- Make small adjustments only, then test.
- After any adjustment, test both safety systems per your manual (many modern openers follow UL 325-style requirements):
- Contact reversal test: place a 2x4 laid flat on the floor under the door and close it. The door should reverse when it hits the board.
- Photo-eye test: close the door and wave a long object (like a broom handle) through the sensor beam. The door should reverse immediately.
Safety note: Do not crank the force setting way up to “solve” a problem. If the door needs high force to close, something is binding and you are masking the real issue.
Step 7: Opener problems (chain/belt, trolley, motor)
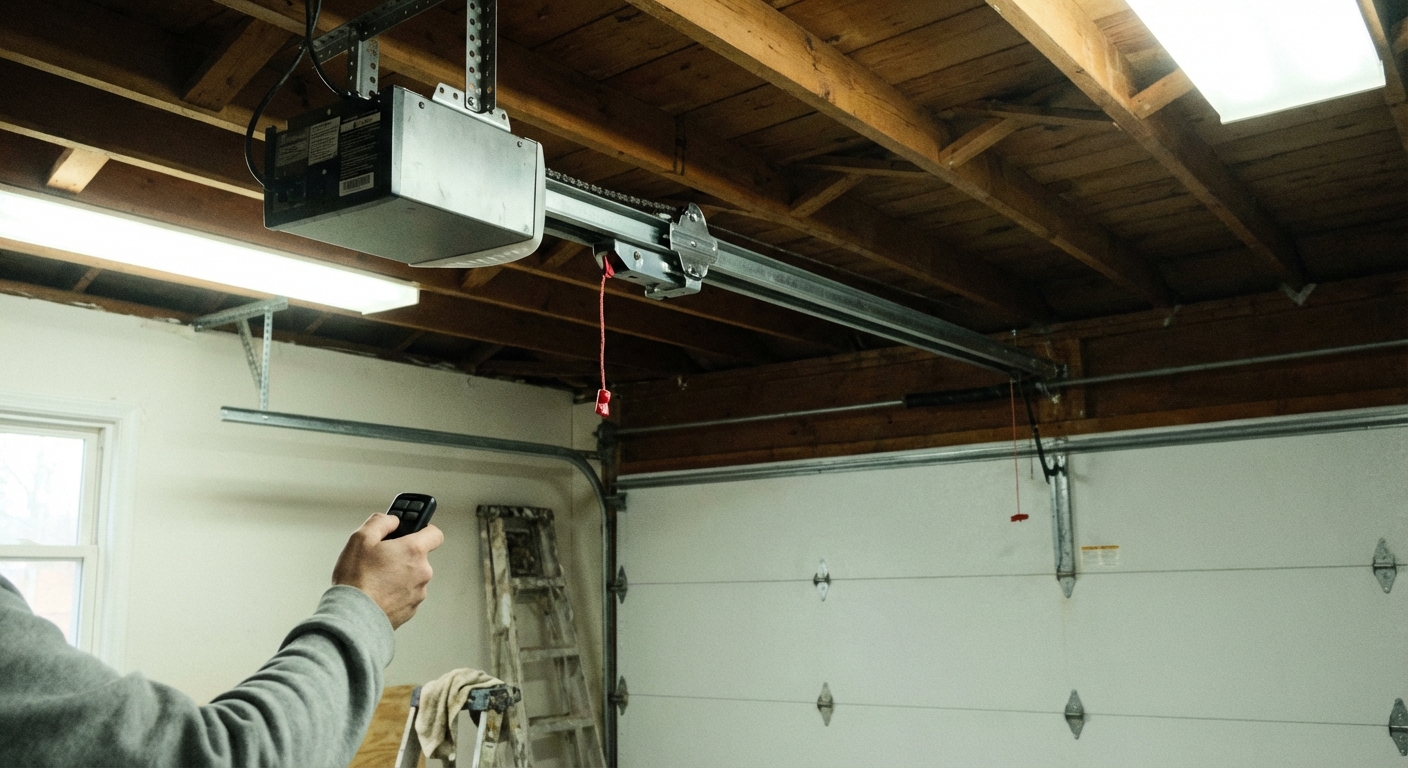
Opener runs but the door does not move
- Emergency release engaged: the trolley may be disconnected. Reconnect it per your manual, often by running the opener until it clicks back in.
- Manual slide lock engaged: see Step 1. If the door is physically locked, the opener will not win that fight.
- Stripped gear: some openers run and hum but do not move the chain or trolley. This can mean a worn internal gear.
Opener hums or clicks, then stops
- The door may be too heavy (spring issue) or binding in the track.
- On older units, a failing capacitor or motor can also cause this. Not guaranteed, but worth considering if everything else checks out.
Remote range is terrible all of a sudden
- LED bulb interference: certain LED bulbs (especially in the opener) can create radio interference that kills remote range. Try swapping to a garage-door-compatible LED or an incandescent bulb if your opener allows it.
- Antenna: make sure the opener’s hanging antenna wire is intact and pointing down.
Keypad not working
- Replace the keypad battery if your model uses one.
- Confirm you are not in a lockout mode from the wall console.
- If it recently lost programming (power outage can do it), reprogram it using the opener’s “Learn” button per the manual.
What’s DIY vs pro here?
- DIY: reconnecting the trolley, tightening visible mounting bolts, replacing remote and keypad batteries, reprogramming remotes/keypads, basic lubrication (see below).
- Pro or experienced DIY: internal gear replacement, logic board troubleshooting, motor replacement, rewiring, or anything that involves disassembling the opener housing if you are unsure.
Maintenance that prevents most garage door surprises
A little routine care goes a long way, especially if you live where dust, road salt, or freezing temps are normal.
Lubricate the right parts (2 times per year)
- Use a garage-door-specific lubricant (silicone or lithium-based, per label) on hinges, springs (light coat), and metal rollers.
- Do not heavily spray nylon rollers. If you have nylon rollers with bearings, a light, targeted application on the bearing area is plenty.
- Do not grease the tracks. Tracks should be clean, not slippery.
- Avoid using WD-40 as your primary lubricant. It is more of a cleaner/water displacer than a long-lasting garage door lube.
- Wipe excess so it does not drip onto the car, floor, or sensors.
Tighten and inspect (10-minute check)
- Look for loose track bracket bolts and opener mounting hardware.
- Scan cables for fraying and rollers for cracks. If you see damage, schedule service.
Test balance (only when the door is closed to start)
- Disconnect the opener with the emergency release.
- Lift the door halfway and let go carefully.
- A properly balanced door should stay in place (or stay roughly in place). If it drops or shoots up, springs likely need adjustment by a pro.
When to call a professional (no hesitation list)
If any of these are true, stop troubleshooting and book service. This is where injuries and expensive damage happen.
- Broken torsion or extension spring
- Loose, frayed, or snapped lift cables
- Door off-track or hanging crooked
- Bottom bracket issues (the cable attaches here, and it is under tension)
- The door feels extremely heavy when disconnected from the opener
- Repeated reversals after you have confirmed sensors and tracks are clear
Quick troubleshooting checklist
If you only have a minute, run this sequence:
- Replace remote battery
- Check opener power, breaker, and GFCI
- Make sure wall console lock is off
- Check the manual slide lock on the door
- Clean and align safety sensors
- If it is freezing, check for a door frozen to the floor
- Clear track obstructions and check for bent track
- Disconnect opener and hand-lift test (door closed first). If heavy, schedule spring service
- If opener runs but door does not, check emergency release and trolley
- If remote range suddenly stinks, consider LED bulb interference
If you tell me one detail, I can narrow it down
If you want help diagnosing it fast, tell me:
- Does the wall button work?
- Does the door close then reverse?
- Do you see any blinking sensor lights?
- When you pull the emergency release (door closed first), does the door feel heavy?
- Opener brand and approximate age (LiftMaster, Chamberlain, Genie, Craftsman, etc.)
That combo usually pinpoints the culprit without guesswork.
About Marcus Vance
Content Creator @ Grit & Home
Marcus Vance is a lifelong DIY enthusiast and self-taught home renovator who has spent the last decade transforming a dilapidated 1970s ranch into his family's dream home. He specializes in budget-friendly carpentry, room-by-room renovations, and demystifying power tools for beginners. Through his writing, Marcus shares practical tutorials and hard-learned lessons to help homeowners tackle their own projects with confidence.