A running toilet is one of those problems that feels small until you see the water bill. The good news is many running toilets are not “call a plumber” situations. They are usually a worn flapper, a misadjusted float, or a tired fill valve. I have fixed all three in my own 1970s ranch, sometimes more than once, because I love learning the hard way.
This guide will help you figure out what is happening, then fix it with simple parts you can grab at any hardware store.

Before you start
Tools and supplies
- Adjustable wrench or channel-lock pliers
- Small bucket or shallow pan
- Old towel or rag
- Sponge (optional but handy)
- Replacement flapper (or a universal flapper)
- Replacement fill valve (universal style works for most toilets)
- Optional: new braided supply line if yours looks old or crusty
Safety and quick prep
- Skip the chlorine or bleach drop-in tank tablets. They can degrade rubber parts and shorten flapper life (even the “safe” ones can be hard on older seals).
- Put the tank lid somewhere safe. Porcelain lids chip easily and seem magnetically attracted to tile floors.
- Know your shutoff valve location. It is usually on the wall or floor behind the toilet.
- If the shutoff valve is stuck, do not force it. Old valves can snap or start leaking. If it will not turn with gentle pressure, stop and consider calling a plumber.
How a toilet runs
Your toilet tank is basically a small water reservoir with two jobs:
- Fill valve: refills the tank after you flush and stops when it reaches the right level.
- Flapper (flush valve seal): seals the opening at the bottom of the tank so water stays put until you flush again.
A toilet “runs” when water keeps refilling because it is leaking out somewhere, usually past the flapper into the bowl, or out the overflow tube because the water level is too high.
Fast diagnosis
Step 1: Take the lid off and listen
If you hear water continuously, look at the overflow tube. If water is spilling into it, your water level is too high or the fill valve is not shutting off.
Step 2: The quiet test
With the tank full, turn off the shutoff valve (clockwise). Do not flush. Wait 10 to 15 minutes.
- If the water level in the tank drops, water is leaving the tank. That is usually a leaking flapper (or a flush valve seal issue).
- If the water level stays put with the supply off, but you had running before you shut it off, the problem is likely overfilling (float set too high) or a fill valve that will not shut off reliably.
Step 3: Food coloring test (optional)
Add a few drops of food coloring to the tank water. Do not flush. If colored water shows up in the bowl within 10 to 30 minutes, the flapper or flush valve seal is leaking.
Pro tip: Flush afterward so you do not stain the bowl.
Fix 1: Flapper
If I had to bet lunch money on one part, it is the flapper. Rubber hardens, chains get misadjusted, and mineral buildup keeps seals from sealing.
1) Shut off water and drain
- Turn the shutoff valve clockwise until it stops.
- Flush and hold the handle down to empty as much as possible.
- Sop up the remaining water with a sponge or towel.
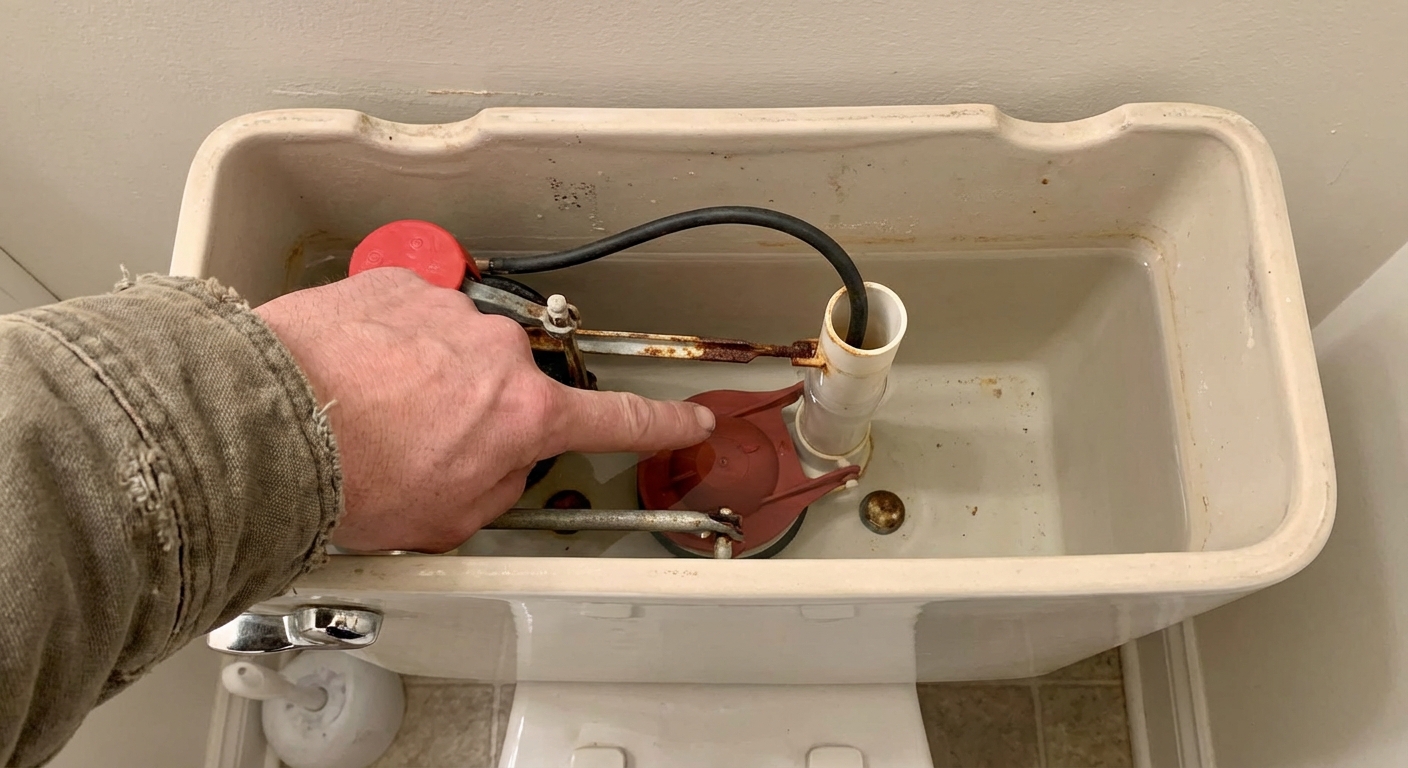
2) Check the chain
The chain should have a little slack. Too tight and it holds the flapper open just enough to leak. Too loose and the flapper may not lift properly on flush.
- Aim for a little slack, about 1/4 to 1/2 inch, when the flapper is closed.
3) Pick the right replacement
Most toilets use a 2-inch or 3-inch flapper. If you are not sure which you have, measure the flush valve opening, or take the old flapper with you.
Quick heads-up: Some toilets do not use a flapper at all. They use a canister style flush valve with a rubber seal. If you open the tank and do not see a flapper, you likely need a canister seal, not a flapper.
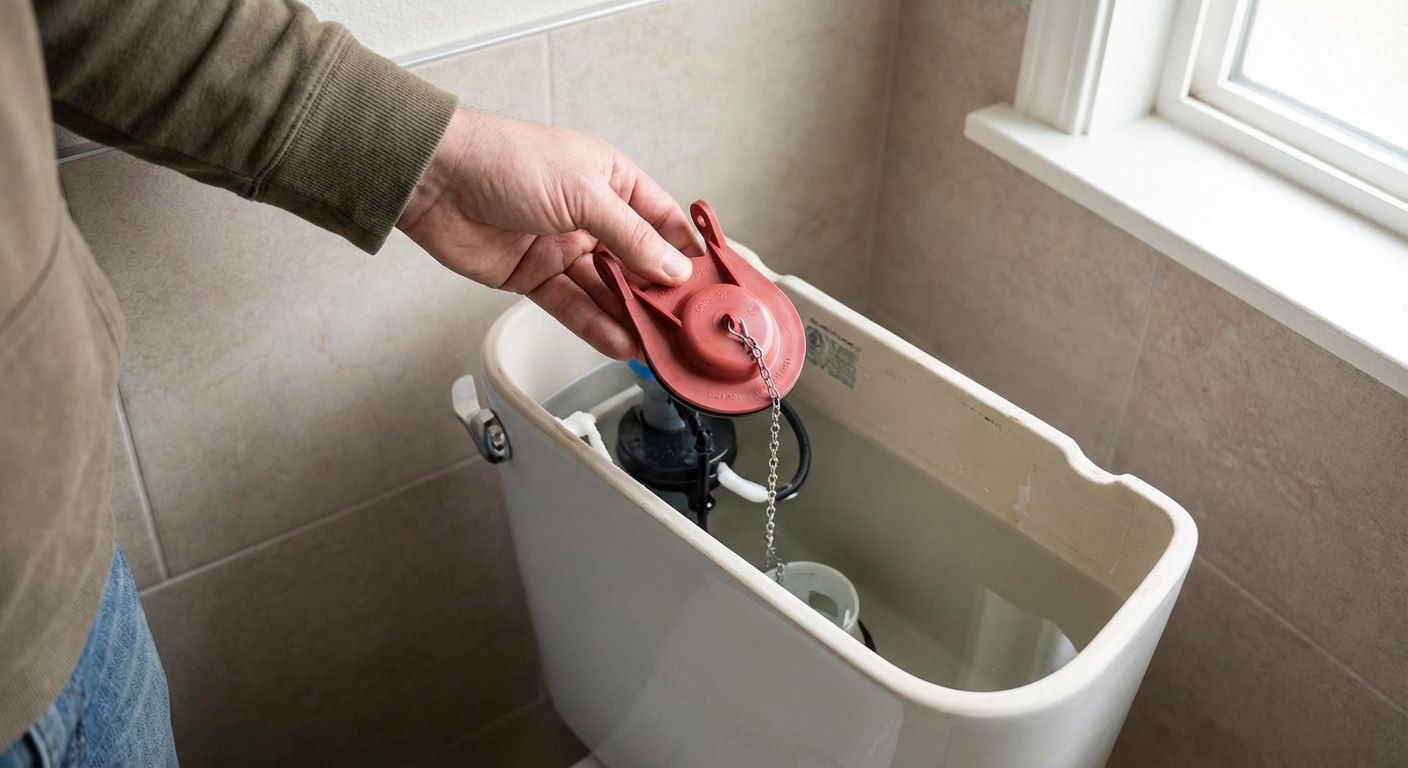
4) Remove the old flapper
Most flappers either:
- Clip onto two little “ears” on the overflow tube, or
- Slide off a ring that sits around the overflow tube (common on some models).
Unhook the chain from the flush lever, then remove the flapper.
5) Clean the seal surface
Wipe the rim where the flapper seals. If you have crusty mineral buildup, gently scrub it off with a rag. This one step has saved me from replacing parts more than once.
6) Install the new flapper and test
- Match the old style if you can, or use a universal flapper that fits your overflow tube setup.
- Hook the chain back up with that small amount of slack.
- Turn the shutoff valve back on (counterclockwise). Let it fill, then watch and listen.
No trickle into the overflow tube, no periodic refilling, and you are in business.
Fix 2: Water level and float
If water is running into the overflow tube, your tank is overfilling. That is usually a float adjustment issue, or a fill valve that can no longer shut off.
Target water level
Most toilets have a mark inside the tank or on the overflow tube. A good rule of thumb is about 1 inch below the top of the overflow tube.
Float cup adjustment
Many newer fill valves have a float cup that rides up and down the valve shaft.
- Look for an adjustment screw on top of the valve, or a clip you squeeze to slide the float.
- Adjust so the valve shuts off sooner and the water level stops below the overflow tube.
Float ball adjustment
If you have the older arm with a ball float:
- There is often an adjustment screw near the pivot, or
- You can gently bend the rod down slightly so the valve closes earlier.
My mistake to help you avoid it: I once cranked the adjustment too far, then wondered why the flush got weak. If the water level is too low, the bowl will not clear well. Adjust in small steps and test between changes.
Fix 3: Fill valve
If your toilet keeps running, the float is set correctly, and you still hear hissing or slow refilling, the fill valve is likely worn out. Replacing it is a beginner-friendly job that feels intimidating until you do it once.
1) Shut off water and drain
- Turn off the shutoff valve.
- Flush to empty the tank.
- Catch any remaining water with a small bucket and towel.
2) Disconnect the supply line
Under the tank, loosen the coupling nut that connects the supply line to the fill valve shank. A towel under the connection saves cleanup.
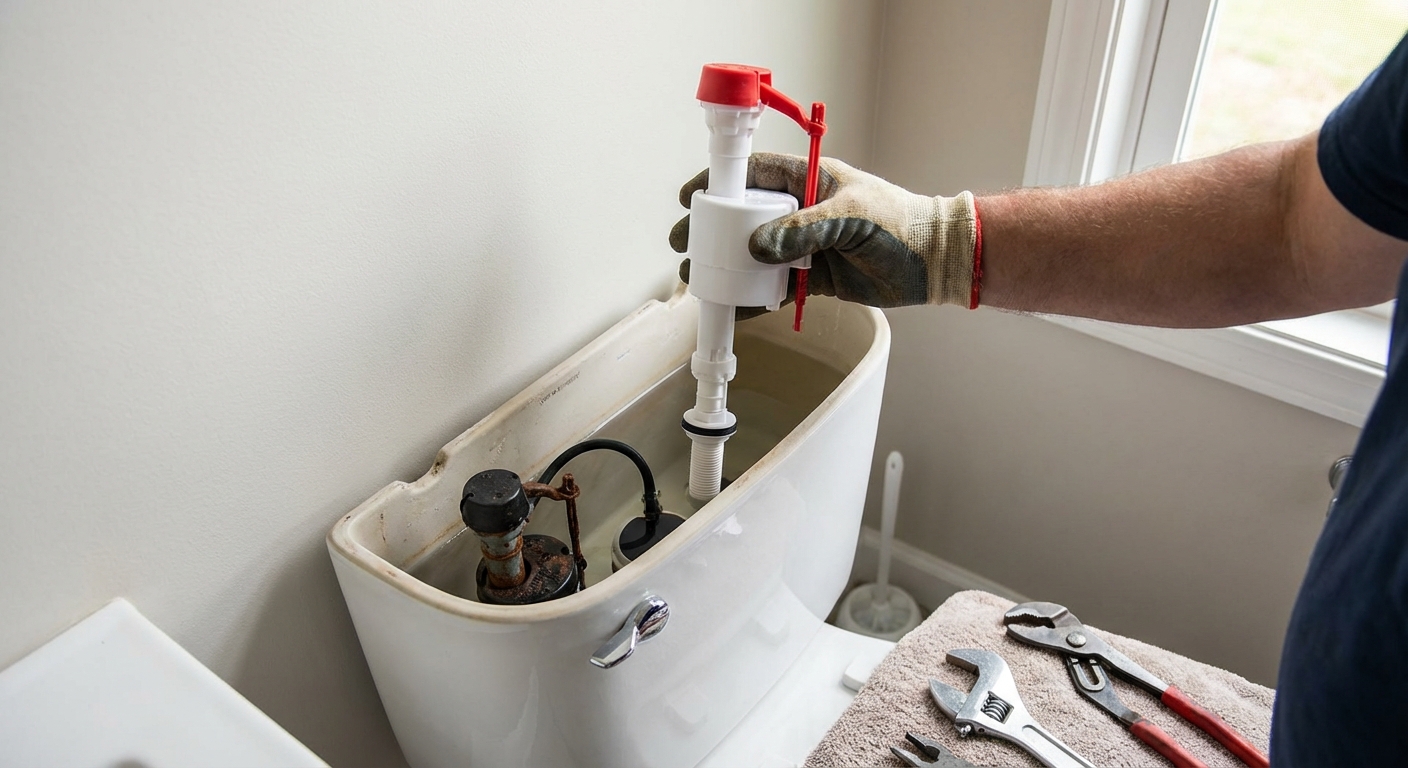
3) Remove the old fill valve
Inside the tank, the fill valve is held by a large plastic nut underneath the tank. Unscrew it and lift the fill valve out.
4) Install the new fill valve
- Set the height per the manufacturer instructions. On most valves, set the critical level (CL) mark so it sits at least 1 inch above the top of the overflow tube (or whatever your instructions specify).
- Tighten the lock nut snug, but do not go gorilla-tight. It is plastic.
- Reconnect the supply line.
- Reconnect the refill tube to the overflow tube using the provided clip. The refill tube should not be shoved down inside the overflow tube.
Why the clip matters: if the refill tube is pushed down into the overflow tube, it can create a siphon and slowly pull water through the fill valve, which can keep the toilet “running” even when everything else seems fine.
5) Turn on water and check for leaks
Turn the shutoff valve back on and watch every connection:
- Supply line at the shutoff valve
- Supply line at the tank
- Lock nut under the tank
If you see a slow drip, tighten a touch. If the supply line looks stiff, cracked, or heavily corroded, replace it while you are here.
Fix 4: Other causes
Handle sticking
If the handle does not spring back, the chain can stay tight and keep the flapper open.
- Check that the chain is not tangled.
- Make sure the flush lever is not rubbing the tank lid or tank wall.
Flush valve seat damage
If the sealing surface where the flapper sits is rough or cracked, a new flapper may not fully stop the leak.
- Light mineral buildup can be cleaned.
- If the flush valve seat is damaged, you may need a flush valve replacement, which involves removing the tank from the bowl. It is doable, but it is a bigger project.
Cracked overflow tube
A cracked overflow tube can let water leak into the bowl. If you see a crack, plan on replacing the flush valve assembly.
Troubleshooting cheat sheet
- Water trickling into overflow tube: lower water level or replace fill valve.
- Tank refills every few minutes: flapper leak, chain too tight, or dirty sealing surface.
- Weak flush after fixing: water level set too low.
- Hissing sound at end of fill: fill valve not sealing, replace it.
- Leak at base of tank bolts or under tank: different issue than “running” and needs gasket or bolt attention.
When to call a plumber
Most running toilets are an easy win, but call in help if:
- Your shutoff valve will not fully close, is stuck, or it is leaking around the stem.
- You find a crack in the tank or bowl.
- You replaced the flapper (or canister seal) and fill valve and it still runs, especially if the flush valve seat appears damaged.
- You are uncomfortable disconnecting the supply line or working under the tank.
My thrifty parts advice
If you are standing in the aisle staring at 30 options, here is what I do:
- Start with the flapper (or canister seal). It is cheap and the most common failure.
- If the toilet is older or you see crusty buildup, replace the fill valve too. The extra cost is usually worth the time saved.
- Take a quick photo inside your tank before you go to the store, especially of how the seal attaches and the shape of the fill valve.
- If you are buying a flapper, confirm size (2-inch vs 3-inch) before you leave the aisle.
Wrap-up
Fixing a running toilet is one of the best beginner DIY plumbing projects because the parts are simple, the steps are repeatable, and the payoff is immediate. Start by figuring out whether you have a flapper leak or an overfill problem. Then replace the right part, adjust the water level, and you will get your quiet bathroom back.
If you want, tell me what you see in your tank, flapper or canister style, float type, and whether water is going into the overflow tube. I can help you narrow it down fast.
About Marcus Vance
Content Creator @ Grit & Home
Marcus Vance is a lifelong DIY enthusiast and self-taught home renovator who has spent the last decade transforming a dilapidated 1970s ranch into his family's dream home. He specializes in budget-friendly carpentry, room-by-room renovations, and demystifying power tools for beginners. Through his writing, Marcus shares practical tutorials and hard-learned lessons to help homeowners tackle their own projects with confidence.