A slow-draining bathroom sink is one of those little problems that can make your whole morning feel off. The good news is it is usually not a serious plumbing failure. It is almost always a clog you can reach in minutes, usually hair and soap scum caught at the pop-up stopper or sitting in the P-trap.
I have cleared more of these than I can count in our 1970s ranch. The first time I did it, I assumed I needed chemicals or a plumber. Turns out I just needed a towel, a bucket, and the willingness to pull out something gross.
This page walks you through the common causes and a few fixes, from easiest to more hands-on. Most sinks are back to normal in about 15 minutes.
Before you start
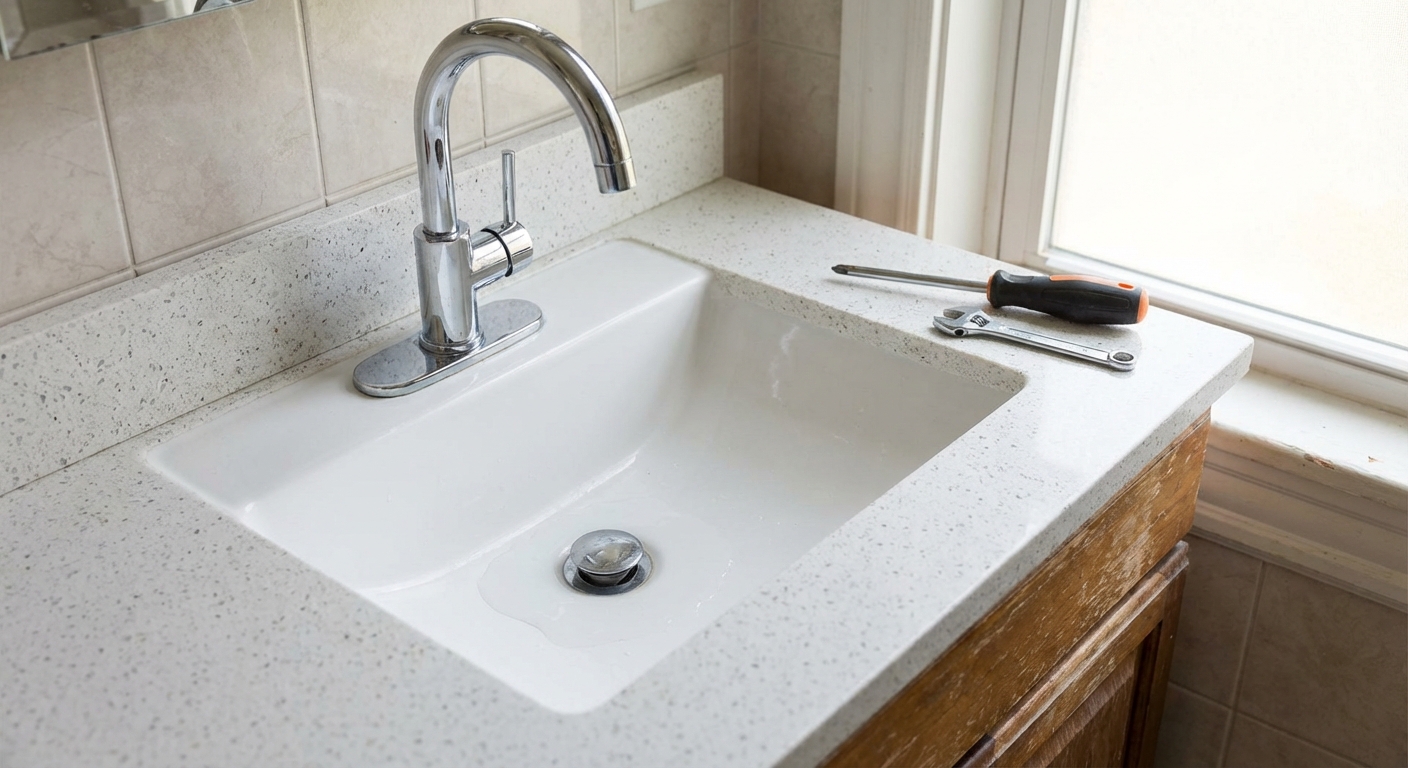
What you will need
- Old towel or rag
- Small bucket or bowl
- Adjustable pliers or channel-locks (optional)
- Drain snake or small zip drain tool (a 10 to 25 foot hand snake is perfect)
- Flashlight
- Dish soap and an old toothbrush (for cleaning parts)
- Rubber gloves (strongly recommended)
Quick safety and sanity notes
- Skip the chemical drain cleaner if you can. It often does not dissolve hair well, it can damage older finishes, and it makes the next step miserable if you have to open the trap.
- Protect the cabinet with a towel before you loosen anything. Even “dry” traps usually have some water in them.
- Do not over-tighten plastic parts. Most bathroom sink traps are PVC with slip nuts that seal with a washer, not brute force.
Common causes
Bathroom sinks clog differently than kitchen sinks. You are typically dealing with a hair and soap problem, not grease and food.
- Hair buildup that grabs onto the pop-up stopper and forms a little net.
- Soap scum and toothpaste residue that thickens over time and narrows the drain path.
- Gunk under the stopper where the drain body necks down. This is the classic “it drains, but painfully slow” situation.
- P-trap sludge in the curved section under the sink that holds water to block sewer gas.
Step 1: Simple flush (2 minutes)
If the sink is draining, just slowly, start with the least dramatic option. Sometimes you can soften the soap scum enough to get things moving again.
- Run hot water for 30 to 60 seconds to warm the pipe.
- Add a small squirt of dish soap into the drain.
- Run hot water again for another minute.
If the sink is still sluggish, do not keep repeating this for 20 minutes. Move on. The clog is probably hair at the stopper or in the trap.
Step 2: Clean the stopper (5 minutes)
In my experience, this fixes the majority of slow bathroom sinks. The stopper is a perfect hook for hair and gunk, and it sits right where the drain narrows.
What about using a plunger?
You can try one, but bathroom sink stoppers and overflow holes make plunging less effective than people expect. If you plunge, cover the overflow hole with a wet rag and use a few gentle plunges, not a full-body workout. Still, I usually skip it and go straight to pulling the stopper because that is where the hair normally is, and it takes about the same amount of time.
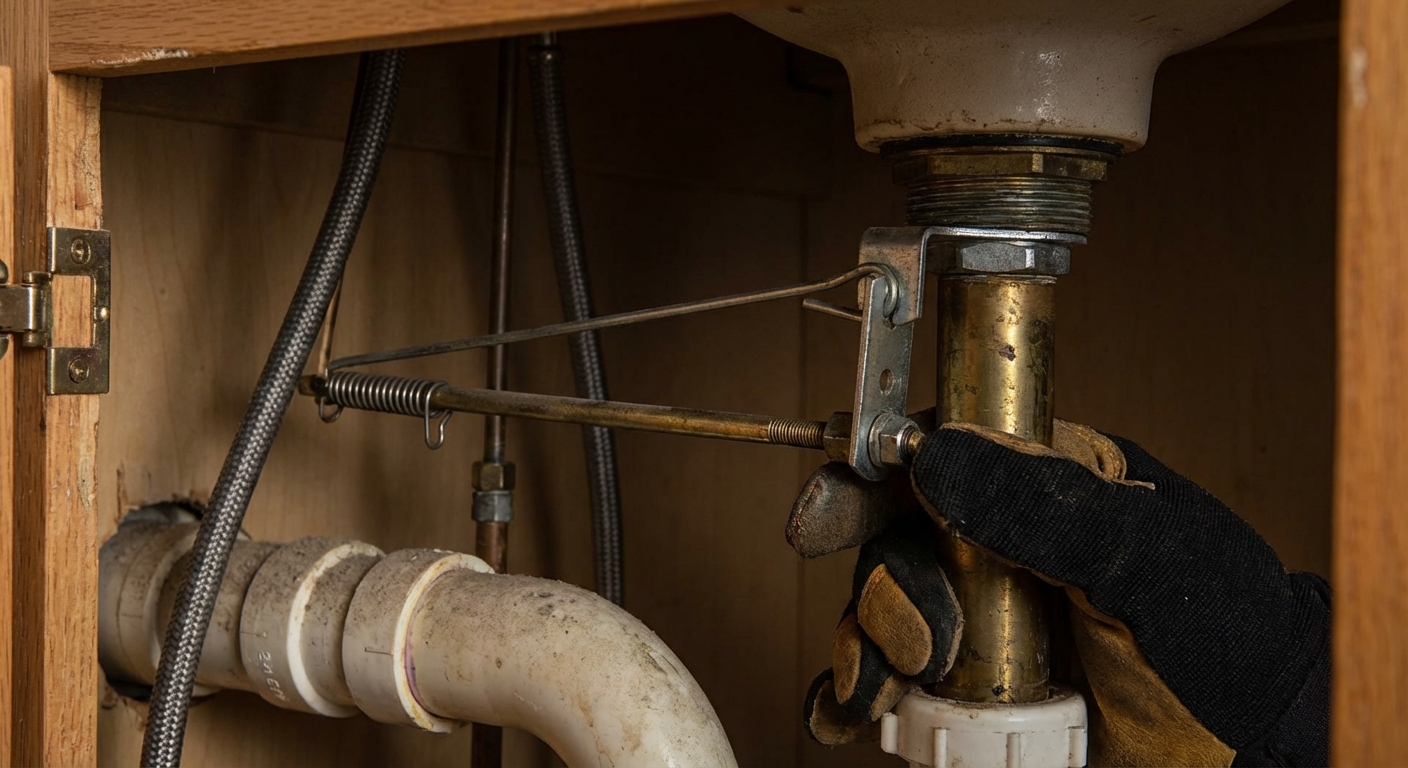
How to remove the stopper
- Look under the sink behind the drain. You will see a horizontal rod (pivot rod) going into the drain pipe with a small nut holding it.
- Place a towel and a small bucket under that area. A little water can drip out when you pull the rod.
- Unscrew the pivot nut by hand. If it is tight, use pliers gently. Turn counterclockwise.
- Pull the pivot rod straight out. Keep track of the order of any small washers.
- Lift the stopper out from above (from inside the sink).
Clean it well
- Peel off hair and wipe the black slime off the stopper and the pivot rod.
- Use an old toothbrush with dish soap to scrub the stopper and the drain opening.
- Rinse with hot water and test the drain with the stopper still out.
Put it back
- Drop the stopper back in from above.
- Reinsert the pivot rod so it catches the hole at the bottom of the stopper.
- Tighten the pivot nut snug, then stop. Overtightening can crack plastic or distort washers.
Marcus tip: If your stopper feels loose or will not seal after reinstalling, the pivot rod probably missed the hole in the stopper. Pull it and try again. I have done that exact mistake more times than I want to admit.
Step 3: Snake the drain (5 to 10 minutes)
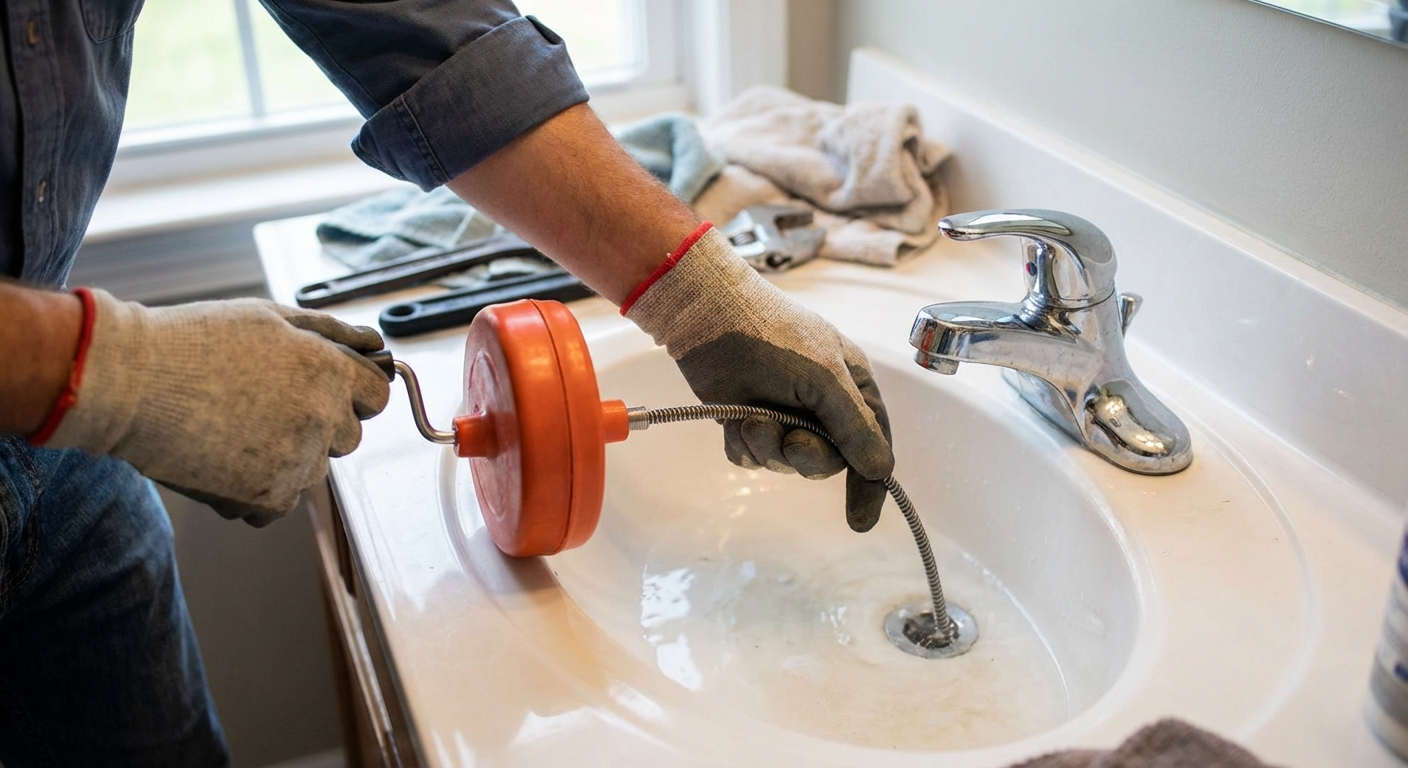
If cleaning the stopper did not fix it, the clog is usually just past the drain body or sitting in the first bend. A small hand snake is ideal here.
Option A: Use a zip drain tool
Those cheap plastic barbed wands are surprisingly effective on hair clogs, and they are beginner-friendly.
- Remove the pop-up stopper first.
- Feed the zip tool into the drain until you feel it catch and resist. Do not force it.
- Twist and pull it out slowly. The barbs usually come out wearing a hair sweater.
- Trash the gunk, then repeat once or twice.
- Flush with hot water for a minute to rinse the line.
Option B: Use a small hand snake
- Remove the pop-up stopper first if you have not already. Snaking with it installed is frustrating.
- Feed the snake into the drain. Go slowly. When you feel resistance, do not force it.
- Twist and work the cable gently to grab hair or break up the clog.
- Pull the cable out and wipe it clean into the trash. Repeat a couple times.
- Flush with hot water for a minute to rinse the line.
Avoid this beginner trap: If you have a flexible, accordion-style drain trap under the sink, the snake can snag in the ridges. Those traps clog easily and are not ideal long-term. If you see one, consider swapping it for a smooth P-trap assembly when you have time.
Step 4: Clean the P-trap (10 to 15 minutes)
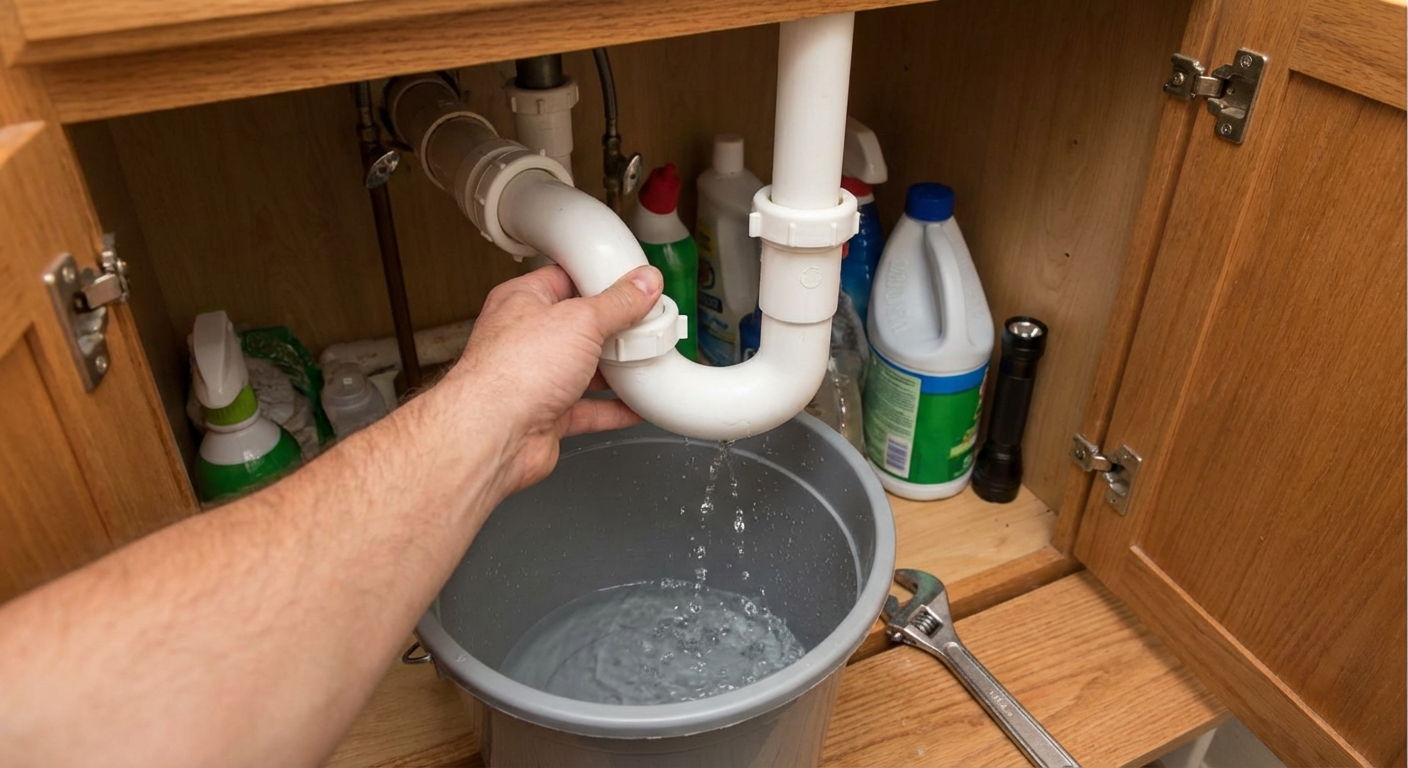
If the drain is still slow, it is time to open the P-trap. This is the curved pipe under the sink. It holds water to block sewer gases, and it is also a natural place for sludge and hair to settle.
How to remove and clean the P-trap
- Put a bucket under the trap. This is non-negotiable.
- Loosen the two slip nuts on either side of the curved section. Most turn by hand. Use pliers gently if needed.
- Lower the trap carefully and dump the water into the bucket.
- Clean the trap with a bottle brush, old toothbrush, or rag. Pull out any hair clumps and scrape out the sludge.
- Check the trap arm (the pipe heading into the wall) for buildup you can reach and wipe it out.
- Reinstall the trap, making sure the washers are seated correctly. Tighten the nuts snug by hand, then a tiny bit more if needed.
- Test for leaks by running water for 30 to 60 seconds. Feel around the slip nuts with a dry finger.
Washer orientation
Most slip-joint washers are beveled. The flat side goes against the nut, and the beveled (tapered) side points into the fitting so it can wedge in and seal as you tighten. If you get a drip after reassembly, a flipped or mis-seated washer is the first thing I suspect.
If it is still slow
If you cleaned the stopper, snaked the drain, and cleaned the P-trap but the sink still drains slowly, the clog may be deeper in the branch line in the wall or you may be dealing with a venting issue. Here is what I would check next:
- Does the sink gurgle when draining or when the toilet flushes? That can hint at venting or a partial blockage further down the line.
- Does the bathroom sink affect another fixture (tub or toilet) when you run water? That can point to a clog beyond the sink line.
- Is the trap installed correctly with a proper slope to the wall? A trap arm that slopes the wrong way can drain poorly.
At that point, a longer snake from the trap arm into the wall is the next DIY step. If you are in a condo or you suspect a main line issue, calling maintenance or a plumber can save you time.
Keep it from coming back
- Pull and clean the stopper every month or two if you have long hair in the house. It takes 2 minutes once you have done it once.
- Run hot water for 10 seconds after brushing teeth to push toothpaste residue through the trap.
- Use a simple mesh drain screen if your sink setup allows it. Catching hair up top beats fishing it out later.
- Avoid oily products down the sink. Some beard oils, cosmetics, and lotions can add to the sticky buildup.
15-minute checklist
- Remove pop-up stopper and clean hair and scum
- Use a zip tool or snake the drain with the stopper removed
- Clean the P-trap and check washers
- Run water and confirm no leaks under the sink
If you get stuck on a specific sink style, take a quick photo under the sink and compare what you see to the parts above. Most bathroom sink drains are the same basic setup with minor variations.
About Marcus Vance
Content Creator @ Grit & Home
Marcus Vance is a lifelong DIY enthusiast and self-taught home renovator who has spent the last decade transforming a dilapidated 1970s ranch into his family's dream home. He specializes in budget-friendly carpentry, room-by-room renovations, and demystifying power tools for beginners. Through his writing, Marcus shares practical tutorials and hard-learned lessons to help homeowners tackle their own projects with confidence.