There are few sounds in a house more annoying than a door that rrrrrips across the jamb every time you close it. The good news is most sticking and rubbing interior doors are not “bad doors” at all. They are usually just a little out of alignment from loose hinges, seasonal swelling, or a house that has settled a hair.
I have fixed a lot of these in my 1970s ranch, and the pattern is almost always the same: start with the hinges, then move to sanding only if you have to. Below is my under-30-minutes routine.

Quick safety and tool list
Tools (grab what you have)
- #2 Phillips screwdriver or drill/driver with a clutch setting
- Utility knife or pencil for marking rub spots
- Sandpaper (80 and 120 grit) and a sanding block
- 1 or 2 longer screws (typically 2 1/2 inch works for most hinge-side fixes)
- Thin cardboard (cereal box) for shims
- Vacuum or brush for dust
Optional but helpful
- A scrap of paper to check gaps
- A small block plane if you have one (not required)
Safety note: If you sand or plane, go slow and keep fingers clear. If your door is heavy, it helps to have someone steady it while you work on hinges.
Step 1: Find exactly where it’s rubbing (2 minutes)
Before you touch a screw, figure out what the door is telling you. Open and close it slowly and watch the gap between the door edge and the jamb.
- Rubbing at the top on the latch side: Classic loose top hinge screws or a sagging door.
- Rubbing at the bottom on the latch side: Often a swollen door, thick paint, or the hinge side sitting proud.
- Rubbing along the hinge side: Hinge is binding, paint buildup, or the door is shifted toward the hinge jamb.
- Hard to latch but not rubbing: Strike plate is slightly off or the latch is hitting the plate.
Quick trick: Close the door until it just touches, then slide a piece of paper around the perimeter. Where it won’t slide, that’s your tight spot.

Step 2: Tighten hinge screws first (5 minutes)
This is the highest payoff fix, and it costs nothing. Use a screwdriver if you can. If you use a drill, use a low clutch setting so you do not strip the screw head or the wood.
What to do
- Tighten every screw on the door side and the jamb side of all hinges.
- Pay special attention to the top hinge. That one takes the most abuse and is the usual culprit.
My real-life mistake: Early on, I cranked down on a drill and spun a screw hole into sawdust. The screw felt “tight” for about one day. If a screw just spins, jump to the next step.
Step 3: Replace one hinge screw with a longer screw (5 minutes)
If the door is sagging, you want the hinge to grab the framing behind the jamb, not just the thin jamb wood. A longer screw does that.
Best place for the longer screw
- Use the top hinge, on the jamb side.
- Swap just one screw first. Usually the top-most hole or a center hole works great.
How to do it
- Remove one existing hinge screw.
- Drive in a 2 1/2 inch screw until snug.
- Test the door. If the rub improves, you are on the right track.
Tip: If the hinge wants to shift while you swap screws, keep the door gently pushed toward closed so the hinge stays seated.

Step 4: Use a cardboard shim for fine-tuning (8 minutes)
If tightening and a longer screw helped but did not fully solve it, you can “steer” the door by shimming behind a hinge leaf. A thin cardboard shim is the old-school, works-every-time fix.
Which hinge to shim?
- Door rubs at the top latch side: Shim the bottom hinge (usually on the jamb side) to nudge the top of the door away from the jamb.
- Door rubs at the bottom latch side: Shim the top hinge to nudge the bottom away.
- Door is tight at the hinge side evenly: Shim both hinges very lightly. This moves the door away from the hinge jamb and can clear paint buildup or a hinge that is sitting a bit proud.
- Door is tight at the latch side evenly: Skip shims. Shimming hinges pushes the door toward the latch side and usually makes this worse. Jump to Step 5 (seasonal swelling or paint), or check for paint buildup on the stop molding.
How to shim with cardboard
- Open the door and support it with your foot or a wedge.
- Remove the screws from one hinge leaf (jamb side is easiest).
- Trace the hinge leaf on thin cardboard and cut it out.
- Place the cardboard in the mortise behind the hinge leaf.
- Reinstall screws and test. Add a second layer only if needed.
Keep it modest: One layer of cereal box cardboard is often plenty. Too much shim can cause the hinge to bind or create a new rub spot.

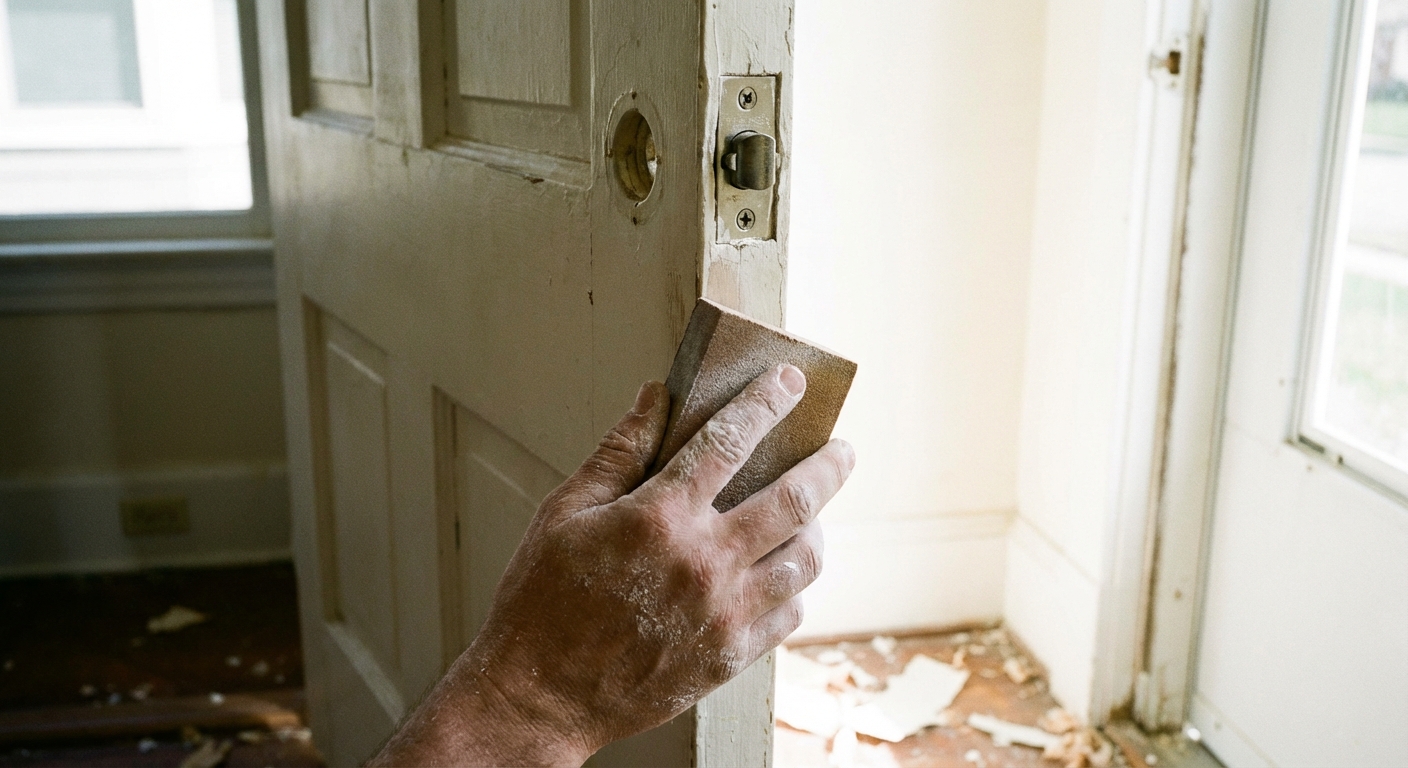
Step 5: Sand the edge only if the door is swollen or painted tight (8 to 12 minutes)
If your hinges are solid and the door still rubs, the door may be slightly oversized for the season. This is common in humid months, bathrooms, or doors that have been painted a few times.
Mark the rub and sand the minimum
- Run a pencil along the tight area, or lightly score the edge with a utility knife where paint is building up.
- Take the door off only if you need room. For small spots, you can often sand with the door in place.
- Start with 80 grit for fast removal, then switch to 120 grit to smooth it.
- Test the fit every minute or two. You are sneaking up on the perfect gap, not reshaping a canoe paddle.
Important: If you sand down to bare wood, seal it with primer and paint. Unsealed wood will soak up moisture and swell again, sometimes worse than before.
Bonus: If it closes but won’t latch (5 minutes)
Sometimes the door swings fine, but the latch hits the strike plate. That is alignment, not rubbing.
Fast checks
- Close the door slowly and watch where the latch hits the strike plate opening.
- If it is off by a hair, you can often fix it by tightening the hinges or using the longer screw first.
- If it is still off, loosen the strike plate screws, nudge the plate slightly, and retighten.
If the hole is too small: A couple passes with a file on the strike plate opening can be enough. Go slow so the latch still looks clean when closed.
30-minute game plan
- Minute 0 to 2: Find the rub spot with a slow close and the paper test.
- Minute 2 to 7: Tighten all hinge screws.
- Minute 7 to 12: Add one longer screw to the top hinge on the jamb side.
- Minute 12 to 20: Shim one hinge with cardboard if needed.
- Minute 20 to 30: Sand only the marked area, then seal any bare wood.
When to stop and call in help
Most interior door rubs are simple. But if you see any of the below, the issue may be the frame or structure, not just hinges.
- The door frame is visibly cracked or pulling away from the wall.
- The gap is wildly uneven on all sides and keeps changing.
- The door rubs because the floor is heaving or the threshold has shifted.
Otherwise, you are almost certainly a few turns of a screwdriver away from peace and quiet.
About Marcus Vance
Content Creator @ Grit & Home
Marcus Vance is a lifelong DIY enthusiast and self-taught home renovator who has spent the last decade transforming a dilapidated 1970s ranch into his family's dream home. He specializes in budget-friendly carpentry, room-by-room renovations, and demystifying power tools for beginners. Through his writing, Marcus shares practical tutorials and hard-learned lessons to help homeowners tackle their own projects with confidence.