🚨 In a DIY emergency or rush?
Skip the details and jump straight to our 30-second cheat sheet for the most crucial info.
A French drain is one of those projects that feels almost magical when it works. Water disappears, the yard dries out, and you stop stepping over puddles like you live in a swamp. When it stops working, it’s tempting to assume the whole thing “failed.” In reality, most clogged or sluggish French drains can be brought back to life with a little detective work and a good, messy flush.
I’ve had this happen at my own 1970s ranch: everything was fine for a few seasons, then one spring the same low spot came back with a vengeance. The fix was not a full redo. It was an outlet buried under mulch and a line full of fine silt.
This guide is all about maintenance and restoration for an existing French drain. We’ll track down where the water is supposed to go, clear the usual suspects, and talk honestly about when flushing won’t cut it and re-trenching is the smarter play.
How to tell if the drain is clogged or undersized
A French drain can “not work” for a few different reasons. Before you start blasting water into pipes, use the symptoms to narrow it down.
Common signs of a clog
- Water backs up in the same spot even after the rain stops.
- You hear gurgling at a cleanout or catch basin and then it stalls.
- The outlet dribbles during a storm when you expect a steady flow.
- Standing water over the trench line as if the pipe is full and the gravel is saturated.
Signs it might not be a clog
- It only fails in extreme storms. That can mean the system is undersized or the soil is overwhelmed.
- The outlet runs strong but the yard still floods. That can mean the drain is in the wrong spot, too shallow, or water is coming from elsewhere.
- The drain used to work, but landscaping changed. New mulch beds, edging, or a regraded yard can bury an outlet or change how water reaches the trench.
If you’re seeing weak outlet flow, slow draining, or recurring soggy spots along the line, a flush and cleanout is usually worth the effort.
Find the outlet and any cleanouts first
If you only do one thing before grabbing tools, do this: figure out where the water is supposed to exit. If the outlet is blocked or buried, the whole line can act clogged even if the pipe is clean.
Where outlets usually hide
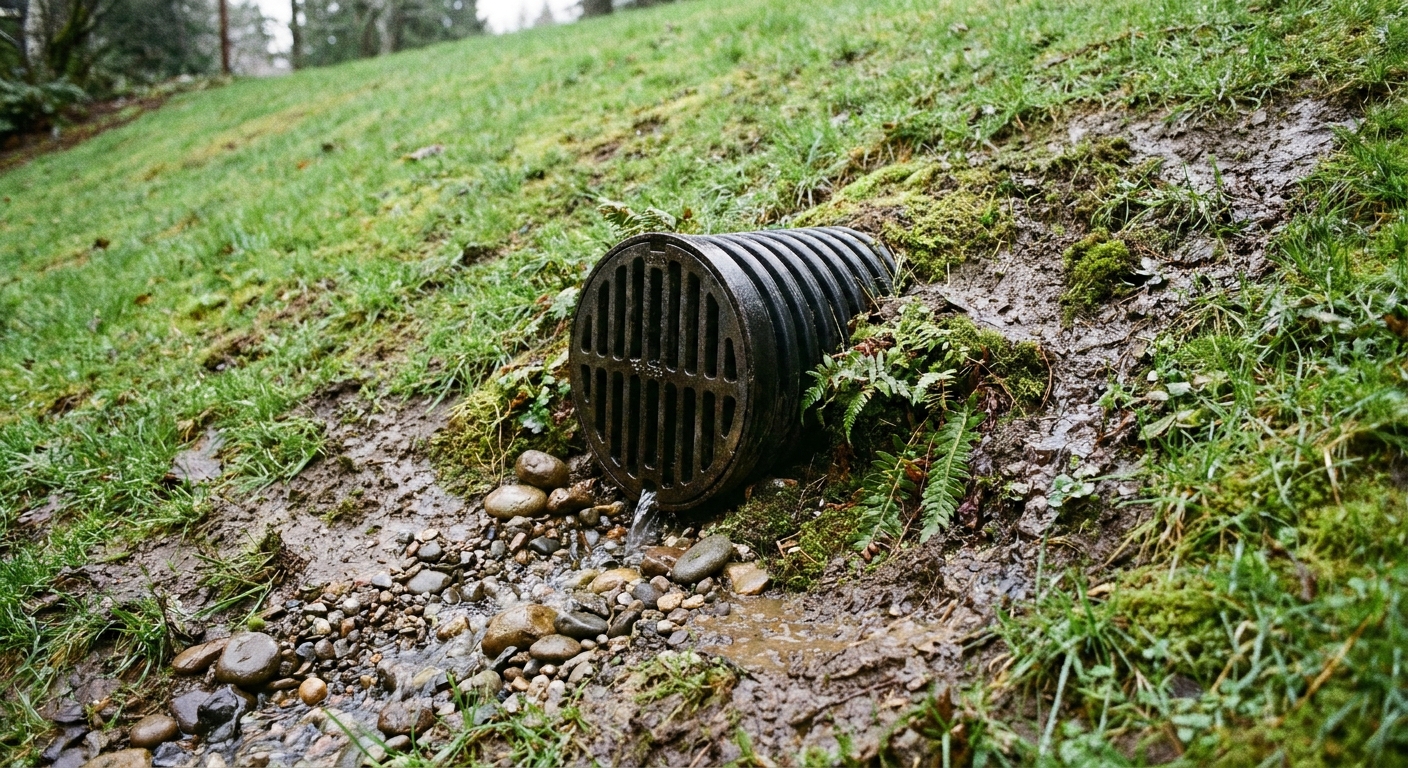
- Daylight outlet on a slope, often with a grate
- Pop-up emitter in the yard
- Connection into a solid drain line to the street (where allowed)
- Discharge into a dry well
How to locate a missing outlet
- Follow the trench route. Look for a subtle dip line, greener grass strip, or settled soil that traces the gravel path.
- Look downhill. Most French drains are designed to flow to the lowest practical point.
- Use a hose test. Run water into an upstream cleanout or catch basin and walk the yard listening for running water and watching for seepage.
- Probe gently. A thin rod or screwdriver can find a buried pop-up emitter without destroying your lawn.
Quick safety note: Call 811 before you probe or dig, even for small holes. It’s free, and it’s not optional if you want to sleep at night.
Tools that make this easier (and what you can skip)
You can restore a lot of drains with basic stuff. Specialty tools help, but you don’t need to turn this into a shopping spree.
DIY-friendly tools
- Garden hose with a spray nozzle or jet setting
- Wet/dry shop vac (great for catch basins and cleanouts)
- Plumber’s snake (hand auger) for roots and packed debris
- Pressure washer with a sewer jetter hose (best upgrade if you have long runs)
- Shovel and hand trowel for exposing outlets
- Bucket, gloves, eye protection
Nice-to-have
- Small inspection camera (borescope) to confirm root intrusion or collapsed pipe
- Laser level or string level to check slope
If you are choosing one “power move” tool: a pressure washer sewer jetter hose is the closest thing to a reset button for many clogged drain lines, as long as the pipe isn’t collapsed.
Step-by-step: Flush and clear a sluggish French drain
The goal is to push sediment and debris out of the system, not deeper into it. That means working with the direction of flow whenever possible.
Step 1: Clear and test the outlet
- Expose the outlet opening fully. Remove mulch, leaves, and packed soil.
- Check for a crushed end, missing grate, or animal nest.
- Run a short burst of hose water into an upstream point and see if anything comes out.
If the outlet is blocked, fix that first. A blocked outlet can make the whole drain behave like a clog upstream.
Step 2: Identify an access point upstream
Best case, you have a vertical cleanout pipe. If not, you might have:
- A catch basin with an outlet pipe
- A downspout tie-in with a removable adapter
- An accessible end of solid pipe before it transitions to perforated pipe

Step 3: Vacuum out what you can
If you have a catch basin or cleanout with standing water, start with a shop vac:
- Suck out water and sludge.
- Scoop leaves and grit from the basin bottom.
- Rinse the basin walls so the next flush does not immediately reintroduce debris.
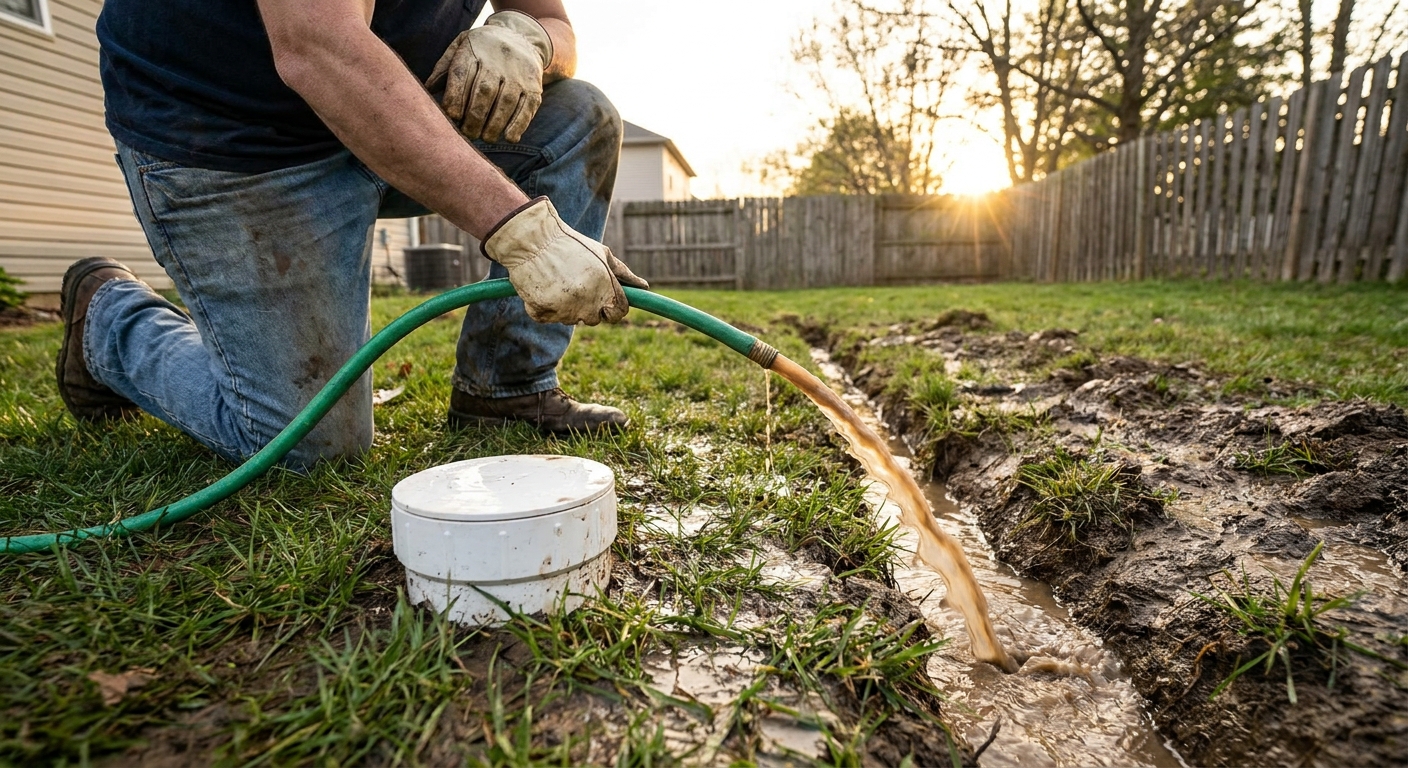
Step 4: Flush from upstream while monitoring the outlet
- Stick the hose 1 to 2 feet into the pipe and run water.
- Have a helper watch the outlet (or set up your phone on video).
- Pulse the water: 20 to 30 seconds on, then off. This helps loosen silt instead of packing it.
Expect muddy water and grit at the outlet. That is a good sign. Keep flushing until the outlet runs noticeably clearer.
Step 5: If flow stalls, snake before you push harder
If water starts backing up at the cleanout, don’t just keep forcing it. That can compact the clog. Instead:
- Run a hand snake in gently until you feel resistance.
- Work it back and forth to break up roots or packed sediment.
- Pull the snake out and remove debris.
Step 6: Use a pressure washer jetter (the correct direction matters)
A jetter hose’s rear-facing nozzles spray backward. That backward spray is what pulls the hose forward through the pipe. It also means the “best” feed direction depends on what you are trying to accomplish and what access you actually have.
- Best case for flushing debris out the outlet: Feed the jetter in from the downstream end (the outlet or a downstream access point) and work it upstream. As you pull the hose back out, the jet action helps wash loosened grit and silt back down and out of the outlet.
- If you can only access upstream (a cleanout near the house): You can still jet, but do it in short passes. Advance a few feet, then pull back to drag debris downstream, and keep checking that the outlet is actually discharging. If you just keep feeding forward nonstop, you risk blasting and stirring material without getting it out.
- Go slow: Keep the nozzle moving and avoid “parking” it at one spot.
Tip from a guy who learned the messy way: Put a splash block or a short piece of scrap gutter under the outlet so you do not blast mud onto your siding or fence.
Root intrusion: the clog that keeps coming back
Roots love French drains because they love water and oxygen. If your line runs near trees or big shrubs, roots are a prime suspect.
How to recognize roots in a drain
- You pull fibrous strands out with a snake.
- Flow improves after cleaning but slows again within weeks or months.
- A camera shows “hair” in joints or at perforations.
What you can do
- Mechanical removal: Snake it and physically remove roots. This is usually step one.
- Spot repair: If roots enter at a joint in solid pipe, dig that section and replace it with properly glued PVC or a tight coupling.
- Reroute or increase separation: If a drain is basically inside a root zone, you may be fighting a losing battle.
About chemical root killers: They exist, but they are not a magic fix, and they can be a bad idea near desirable trees, wells, or sensitive areas. If you’re considering chemicals, read the label carefully and follow local rules. My preference is to treat root entry as a construction problem: fix the point of entry or reroute.
Outlet problems: pop-up emitters and daylight drains
Even a perfectly clean pipe cannot drain if the last 6 inches are blocked.
Pop-up emitter issues
- Soil compaction prevents the pop-up from opening.
- Grass thatch and mulch bury the cap.
- Freezing can crack the housing or shift the fitting.
Fixes are usually simple: expose it, clean it, and reset it flush with grade. If it sits in a low spot that holds water, consider relocating it to a slightly higher patch so it can actually pop.
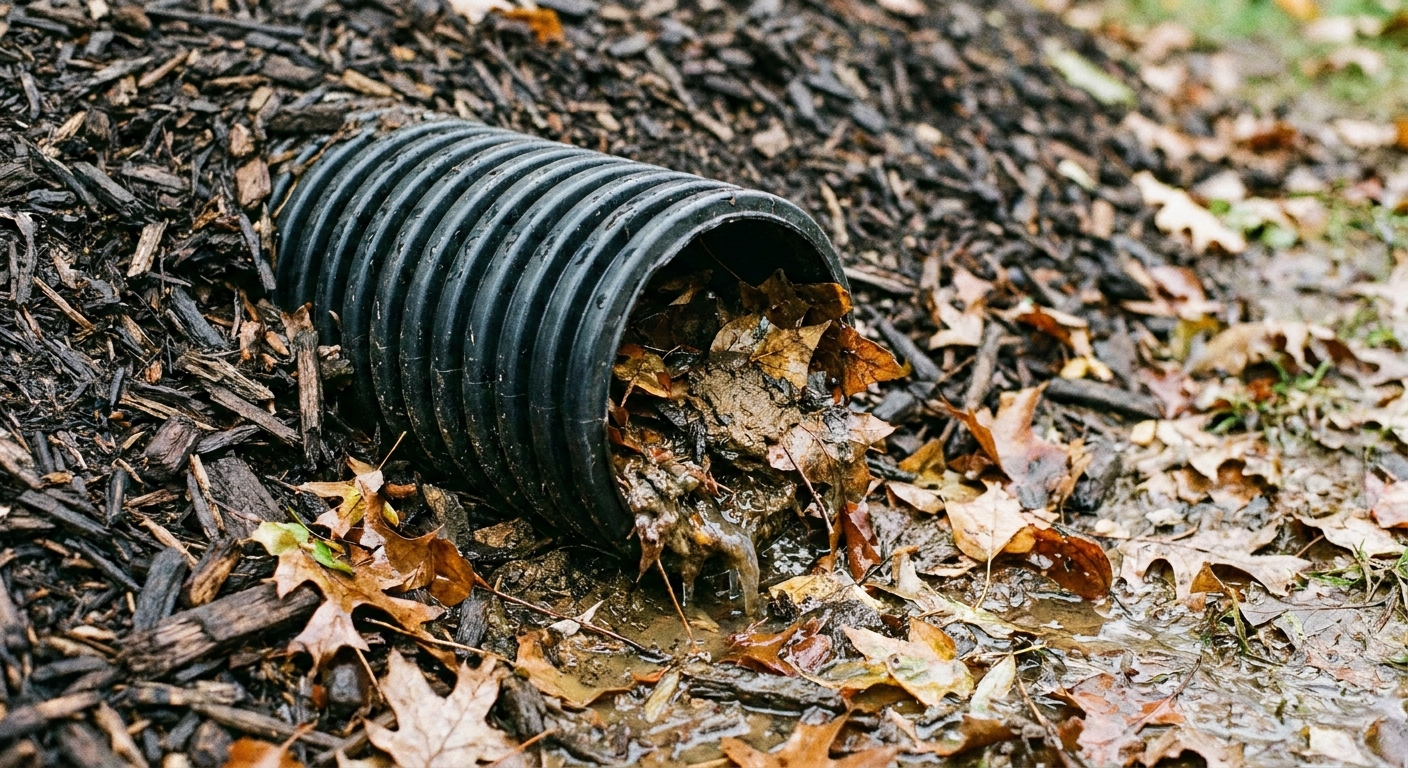
Daylight outlet issues
- Leaves and sediment pack into the opening.
- Animals nest in open pipes.
- Erosion undercuts the pipe so it sags and holds water.
Install a grate, stabilize the area with rock, and make sure the pipe end is not acting like a little shelf that traps sediment.
Slope and sagging: when the pipe holds water like a belly
A French drain relies on consistent slope. Over time, soil can settle and create a low spot in the pipe run. That low spot fills with water, drops sediment, and slowly becomes a recurring clog factory.
Clues you have a belly or lost slope
- You flush and get temporary improvement, but it never runs strong.
- Water stands in the cleanout long after the outlet stops flowing.
- Camera inspection shows standing water in the line.
What you can do without re-trenching everything
- Expose and re-bed a short section. If you can identify where it sags, dig that portion and reset the pipe with proper slope.
- Improve the outlet drop. Sometimes you can gain slope by lowering the outlet elevation (where feasible) so the whole line drains better.
If the system was installed nearly flat to begin with, there may not be enough vertical drop to work with. That is one of the few times I’ll say flushing is not the main fix.
When flushing does not work: filter fabric failure and “mud pipes”
Some French drains clog because soil fines migrate into the gravel and eventually into the pipe. This is often tied to:
- Missing or torn filter fabric
- Fabric wrapped incorrectly or clogged on the outside
- Using the wrong gravel or including too much fines
When this happens, you can flush a little sediment out, but the system keeps feeding itself more silt. You end up with what I call a “mud pipe.” It looks like a drain but acts like a buried gutter full of wet dirt.
Signs this is your problem
- You get a lot of sand and silt every time you flush.
- The drain works briefly then slows again.
- You see muddy water weeping up along the trench line.
At that point, the honest answer is often: rebuild that section correctly rather than repeatedly fighting it.
Re-trench or replace? A practical decision checklist
Here’s how I’d decide on a real weekend, with real time and money limits.
Try flushing and spot repairs if
- The outlet was buried or blocked.
- The drain worked well for years and just recently slowed down.
- You can access cleanouts or a catch basin easily.
- Clogs seem localized (one section, one tree area).
Plan on re-trenching if
- You suspect long sections have lost slope or the pipe is crushed.
- Filter fabric or gravel was installed incorrectly and the trench is full of fines.
- The drain never worked well from day one.
- You cannot find a functional outlet and it appears to discharge into nowhere.
If you do re-trench, use what you learned: add cleanouts, protect the outlet, and keep sediment out from the start. Future you will be grateful.
Prevent clogs: simple maintenance that actually pays off
French drains are “set it and forget it” only if debris never reaches them. In real yards, maintenance matters.
- Inspect the outlet every season. Five minutes prevents a weekend of digging.
- Keep downspout screens clean. If gutters dump grit into the system, the system will eventually become grit.
- Keep pop-up emitters visible. Don’t mulch over them and hope.
- Flush annually if you have heavy clay or lots of trees. A short preventive flush is easier than a full rescue.
My thrifty rule: if a task takes under 10 minutes and prevents a $1,000 problem, it goes on the seasonal checklist.
When to call a pro
I’m all for DIY, but there are a few situations where hiring help is the safest and cheapest move long-term.
- Repeated backups with no clear outlet. A pro can camera-scope the line and locate collapse points.
- You suspect the drain ties into municipal storm piping. Local rules vary and mistakes can get expensive.
- Large tree root problems. If you need excavation near major roots, an experienced crew can avoid damaging a tree you want to keep.
- Basement water issues. If the clogged drain is tied to foundation drainage, don’t gamble. Get a clear diagnosis.
Even if you DIY the fix, paying for a one-time camera inspection can save you from guessing wrong and digging twice.
The 30-Second Cheat Sheet
Essential takeaways for: French Drain Clogged? Flush It and Restore Flow
Fast diagnosis
- Weak or no flow at the outlet during rain usually means outlet blockage, sediment clog, roots, or lost slope.
- Works in small storms, fails in big ones can mean the drain is undersized, not necessarily clogged.
Do this first (best ROI)
- Find and clear the outlet. Many “clogs” are just a buried pop-up emitter or leaf-packed daylight pipe.
- Locate an upstream access (cleanout or catch basin).
- Vacuum sludge from basins and cleanouts with a shop vac.
- Flush from upstream with a garden hose while watching the outlet for muddy discharge.
If flushing stalls
- Snake the line to break up packed silt or roots before forcing more water.
- Use a pressure washer jetter the right way for your access: ideally from the outlet toward the clog so debris washes out the outlet. If you can only access upstream, use short passes and pull back often to avoid packing debris.
Root intrusion clues
- Roots come out on the snake, or the drain clogs again quickly.
- Best fix is usually mechanical removal plus a spot repair where roots enter, or rerouting away from the root zone.
When it’s time to re-trench
- The pipe has sags (a belly) or is crushed.
- Trench is full of fine sediment due to fabric or gravel issues.
- The system never worked well from day one.
Prevent future clogs
- Inspect and clear the outlet every season.
- Keep gutters and downspout screens clean.
- Do an annual preventive flush if you have clay soil or lots of trees.
💡 Tip: Scroll up to read the full article for detailed, step-by-step instructions.
⬆️ Back to topAbout Marcus Vance
Content Creator @ Grit & Home
Marcus Vance is a lifelong DIY enthusiast and self-taught home renovator who has spent the last decade transforming a dilapidated 1970s ranch into his family's dream home. He specializes in budget-friendly carpentry, room-by-room renovations, and demystifying power tools for beginners. Through his writing, Marcus shares practical tutorials and hard-learned lessons to help homeowners tackle their own projects with confidence.