When a garage door opener quits, it is tempting to assume the worst. In my experience, most “dead opener” calls often come down to one of three simple things: no power, a remote or keypad issue, or safety sensors that think something is in the way.
This page walks you through the fastest checks first, then the deeper fixes. We will stay safety-first the whole time, because the opener is one thing, but the springs, cables, and door weight are another. If anything feels unstable, crooked, or heavy, pause and get help.
Safety first (read this first)
- Do not loosen or adjust torsion springs, extension springs, lift cables, or bottom brackets. Those parts can injure you fast and they are not part of basic opener troubleshooting.
- Unplug the opener before opening the housing or touching wiring terminals.
- If the door is stuck halfway open, do not walk under it. If you must stabilize it briefly, clamp locking pliers below the bottom roller on both tracks so the door cannot slide down. This is temporary stabilization only, not a repair.
- If the door feels unusually heavy when disconnected from the opener, stop. That points to a spring or door issue, not an opener issue.
If you suspect a spring problem, head to a door-specific repair guide or call a pro. A properly balanced door should lift smoothly with minimal effort and stay put around mid-travel when disconnected from the opener.
Step 1: Confirm power (quick wins)
Start here even if the opener “was working yesterday.” Outlets trip. GFCIs pop. Power strips fail. I have lost an hour before because I trusted a plug that looked fine.
Check the basics
- Is the opener plugged in? Vibration can work a plug loose over time.
- Test the outlet with a lamp or phone charger.
- Look for a tripped GFCI in the garage or nearby (sometimes the garage ceiling outlet is fed by a GFCI in a bathroom or exterior receptacle).
- Check the breaker labeled “garage” or “opener.” Reset it fully by switching off, then on.
Look for life signs
- Do the opener lights on the motor head turn on when you press the wall button?
- Do you see any LED indicator lights on the motor unit?
- Does the wall control panel light up (if it is the type with a display)?
Check for battery backup (if equipped)
Many newer openers have a backup battery. A dead or disconnected backup battery can trigger beeps or warning lights and cause odd behavior after an outage.
- Look for a battery status light or a warning label on the motor head.
- If the unit is beeping, check the manual for what that beep pattern means.
- If the battery is old, plan on replacing it. Many are meant to be replaced every few years.
If there are zero signs of power and the outlet is good, you may be dealing with a blown internal fuse (some models), a failed power supply, or a bad logic board. We will circle back to replacement decisions later.
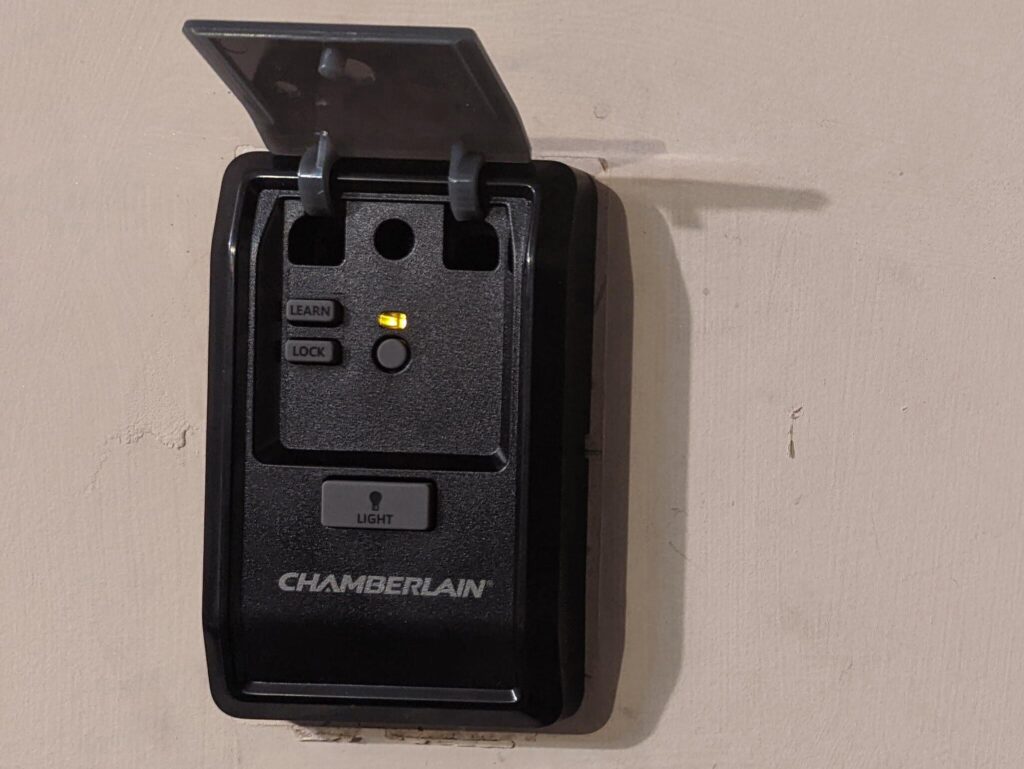
Step 2: Make sure it is not locked
Many wall consoles have a Lock or Vacation switch. When it is on, remotes and keypads stop working even though the wall button still operates the door.
- If the wall button works but all remotes and the keypad do not, check for Lock mode first.
- On many units, you toggle it by holding the Lock button for a few seconds.
Step 3: Remote not working (wall button works)
If the wall button works reliably, you know the opener has power and the motor can run. That points the finger at the remote, its battery, or the opener’s receiver.
Replace the remote battery
- Most remotes use a coin cell battery like CR2032, but check your remote model.
- Clean the battery contacts if you see white residue or corrosion.
- Make sure the battery is installed with the correct polarity.
Test range and interference
If the remote works only when you are very close to the door, you likely have a range issue.
- Try the remote right next to the opener in the garage. If it works there but not in the driveway, think interference.
- LED bulbs in the opener light sockets can cause radio interference on some openers. Swap to a bulb listed as opener-compatible and retest.
- Remove any metal objects or shelving that may block the opener antenna, and confirm the antenna wire is hanging down.
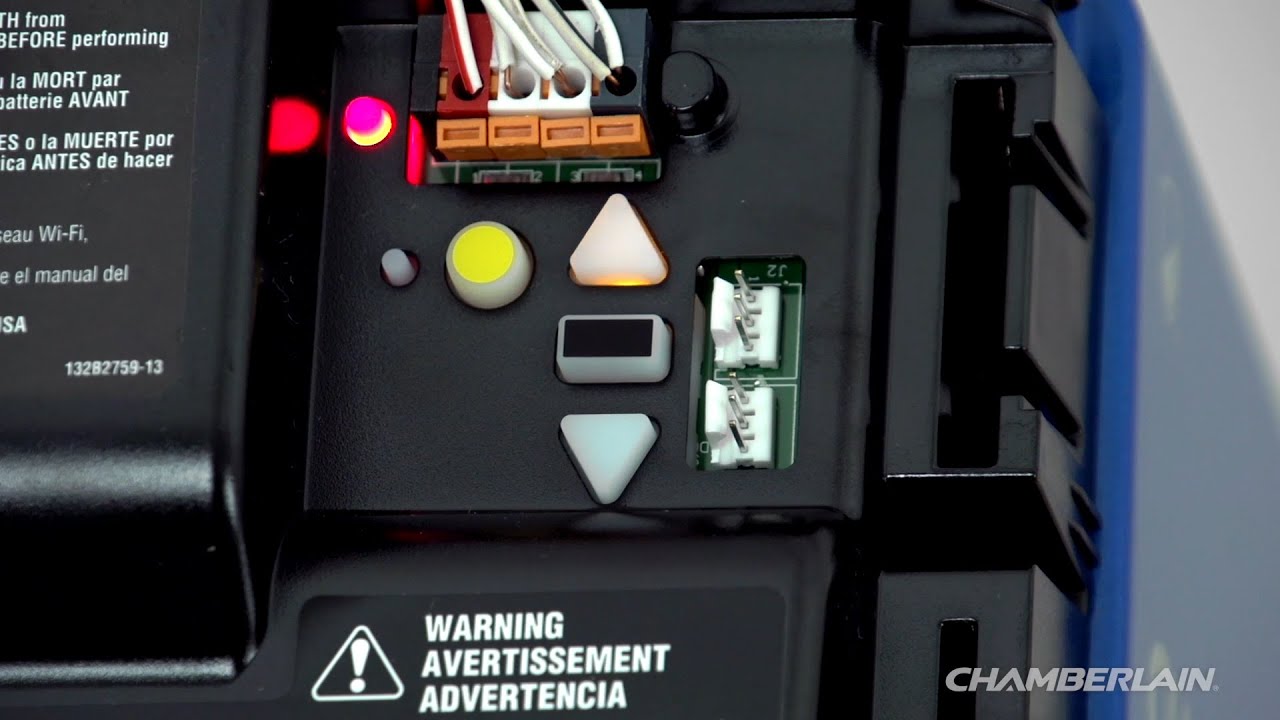
Re-sync the remote (reprogram)
If a battery swap did not help, reprogram the remote to the opener using the Learn button on the motor unit. The exact steps vary by brand and year, but the pattern is usually:
- Locate the Learn button on the opener (often behind the light lens).
- Press and release Learn. An LED will light or blink for a short window.
- Press the remote button you want to use until the opener confirms (click, light flash, or a brief motor movement).
If you have multiple remotes, program one at a time. If none will program, skip ahead to the replacement section.
Step 4: Keypad not working
Keypads are great until they sit outside for a few seasons and the battery gets weak or the buttons stop registering. The good news is most fixes are simple.
Swap the keypad battery
- Open the keypad housing and replace the battery with the exact type recommended.
- While you are in there, inspect for moisture and corrosion. Dry it out and clean contacts if needed.
Confirm the code
I know this sounds obvious, but I have personally chased “equipment problems” that were really a forgotten PIN after a busy week. Try a slow, deliberate entry. Some keypads need you to press Enter.
Reprogram the keypad
Most keypads pair to the opener the same way a remote does, using the Learn button.
- Press and release the opener Learn button.
- Enter your desired PIN on the keypad.
- Press the keypad’s Enter button until the opener confirms.
Keypad lights up but will not open the door
- Check Lock/Vacation mode on the wall console.
- If you use a smart app, confirm the opener shows as online and there are no account or outage alerts. Power bumps can sometimes require a quick reconnect or re-login.
- If the keypad is old and weathered, consider replacement. They are usually an easy DIY swap.
Step 5: Starts down then reverses
This is one of the most common complaints, and it is often not a “bad opener.” Modern openers are designed to reverse if they sense resistance or if the photo-eyes are blocked.
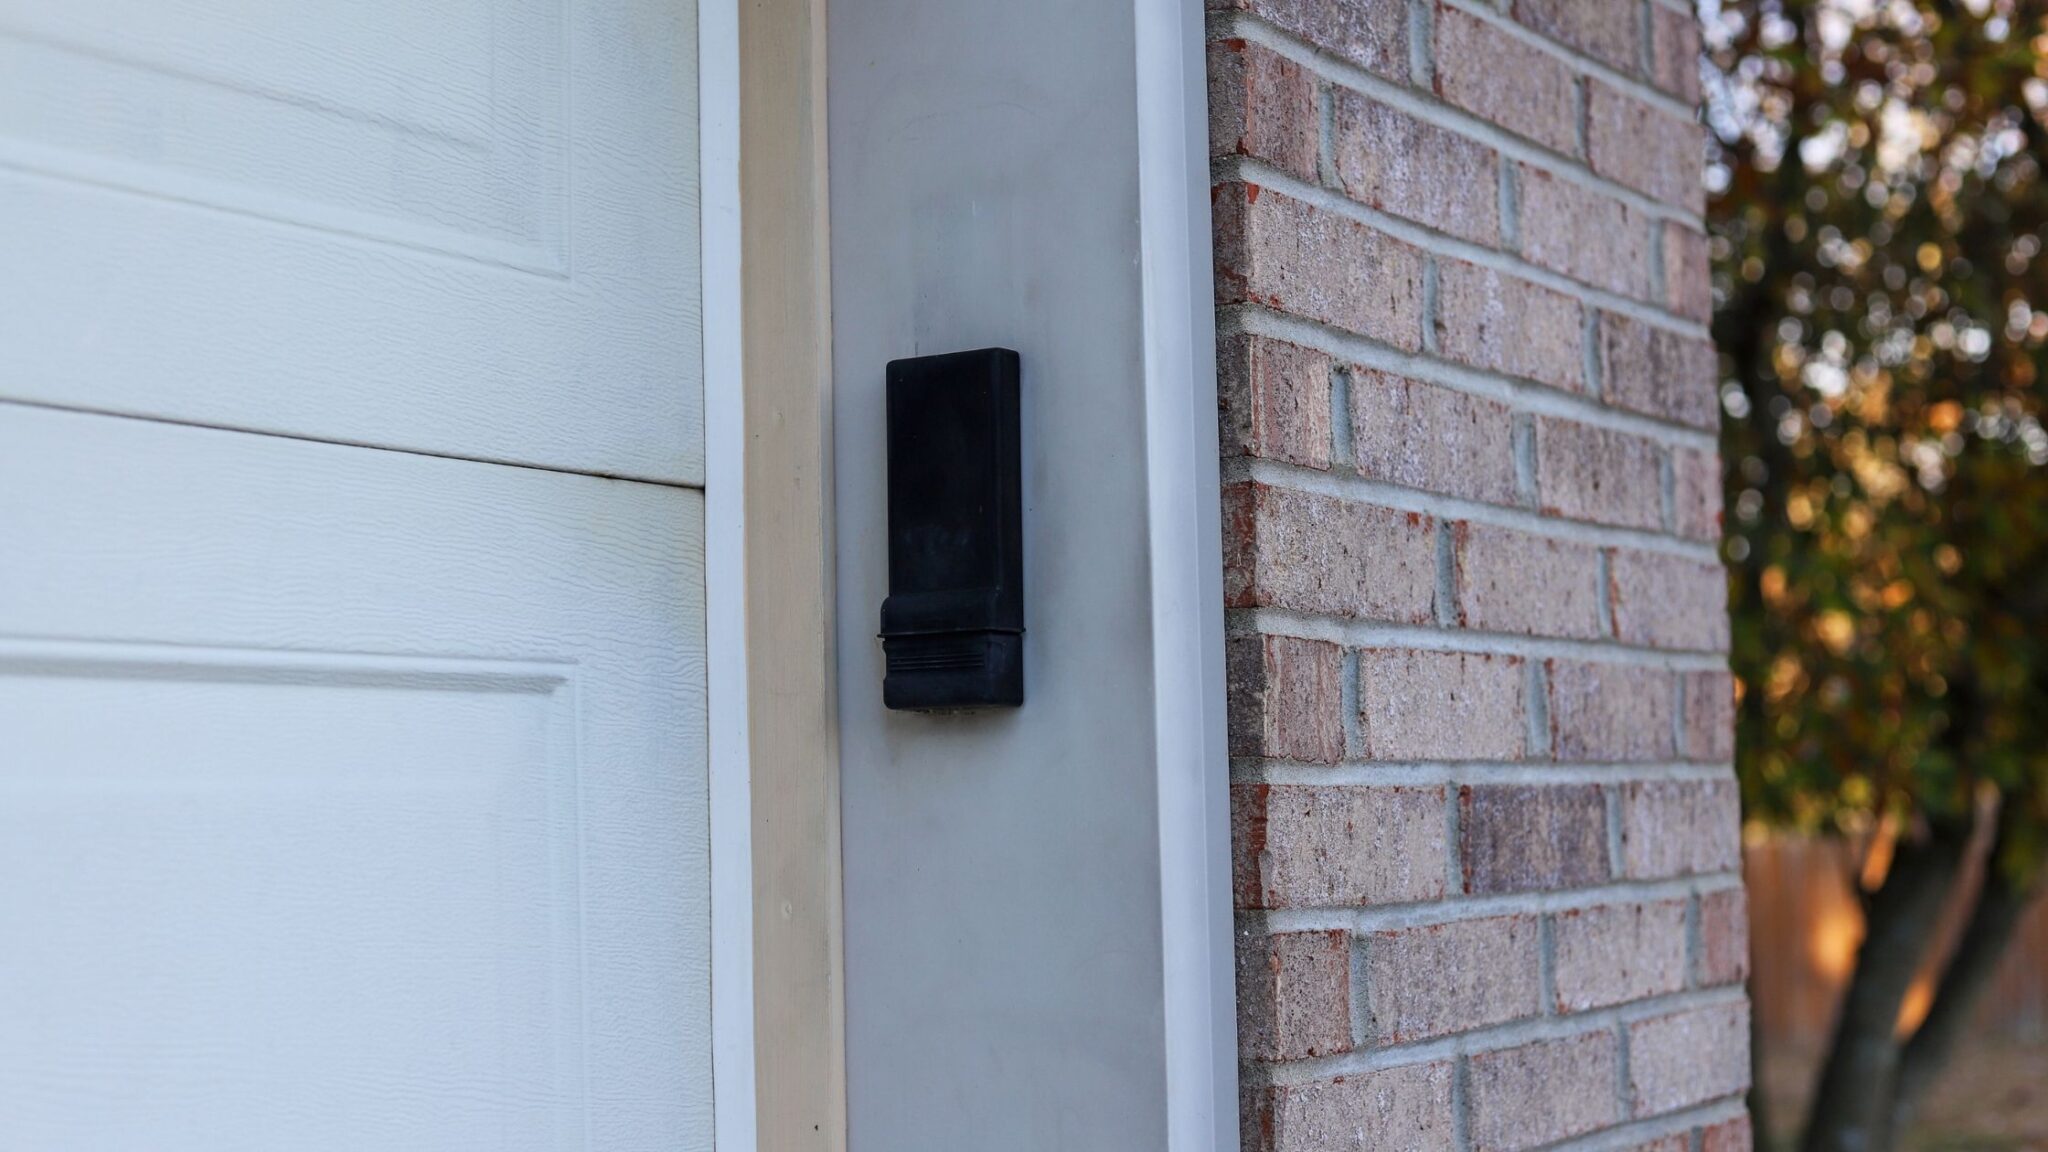
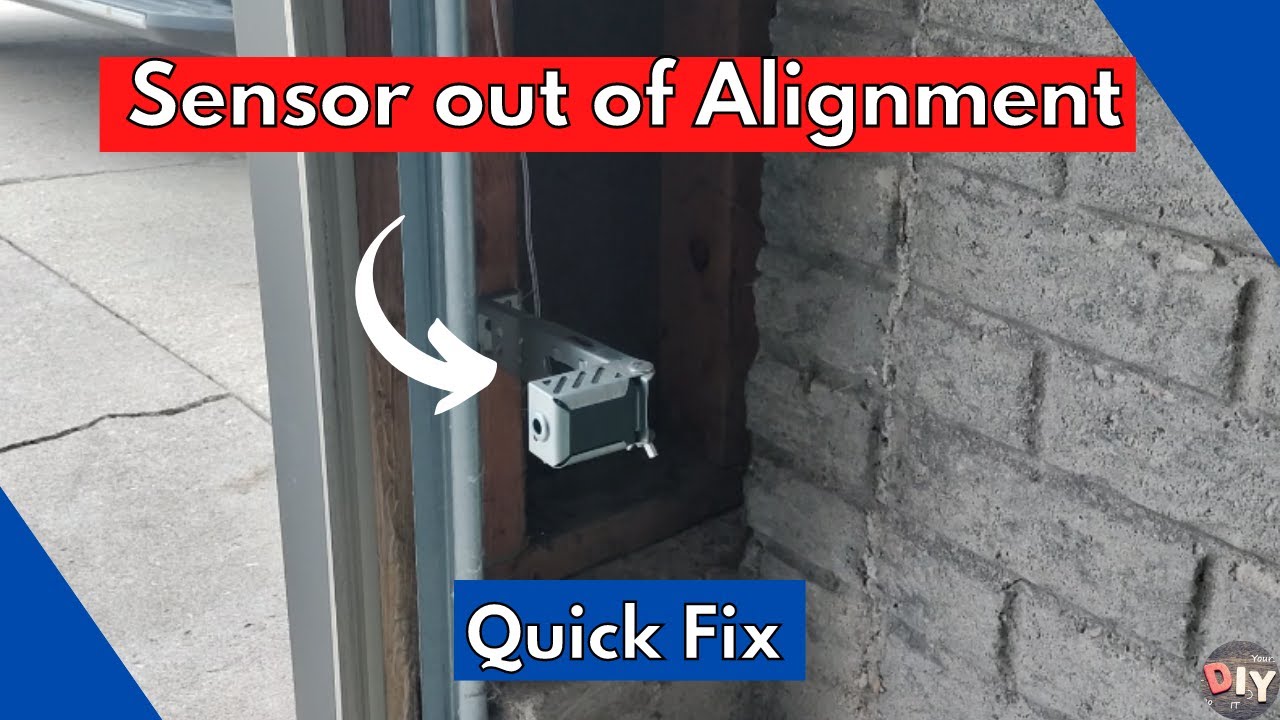
First check the photo-eye safety sensors
Those little sensors near the bottom of the tracks are there to prevent the door from closing on a kid, pet, or toolbox. If they cannot see each other clearly, the opener will refuse to close or will reverse.
- Make sure both sensor lenses are clean. Wipe with a soft cloth.
- Remove anything in the line between them, including spider webs.
- Confirm both sensors are aimed at each other and mounted at the same height.
- Look at the indicator LEDs on the sensors. Many brands show solid lights when aligned and blinking when misaligned.
Temporary close workaround (use with caution)
Many openers allow you to hold the wall button to close the door even when the sensors are not reading correctly. This is meant as a short-term override.
- Only use this if you can see the full doorway and you are sure nothing is in the opening.
- Keep holding the button until the door is fully closed, and stop immediately if anything looks off.
- Do not leave the sensors unfixed. They are there for a reason.
Quick alignment trick
Loosen the wing nut or screw just enough to nudge the sensor. Move it slowly until the indicator light turns solid, then tighten while holding it in position.
If the sensors look fine but it still reverses
- Check the door tracks for debris and dents.
- Look for a roller that has popped out or is binding.
- Inspect the bottom seal. A folded seal can catch on uneven concrete.
- In winter, check for ice bonding the door to the floor.
Step 6: Limits and force settings
If your opener closes the door but stops short, or it hits the floor and immediately reverses, your travel limits may be off. Limits tell the opener where “fully open” and “fully closed” are.
Symptoms of bad limits
- Door closes, touches the floor, then reopens.
- Door stops a few inches above the floor and will not go farther.
- Door opens partway and stops.
How to adjust safely
Check your manual for your exact model. Some use adjustment screws, others use buttons and a setup mode. General best practices:
- Make small adjustments and test each time.
- Keep hands clear of the door and rail while testing.
- Do not crank up the force setting to “muscle through” a problem. Force is a safety feature, not a performance knob.
If you find yourself needing much higher force than before, that often means the door is binding or out of balance. That is a door issue that can burn up an opener.
Step 7: Hums or runs, door does not move
This is where you separate a “control problem” from a “mechanical transfer problem.”
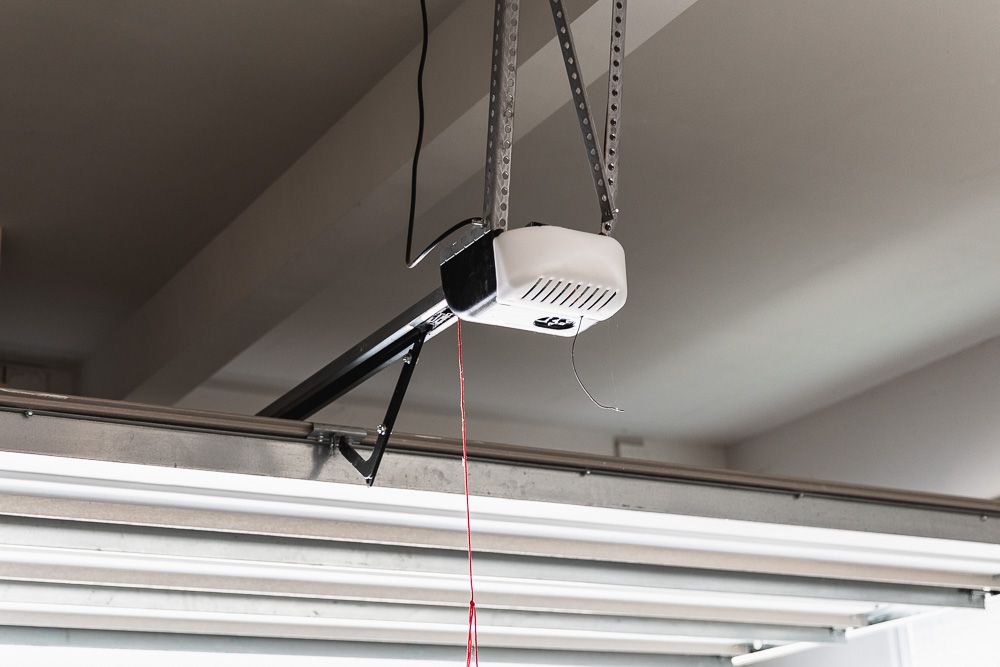
Check the emergency release
The red cord and trolley release can get pulled accidentally. If the trolley is disengaged, the motor will run but the door will not move.
- With the door closed (safest position), use the release to re-engage the trolley. The exact motion varies by model.
- On many setups, you may need to run the opener until the trolley “catches” and locks back in.
Inspect the drive system
- Belt drive: look for a shredded belt or a belt that has jumped the sprocket.
- Chain drive: check for a broken chain, loose master link, or excessive slack.
- Screw drive: check for a dry screw, missing coupler, or stripped carriage.
If the door is disengaged and still feels extremely heavy to lift by hand, stop and do not keep running the opener. A spring may be broken, and the opener is not designed to lift the full door weight.
Step 8: Wall button not working
This is less common, but it happens. If the remote operates the door and the wall control does nothing, suspect the wall button, its wiring, or a loose connection at the opener terminals.
Simple checks
- Make sure the wall console is not in Lock mode (some models behave oddly if the button is failing).
- Inspect the low-voltage wires for staples driven too tight or a nick in the insulation.
- At the opener, gently tug each low-voltage wire to confirm it is seated in the terminal.
If you are comfortable, you can replace a basic wall button. If you have a smart wall console with a display, it may be model-specific and pricier.
Step 9: Use the built-in diagnostics
Many openers will flash lights or display blink codes to point you toward sensors, wiring, or travel issues. If your motor head has an LED that blinks in a pattern, check the manual (or the label on the unit) for what that code means. It can save a lot of guesswork.
When replacement makes sense
At a certain point, troubleshooting turns into throwing time at a tired machine. Here is how I decide whether to repair or replace.
Signs you may have a failing logic board
- Remotes will not program even with fresh batteries and correct Learn-button steps.
- Random behavior after power outages or surges, like ignoring controls (rule out stuck buttons first).
- No response from wall control and remotes, despite confirmed power at the outlet.
- Visible burn marks or a strong electrical smell at the opener housing.
Signs the motor or start parts are failing
- Motor hums but struggles to start consistently.
- Opener runs for a second then stops repeatedly, with a hot motor housing.
- Unit is very old and parts are discontinued.
Repair vs replace rule of thumb
- If the opener is 10 to 15+ years old and needs a major component, replacement often wins on value.
- If you have a very old opener that lacks modern safety features (like photo-eye sensors) or modern security (rolling code remotes), replacement is a smart upgrade.
- Fix door balance and binding issues first, or you will burn up the new opener too.
- When shopping, confirm compatibility with your door height, existing wiring, and the accessories you want (keypad, car remotes, smart add-ons). Rails and parts are not always interchangeable across brands.
Tip from my own wallet: if you are already paying for a logic board and service call, price out a new opener kit. Many are DIY-friendly, and you get new remotes, keypad compatibility, and updated safety features.
Quick troubleshooting flow
- Nothing works: outlet, GFCI, breaker, power at opener, battery backup status.
- Wall button works, remote does not: remote battery, Lock mode, reprogram, LED bulb interference.
- Wall button works, keypad does not: keypad battery, reprogram, Lock mode.
- Starts down then reverses: photo-eyes, track obstructions, limits. Use hold-to-close override only to secure the door temporarily and only if you can see the opening.
- Motor runs but door does not: emergency release, belt or chain issues, door balance check.
When to call a pro
If you see any of the issues below, it is time to step back:
- Broken spring, frayed cable, or the door is visibly crooked in the opening.
- Door is too heavy to lift manually when disconnected.
- Track is bent badly or pulling away from the wall.
- You smell burning electronics, see smoke, or find melted wiring.
There is no shame in calling it when the risk jumps. The goal is a working door and everyone staying in one piece.
About Marcus Vance
Content Creator @ Grit & Home
Marcus Vance is a lifelong DIY enthusiast and self-taught home renovator who has spent the last decade transforming a dilapidated 1970s ranch into his family's dream home. He specializes in budget-friendly carpentry, room-by-room renovations, and demystifying power tools for beginners. Through his writing, Marcus shares practical tutorials and hard-learned lessons to help homeowners tackle their own projects with confidence.