What “slow drain” usually means
When a garbage disposal drains slowly, the disposal itself is rarely the problem. Most of the time, the restriction is downstream: in the trap under the sink, in the short horizontal run to the wall, or farther down the branch line in the wall.
The trick is clearing it without cracking plastic fittings, flooding the cabinet, or forcing debris deeper into the line.
- Most common: grease and food sludge packed in the trap or the disposal outlet elbow.
- Also common: a partial clog in the wall line that only shows up when you dump a sink full of water.
- Less common: venting issues, a sagging pipe, or a bigger blockage farther down the branch line.
Quick safety check before you touch anything
I know it is “just a slow drain,” but disposals have sharp edges, and water plus electricity is a bad combo. Do these every time.
- Cut power: Switch the disposal off, then unplug it under the sink. If it is hardwired, turn off the breaker.
- Do not put your hand in the disposal: Use tongs or pliers if you need to grab something.
- Skip chemical drain cleaners: They can soften PVC, ruin rubber seals, and make trap removal dangerous if you end up opening the line.
- Have a plan for water: Bucket, towels, and a shallow pan make this a calm project instead of a cabinet-soaking event.
Trap clog vs wall-line clog: how to tell
The “bucket test” diagnosis
This is the fastest way I know to decide whether you should start at the trap (under the sink) or prepare to snake the wall line.
Clear the sink basin first. If the sink is full, bail it into a bucket so you are not working under a waterfall.
Check the dishwasher drain hose. If your dishwasher drain hose connects to the disposal, make sure it is not kinked, pinched, or sagging. (A low sag full of gunk can mimic a slow disposal drain.)
Run a steady stream of water. Watch what happens.
- If water backs up quickly and stays high: likely a clog in the P-trap or disposal elbow.
- If it drains, but very slowly, and improves briefly after you stop the water: often a partial wall-line restriction.
- If a sink full of water dumps and then gurgles or burps air: can be a wall-line clog or a venting issue. Clogs are far more common.
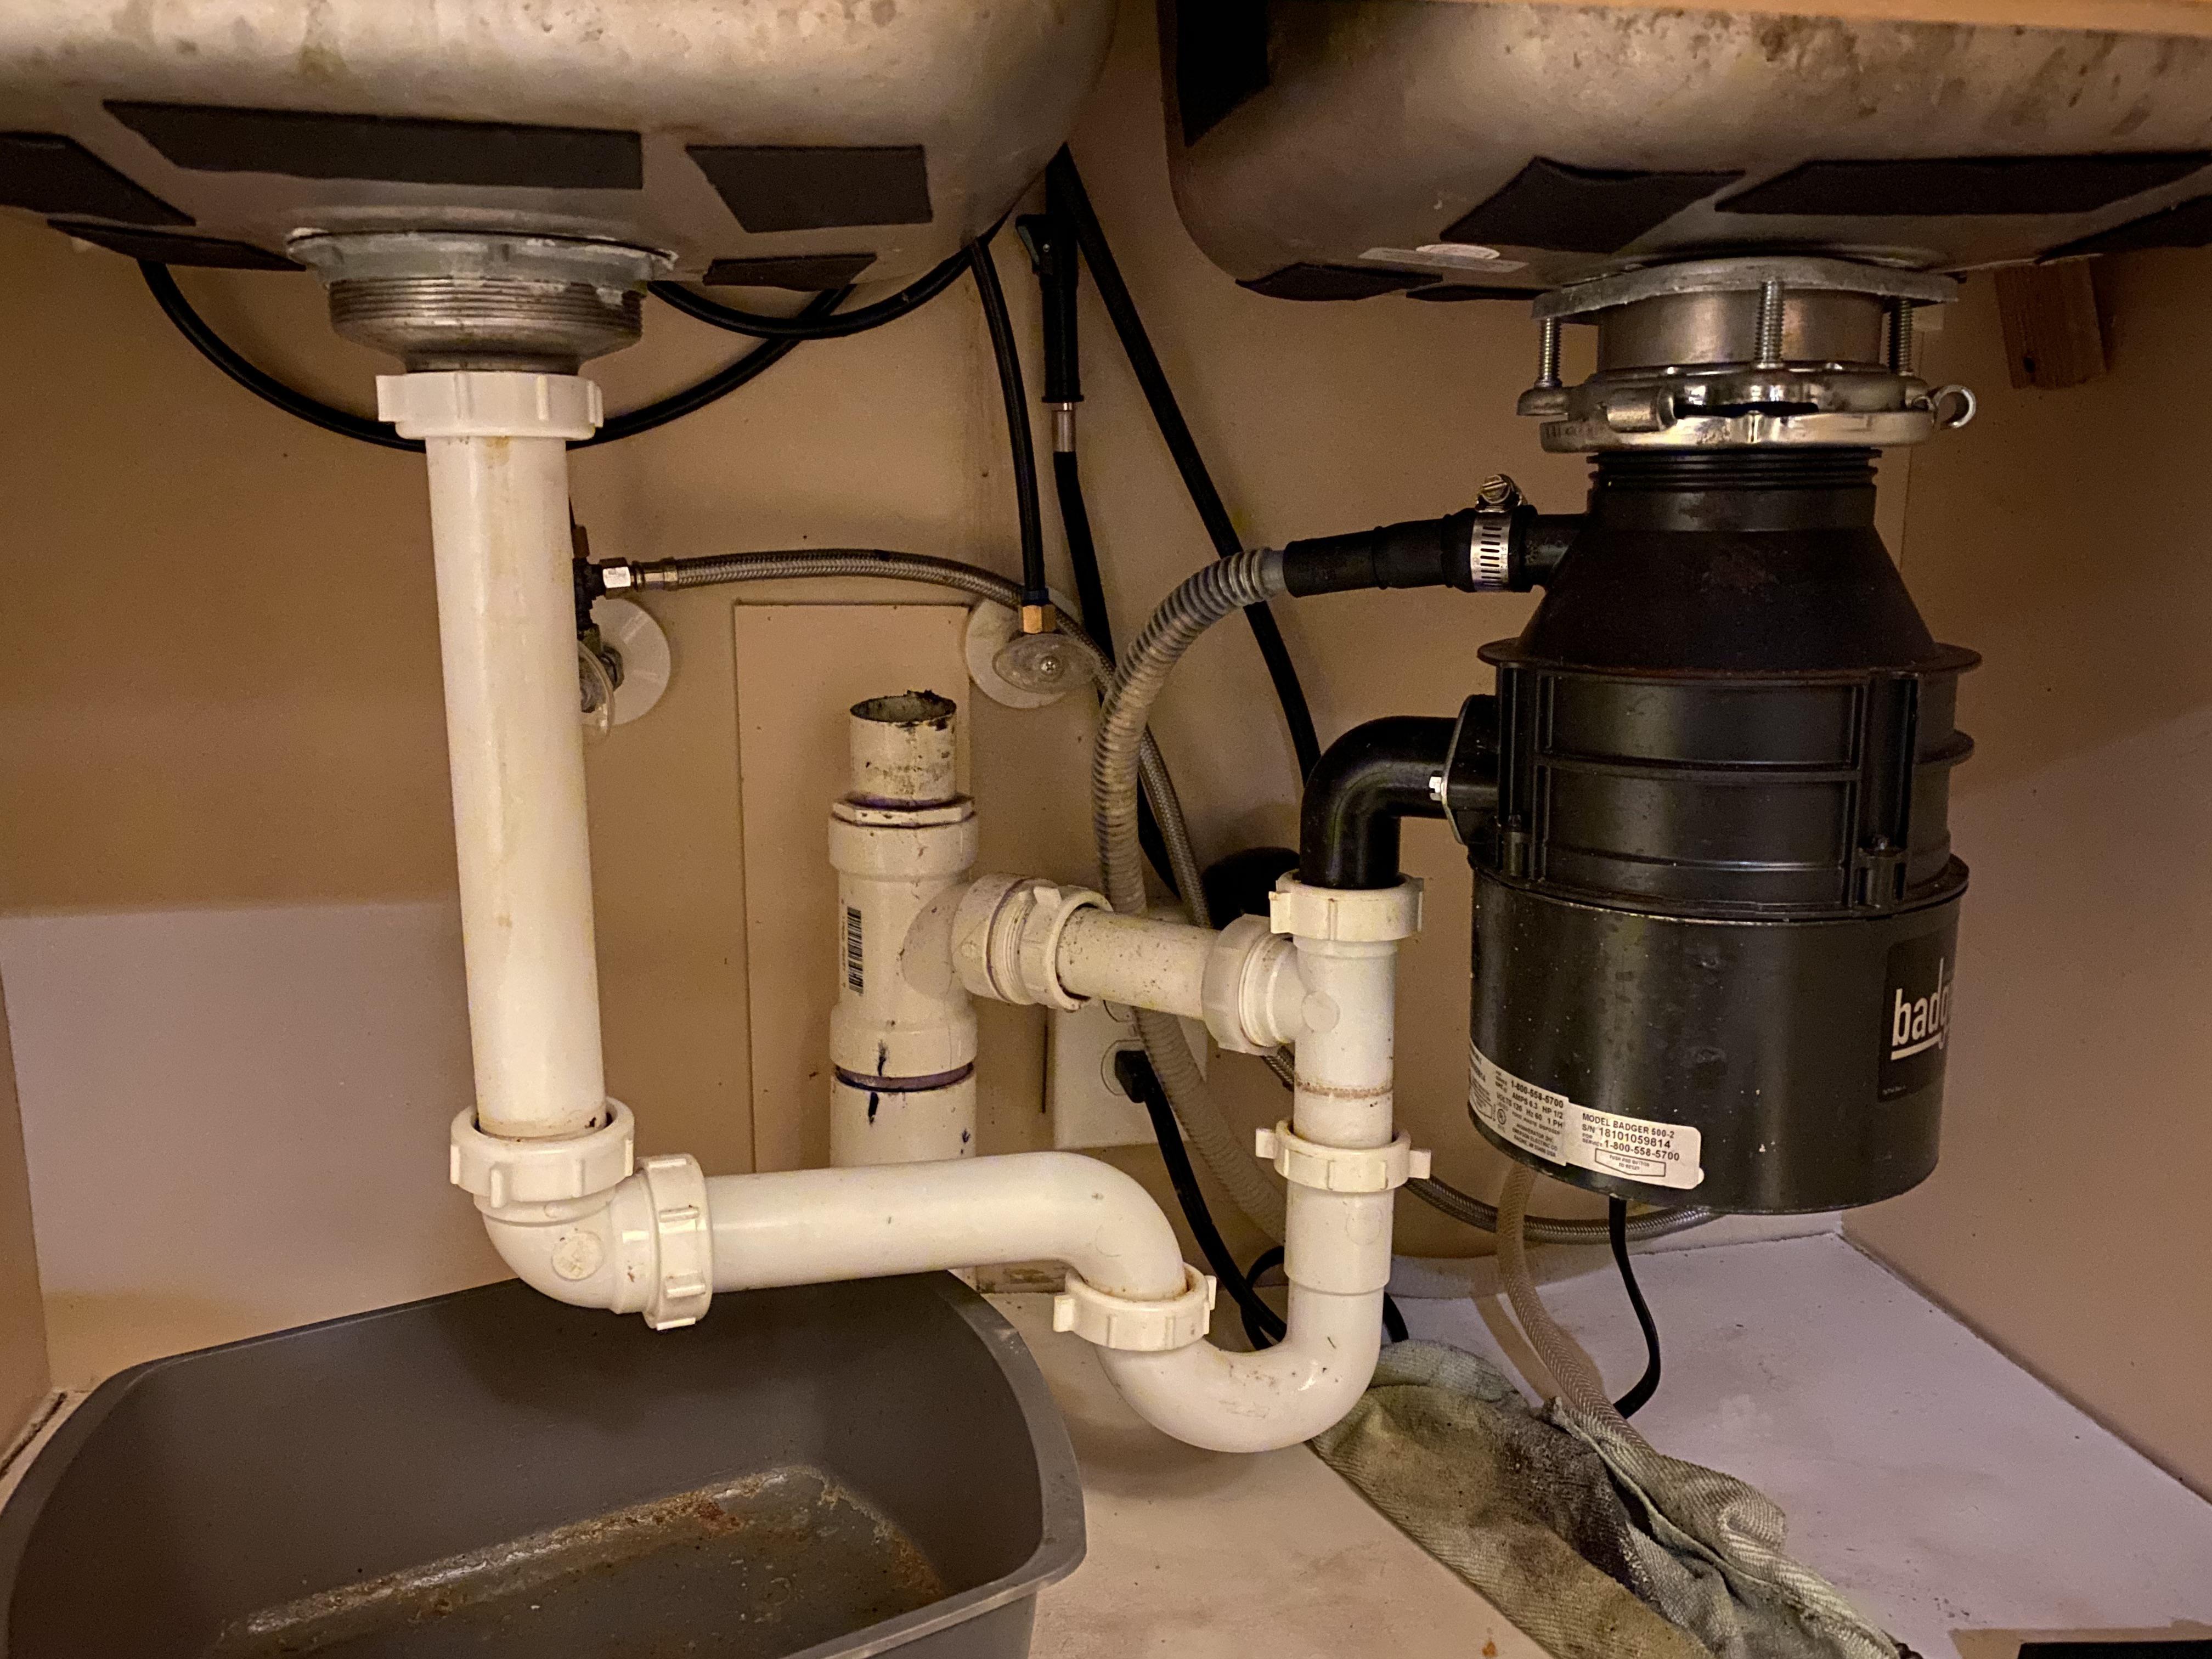
Common under-sink pinch points
People say “P-trap clog,” but with a disposal there are two usual pinch points:
- Disposal outlet elbow: the short curved piece right after the disposal. It catches heavy paste, rice, potato peel sludge, and coffee grounds.
- The P-trap itself: the U-shaped section that holds water. It loves grease, eggshell grit, and anything that settles out.
Wall-line issues (in the wall)
If the trap is clean and you still get a slow drain, the restriction is often in the trap arm (the horizontal pipe from the trap to the wall) or farther down the branch. That is where a hand snake can be appropriate.
First fix: clear the simplest stuff
Flush correctly
Here is my default “safe flush” routine:
- Run cold water and turn the disposal on for 10 to 15 seconds.
- Turn the disposal off but keep water running for another 15 to 20 seconds.
Cold water keeps fats more solid so they are more likely to move as particles instead of smearing into the pipe walls. If you suspect a grease-heavy clog, a kettle of hot water can help, but only after you are confident the line is mostly open. Pouring hot water into a nearly blocked plastic trap can soften buildup just enough to make a worse plug.
Use a strainer basket
Disposals are not trash cans. The best slow-drain prevention is stopping the problem before it hits the pipe.
If your sink accepts one, keep a removable disposal strainer basket in the drain when you are not actively grinding food. It catches the little scraps that turn into sludge later, and you can dump them in the trash instead of feeding the plumbing.
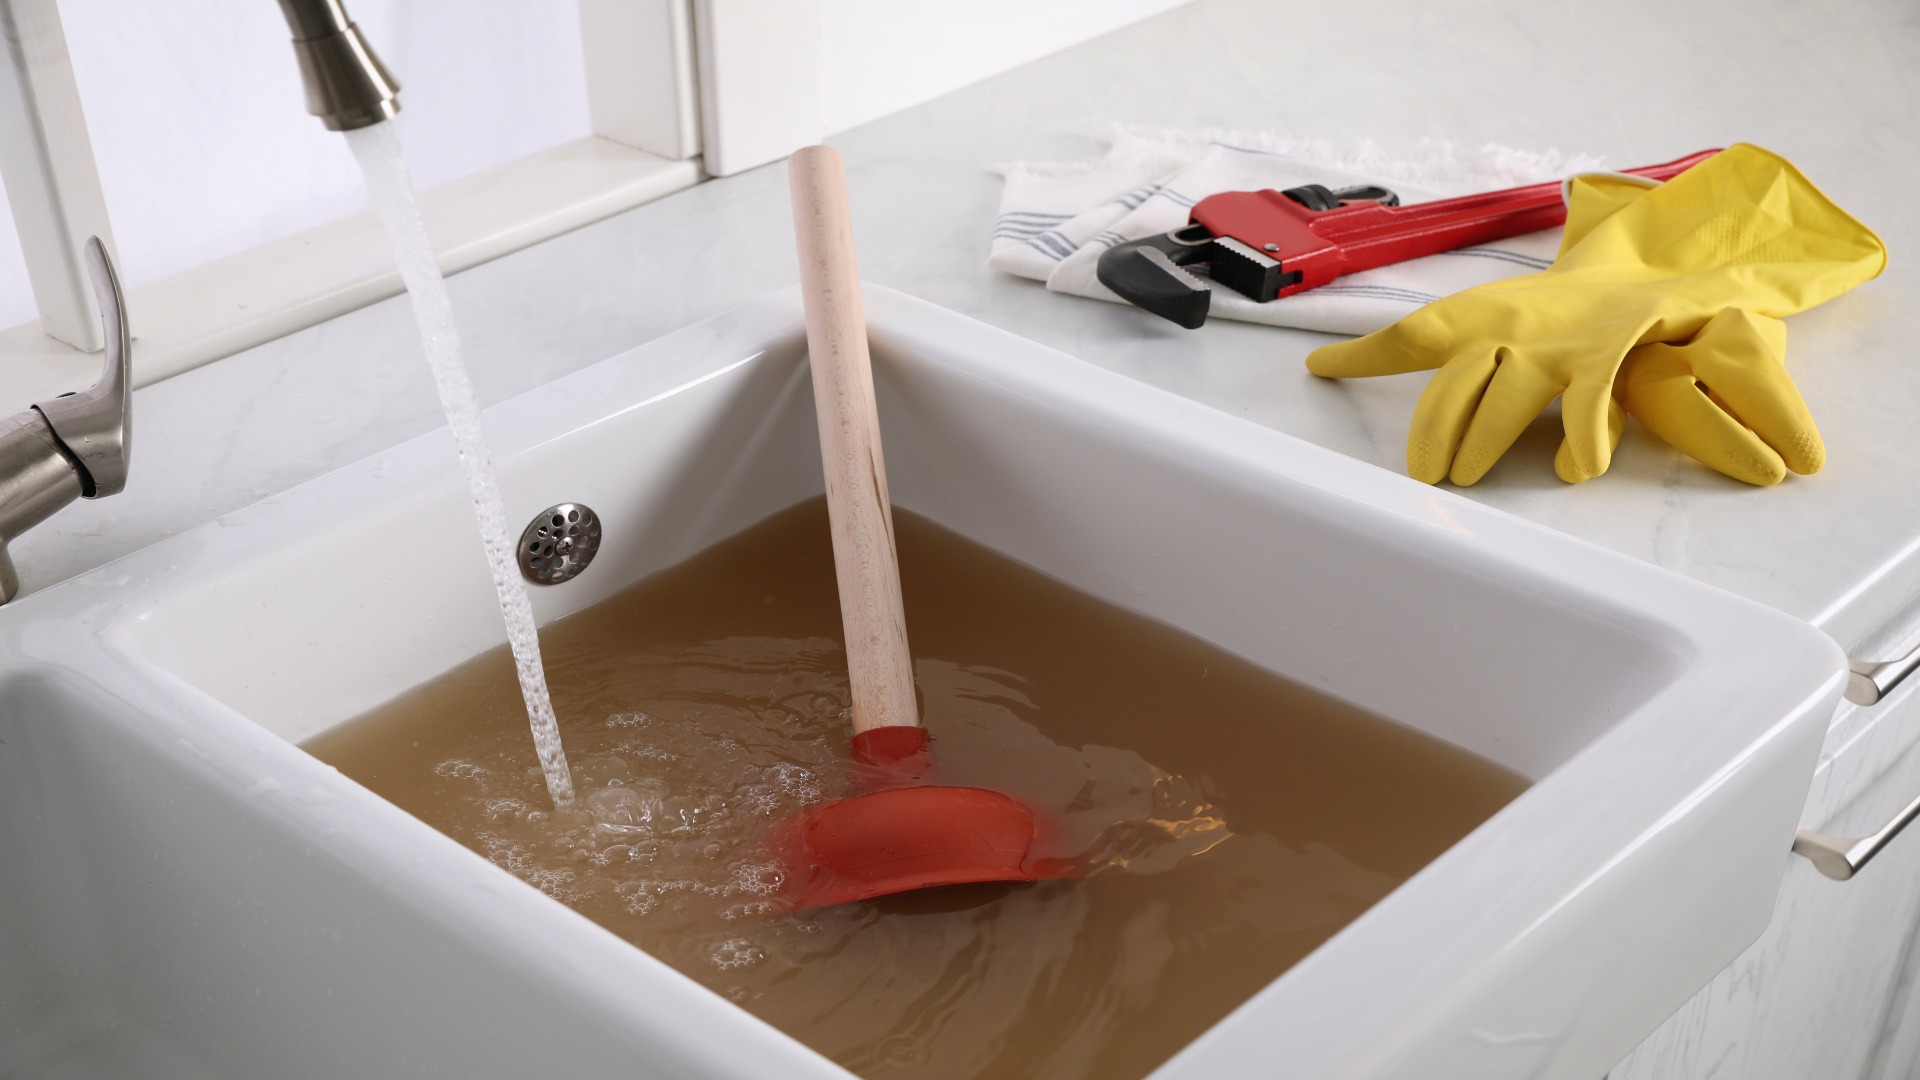
Plunging a disposal sink safely
A plunger can work great, but only if you do it the right way. The goal is to pulse water through the blockage, not blast apart your slip nuts.
What plunger to use
- Best: a standard cup plunger for a flat-bottom kitchen sink.
- Avoid: the toilet flange style unless you can fold the flange in so it seals flat.
How to plunge without causing a mess
Plug the other basin. If you have a double sink, use a stopper or a wet rag to seal the second drain. If you do not, air just escapes and you lose force.
Pinch off the dishwasher drain hose. If your dishwasher drains into the disposal, plunging can force dirty sink water back into the dishwasher. Temporarily clamp the dishwasher drain hose under the sink with a small spring clamp, or gently pinch it closed. Remove the clamp when you are done.
Add water. You want enough to cover the plunger cup by about an inch.
Seal and pulse. Press down to seal, then do short, controlled plunges. Think “firm and rhythmic,” not “full-body slam.”
Check for leaks underneath. Stop if you see water weeping at slip joints. A small drip can turn into a popped joint fast.
Test the drain. Remove the plunger and let the water drain. Repeat once or twice if it improves.
When plunging is a bad idea
- You used chemical drain cleaner recently.
- Your under-sink plumbing is already loose, brittle, or poorly supported.
- You suspect a major blockage far down the line and the sink is close to overflowing. At that point, you are more likely to make a mess than progress.
The safest disconnect sequence
If plunging does not help, it is time to open the plumbing and remove the gunk directly. This is usually the fastest fix for a slow disposal drain.
Tools and supplies
- Bucket and towels
- Channel-lock pliers (optional, go easy on plastic)
- Old toothbrush or bottle brush
- Flashlight or headlamp
- Replacement slip-joint washers (cheap insurance)
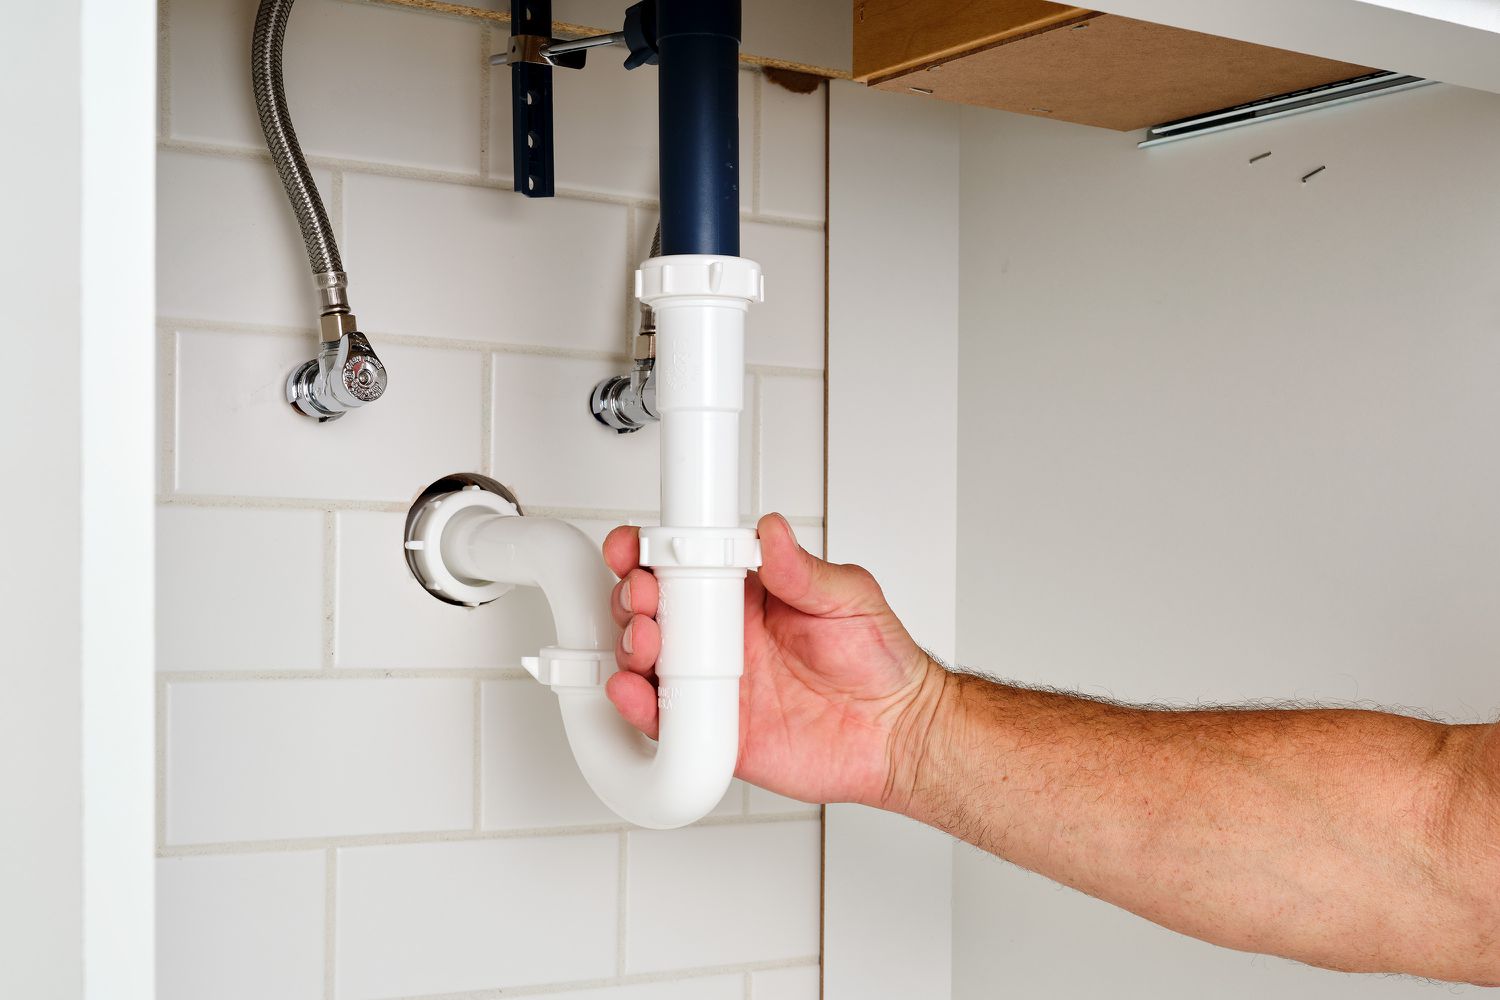
Disconnect order that keeps water under control
Unplug the disposal. Always first.
Place the bucket under the P-trap. Not under the disposal. The trap holds the water.
Loosen the slip nut at the wall side first. This lets trapped water drain into your bucket in a more predictable way.
Loosen the slip nut at the trap bend. Support the pipes with your other hand so you are not stressing the disposal flange.
Remove the trap and the disposal elbow if needed. Many clogs are packed right at the elbow coming off the disposal.
What to look for
- Paste-like sludge: common from starchy foods and coffee grounds. Scrub it out.
- Grease layer with grit: scrape and clean, then flush with plenty of water once reassembled.
- Hard objects: small bones, fruit pits, or bottle caps can lodge at the elbow or trap bend.
Reassemble without leaks
- Make sure the tapered washers are oriented correctly, usually taper toward the joint.
- Hand-tighten first, then a small additional snug if needed. Over-tightening plastic slip nuts can crack them.
- Run water and watch each joint for a full minute.
When and how to snake a disposal drain
If the trap and elbow are clean and the sink still drains slowly, you are probably dealing with a wall-line restriction. This is where a snake can help.
Is snaking appropriate here?
- Yes if the clog is beyond the trap, the drain is consistently slow, and you can access the wall stub-out by removing the trap.
- No if you have old, fragile piping (some thin-wall chrome traps), or if the drain ties into a complex setup you are not confident about. In that case, a plumber may be cheaper than fixing a damaged line.
Where to snake from
Snake from the wall pipe opening after removing the trap, not down through the disposal. Snaking through the disposal can damage internal parts and can hang up on fittings.
How to snake it (basic method)
Feed the snake slowly into the wall line. Keep gentle forward pressure.
Rotate as you go. If you feel resistance, do not force it. Work the head back and forth while turning.
Withdraw and clean the cable. Expect gross stuff. Wipe the cable as you pull it out.
Flush with water. Reinstall the trap temporarily if needed, then run water to confirm improvement.
A note on power augers
For most kitchen sink slow drains, a small hand snake is plenty. Power augers can chew up PVC or get stuck if you do not know the line layout. If you are tempted to rent a machine, that is often the point where calling a plumber makes sense.
Common mistakes I see
- Using chemicals “to avoid taking pipes apart.” It usually delays the real fix and makes the eventual fix nastier.
- Plunging without sealing the second basin. You do a lot of work for almost no pressure.
- Plunging without pinching off the dishwasher drain hose. You can end up sending sink water into the dishwasher.
- Over-tightening slip nuts. Plastic cracks easily, especially if it is older.
- Forgetting the dishwasher drain hose connection. A clogged or sagging dishwasher hose can mimic a disposal drain issue.
- Grinding fibrous foods. Celery, onion skins, corn husks, and potato peels can make a ropey mat that grabs everything else.
When to call a pro
DIY is great, but not every slow drain should be a Saturday project. Bring in help if:
- The sink backs up into another fixture (like a nearby bathroom sink or tub). That suggests a bigger branch or main issue.
- You cleaned the trap and snaked the wall line but the drain still bogs down.
- You see signs of a leak inside the wall or cabinet floor damage.
- Your home has older plumbing and you are not sure what material you are dealing with.
Keep it draining
- Cold water always when running the disposal, and keep it running 15 to 20 seconds after.
- Scrape plates first. The disposal is for leftovers, not for a full meal’s worth of scraps.
- Avoid grease. Wipe greasy pans with a paper towel and toss it.
- Monthly rinse: A sinkful of warm water with a small squirt of dish soap, then drain it fast. It helps move light buildup before it becomes a plug.
If you want one “north star” rule: keep solids out, keep water moving. Your disposal and your pipes will both last longer.
About Marcus Vance
Content Creator @ Grit & Home
Marcus Vance is a lifelong DIY enthusiast and self-taught home renovator who has spent the last decade transforming a dilapidated 1970s ranch into his family's dream home. He specializes in budget-friendly carpentry, room-by-room renovations, and demystifying power tools for beginners. Through his writing, Marcus shares practical tutorials and hard-learned lessons to help homeowners tackle their own projects with confidence.