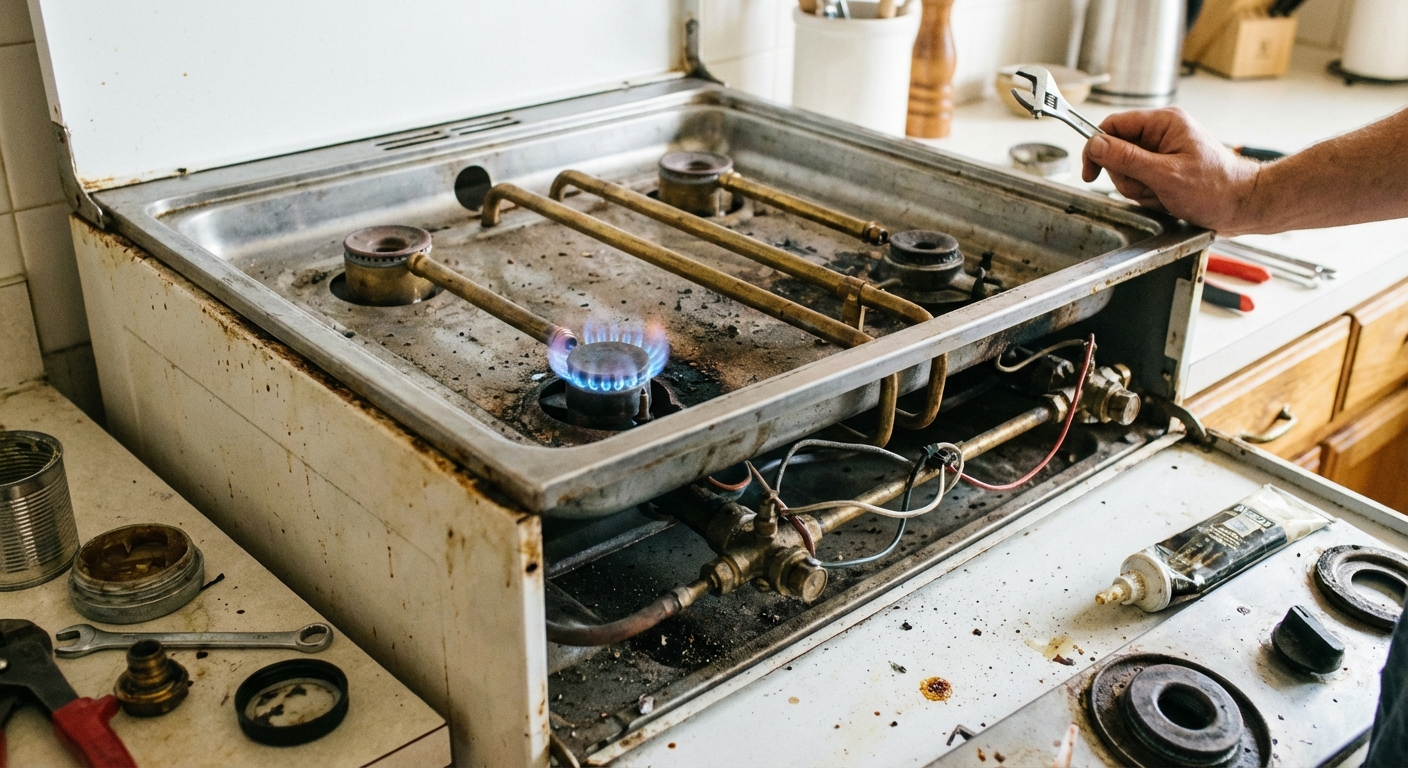
When a gas stove pilot light keeps going out, it feels personal. You light it, it behaves for a minute, then the flame disappears and you are right back where you started. The good news is that most true pilot problems come down to a few repeat offenders: dirt in the pilot, a sensor that is not sensing heat or flame, a sneaky draft, or a gas valve that is not holding open.
I have been there. Early on in my own renovation, I spent an hour re-lighting a pilot that would not stay lit, only to find a greasy dust bunny partially blocking the pilot opening. Let’s walk through the fixes from easiest to most involved, with a strong focus on safety.
Quick disclaimer: Always follow your stove’s manual for lighting and service steps. If you are not comfortable working around gas or you are unsure what you are looking at, stop and call a licensed appliance technician.
First, confirm you have a pilot
Many newer ranges do not use a standing pilot at all, especially on cooktops. Most modern cooktops use spark ignition, and many ovens use a hot-surface (glow bar) igniter. “Intermittent pilot” systems exist, but they are less common in typical residential ranges today.
- Standing pilot: a small flame stays on all the time (often in older ovens, and on some older cooktops).
- Spark ignition (common on cooktops): you hear clicking and a spark lights the burner when you turn the knob.
- Hot-surface ignition (common in ovens): no pilot flame; an igniter glows and lights the burner.
If you do not have a standing pilot flame, skip down to “If you have electronic ignition instead” for next steps.
Safety first
Gas appliances are DIY-friendly when you work carefully, but you need a few hard rules.
- If you smell gas: do not light anything. Turn the stove off, shut off the gas supply valve if you can, open windows, and contact your gas utility or a licensed technician.
- Let the stove cool: pilots and burner parts stay hot longer than you think.
- Know your shutoff: the gas shutoff valve is usually behind the range or in the cabinet next to it. The handle parallel to the pipe is typically ON, perpendicular is OFF.
- Use the right tools: a flashlight, a small brush, compressed air, and a screwdriver cover most of this.

Read the pilot flame
Healthy pilot
- Steady, mostly blue flame
- Flame consistently heats the safety sensor (thermocouple or thermopile on standing-pilot systems)
- Does not flutter when you walk past or close a nearby door
Common clues
- Weak, tiny flame: pilot opening partially clogged, pilot needs adjustment (on some models), low gas flow, or dirty pilot assembly.
- Yellow or lazy flame: dirty pilot, poor air mix, or lint and grease buildup. If it stays yellow after cleaning, treat it as a combustion issue and consider a professional inspection.
- Flame flickers a lot: drafts, misaligned pilot, or a missing access cover that normally shields the flame.
- Pilot stays lit only while holding the knob: the sensor is not heating enough, the sensor is failing, or the safety magnet in the gas valve is weak.
Fix 1: Clean the pilot
Kitchen air is full of grease, dust, and pet hair. That mix loves to collect right where a pilot needs a clean, precise gas stream. Cleaning is usually the best first move because it costs nothing and solves a big chunk of cases.
What you are cleaning
- Pilot hood/assembly: the metal tip where the pilot flame comes out.
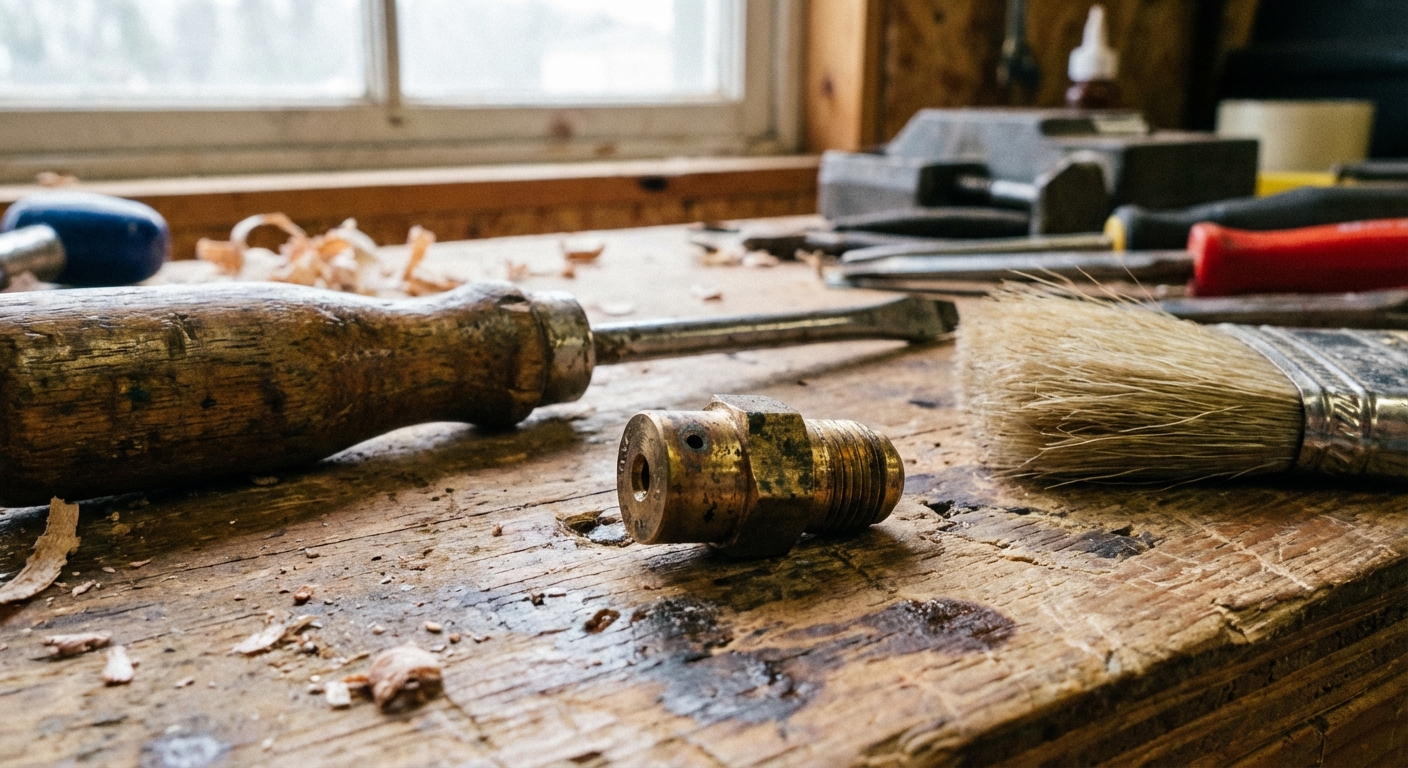
- Pilot opening or orifice: a tiny metering opening (sometimes a removable brass fitting).
- Area around the pilot: crumbs, rust flakes, and grease can mess with airflow.
Steps
- Turn the gas OFF at the shutoff valve and confirm all burner knobs are OFF.
- Access the pilot area. For cooktop pilots, remove grates and burner caps. For oven pilots, remove the oven bottom panel (usually a couple of screws at the back, then lift out).
- Brush and vacuum loose debris. A soft brush and a shop vac help a lot. Keep the vacuum nozzle a bit back so you do not bump delicate parts.
- Blow out the pilot opening. Use compressed air in short bursts first.
- If you still suspect a blockage, be careful. Some people gently clear the opening with a single strand of soft copper wire, but it is easy to damage or enlarge the opening if you get aggressive. If you cannot clear it with air and light brushing, the safer move is to consult your manual or replace the orifice/assembly (or call a technician).
- Wipe greasy residue. A cotton swab lightly dampened with rubbing alcohol is great for removing grime around the pilot hood.
- Reassemble, turn gas ON, and re-light following your stove’s lighting instructions.
My mistake to help you avoid it: Do not use a drill bit, nail, or anything that can widen the pilot opening. If you enlarge it even a little, you can end up with an oversized pilot flame or unreliable operation.
Fix 2: Stop drafts
Pilot flames are small. A draft that barely moves a curtain can be enough to push the flame off the sensor tip or snuff it out completely.
Common draft sources
- A nearby window or exterior door
- A strong range hood on high
- HVAC supply vent blowing toward the stove
- Oven bottom panel or flame spreader not seated correctly after cleaning
How to test
- Light the pilot.
- Turn on the range hood and see if the pilot flickers or shrinks.
- Walk past, open and close nearby doors, and watch for fluttering.
- For an oven pilot, confirm the metal panels you removed are reinstalled and aligned. Those panels often act like a wind shield.
If drafts are the culprit, the fix might be as simple as reinstalling a panel correctly, redirecting an HVAC vent, or avoiding running the hood on max while you are lighting the pilot.
Fix 3: Check the sensor
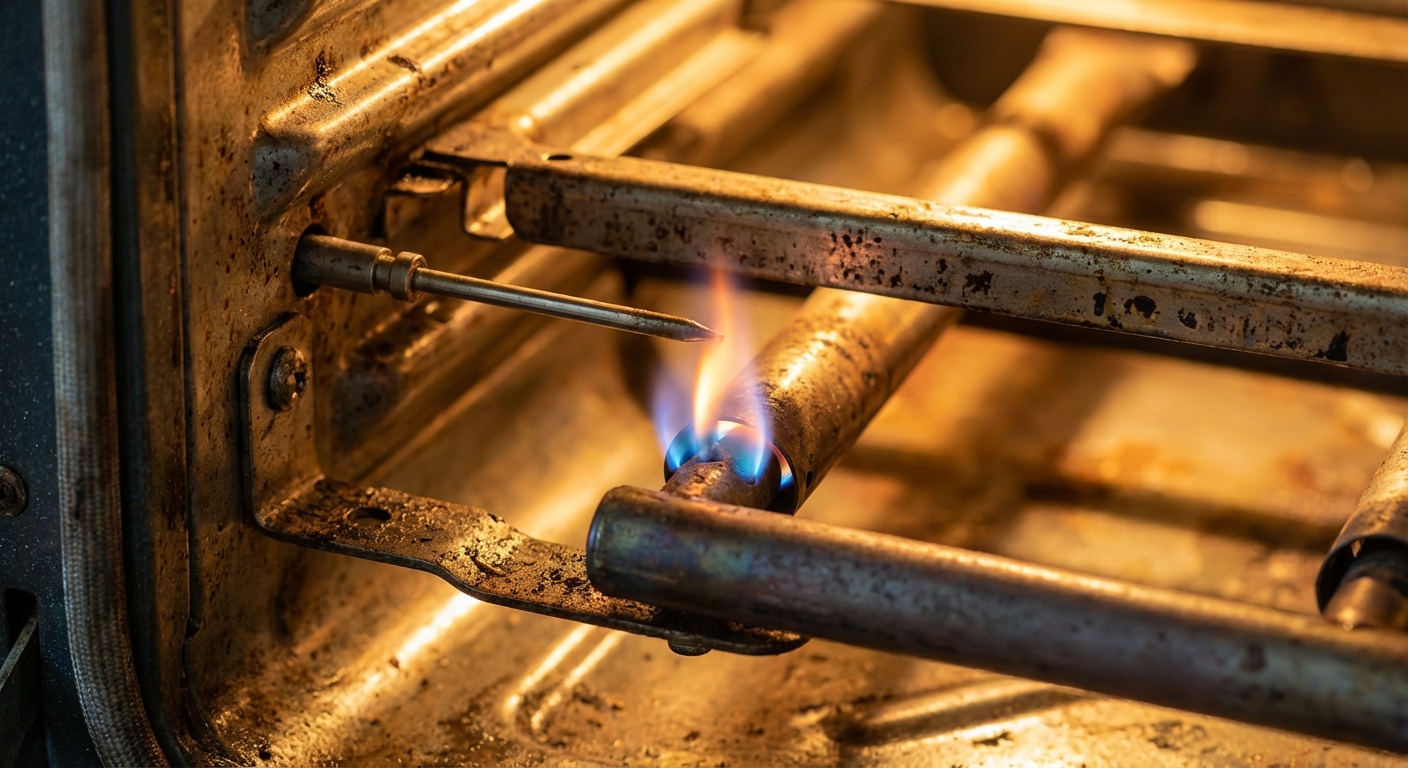
This is where it helps to name the system. On standing pilot appliances, the safety sensor is usually a thermocouple or thermopile. Heat from the pilot generates a small signal that tells the gas valve, “Flame is present, keep gas flowing.” If that sensor is dirty, misaligned, or failing, the valve shuts off and the pilot goes out.
On electronic ignition appliances, you may instead have a flame-sensing setup (often flame rectification) plus an igniter system. That is a different troubleshooting path, so do not force thermocouple logic onto a stove that does not have a standing pilot.
What to look for
- Position: the pilot flame should engulf the sensor tip consistently. Check your manual for the correct placement on your model.
- Condition: soot, oxidation, or pitting on the tip can reduce heat transfer.
- Mounting: a loose bracket can let it drift out of position over time.
Clean and align
- Turn gas OFF and let everything cool.
- Lightly clean the sensor tip with fine steel wool or a Scotch-Brite pad. You are removing oxidation, not sanding it down.
- If it is bent away, gently reposition it so the pilot flame wraps around the tip.
- Tighten any small mounting screws holding the bracket.
- Turn gas ON and test again.
Tip: If the pilot will only stay lit when you hold the knob down for a long time, that is often a sign the sensor is struggling to heat up. Cleaning and positioning are the first wins.
Fix 4: Replace the thermocouple
If cleaning and alignment do not help, a thermocouple can simply wear out. They are relatively inexpensive, and replacement is usually within reach for a careful DIYer.
Pick the right part
- Match your range model number whenever possible. Look on the frame behind the storage drawer, under the cooktop, or on the oven door frame.
- Bring the old thermocouple to the parts store to match length and fitting style.
- Some appliances use a thermopile or a different sensor setup. If you are unsure, use the model number to confirm the correct part.
Basic steps
- Turn gas OFF at the shutoff valve.
- Access the pilot area and locate where the thermocouple connects to the gas valve (a small threaded connection).
- Unscrew the thermocouple from the gas valve using the correct wrench size. Support nearby tubing so you do not kink it.
- Remove the mounting screw or clip holding the thermocouple at the pilot.
- Install the new thermocouple in the same routing and position. Avoid sharp bends.
- Thread the connection into the valve by hand first to avoid cross-threading, then snug with a wrench. Do not over-tighten.
- Turn gas ON and test lighting.
Leak check: After any gas connection work, use a store-bought leak detection solution or a mix of dish soap and water. Brush it on the connection and watch for bubbles with the gas on. If you see bubbles, turn gas off and re-seat the connection. Never use a flame to check for leaks.
Fix 5: Clean air intakes
On some ranges, a pilot that looks “dirty” is actually suffering from blocked air intake around the pilot or burner tube. Grease and lint can change how the flame burns.
- Wipe greasy film from nearby metal surfaces.
- Vacuum the bottom of the oven cavity (once cool) and around burner tubes.
- Make sure any flame spreader plates sit flat and are not warped.
Pilot adjustment notes
Some standing-pilot systems have a pilot flame adjustment screw (often on the valve). If your pilot is consistently too small even after cleaning, adjustment may be part of the solution.
Because this involves changing gas settings, I recommend following the manual exactly or having a technician handle it. If you are already uneasy, this is a good point to stop and call it in.
Gas supply issues
Most pilot issues are local to the pilot and sensor, but there are a few less common causes worth mentioning.
- A shutoff valve that is not fully open
- A failing regulator (in the appliance or upstream)
- Low or inconsistent gas supply pressure
If multiple gas appliances are acting strange, or the flame looks weak across the board, that points away from a simple pilot cleaning and toward a supply or regulator issue. That is usually a call to your gas utility or a licensed technician.
When it is the gas valve
If the pilot flame is strong and properly heating the sensor, the sensor is new and correctly installed, and the pilot still drops out, the issue may be inside the gas safety valve itself. The safety magnet can get weak, or the valve can fail to hold open even when the sensor signal is present.
Common signs
- Pilot goes out even with a new, correctly positioned thermocouple
- You must hold the pilot knob down far longer than normal and it still will not “catch”
- Inconsistent behavior that does not correlate with cleaning or drafts
Gas valve replacement often involves disconnecting gas lines and confirming proper operation afterward. If you are not 100 percent comfortable working on gas plumbing, this is where I recommend calling a licensed appliance tech. It is money well spent for safety and peace of mind.
Relighting basics
Every model is a little different, but these habits help:
- Keep the area well ventilated.
- Use a long-reach lighter or match holder.
- Hold the pilot knob down long enough to heat the sensor. Many stoves need 30 to 60 seconds.
- If it does not light quickly, stop and let gas dissipate for a few minutes before trying again.
If you have electronic ignition
If you read this and realized your range does not have a standing pilot, you are not alone. A lot of “pilot” complaints are really ignition problems.
- Cooktop with spark ignition: clean clogged burner ports, dry out wet burner parts, and listen for clicking. No click can point to a switch harness, spark module, or power issue.
- Oven with hot-surface igniter: a weak igniter can glow but still fail to draw enough current to open the gas valve. Slow ignition, gas smell before ignition, or no ignition with glowing can all point to an igniter problem.
If you are unsure which system you have, use the model number to pull up the parts diagram. It will usually make the ignition type obvious.
Troubleshooting checklist
- Pilot flame weak or yellow: clean pilot and opening, clean surrounding grease and dust, and consider professional help if yellow persists.
- Pilot flickers or goes out with hood or HVAC: address drafts and reinstall missing panels.
- Pilot only stays lit while holding knob: clean and align the sensor, then replace if needed.
- New thermocouple did not help: suspect gas valve or less common gas supply issues, call a pro.
- No standing pilot: shift to spark or hot-surface ignition troubleshooting.
When to call a pro
Here is my personal line in the sand:
- You smell gas at any point and cannot immediately identify why
- You see damaged, kinked, or corroded gas tubing
- The pilot area is heavily rusted or the burner looks compromised
- You have tried cleaning, draft checks, and sensor replacement with no improvement
If you have worked through the basics and it still will not behave, that is your cue to stop. DIY is about smart wins, not white-knuckle risks.
Tools and supplies
- Flashlight or headlamp
- Long-reach lighter
- Soft brush and shop vac
- Compressed air
- Fine steel wool or Scotch-Brite pad
- Small wrenches for thermocouple fitting
- Leak detection solution or dish soap and water
About Marcus Vance
Content Creator @ Grit & Home
Marcus Vance is a lifelong DIY enthusiast and self-taught home renovator who has spent the last decade transforming a dilapidated 1970s ranch into his family's dream home. He specializes in budget-friendly carpentry, room-by-room renovations, and demystifying power tools for beginners. Through his writing, Marcus shares practical tutorials and hard-learned lessons to help homeowners tackle their own projects with confidence.