What aeration and overseeding do
If your lawn looks thin, bumpy, or tired even though you water and mow, odds are the problem is under your feet. Soil gets compacted from kids, pets, mowing, and even just time. Compacted soil makes it hard for water, oxygen, and nutrients to reach the roots. Aeration relieves that compaction and opens pathways down into the root zone. Overseeding fills in the thin spots with new grass plants.
Aeration opens the soil so air, water, and fertilizer can move into the root zone.
Overseeding adds new grass seed to thicken the turf, improve color, and crowd out weeds over time.
Do them together and you get the best of both worlds: seed-to-soil contact plus a healthier root environment. It is one of the highest “sweat equity” upgrades you can do for a lawn.
When to aerate and overseed
Timing matters more than fancy products. You want warm soil for germination and mild air temps so seedlings are not stressed.
The simple rule I use: cool-season lawns get aerated and overseeded in early fall. Warm-season lawns get aerated during active growth, usually late spring into early summer. (And not every warm-season grass is commonly seeded.)
Cool-season grasses: fall is best
If you have tall fescue, Kentucky bluegrass, perennial ryegrass, or fine fescue, aim for late summer through early fall. In most areas, that is roughly mid-August to mid-October depending on your first frost date.
- Why fall wins: soil is still warm, weed pressure drops, and grass has two growing seasons (fall and spring) to mature before summer heat.
- Best window: about 4 to 6 weeks before your average first frost.
Warm-season grasses: late spring to early summer
If you have Bermuda, zoysia, centipede, or St. Augustine, do aeration when the lawn is actively growing, usually late spring into early summer once nights are consistently warm.
- Seeding note: Some warm-season lawns can be seeded (many Bermudas). Others are usually thickened with sod, plugs, or sprigs (St. Augustine is generally not seeded, and many zoysias are not either). If you are unsure, check what is realistic for your specific variety before buying seed.
- Winter color note: Many warm-season lawns get “overseeded” with annual ryegrass for winter color. That is a separate goal (temporary green) and can slow spring green-up if overdone.
Can you do it in spring?
You can, especially for cool-season lawns, but spring overseeding competes with crabgrass and summer heat. If spring is your only option:
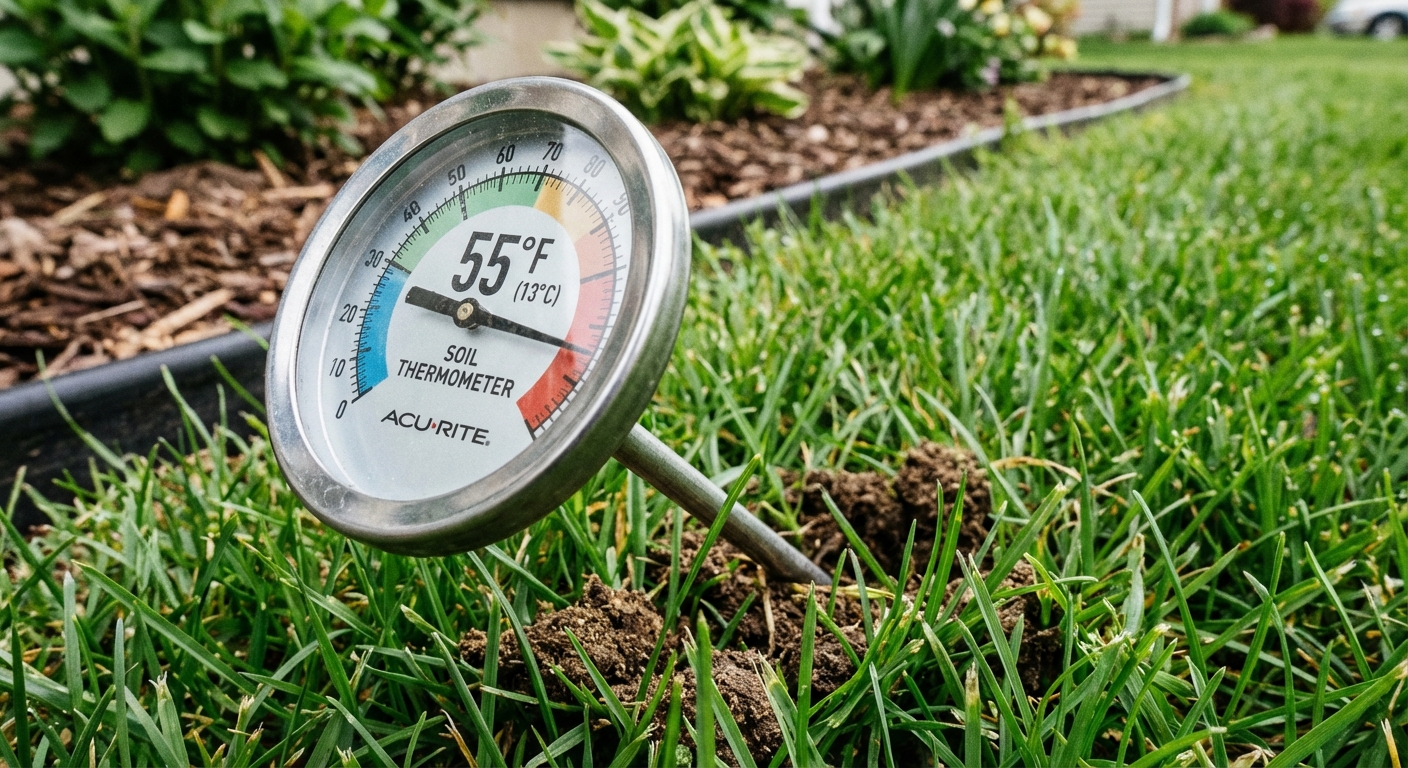
- Time it by soil temperature, not the air. Many cool-season seeds germinate best when soil temps are roughly 50 to 65°F (species varies). If you can, use a soil thermometer or local soil temp data.
- Be cautious with crabgrass pre-emergent. Many pre-emergents also block grass seed.
- Plan for extra watering heading into summer.
Core aerator vs. spike aerator
This is where a lot of homeowners get steered wrong. Both tools make holes, but they do not treat compaction the same way.
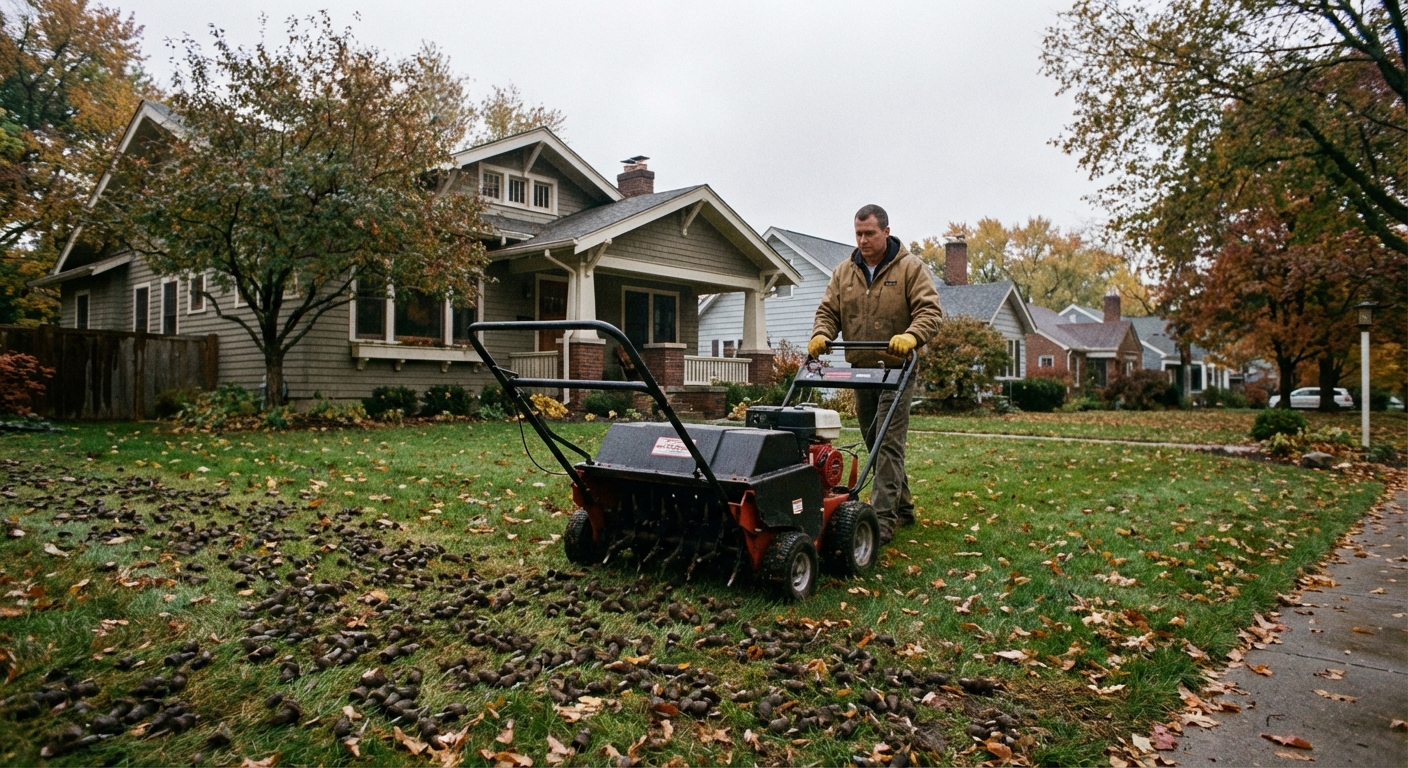
Core aerator: the one you want
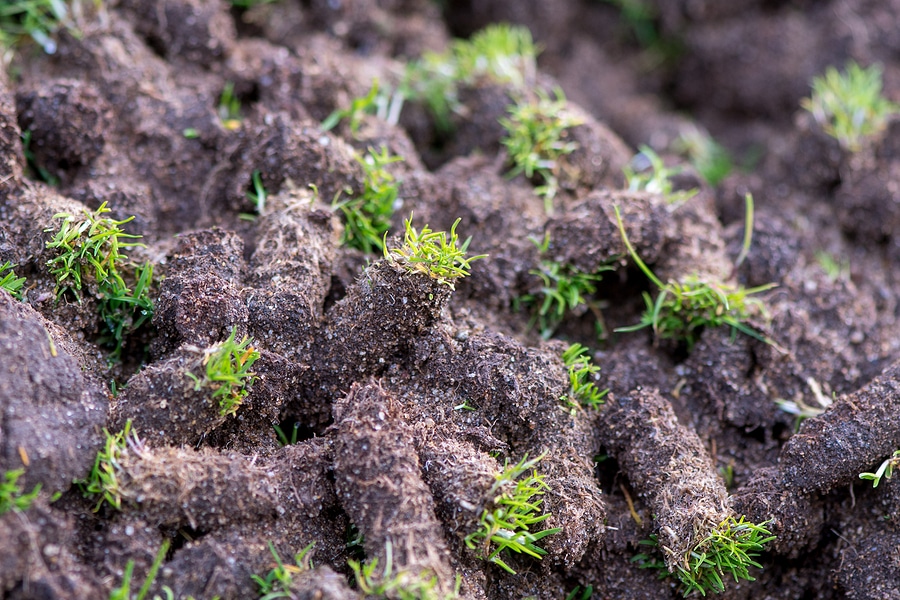
A core aerator pulls small plugs of soil out of the ground. That physically removes compacted soil and leaves space for roots to expand.
- Best for: compacted lawns, heavy clay, high-traffic yards
- Typical plug: about 2 to 4 inches deep depending on soil moisture and the machine
- Result: real compaction relief and great seed-to-soil contact
Spike aerator: light maintenance only
A spike aerator punches holes but does not remove soil. In heavy clay, especially if the soil is not evenly moist, it can push soil sideways and create compaction around the hole.
- Best for: sandy soil or very mild compaction
- Result: less effective for dense, hard ground
My neighbor-to-neighbor advice: If you are renting a machine for the weekend, rent a core aerator. If you already did all the work, you might as well get the payoff.
What you need
- Core aerator (rental) or service scheduled
- Grass seed suited to your region and sun conditions
- Broadcast spreader (or drop spreader for tight areas)
- Starter fertilizer (optional but helpful)
- Topdressing material (optional): compost, screened topsoil, or peat moss
- Leaf rake or dethatching rake for prep
- Flags to mark sprinkler heads, shallow cables, and invisible dog fences
- Hose timers or irrigation plan for watering
Step 1: Prep the lawn
I used to rush straight to seeding. My results were “okay,” but not great. The best lawns I have helped friends renovate all had one thing in common: good prep.
Mow lower than normal
Mow to roughly 1.5 to 2 inches for cool-season lawns right before aerating and seeding (do not scalp down to dirt). Bag clippings if they are heavy.
Rake out debris
Rake leaves, dead grass, and loose thatch so seed can reach soil. If you have thick thatch (more than about 1/2 inch), consider dethatching first or you will end up “seeding the thatch,” which dries out fast.
Quick note: aggressive power dethatching can be stressful on the lawn. For cool-season grass, early fall is usually the least risky time. If your thatch is not actually thick, skip the trauma and just rake the surface clean.
Water the day before
A core aerator needs the soil to be moist but not muddy. If your lawn is bone dry, water the day before. If it is soggy, wait. The goal is plugs that pull cleanly.
Mark obstacles
Stick little flags by sprinkler heads, shallow irrigation lines, and anything else you do not want to “discover” with a rental machine.
Step 2: Aerate
Core aerators are heavy and they like to wander. Take your time.
Make multiple passes
- Do two passes minimum.
- For compacted areas, do three to four passes, changing direction each time (north-south, then east-west).
Leave the plugs
Those little plugs look ugly for a week, but they break down and feed the soil. Just leave them. Mowing and watering will crumble them naturally.
Skip it when the lawn is stressed
Avoid aerating during drought stress or extreme heat. You are trying to help the lawn recover, not pile on more stress.
Step 3: Choose seed
Seed is where a lot of money gets wasted. The “best” seed is the one that matches your climate, sun exposure, and how you actually use the yard.
Match seed to your lawn
- Cool-season, sunny yards: Kentucky bluegrass blends, turf-type tall fescue blends, or fescue and rye mixes
- Cool-season, shade: fine fescues (creeping red, chewings, hard fescue) and shade blends
- Warm-season lawns: use the recommended variety for your region. For some grasses, thickening is more realistic with sod, plugs, or sprigs than seed.
Blends usually win
Blends and mixes help because different cultivars handle disease, drought, and shade a little differently. That makes the whole lawn more resilient.
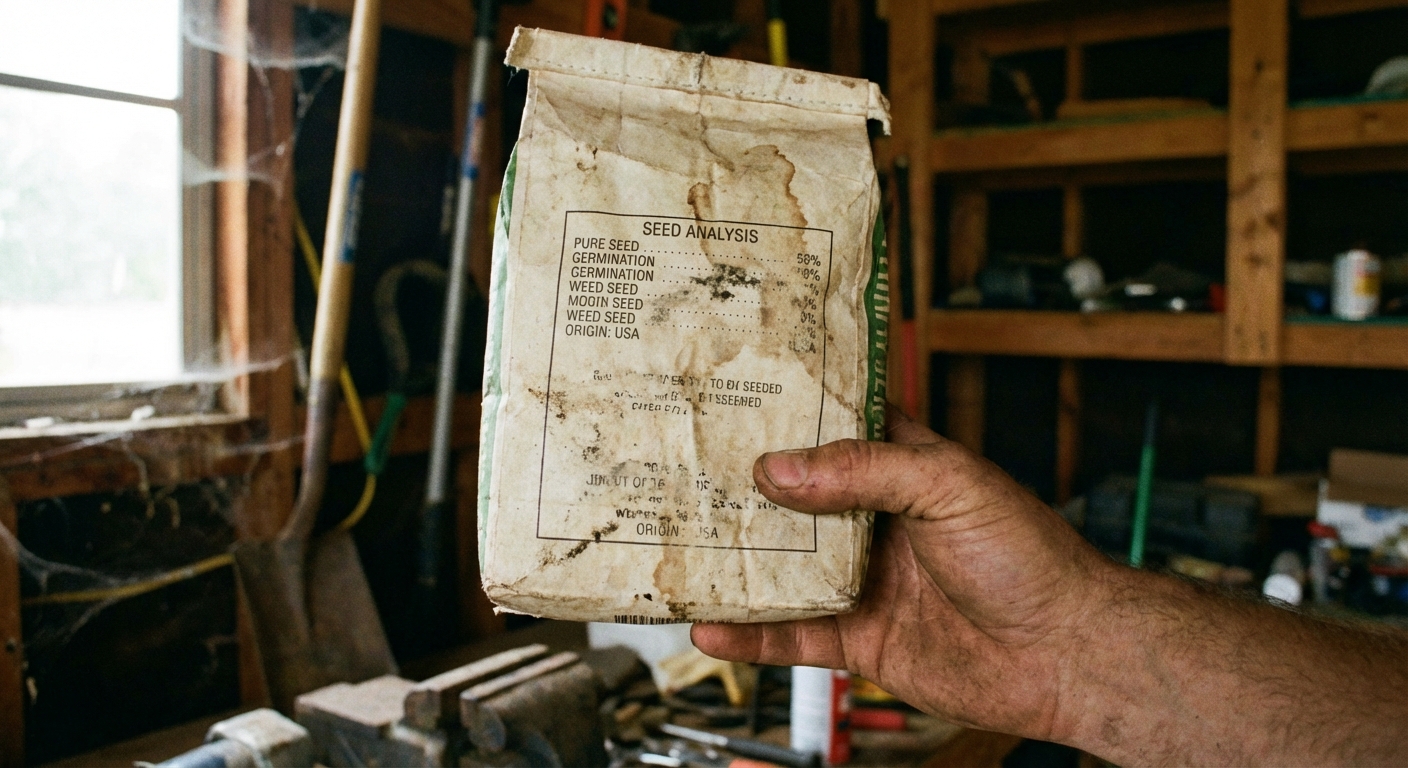
Read the seed label
On the bag, look for:
- Seed purity: higher is better
- Germination rate: higher is better
- Weed seed: as close to zero as possible
- Other crop: as low as possible
If the bag is loaded with coating and filler, the “pounds” can be misleading. Compare the actual seed content and the recommended coverage for overseeding.
Step 4: Overseed
Overseeding is not just flinging seed and hoping for the best. Your job is to get seed touching soil and keep it evenly moist until it sprouts.
How much seed to apply
Use the overseeding rate on your seed bag, not the “new lawn” rate. As a rule of thumb, many cool-season mixes land in the neighborhood of 3 to 8 pounds per 1,000 sq ft for overseeding, but the bag wins.
Spread without stripes
- Split your seed into two equal batches.
- Spread batch one walking north-south.
- Spread batch two walking east-west.
Rake it in lightly
After spreading, lightly rake to work seed into the aeration holes and the soil surface. You are not burying it. You are just improving contact.
Optional but excellent: topdress
A thin layer of topdressing helps hold moisture and improves results.
- Compost: About 1/4 inch is plenty. It holds moisture and improves soil over time. If you have heavy clay like I do, compost is the slow, steady fix that keeps paying you back.
- Peat moss: Also a great moisture retainer, and it is typically weed-free. Use a very light layer so you do not smother the seed. (If peat is hard to find or not your thing, compost works great.)
Starter fertilizer
A starter fertilizer can help seedlings establish. Follow label directions and local guidelines. If you already fertilized recently, do not double up just because you are excited.
Important: avoid standard weed and feed products when seeding. Many contain pre-emergent herbicides that can stop grass seed from germinating.
Pro tip: if you need weed prevention during seeding, some people use a seedling-safe option with mesotrione (often sold as Tenacity) on certain cool-season lawns. It is not for every grass type or situation, so follow the label and local rules.
Watering after overseeding
Watering is where overseeding succeeds or fails. Seed needs consistent moisture at the surface. Not puddles, not floods, just steady dampness.
Days 1 to 14
- Water 2 to 4 times per day for short bursts (about 5 to 10 minutes depending on your sprinklers and weather).
- Goal: keep the surface damp between cycles without runoff.
- Sandy soil may need more frequent cycles. Heavy clay often needs less frequent cycles to avoid puddling.
Weeks 3 to 4
- Water once per day (or every other day if cool and cloudy), but longer.
- You are training roots to chase water deeper.
Weeks 5 and beyond
- Water 1 to 2 times per week deeply (depending on your climate and soil).
- Early morning is best to reduce evaporation and disease risk.
My most common mistake: I used to water too long, too infrequently right after seeding. The surface dried out, the seed stalled, and I blamed the seed. If the seed coat dries after it has started to swell, germination can be uneven. Short and frequent at first feels silly, but it works.
Mowing and traffic rules
When to mow
Mow when the new grass reaches about 3 to 4 inches, and only if the ground is firm. Use a sharp blade and mow on a dry day. If your mower turns in place and tears seedlings, back out and wait a few more days.
Keep off it
Try to limit foot traffic for the first 3 to 4 weeks. Seedlings are easy to crush before they root in.
Common problems
Patchy germination
- Cause: uneven watering, seed not touching soil, birds, or old seed
- Fix: adjust sprinkler coverage, lightly rake and reseed thin spots, add a very thin compost or peat moss topdress
Seed washed into piles
- Cause: heavy watering or rain right after spreading
- Fix: switch to short cycles, avoid seeding before big storms, lightly rake seed in next time
Weeds popping up with new grass
- Cause: bare soil invites everything
- Fix: focus on establishing grass first, then address weeds later with the right product for your grass type and the lawn’s age. Many herbicides are not safe for brand-new seedlings.
No results after 10 to 14 days
Some grasses germinate fast (ryegrass), others slower (Kentucky bluegrass can take 2 to 4 weeks). If you seeded bluegrass, patience is part of the job. If nothing is happening anywhere, check watering first, then seed freshness.
Quick FAQ
Aerate before or after overseeding?
Before. Aeration opens the soil so seed can settle into holes and make contact.
Do I need to dethatch first?
Only if thatch is thick. A thin layer is normal. If the seed is landing on a spongy mat instead of soil, dethatching helps a lot.
Can I put compost and seed down the same day?
Yes. Aerate, seed, then topdress lightly so you do not bury the seed too deep.
How often should I aerate?
High-traffic or clay lawns: often once per year. Lower-traffic or sandy lawns: every 2 to 3 years can be enough.
Should I do a soil test?
If you want a simple “unfair advantage,” do a soil test every few years. It tells you if you actually need fertilizer and if pH is holding your lawn back.
My simple game plan
If you want the cleanest, most repeatable approach, here is the order I follow on my own place:
- Mow low, rake clean, water the day before if needed
- Core aerate with 2 passes minimum
- Overseed in two directions
- Light rake, optional compost or peat moss topdress
- Water short and frequent for 2 weeks
- First mow at 3 to 4 inches with a sharp blade
Do that once in the right season and your lawn usually looks like you hired it out.
About Marcus Vance
Content Creator @ Grit & Home
Marcus Vance is a lifelong DIY enthusiast and self-taught home renovator who has spent the last decade transforming a dilapidated 1970s ranch into his family's dream home. He specializes in budget-friendly carpentry, room-by-room renovations, and demystifying power tools for beginners. Through his writing, Marcus shares practical tutorials and hard-learned lessons to help homeowners tackle their own projects with confidence.