If you have a sloped yard, an eroding garden edge, or a patio area that needs a little help staying put, a small retaining wall can be one of the most satisfying outdoor upgrades you can do. The key phrase is small and the key word is drainage.
I learned this the dusty way on my own 1970s ranch lot. My first attempt looked great for one season, then winter freeze and spring rain taught me a lesson: a retaining wall is less about stacking blocks and more about building a stable, draining base.
This guide walks you through a classic DIY-friendly wall using interlocking concrete blocks. If you take your time on the base and backfill, the stacking part is the easy victory lap.
Know your limits and rules
Before you rent a compactor or order a pallet of block, make sure your wall is actually a good DIY candidate.
Permits and engineering
Permit requirements vary widely. Some areas trigger permits or engineering at 3 feet or even lower, and rules may be based on total retained height, tiered walls, surcharge loads (driveways, patios, slopes), or proximity to property lines and structures.
Bottom line: Check your local building department and your block manufacturer specs before you dig. If you are near a threshold or the site is complicated, get guidance from an engineer or a wall system designed for your conditions.
Height rules of thumb
- Under 3 feet: often DIY-friendly with interlocking blocks when you build the base correctly and manage water.
- 3 to 4 feet: sometimes doable, but pay close attention to manufacturer specs, soil type, and drainage. Permits and engineered plans are common in this range depending on conditions.
- Over 4 feet: usually not a weekend DIY project. Walls in this range often need engineering, geogrid reinforcement, specific base dimensions, and inspections.
Also watch for these red flags
- A driveway, structure, or pool is within a few feet of the wall.
- The wall will hold back a steep slope or heavy saturated soil.
- You see springs, standing water, or constant runoff in the area.
- Your yard has very soft soil, expansive clay, or you are unsure what is underneath.
Pick the block system
For most homeowners, the simplest path is a segmental retaining wall (SRW) system: interlocking concrete blocks designed to stack with a built-in setback. That slight step-back is part of what helps the wall resist pressure. Do not fight the built-in batter or setback. Build to it.
What to look for
- Interlock method: rear lip or pin system (both can work, just follow the manufacturer rules).
- Matching cap blocks available in the same line.
- Corner blocks or a clean method for creating corners and ends.
- Published specs for maximum unreinforced height, base depth, embedment, and drainage recommendations.
My thrifty tip: pick a block that is common at local landscape supply yards. You will get better availability for caps, corners, and extra blocks when you inevitably miscalculate by a few.
Plan like a builder
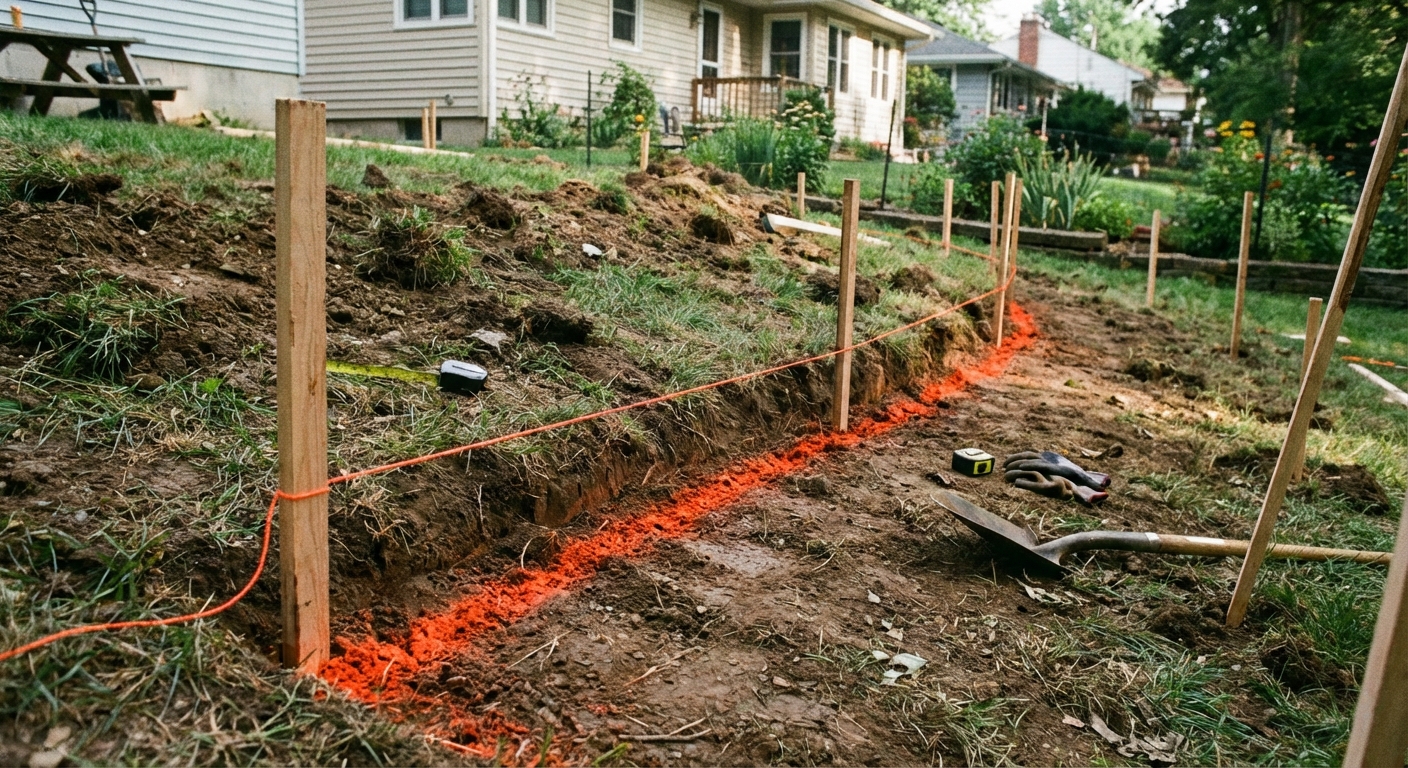
1) Layout and shape
Use marking paint or a garden hose to sketch the face of the wall. Gentle curves look great, and depending on the system and radius, they can also be more forgiving than a long, perfectly straight run. Either way, the base prep and drainage still do the real work.
Then set up a string line for straight sections or short strings for segments of a curve. Your goal is a clean, consistent line to build against.
2) Decide where the water goes
Water is the enemy behind a retaining wall. You are not just holding back dirt, you are managing a wet sponge of soil that expands, freezes, and gets heavy.
- Plan for free-draining gravel behind the wall.
- Add a perforated drain pipe at the base for most walls, especially in wet climates or clay soils.
- Make sure the pipe can daylight (exit to open air) at one end, or connect to an approved drainage point.
If water has no exit, it will try to exit through your wall. That is when leaning, bulging, and cracked caps show up.
Materials and math
Block and cap count
- Wall length: measure the total run along the face.
- Wall height: plan for extra height to bury the first course. Many manufacturers call for at least one full buried course regardless of height, and more embedment on slopes or poor soils.
- Blocks per course: length of wall ÷ block face length.
- Number of courses: height of wall ÷ block height.
Then multiply blocks per course by number of courses and add 5% to 10% extra for cuts and mistakes.
Base gravel and drainage gravel
A common DIY spec for small SRW walls:
- Base layer: 6 inches of compacted crushed stone (often called 3/4-inch minus, road base, or paver base).
- Base width: at least the block depth plus 6 to 12 inches. Check your block manufacturer.
- Drainage gravel: 12 inches or so behind the wall with clean angular stone (often 3/4-inch clean).
Gravel math is easiest in cubic feet or yards. For cubic yards, use:
(Length in feet × Width in feet × Depth in feet) ÷ 27 = cubic yards
Other materials
- Landscape fabric (to separate drainage gravel from native soil)
- Perforated drain pipe (4-inch is common) and fittings
- Leveling sand is generally not used under retaining wall base. Use compacted crushed stone instead.
- Construction adhesive rated for concrete for cap blocks
Quick shopping list
- SRW blocks: ____ per course × ____ courses + 5% to 10%
- Caps: ____ linear feet ÷ cap length + 5%
- Base gravel: (L × W × 0.5 ft) ÷ 27 = ____ yd³ (for a 6-inch base)
- Drainage gravel: (L × drainage width × height) ÷ 27 = ____ yd³
- Drain pipe: ____ feet + fittings (tees, elbows as needed)
- Landscape fabric: ____ sq ft (include overlap)
Tools
- Shovel, trenching shovel, and a steel rake
- Hand tamper or plate compactor (renting a compactor is worth it)
- 4-foot level and a small torpedo level
- Rubber mallet and a dead blow hammer
- Mason line, line level, and stakes
- Angle grinder with a masonry cutting wheel (or a block splitter rental)
- Broom for cleaning block surfaces between courses
- Safety glasses, hearing protection, gloves, dust mask for cutting
Build the wall
Before you dig
Call your local utility locate service before excavation (in the US, dial 811). Hitting a line is a fast way to turn a weekend project into a nightmare.
Step 1: Excavate the trench
This is where most DIY walls are won or lost.
- Trench depth: enough for 6 inches of compacted base gravel, plus embedment for the first course. A common rule of thumb is burying about 10% to 15% of the wall height, but many block systems specify one full buried course minimum. In cold climates, deeper is often better.
- Trench width: block depth + 6 to 12 inches, depending on your system.
Dig to undisturbed soil. If you hit soft topsoil, organic matter, or muddy material, keep going until you reach firm ground. If the trench fills with water, stop and solve drainage first.
Step 2: Add and compact the base
Pour in crushed stone in thin lifts and compact each lift so the compactor can actually achieve full density. For many plate compactors, that means 2 to 3 inch lifts (check your rental shop and material type).
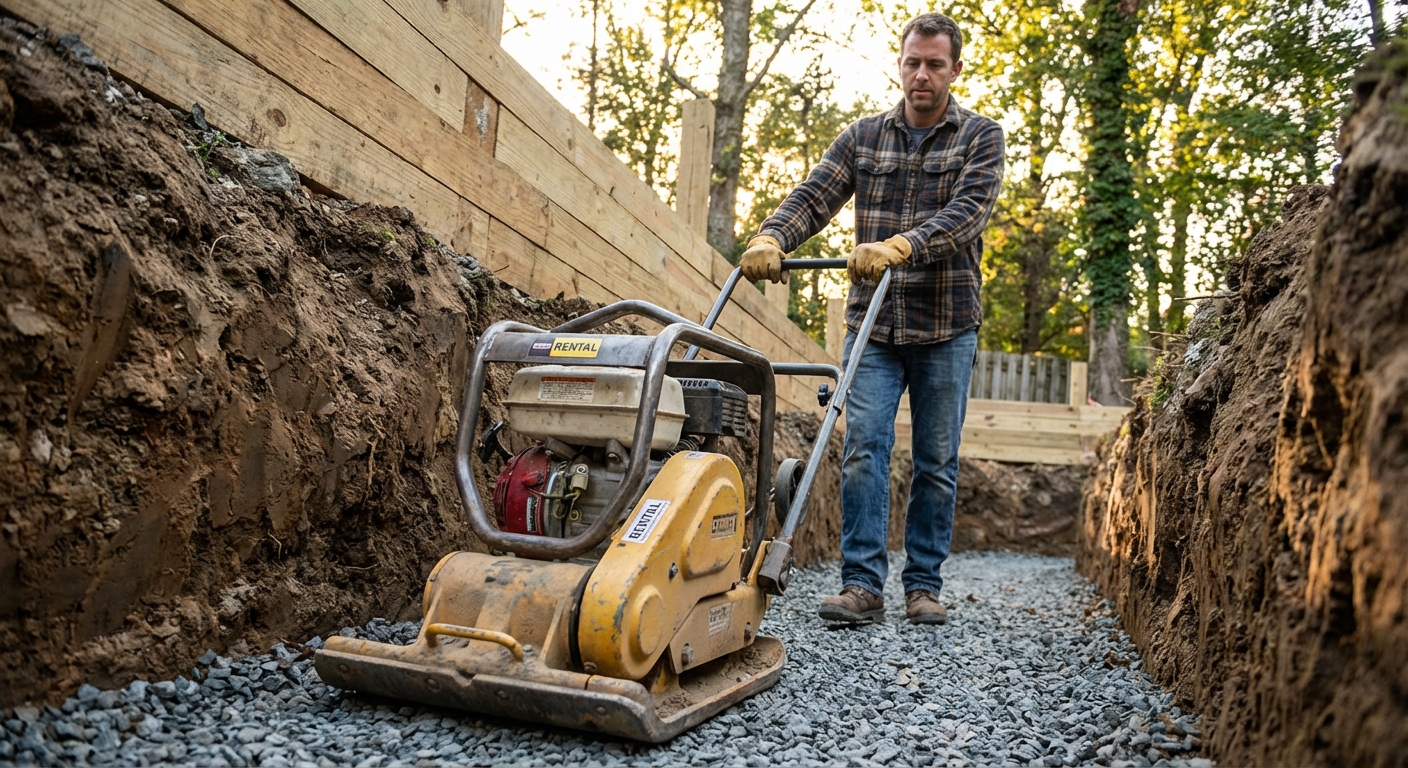
Use your level to make the base flat side-to-side and consistent front-to-back. A long straight board helps you screed and check for dips.
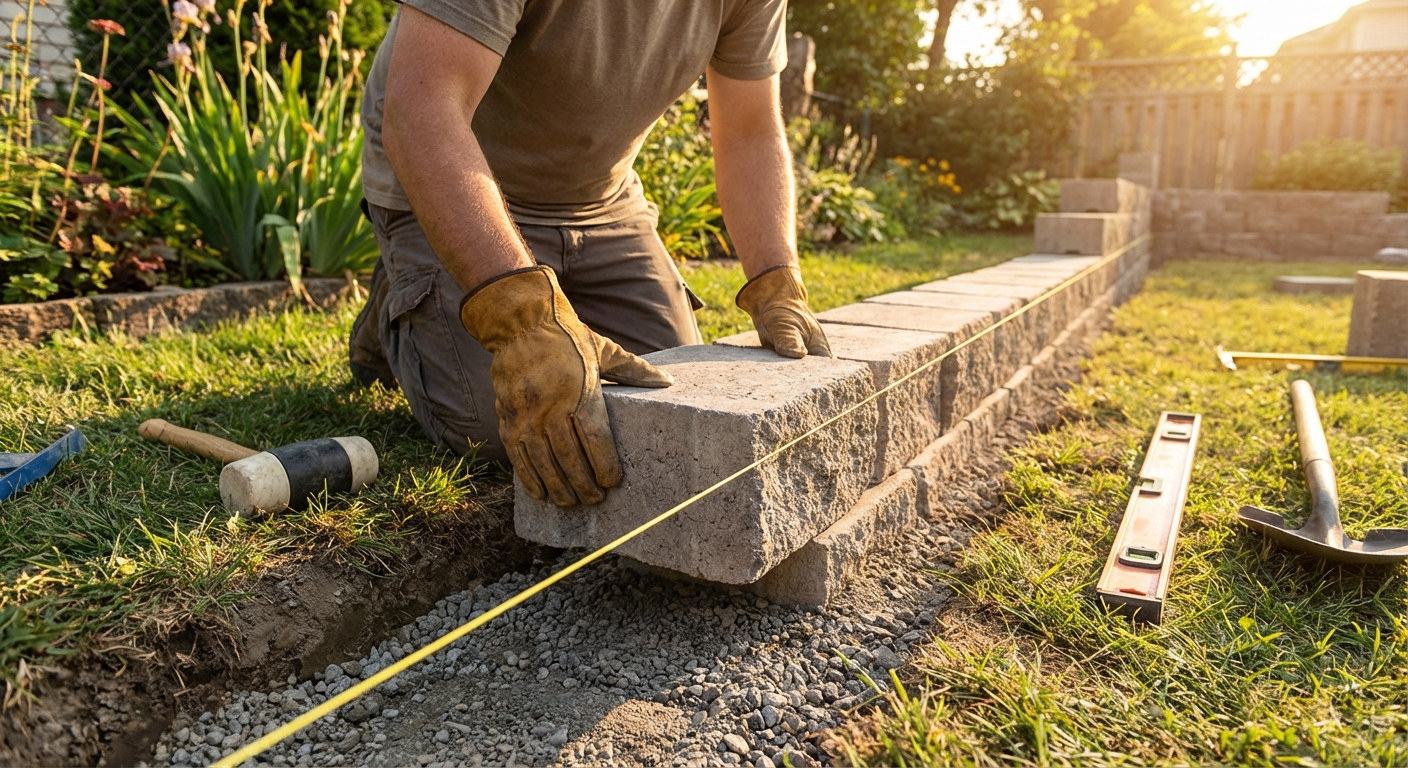
Step 3: Set the first course
The first course is the most important course. Every mistake here multiplies as you go up.
- Place the first block and level it front-to-back and side-to-side.
- Set the next block tight to it, level it, and keep going.
- Use a string line along the front faces to keep them straight.
- If a block is high, lift it and remove a bit of gravel. Do not try to smash it down and hope.
When I rush this step, I end up fighting every course above it. When I take an extra hour here, the whole wall feels like it builds itself.
Step 4: Install fabric and drain pipe
Place landscape fabric against the native soil behind the wall area, then add a 4-inch perforated drain pipe at the base behind the first course. A good target slope is about 1% (roughly 1/8 inch per foot) toward the outlet, or whatever your site allows.
- Use clean drainage gravel around the pipe.
- Make sure the outlet is protected and accessible. A simple grate or rodent guard helps keep critters and debris out.
- If daylighting is not possible, a pop-up emitter or tying into an approved drainage point can work, but follow local rules.
Step 5: Stack courses
Before each new course:
- Sweep the top of the blocks clean. A few pebbles can throw off alignment.
- Stagger vertical joints like brickwork whenever possible.
Then place the next course, ensuring each block seats fully on the interlock lip or pins. Check level and alignment often. Small adjustments now prevent a wavy wall later.
Step 6: Backfill as you go
Do not build the full wall first and then dump soil behind it. That is a common way to shove a fresh wall out of alignment.
Instead, after each course:
- Add drainage gravel behind the blocks, typically 8 to 12 inches deep.
- Compact the backfill gently in lifts. A hand tamper works well close to the wall.
- Keep native soil separated from the gravel with landscape fabric as you build up.
Clay note: clay holds water, so keep it out of your drainage zone. Use clay as native backfill only behind the fabric, not right against the blocks.
Step 7: Cut blocks
Use an angle grinder with a masonry wheel for clean cuts. Mark your cut line, wear eye and hearing protection, and cut outdoors with a dust mask.
Thrifty trick: save your best-looking factory faces for the visible ends. Use cut faces where they are least noticeable or where caps will cover them.
Step 8: Add caps
When you reach final height:
- Make sure the top course is clean and level.
- Dry-fit caps first to confirm spacing and overhang.
- Use a concrete-rated construction adhesive on each cap, then set and press firmly.
Give the adhesive time to cure before kids, dogs, or weekend yard games put it to the test.
Build on a slope
Yes, you can build a retaining wall on a slope, but you typically step the wall in level sections instead of trying to follow the slope with a single slanted base.
Simple stepping method
- Start at the lowest point and build your first level section.
- When you step up, excavate a new level pad and bury the first course again for that new section.
- Overlap blocks at the step so the transition ties together cleanly (your block system may have specific step-up details).
Geogrid basics
If your wall design calls for geogrid, treat it like a structural component, not an optional upgrade. Geogrid is a reinforcement mesh that extends back into the soil to create a stronger mass behind the wall.
- Follow the manufacturer or engineer plan for grid length, vertical spacing, and connection details.
- Use the specified backfill (often compacted granular fill) in the reinforced zone.
- If your wall needs geogrid, it usually also needs closer attention to compaction, drainage, and inspection.
Drainage that prevents failures
If you only remember one thing, remember this: hydrostatic pressure is what topples walls. Water trapped behind the wall has nowhere to go, so it pushes.
Drainage checklist
- Crushed stone base, compacted
- Drainage gravel zone behind the wall
- Perforated drain pipe that actually exits somewhere
- Landscape fabric to keep soil from clogging the gravel
- Surface grading so water runs away from the wall, not into it
In climates with freeze-thaw cycles, drainage is non-negotiable. Ice expansion behind a wall is like a slow-motion jack pushing from the back.
Common mistakes
- Skipping compaction: a pretty wall on a loose base will settle and lean.
- Using rounded river rock: it does not lock together and can shift. Use angular stone.
- No buried first course: the wall can slide forward over time.
- Backfilling with clay right against the blocks: clay holds water and increases pressure. Keep clay behind the fabric, not in the gravel zone.
- Building too tall without reinforcement: if the wall needs geogrid, it needs geogrid.
- Not checking local rules: permits and thresholds vary, and they can be triggered by more than height alone.
Maintenance
- Keep the drain outlet clear of mulch, leaves, and soil.
- Watch for early signs of trouble: new leaning, bulging, or sinking caps.
- Maintain grade so roof or patio runoff does not dump behind the wall.
- Re-seat shifted caps and touch up joints before small issues become big ones.
Quick FAQ
How deep should I dig?
Plan for a trench deep enough to fit about 6 inches of compacted base gravel plus embedment for the first course. A common rule is burying 10% to 15% of total wall height, but many systems call for one full buried course minimum, and more in tougher conditions.
Do I need a drain pipe?
Some very short walls in exceptionally free-draining soils may function without a pipe. In most real yards, and per many SRW manufacturer details, a drain pipe is recommended and sometimes required for the system to perform as intended. It is inexpensive insurance, so I usually include it.
Can I build on a slope?
Yes, but you usually need to step the wall in level sections. Start at the low point, build a level run, then excavate a new level pad for the step-up and bury the first course again.
Do this, not that
- Do spend extra time on excavation and base compaction. Do not try to fix a bad base with shims, sand, or wishful thinking.
- Do build in drainage from day one. Do not trap water behind the wall.
- Do respect height limits, site conditions, and manufacturer specs. Do not freestyle a tall wall because the blocks were on sale.
If you keep the wall small, build the base like it is holding up a driveway, and give water an easy escape route, you can absolutely build a retaining wall you will be proud to point at for years and say, “I built that.”
About Marcus Vance
Content Creator @ Grit & Home
Marcus Vance is a lifelong DIY enthusiast and self-taught home renovator who has spent the last decade transforming a dilapidated 1970s ranch into his family's dream home. He specializes in budget-friendly carpentry, room-by-room renovations, and demystifying power tools for beginners. Through his writing, Marcus shares practical tutorials and hard-learned lessons to help homeowners tackle their own projects with confidence.