Changing a furnace filter is one of those small home maintenance jobs that pays you back fast. A clean filter helps your system breathe, keeps airflow steady, and can reduce dust in the house. A clogged filter makes your system work harder, which can mean higher energy bills, more wear on parts, and comfort issues like weak airflow.
If you have ever wondered, “Where even is my filter?” you are in the right place. I will walk you through finding it, buying the correct replacement, installing it in the right direction, and setting a schedule you will actually stick to.
Before you start
What you need
- A new filter (correct size and type)
- A flashlight (phone light works)
- A vacuum or rag for loose dust around the slot (optional)
- A pen or marker to write the install date on the filter frame
Quick safety note
For most homeowners, the safest habit is simple: set the thermostat to Off and turn off power to the furnace or air handler at the service switch (often on or near the unit) before you open any access panels. Some units have safety interlock switches, and on others you can still end up near moving parts if a panel is removed at the wrong time.
Also, do not run the system with the filter access door or return grille left open. It can be a safety issue and it can pull unfiltered air in around the filter.
Step 1: Find the filter
The filter is usually located where the system pulls air in (the return), not where it blows heated or cooled air out (the supply). In plain terms: returns pull air back to the equipment, and supplies push air into rooms.
Most homes have one filter location, but some have multiple return grilles and therefore multiple filters. If you find more than one, replace them all on the same schedule. Just avoid stacking filters in the same airflow path (for example, one at a return grille and another at the unit) unless an HVAC pro specifically told you to.
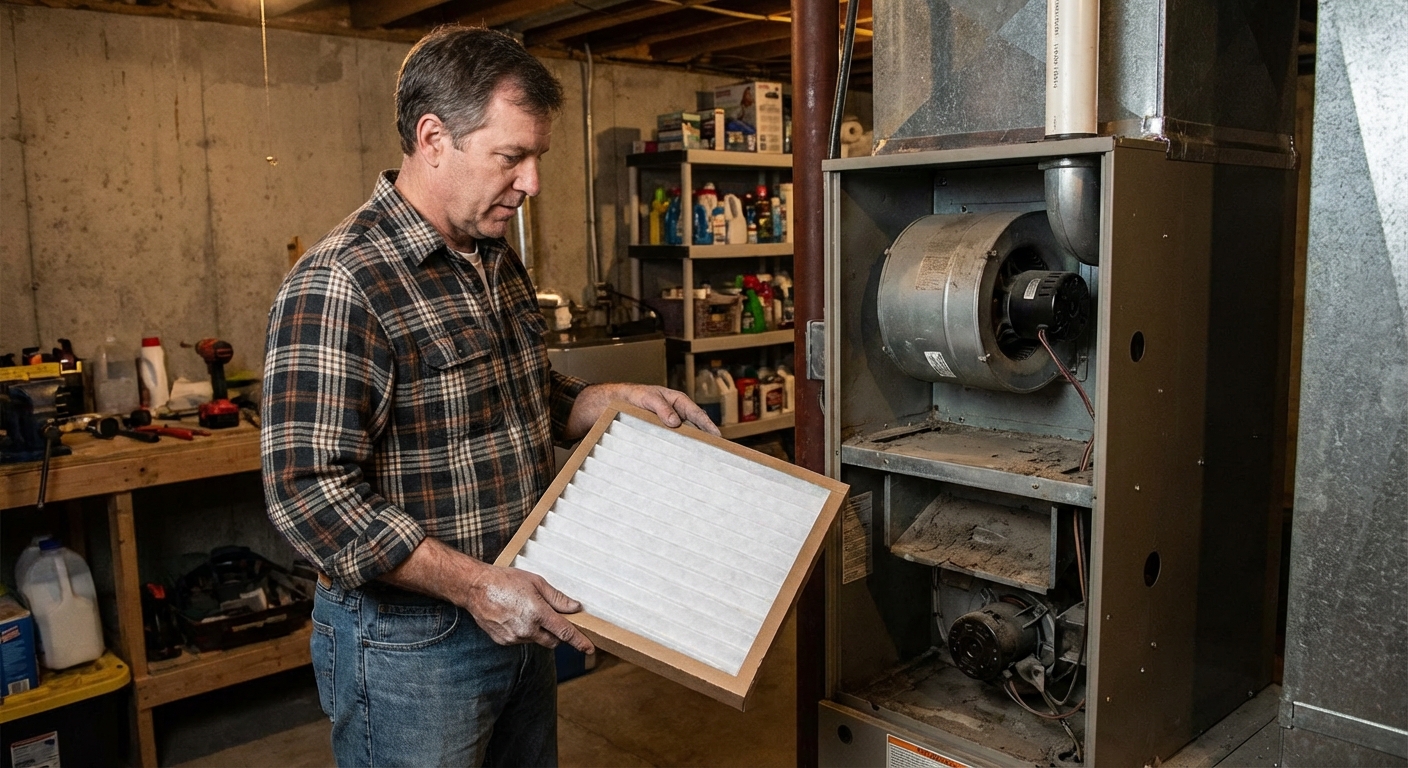
1) In the furnace cabinet
Look for a narrow slot with a removable cover door, usually on the side of the furnace or between the furnace and the return ductwork. The filter slides in like a drawer.
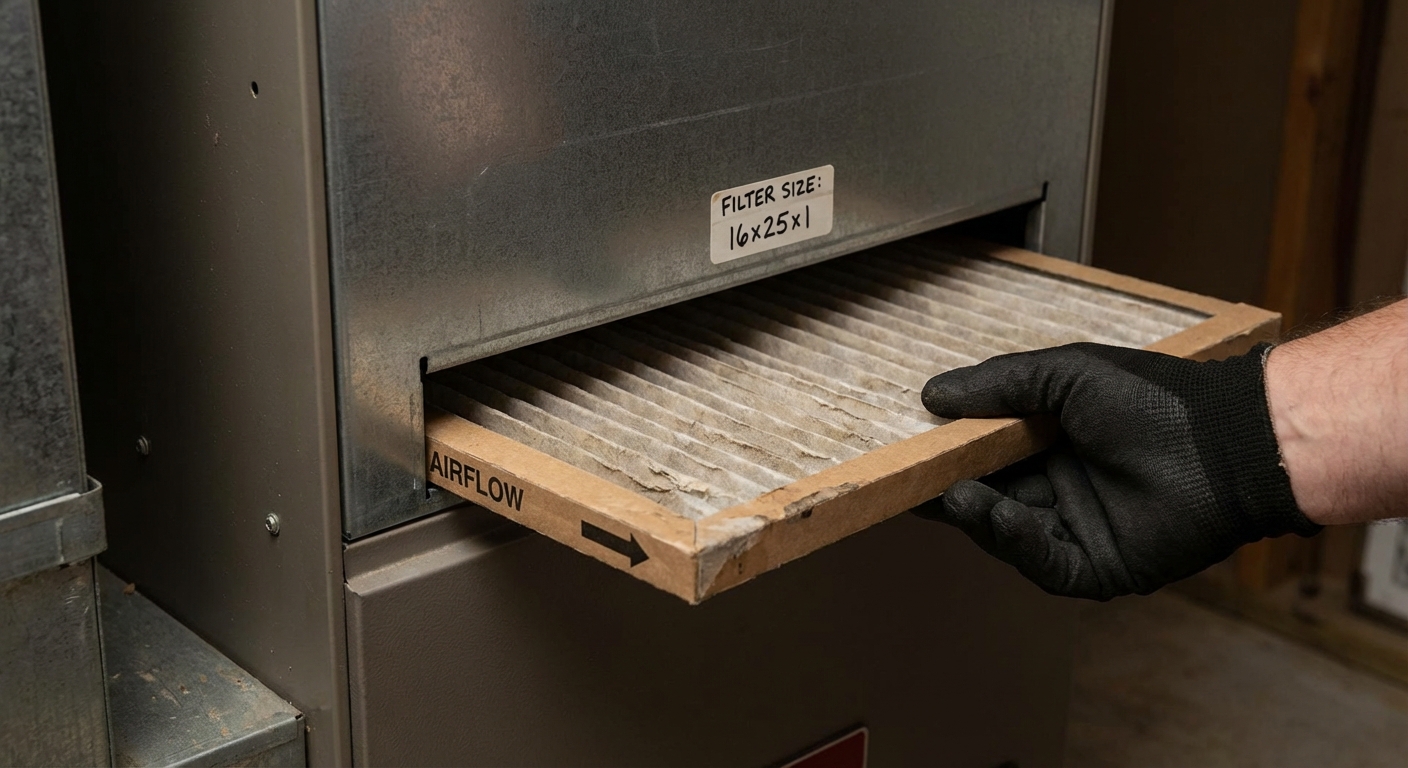
2) In the return duct near the unit
Sometimes the filter sits in a metal track inside the large return duct a foot or two from the furnace or air handler (the indoor unit for many heat pumps). You may see a small access panel held by thumb screws.
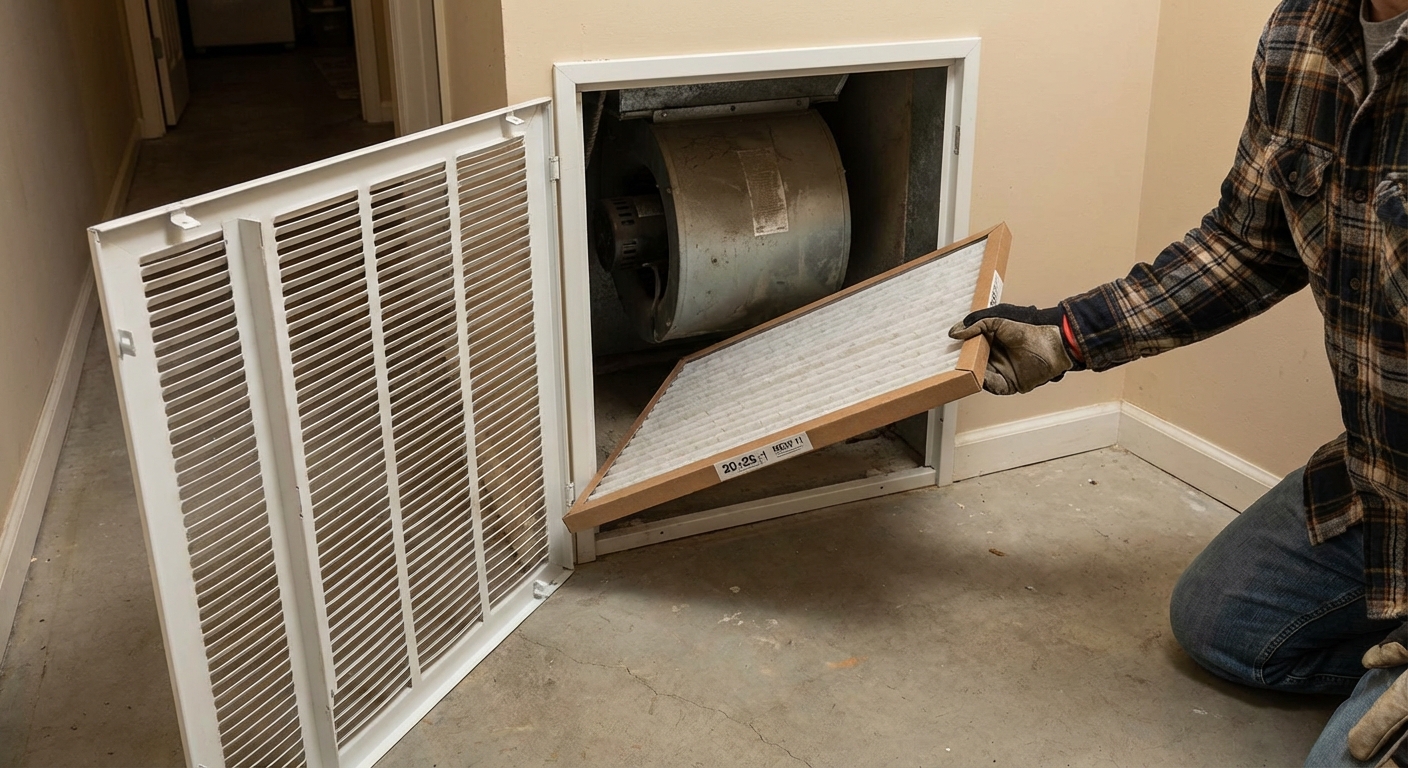
3) Behind a return grille
Some homes use one or more filters behind large return grilles in the wall or ceiling. Open the grille (usually with tabs or a couple screws) and the filter will slide out.
If you cannot find it: follow the larger ductwork. Return ducts are typically larger than supply ducts and lead back to the blower area. If your system uses filters in wall or ceiling returns, the furnace cabinet may not have a filter slot.
Step 2: Confirm the size
Filter sizing trips up beginners because the numbers on the package are often “nominal” sizes. Your goal is to match what your system is designed for.
Where to find the size
- On the old filter frame: common sizes look like 16x25x1, 20x20x1, or 16x25x4.
- On the filter slot or access panel: sometimes the size is printed on a sticker.
- Measure it: if the label is missing or unreadable.
How to measure
Measure length x width x thickness in inches. Thickness matters a lot. A 1-inch filter is not interchangeable with a 4-inch media filter cabinet.
Pro tip from my own mistake: if your new filter bows, does not slide smoothly, or rattles around, the size is wrong. Do not “make it fit” with tape. Air will find the gaps and bypass the filter.
Step 3: Pick a MERV
MERV is a standard rating that tells you how well a filter captures particles. Higher MERV usually means better filtration, but also more resistance to airflow, especially in 1-inch filters. The best choice balances air quality and airflow.
Common MERV ranges
- MERV 5 to 8: basic household dust and lint. Good for many homes and often easiest on airflow.
- MERV 9 to 12: better for fine dust and many allergy triggers. A popular sweet spot for many forced-air systems.
- MERV 13: high filtration that can help with smoke and finer particles. It is often much more workable when the filter has more surface area (like a 4 to 5 inch media cabinet). In a 1-inch filter, it can restrict airflow in some systems.
My neighbor-to-neighbor advice: if you are unsure, start at MERV 8 to 11 in a 1-inch filter, or follow what your equipment manual recommends. If airflow feels weaker after upgrading, step down a level and keep the filter fresh.
Filter types
The filter you choose affects air quality, system performance, and your wallet. Here is the plain-English breakdown.
Fiberglass
- Pros: lowest cost, low airflow resistance.
- Cons: catches fewer small particles and usually does little for allergies or fine dust.
- Best for: protecting the equipment when budget is tight and you can replace frequently.
Pleated
- Pros: better particle capture, widely available, good value.
- Cons: higher MERV pleated filters can restrict airflow if the system is sensitive or the filter is neglected.
- Best for: most homeowners who want a solid air-quality upgrade without getting complicated.
HEPA systems
- Pros: top-tier filtration when properly installed and sealed.
- Cons: not a simple “swap the filter” upgrade. Typically higher cost and may require professional installation.
- Best for: households with significant allergies or air quality needs, and a system designed to handle it.
Quick HEPA clarification: many “HEPA-style” filters sold for HVAC are really high-MERV pleated filters. They can still be great, but they are not the same thing as a sealed HEPA system.
How this hits your energy bill: a dirty filter is usually the bigger problem than a moderately higher MERV filter. If you go higher MERV, commit to checking it more often.
Step 4: Remove old filter
- Set the thermostat to Off (and turn off power at the service switch if available).
- Open the filter access door or return grille.
- Slide the old filter out slowly to avoid dumping dust.
- Take a quick look inside the slot. If you see loose dust, vacuum it out gently.
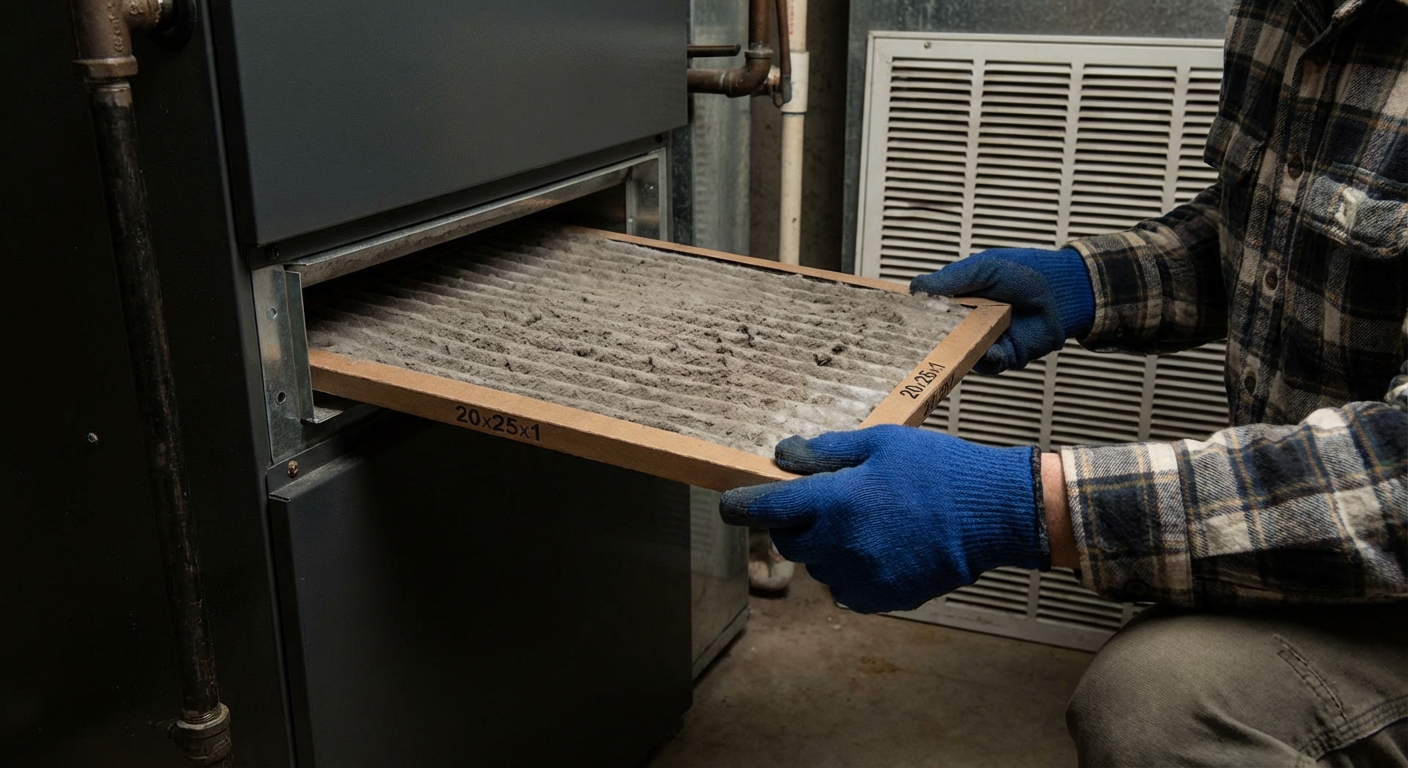
Reality check: if the filter is gray and fuzzy, that is normal. If it is oily, wet, or you see heavy black soot-like buildup, that is worth investigating.
Step 5: Install new filter
This matters more than people think. Most filters have an arrow on the frame that shows airflow direction.
Which way does the arrow go?
The arrow should point toward the equipment, meaning toward the blower and the furnace or air handler. If your filter is in a wall or ceiling return grille, the arrow points into the duct, away from the room.
If there is no arrow
Some filters print words like “Air Flow” instead of an arrow. If yours is truly blank, match the direction of the old filter if you are confident it was correct, or check the manual for your unit. When in doubt, remember the rule: the filter should face the direction air travels on its way back to the blower.
- Slide the new filter into the tracks and make sure it sits flat.
- Close the access panel or grille snugly.
- Write the date on the filter frame so you know when it went in.
If the filter seems too tight, do not force it. Pull it back out and re-check the size and thickness.
Step 6: Set a schedule
“Replace every 3 months” is a decent starting point, but real life is messier. Your home, pets, and season all matter.
Simple guidelines
- 1-inch filters: check monthly, replace every 1 to 3 months depending on dust and runtime.
- 4-inch or 5-inch media filters: often last 6 to 12 months, but still check every couple months at first.
- Pets, allergies, renovations, wildfire smoke: plan on more frequent changes.
- Heavy heating or cooling season: filters load up faster when the fan runs more.
Reminders that work
- Recurring phone reminder on the first weekend of the month to check the filter
- Buy a multi-pack and keep it next to the furnace
- Write “next check” date on the furnace cabinet with painter’s tape
Troubleshooting
A filter swap is simple, but what you notice during the swap can be a clue. Here are a few red flags:
- Filter is collapsing inward: may be installed backward, too restrictive, or severely overdue.
- Dust bypass around the edges: wrong size, warped filter, or missing filter rack seal.
- Filter is wet: possible condensation issue, humidifier issue, or duct sweating in some basements.
- Still weak airflow after replacement: could be a dirty blower, closed dampers, clogged coil, or duct restriction.
When to call a pro
- Filter keeps getting wet or moldy
- You see recurring heavy black soot-like buildup
- The filter clogs unusually fast even after you step down to a sensible MERV
- Your AC coil freezes or you see ice on refrigerant lines
- Airflow stays weak after a correct filter change and basic vent checks
If you are chasing odd furnace behavior like short cycling, no heat, or strange noises, cross-check with our troubleshooting guide: Furnace Troubleshooting.
Quick FAQ
Can I run without a filter for a day?
It is best not to. Without a filter, dust can build up on the blower and evaporator coil, which can reduce efficiency and create bigger maintenance problems later.
Is higher MERV always better?
Not always. Higher MERV can improve air quality, but if it restricts airflow in your setup, it can cause comfort issues and strain the system. A slightly lower MERV filter changed on schedule often beats a very high MERV filter left too long.
Should I use washable filters?
I generally avoid them because many do not filter as well as a quality pleated disposable filter, and they are easy to reinstall damp or not fully clean. If you use one, follow the drying instructions carefully and check it often.
60-second checklist
- Thermostat off (and power off at the service switch if you can)
- Pull the old filter and confirm size
- Pick a sensible MERV for your home and filter thickness
- Arrow points toward the equipment
- Close the panel or grille snugly
- Write the date and set a reminder
That is it. One small habit, a healthier system, and fewer “why is the airflow so weak?” moments in the middle of winter.
About Marcus Vance
Content Creator @ Grit & Home
Marcus Vance is a lifelong DIY enthusiast and self-taught home renovator who has spent the last decade transforming a dilapidated 1970s ranch into his family's dream home. He specializes in budget-friendly carpentry, room-by-room renovations, and demystifying power tools for beginners. Through his writing, Marcus shares practical tutorials and hard-learned lessons to help homeowners tackle their own projects with confidence.