If you have ever noticed your dryer taking forever, running hotter than usual, or leaving clothes still damp, there is a good chance the problem is not the dryer at all. It is the vent.
Lint is basically fuel. When it builds up in the vent and the dryer is pushing hot air through a restricted duct, you are stacking the deck: heat plus combustible material (two of the three ingredients in the fire triangle). The U.S. Fire Administration has long warned that clothes dryer fires are often tied to lint buildup and lack of cleaning (USFA). The good news is that vent cleaning is a very doable DIY job, even if you are new to tools.
Quick vocab note: People say “dryer vent,” “duct,” “run,” and “vent line” like they are different things. In this guide, they all mean the same thing: the 4-inch path that carries hot, moist air from your dryer to the outside.
Signs your dryer vent needs cleaning
I tell friends to treat these like a check-engine light. One sign might be a fluke. Two or more means stop putting it off.
- Dry times getting longer (especially towels and jeans)
- Dryer feels hot on the outside or the laundry room feels unusually warm and humid
- Burning smell or a hot, dusty odor during a cycle
- Lint collecting behind the dryer or around the vent connection
- Exterior vent hood flap barely opens while the dryer is running
- Musty smell in clothes from moisture not venting properly
Tools and supplies
You do not need anything fancy. The key is reaching the full length of the duct and removing lint safely.
- Dryer vent brush kit (flex rods plus round brush, sized for 4-inch ducts)
- Vacuum with hose attachment (shop vac is ideal)
- Screwdriver or nut driver (commonly 1/4-inch or 5/16-inch) for hose clamps
- Work gloves and a dust mask
- Flashlight or headlamp
- Foil HVAC tape (not duct tape) for re-sealing joints if needed
If your vent is plastic or thin foil: put “upgrade to rigid metal or semi-rigid metal” on your to-do list. Metal ducts are far safer and perform better.
Best practice note: Avoid screws or fasteners that stick into the duct. They can snag lint and start a clog. Foil HVAC tape is usually the safer way to seal joints (follow your local code and the dryer manufacturer guidance).
Safety first
- Unplug the dryer. If it is a gas dryer, also turn off the gas valve (usually a lever on the supply line behind the unit).
- Let the dryer cool if it was just running.
- Pull the dryer out slowly. Watch the duct so you do not kink or rip it.
- Do not run the dryer with the duct disconnected. You will dump heat and lint into the house, and a gas unit can create a dangerous venting situation.
One of my early DIY mistakes was yanking the dryer out like I was starting a lawnmower. I crushed the vent, which made drying worse and increased heat. Slow and steady wins here.
Step-by-step: clean your dryer vent
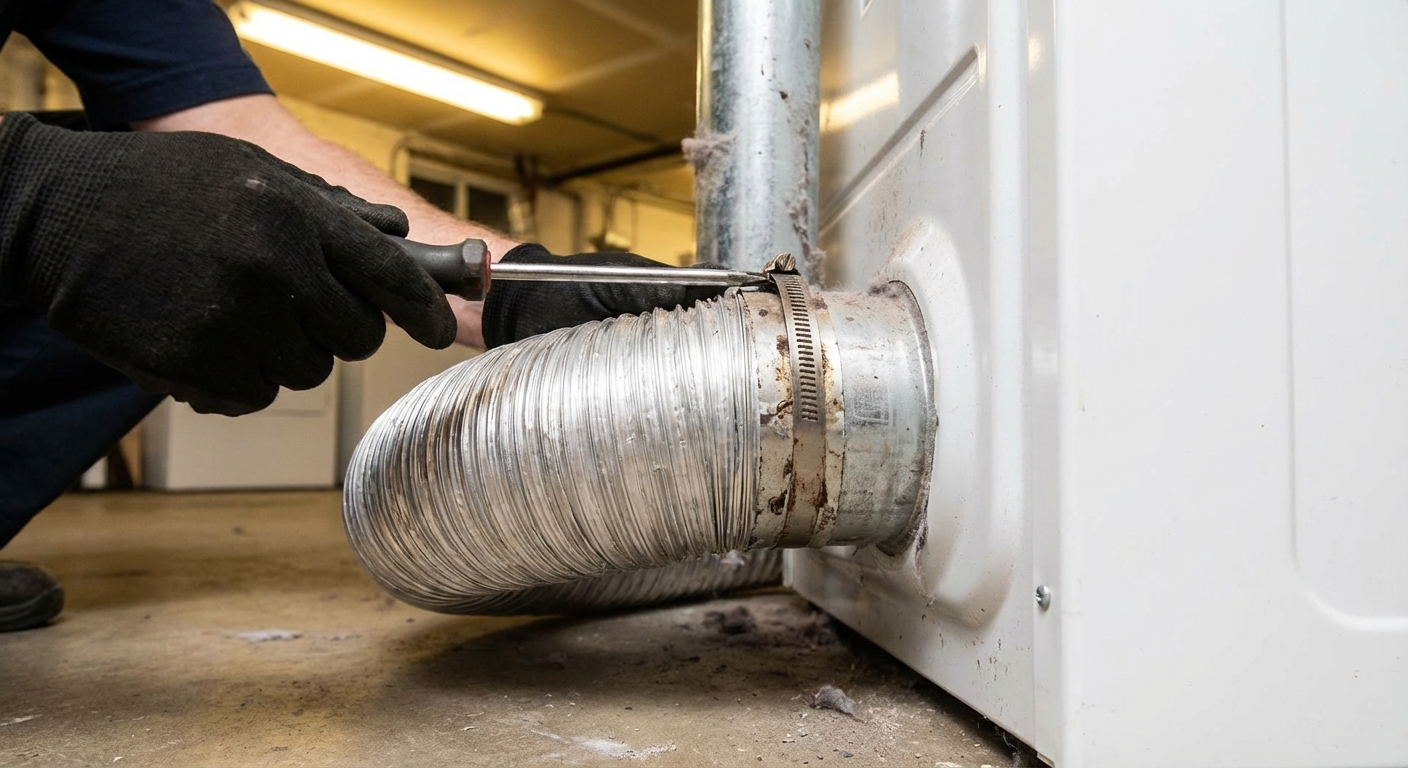
1) Disconnect the duct
Many vents are held with a worm-gear clamp. Some are taped or use a different style of clamp. Either way, the goal is the same: loosen the connection and slide the duct off the dryer outlet.
- Vacuum any loose lint around the outlet and the floor behind the dryer.
- Check the duct end for heavy buildup. If it is packed, you are in the right place.
2) Clean the lint trap housing
Pull out the lint screen and vacuum inside the lint trap slot. If you can, remove the lint trap cover screws and vacuum deeper. A surprising amount of lint sneaks past the screen.
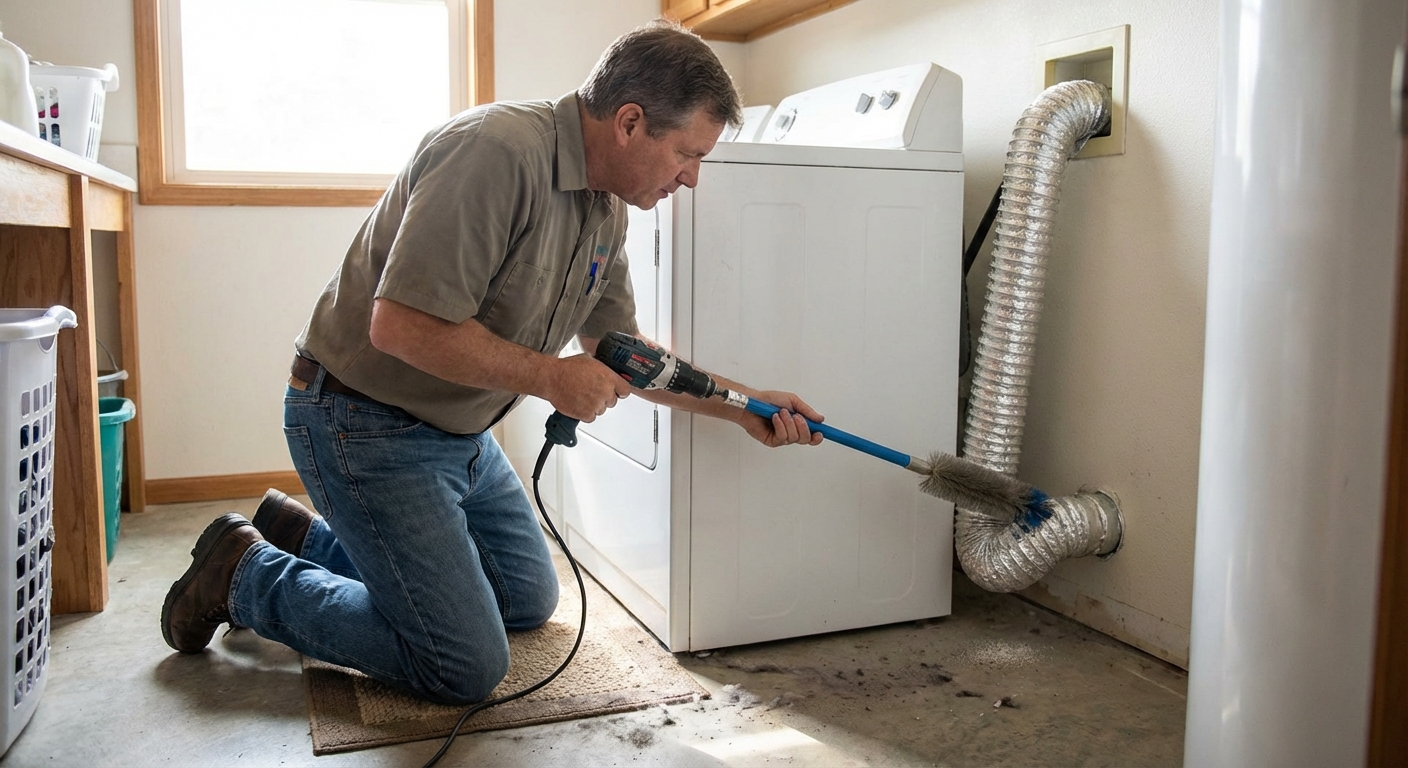
3) Brush the vent from the dryer side
Assemble your vent brush kit rods. Feed the brush into the duct opening and work it forward with gentle clockwise turns. Add rods as you go.
- Only turn clockwise. Most kits use threaded rods that tighten as you turn clockwise. Turning counter-clockwise can unscrew the rods and leave the brush (or a rod section) stuck inside the duct.
- Go slow at bends. Forcing rods can disconnect joints inside the wall or ceiling.
- Pull the brush out periodically and vacuum the lint pile you create.
- If you hit a hard stop early, you may have a crushed duct, a kink, or a joint that came loose.
Tip: Some brush kits can be chucked into a drill. If you do that, run the drill on low speed and keep control. High speed can whip the rod and damage the duct.
Skip the “just blow it out” shortcut: Leaf blowers and high-pressure air can pack lint into elbows or even pop apart a marginal connection. Brushing plus vacuuming is slower, but it is much more controlled.
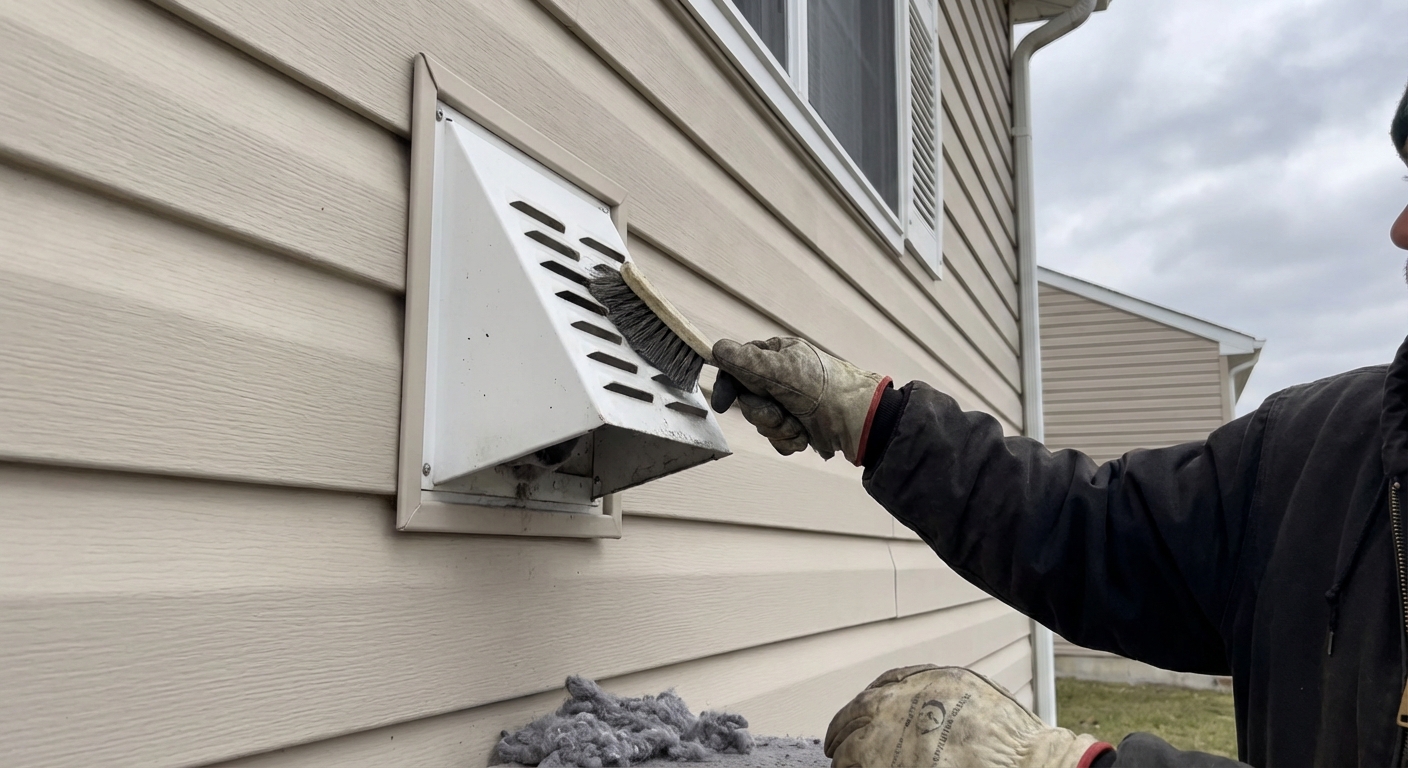
4) Clean from the exterior vent hood side
Go outside to the vent hood. Remove any lint clumps you can reach by hand, then use the brush to clean back toward the house if needed.
- Make sure the flap or louvers move freely.
- Clear bird nests or debris carefully. Wear gloves.
- If you have a screen installed over the hood, it is often not recommended because it traps lint. Check your local code and the hood or dryer manufacturer guidance, but in many setups removing it improves airflow and reduces clogs.
5) Vacuum and inspect
Back inside, vacuum the duct opening again. Then inspect what you can see:
- Crushed sections behind the dryer
- Kinks from pushing the dryer too close to the wall
- Loose joints or gaps that leak lint
- Non-metal ducting that should be replaced
Vent layout matters: A short run that goes straight out the back wall is usually easy. Long runs, lots of elbows, and vertical vents (especially through the roof) clog faster and are harder to clean well from one end.
6) Reconnect and test
Reconnect the duct, tighten the clamp, and gently push the dryer back without pinching the line. Plug the dryer back in. If it is gas, turn the gas valve back on.
If you have a gas dryer: Before you call it done, take a second to confirm the flexible gas line was not kinked, stretched, or rubbed hard when you moved the unit. If you smell gas, stop and ventilate the area. For extra peace of mind, you can do a quick soapy water test on the connection (bubbles mean a leak) or call a pro if anything seems off.
Run the dryer on air fluff or a short heat cycle and check the exterior hood. You should see the flap opening with a strong, steady airflow.
If airflow is still weak: double-check for a crushed transition hose behind the dryer, a stuck exterior flap, a clog you did not reach (common on long runs), or a duct section that has come loose inside a wall or ceiling. If your lint housing or blower area is packed with lint, that can also choke airflow and may require deeper service.
How often to clean it
Most homes should do a full vent cleaning at least once a year. Bump that up to every 3 to 6 months if any of these apply (and always follow your dryer manufacturer recommendations if they call for something different):
- You do laundry daily or have a big household
- You have pets that shed
- Your vent run is long, has multiple elbows, or goes up through the roof
- You use fabric softener sheets often (they can leave residue that catches lint)
Habits that help prevent fires
Clean the lint screen every load
This is the cheapest safety upgrade on the planet. Make it part of unloading the dryer: pull the screen, wipe it clean, then start folding.
Do not overload the dryer
Stuffed loads shed more lint and dry unevenly, which keeps the heat on longer. Longer run time equals more risk.
Use the right ducting
Rigid metal duct is best. Semi-rigid metal is usually acceptable behind the dryer. Avoid plastic and thin foil. They trap lint and can fail under heat.
Keep the run short and smooth
Every elbow and extra foot adds resistance. If you are remodeling, this is worth optimizing. A straighter vent dries faster and stays cleaner.
When to call a pro
DIY is great, but I also know when to tap the brakes. Call a dryer vent professional if:
- The vent goes through the roof or is difficult to access safely
- You cannot get the brush through because of sharp turns or unknown routing
- You suspect the duct has disconnected inside a wall or ceiling
- You still have weak airflow after cleaning both ends
Quick checklist
- Unplug dryer (and shut off gas if applicable)
- Disconnect duct and vacuum loose lint
- Brush the vent line from inside (clockwise only)
- Clean the exterior vent hood and ensure the flap moves freely
- Inspect for crushed, kinked, loose, or non-metal ducting
- Reconnect, test airflow outside, and set a reminder for next cleaning
If you do nothing else this weekend, do this. It saves energy, fixes a lot of “my dryer is acting up” complaints, and it meaningfully reduces one of the more preventable fire risks in a home.
About Marcus Vance
Content Creator @ Grit & Home
Marcus Vance is a lifelong DIY enthusiast and self-taught home renovator who has spent the last decade transforming a dilapidated 1970s ranch into his family's dream home. He specializes in budget-friendly carpentry, room-by-room renovations, and demystifying power tools for beginners. Through his writing, Marcus shares practical tutorials and hard-learned lessons to help homeowners tackle their own projects with confidence.