What epoxy can (and cannot) do
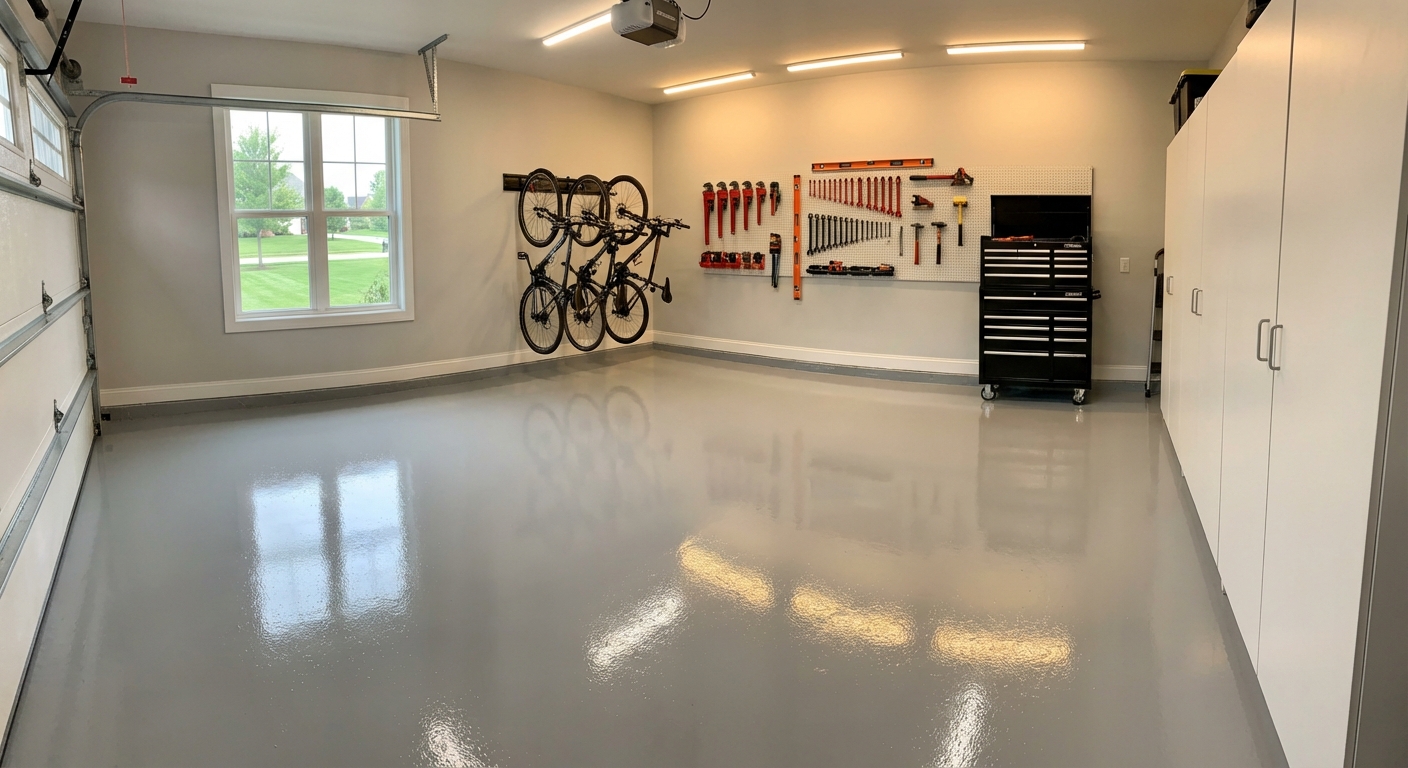
If your garage floor is dusty, stained, and always looks dirty no matter how much you sweep, epoxy is one of the biggest visual upgrades you can DIY in a weekend. Done right, it also makes cleanup easier, reduces concrete dust, and gives you a tougher surface for parking, rolling tool chests, or setting up a home gym.
But epoxy is not magic paint. It will not stick long term to oily concrete, damp slabs, or weak, crumbling surfaces. Most “epoxy failures” I see are actually prep failures. The good news is that prep is predictable. You just have to be patient and follow the steps.
Choose the right coating system
Walk into any home center and you will see “garage floor epoxy kits” in a dozen flavors. Before you buy, decide what you actually need: basic dust control and looks, or a coating that can take real abuse.
Read the label (quick reality check)
Some big-box “epoxy” kits are epoxy-modified or very low-solids coatings. That does not automatically make them bad, but durability usually tracks with the chemistry and how much solids you are actually putting on the floor.
- Look for a true 2-part system (Part A resin + Part B hardener).
- Compare solids by volume when you can. Higher solids usually means a thicker, tougher film.
- If the kit acts like prep is optional, keep walking.
Water-based epoxy (beginner-friendly)
- Pros: Low odor, easier cleanup, longer working time, more forgiving for first-timers.
- Cons: Typically thinner film build and less chemical resistance than higher-solids products.
- Best for: Light to moderate use garages, DIYers who want a simpler application.
Solvent-based epoxy (tougher, stronger fumes)
- Pros: Generally better penetration and durability, better resistance to hot tire pickup when installed correctly.
- Cons: Strong odor and VOCs, shorter working time, more sensitive to temperature and mixing accuracy.
- Best for: Heavier-use garages, people comfortable with stricter safety and timing.
100% solids epoxy and polyaspartic (pro-style)
You may also see 100% solids epoxy and polyaspartic topcoats. These can be extremely durable, but they kick fast and are less forgiving. If you are a first-timer, I recommend a quality kit designed for DIY use, or a slower-curing 100% solids epoxy only if you can recruit a helper and stay organized.
My practical rule for DIY kits
Buy a system that includes (or clearly specifies) profiling requirements (etching solution, grinding, or shot blasting), crack repair guidance, and a clear topcoat option if you want maximum stain resistance.
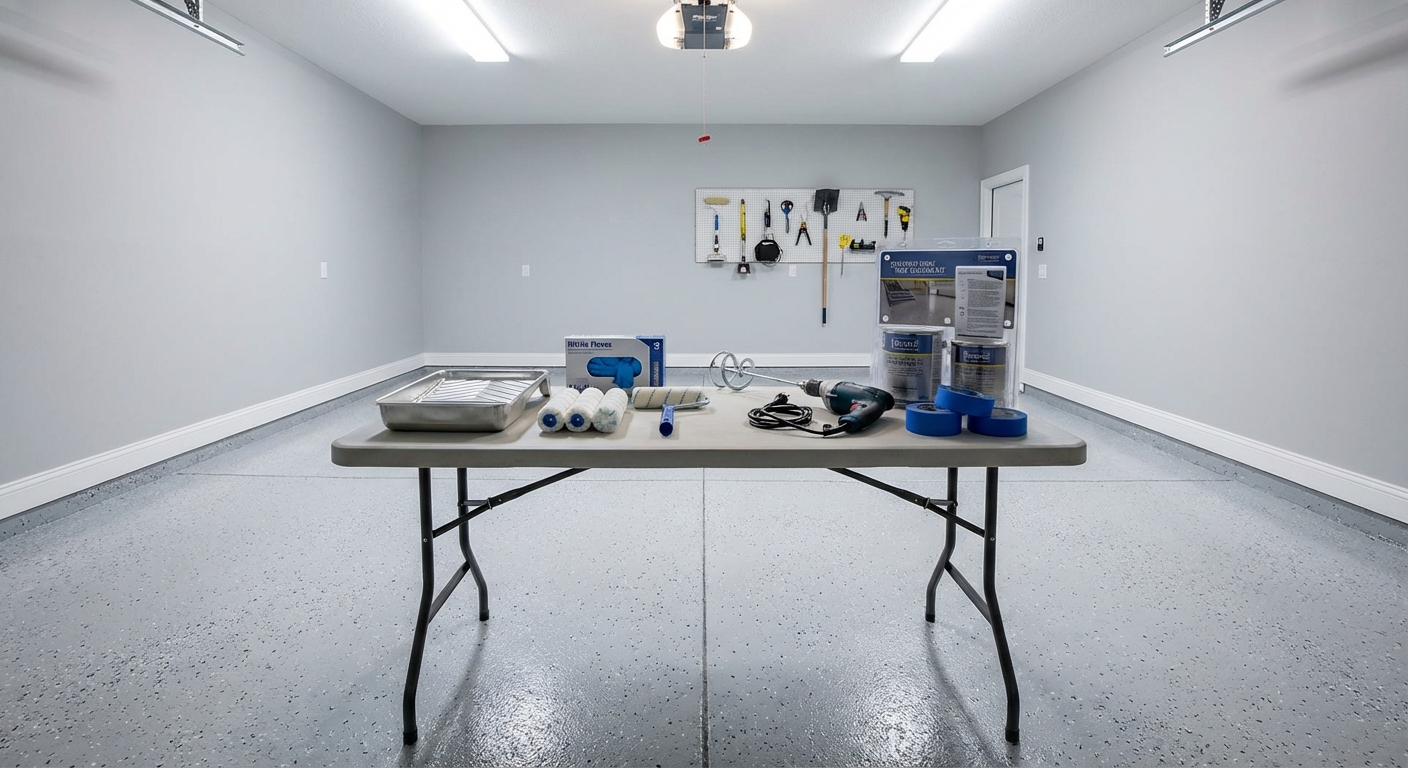
Tools and materials checklist
Having everything ready matters because once epoxy is mixed, the clock starts. Here is what I lay out before I open Part A and Part B.
Tools
- Shop vacuum
- Stiff broom and dustpan
- Hose or pressure washer (optional but helpful)
- Scrub brush or deck brush with handle
- Paint roller frame with 3/8-inch to 1/2-inch nap rollers (match your product and slab texture, and buy extras)
- 2-inch to 3-inch brush for edges and corners
- Squeegee (optional, helps spread some products)
- Mixing drill and paddle (or stir sticks if the kit allows)
- Measuring cup for “split batches” (only if you are experienced)
- Spiked shoes (optional, useful for back-rolling without footprints)
- Floor scraper (helpful if doing a full flake broadcast)
Materials
- Concrete degreaser or cleaner (non-residue type)
- Etching solution or access to a grinder or shot blaster (see Step 4)
- Crack repair: epoxy crack filler or concrete patch designed for coatings
- Joint filler (only if you are filling control joints, see Step 5)
- Painter’s tape and plastic to protect drywall and base plates
- Epoxy kit (base coat and hardener)
- Color flakes (optional)
- Clear topcoat (recommended for longevity and easier cleaning)
- Anti-slip additive for the clear coat (optional, recommended if the floor gets wet)
Safety gear
- Nitrile gloves
- Safety glasses
- Long sleeves and long pants
- N95 (or better) particulate respirator for dust from grinding and sanding
- Respirator rated for organic vapors if using solvent-based products
- Ventilation fan if possible
Step 1: Check your concrete
Do a moisture test
Epoxy and moisture pressure do not get along. If water vapor is coming up through the slab, the coating can blister or peel.
- Tape a 2 ft by 2 ft sheet of plastic to the floor on all four sides.
- Wait 24 to 72 hours (longer is a better screen).
- If you see condensation under the plastic or the concrete darkens noticeably, pause the project and look into a moisture-mitigating primer, an ASTM-style test, or a different flooring option.
Check for sealers
Drip water on the slab. If it beads up for several minutes, your floor may be sealed. Sealers typically require mechanical removal (grinding or shot blasting) for epoxy to bond well.
Look at the “health” of the surface
If the top layer of concrete is powdery or flaking, epoxy will bond to the weak layer and fail with it. In that case, grinding is your friend.
Step 2: Clear the garage
Get everything out. Not “pushed to the side,” but out. Epoxy work goes faster when you can walk freely.
- Sweep and vacuum the perimeter where dust likes to hide.
- Tape plastic a few inches up the drywall if you plan to roll tight to the wall.
- If you have exposed bottom plates, consider taping them to prevent wicking.
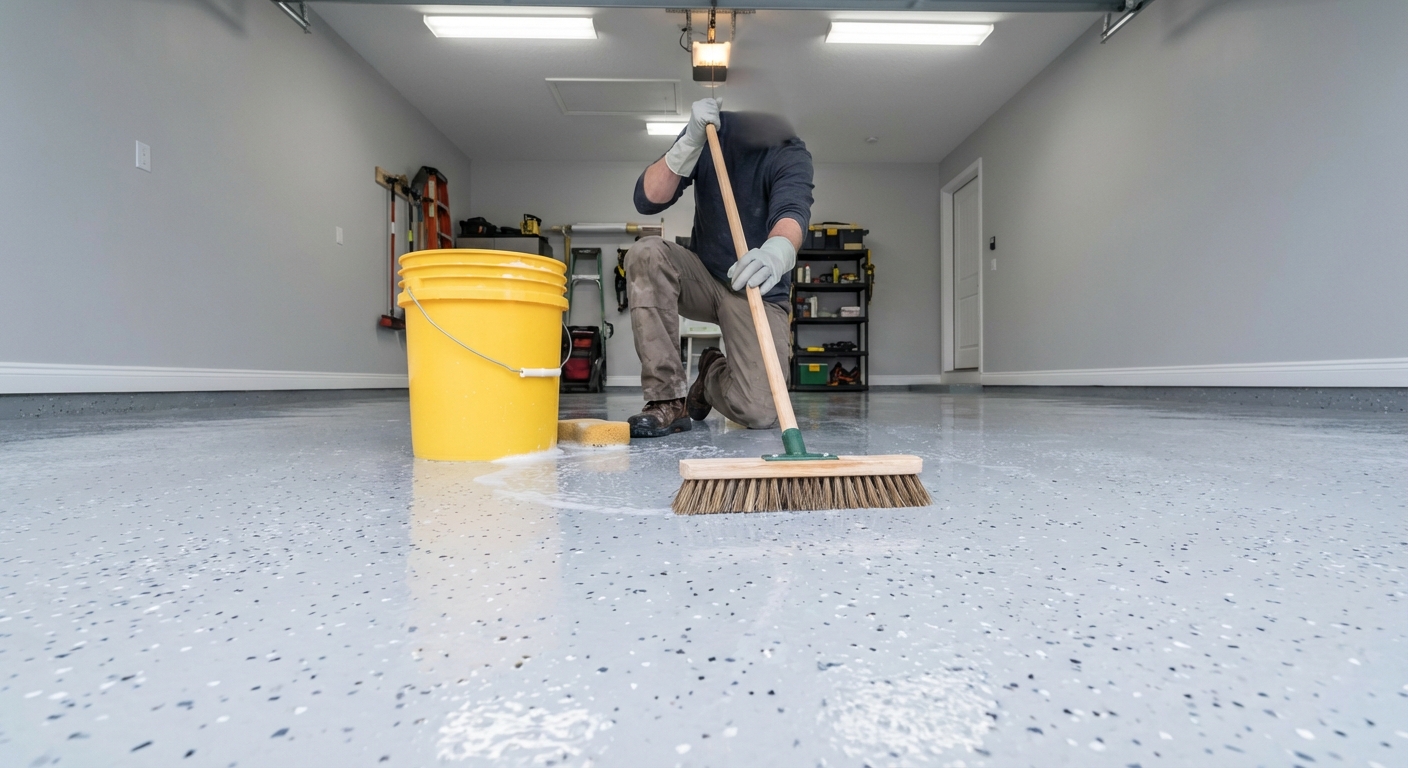
Step 3: Degrease and deep clean
Oil is the silent coating killer. Even if your garage “doesn’t look greasy,” it usually has tiny tire oils and old spills soaked into the slab.
- Wet the floor.
- Apply a concrete degreaser per label directions.
- Scrub hard, especially where vehicles park and where trash cans sit.
- Rinse thoroughly until rinse water is not foamy or dirty.
- Repeat on stained areas. It is normal to do two rounds.
My mistake from year one: I once used a cleaner that left a slick residue. The epoxy looked great for a few weeks, then started lifting in tire paths. Use a cleaner made for concrete prep and rinse like you mean it.
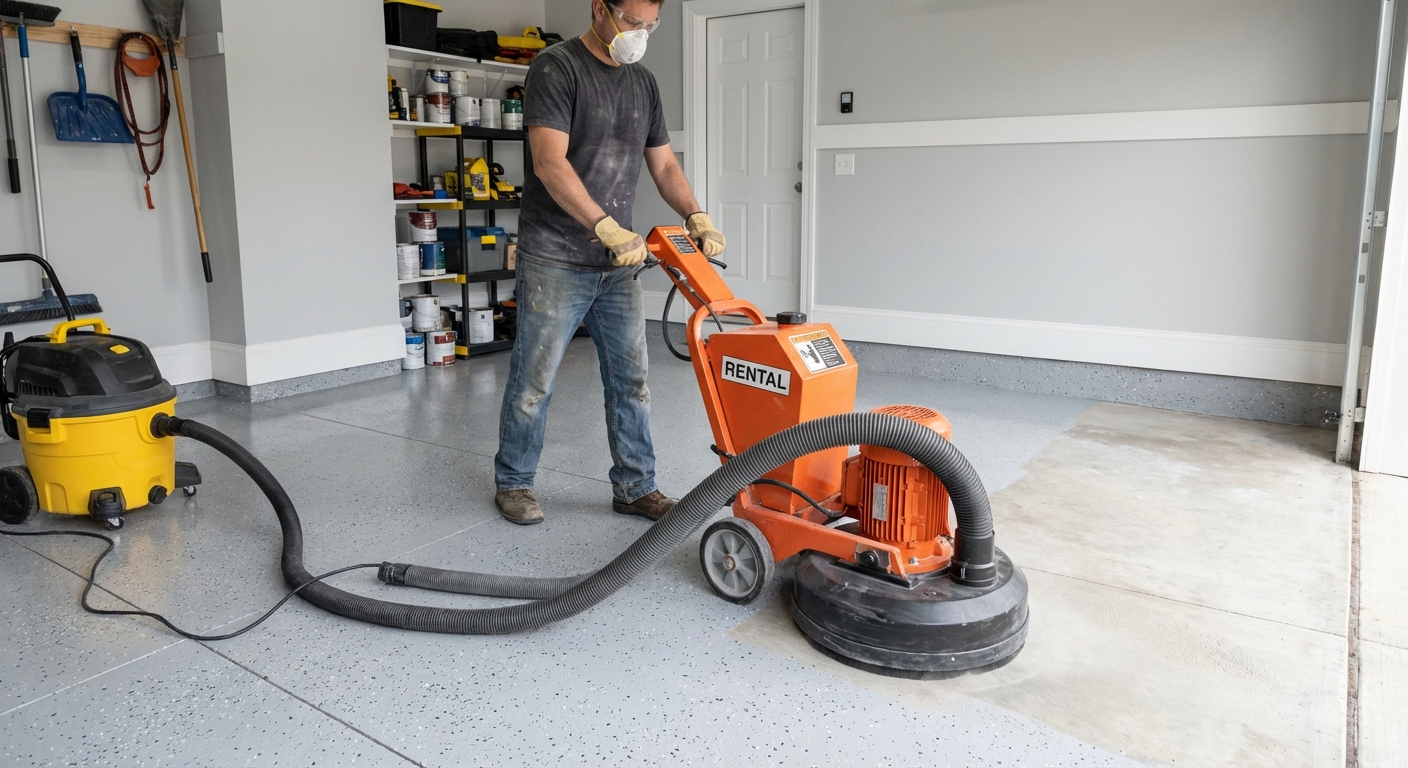
Step 4: Etch or grind
Epoxy needs a surface profile, basically tiny pores and texture to grab. There are two common ways to get it.
Option A: Acid etching
Etching opens the pores of bare concrete. It does not remove sealers well, and it can underperform on very dense or power-troweled slabs, but it can work great on typical garage concrete if the product calls for it.
- Wear gloves and eye protection.
- Pre-wet the floor so the acid does not soak in unevenly.
- Apply etching solution per the kit instructions and scrub with a stiff broom.
- Rinse until the water runs clear.
- Neutralize if your product requires it.
After etching solution and drying, the floor should feel like 120-grit sandpaper, roughly CSP 2 to CSP 3 in many systems (always follow your manufacturer spec).
Option B: Mechanical grinding (best bonding)
Grinding is the gold standard because it reliably removes contaminants and creates a consistent profile. Another common pro method is shot blasting. If your floor is sealed, very smooth, or has old paint, mechanical profiling is usually worth the rental fee.
Silica dust warning: Grinding concrete can release crystalline silica dust, which is hazardous to breathe. Use a dust shroud and a HEPA vacuum when possible, and wear an N95 (or better) particulate respirator even if you are “just doing a quick pass.”
Dry time matters
Whether you etched, washed, or did wet grinding, the slab must be fully dry before coating. Many kits recommend at least 24 hours. In humid weather, plan for longer and run a fan or dehumidifier if needed.
Step 5: Repair cracks and pits
Epoxy is self-leveling to a point, but it will not hide cracks. Repairing now makes the finish look intentional instead of “painted over.”
- Hairline cracks: Use an epoxy crack filler or a coating-compatible patch.
- Wider cracks: Consider chasing them slightly with a crack chaser blade, vacuuming, then filling.
- Pitting or spalling: Use a patch made for thin coatings. Avoid soft patches that can crumble.
Do not fill moving expansion joints with rigid patch. Either leave them visible, or use a joint filler designed for control joints and coatings so the joint can still do its job.
Once repairs cure, sand them flush and vacuum thoroughly. Wear a dust mask (N95 or better) while sanding. Any dust left behind becomes a bond breaker.
Step 6: Plan your layout
This is the part most guides skip, but it is what makes the coating look smooth.
- Pick your exit: Start at the far corner and work toward the garage door.
- Stage tools: Roller tray, brush, flakes, and a trash bag for used rollers.
- Watch the temperature: Most epoxies like something in the 60 to 80 F range. Too cold slows cure, too hot shortens working time.
- Check pot life: Pot life is how long you can use the mixed epoxy before it thickens. Some products give you 20 to 40 minutes, others longer.
- Measure your square footage: Buy enough product for the coverage rate on the label. Stretching epoxy too thin is a fast way to get weak coverage and early wear.
Step 7: Mix epoxy correctly
Epoxy is chemistry. It only cures properly at the right ratio and with thorough mixing.
- Open Part A and Part B.
- Combine exactly as directed. Do not “eyeball” partial mixes unless the product specifically allows it and you measure accurately.
- Mix for the full time listed, scraping sides and bottom.
- If the manufacturer recommends an induction time (letting it sit after mixing), follow it.
Thrifty tip: Use a new mixing paddle or clean it immediately. Cured epoxy on a paddle is basically permanent.
Step 8: Cut in and roll
I like to work in zones. Edges first so you are not trying to brush against tacky epoxy later.
Cut in
- Brush a 3 to 4 inch border along walls, corners, and around posts.
- Keep the edge wet so your rolled area blends smoothly.
Roll
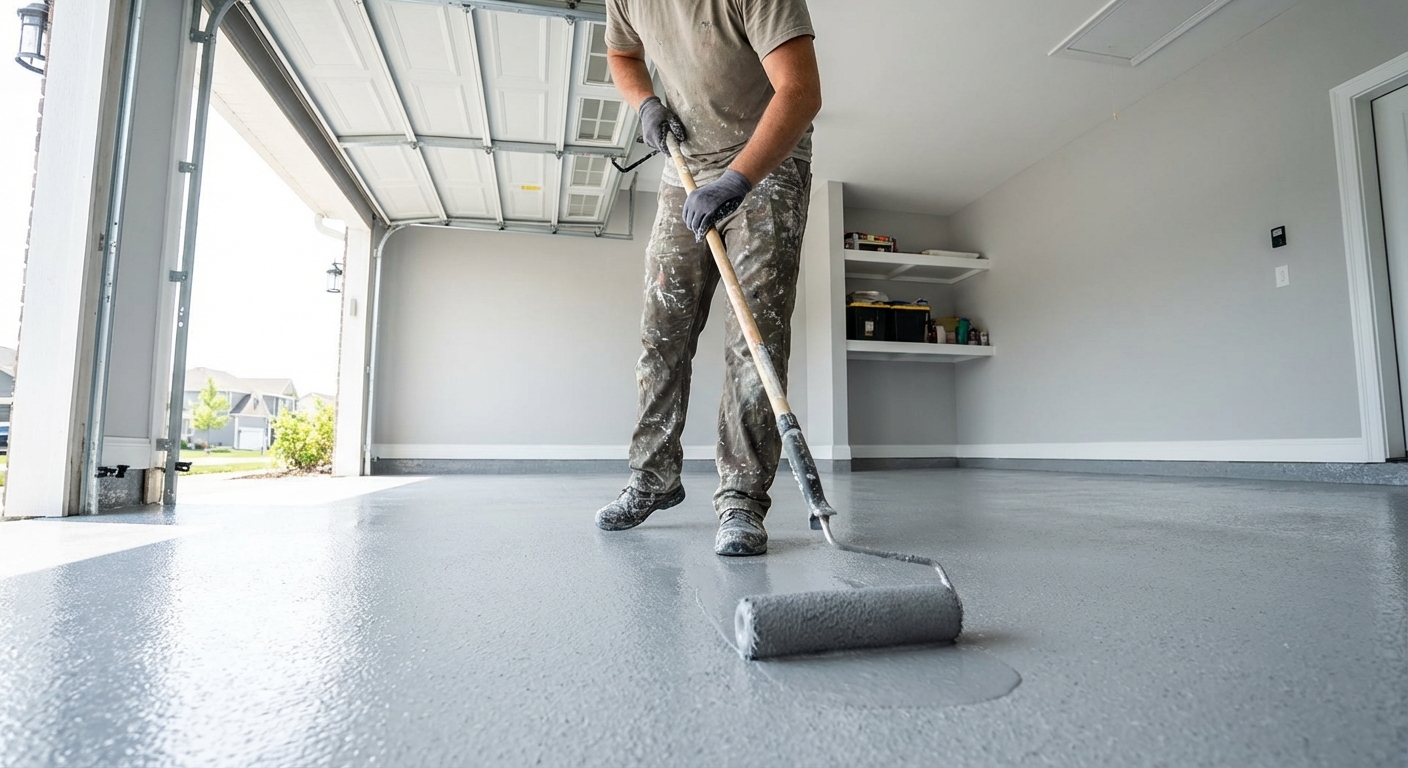
- Pour a ribbon of epoxy on the floor or into a tray, depending on the product.
- Spread evenly with a roller in a “W” pattern, then back-roll to even it out.
- Maintain a wet edge and work your way toward the door.
Ventilation note: If you are using solvent-based products, ventilate aggressively and avoid ignition sources. No smoking, no open flames, and be mindful of things like water-heater pilot lights in adjacent spaces.
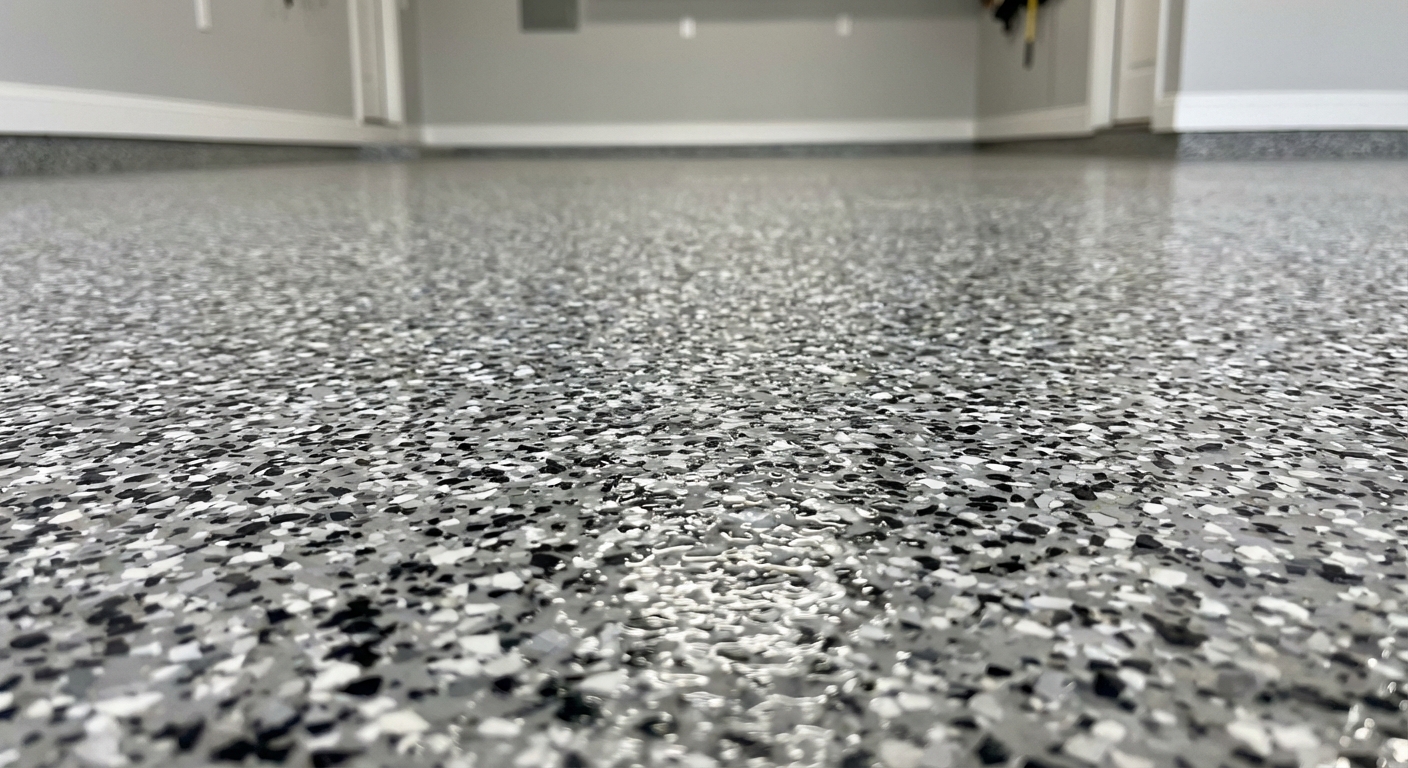
Step 9: Add color flakes
Color flakes make the floor more forgiving and professional-looking. They also add a bit of texture. The key is timing and consistency.
When to broadcast flakes
Broadcast while the base coat is still wet. If you wait too long, flakes will not embed well.
How to broadcast evenly
- Grab a handful and toss upward like you are feeding chickens. That upward toss helps them spread.
- Work in small areas so you do not paint yourself into a corner.
- Decide your look: light sprinkle (subtle) or full broadcast (almost no base color showing).
Note: Full broadcast typically needs scraping and vacuuming after cure, then at least one clear topcoat (sometimes two), depending on the system. Some systems also use a second pigmented coat before clear. Follow your product instructions.
Step 10: Cure times
This varies by product, temperature, and humidity, so always follow your kit. These are common ranges to help you plan:
- Walk-on time: Often 12 to 24 hours
- Light use: Often 24 to 48 hours
- Park a car: Often 72 hours, sometimes up to 7 days for full hardness
- Full chemical resistance: Often 5 to 7+ days for many epoxies, and faster for some polyaspartic systems
If you can, wait longer before parking. Hot tires are one of the biggest early stress tests for fresh epoxy.
Optional: Add a clear topcoat
A clear topcoat makes the floor easier to clean and helps lock in flakes. Some systems include it, some offer it as an upgrade. If your garage sees road salt, fertilizer, oil changes, or gym sweat, I strongly prefer a topcoat.
If you used flakes
- After the base coat cures, scrape the floor lightly with a floor scraper to knock down sharp flakes.
- Vacuum thoroughly.
- Apply clear coat per instructions.
Slip resistance
Clear coats can get slippery when wet, especially if snow and rain come in on tires. If that sounds like your garage, add an anti-slip additive to the clear coat so you get grip without turning the floor into sandpaper.
Common mistakes to avoid
- Skipping the moisture test: Moisture vapor can ruin even a perfect application.
- Inadequate degreasing: Tire oils and old spills cause peeling and fisheyes.
- Etching a sealed slab: If water beads, etching solution is usually not enough. Mechanically profile instead.
- Not rinsing etch residue: Leftover residue can interfere with bonding.
- Coating damp concrete: Traps moisture and leads to cloudiness or failure.
- Mixing too slowly or too briefly: Poor mixing creates soft or sticky spots.
- Working in direct sun with the door open: Sunlight can heat the slab and shorten pot life fast.
- Rolling too thin: Stretching product can cause weak coverage and early wear.
- Parking too soon: The coating may feel dry but not be hard enough yet.
Maintenance
Once cured, epoxy floors are easy to live with, but a little routine care keeps the shine.
- Sweep grit regularly. Sand acts like sandpaper under tires and shoes.
- Mop with a gentle cleaner. Avoid harsh citrus solvents unless your topcoat allows them.
- Wipe spills sooner than later, especially brake fluid and strong chemicals.
- Use pads under metal jacks or kickstands to prevent gouges.
Quick weekend plan
Day 1
- Clear garage, sweep, vacuum
- Degrease and rinse
- Etch with etching solution or mechanically profile, then clean up and dry
- Repair cracks, pits, and joints if time allows
Day 2
- Final vacuum
- Mix and apply epoxy
- Broadcast flakes if using
Day 3 and beyond
- Scrape and vacuum flakes (full broadcast)
- Apply clear topcoat if your system uses one
- Respect cure times before parking
If you take nothing else from this guide, take this: prep is the project. The rolling part is the reward.
About Marcus Vance
Content Creator @ Grit & Home
Marcus Vance is a lifelong DIY enthusiast and self-taught home renovator who has spent the last decade transforming a dilapidated 1970s ranch into his family's dream home. He specializes in budget-friendly carpentry, room-by-room renovations, and demystifying power tools for beginners. Through his writing, Marcus shares practical tutorials and hard-learned lessons to help homeowners tackle their own projects with confidence.