A dead outlet is one of those problems that feels bigger than it is. The good news is the fix is often simple: a tripped breaker, a tripped GFCI upstream, or a worn-out receptacle that finally gave up.
I have chased this exact issue in my 1970s ranch more times than I care to admit, and the pattern is consistent. If you work in a calm, methodical order and treat every wire like it is live until you prove otherwise, you can usually solve it in under an hour.
Safety first (seriously)
Before we touch anything, here are the ground rules I follow every single time:
- Assume the outlet is live until you verify it is not, using a tester.
- Turn off the correct breaker before removing the outlet cover or pulling the receptacle out of the box.
- Confirm power is off at the outlet with a non-contact voltage tester or a multimeter.
- Do not work in wet areas or with wet hands.
- If you see damaged insulation, burnt plastic, or smell melting, stop and call an electrician.
- If you have aluminum wiring (common in some homes from the late 1960s and 1970s), get pro guidance. It requires specific connectors and devices rated for aluminum.
When to call a pro right away: repeated breaker trips, buzzing or crackling, scorching, warm outlets, signs of an open neutral, or if you are not confident identifying wires and terminals.
Tools and supplies
You can diagnose most dead outlets with a couple of basics:
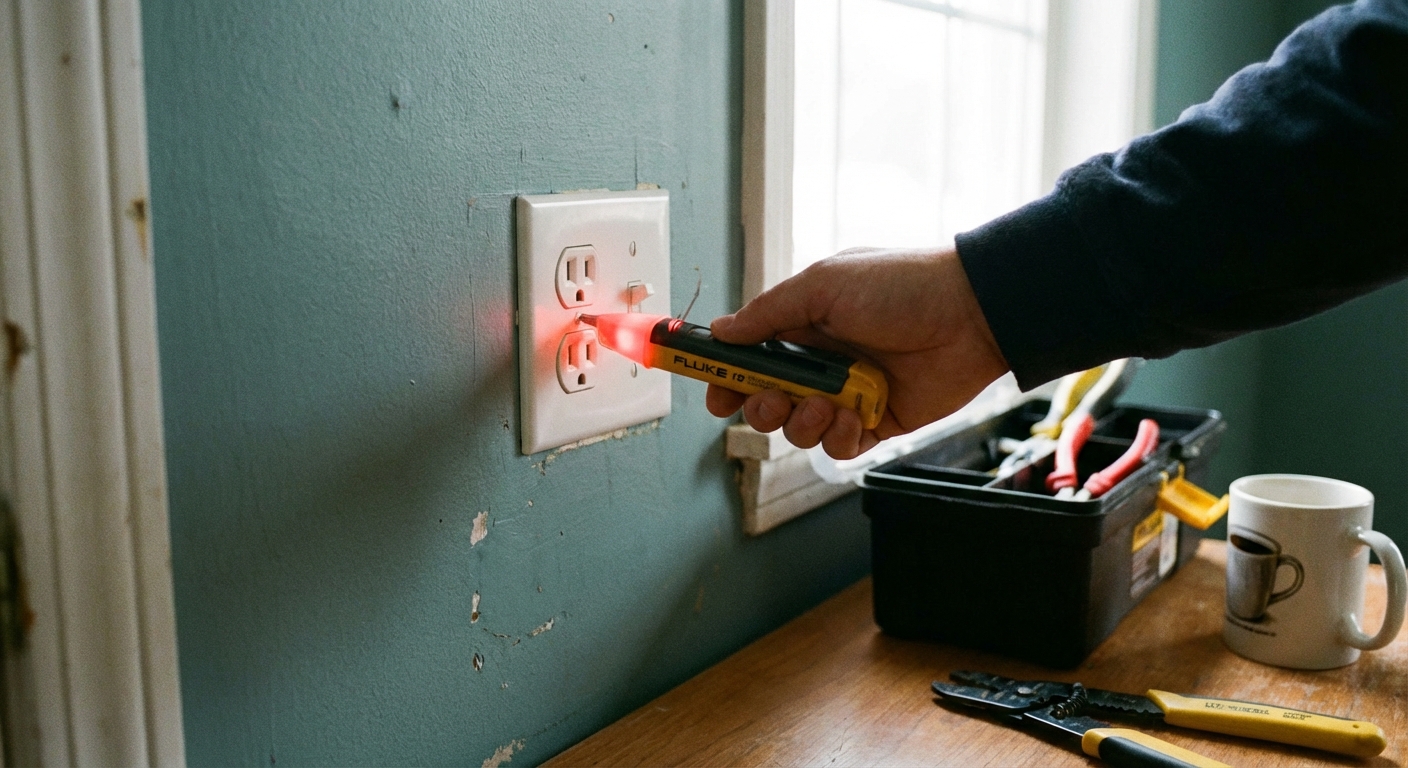
- Non-contact voltage tester
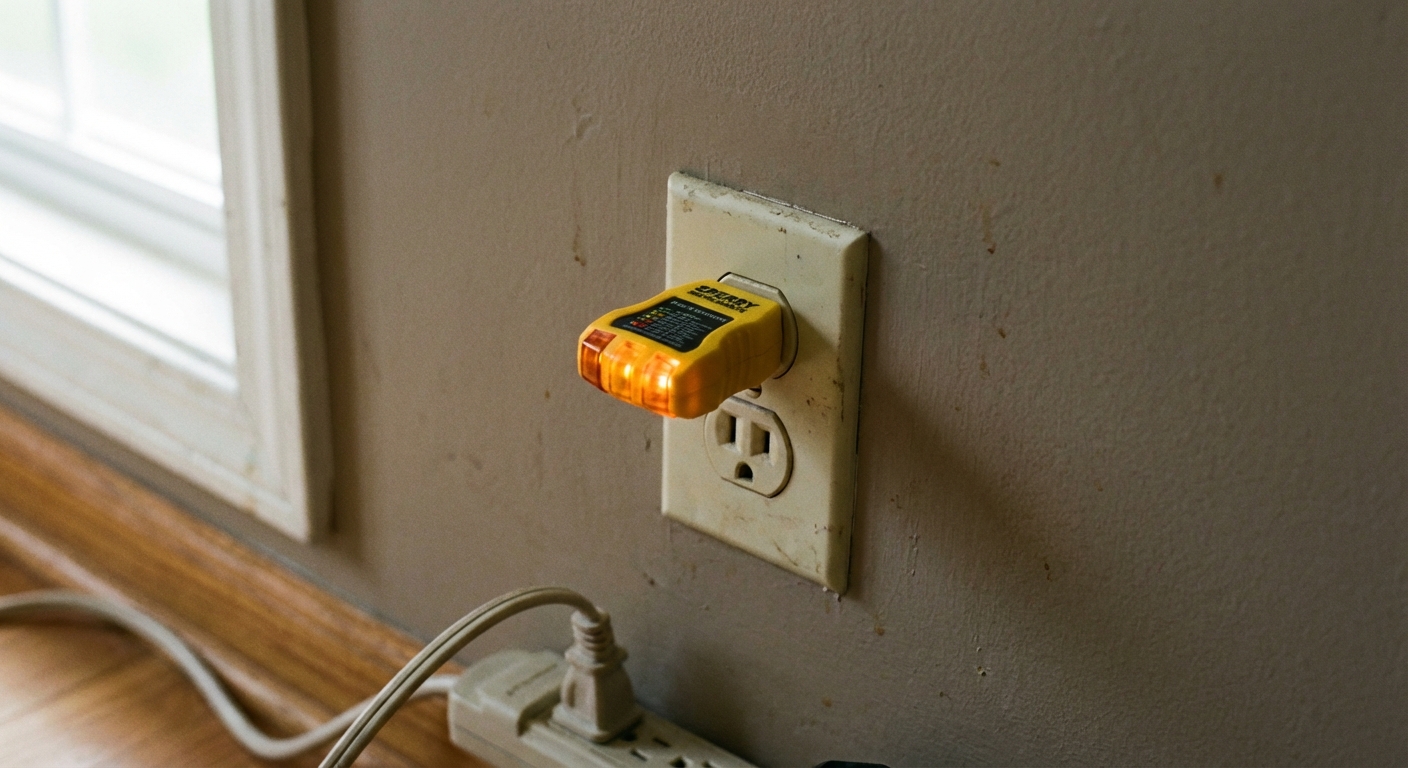
- Plug-in outlet tester (handy for quick checks)
- Multimeter (for real troubleshooting)
- Flathead and Phillips screwdrivers
- Needle-nose pliers
- Flashlight
- Replacement outlet (15-amp or 20-amp to match the circuit)
- Tamper-Resistant (TR) outlet for the replacement in most living spaces (this is a common modern code requirement in residential areas)
- Wire strippers (if you need to re-terminate)
- Wire nuts and a short piece of wire for pigtails (optional but often helpful)
Step 1: Confirm it is actually dead
Start with the simplest check.
- Plug in a lamp you know works. Make sure the lamp switch is on.
- Try another device, just to rule out a finicky plug.
- If part of the outlet works and the other does not, that is a useful clue.
Quick clue: If the outlet is controlled by a wall switch (common in living rooms and bedrooms), the “dead” outlet might simply be switched off. Flip nearby switches and test again.
Step 2: Check the breaker panel
Most people glance at the panel and miss a half-tripped breaker. A tripped breaker can look “on” at a glance, but the handle is sitting slightly off center.
- Find the likely breaker for the room or outlets.
- Turn it fully OFF.
- Turn it back ON firmly.
If it immediately trips again, stop. That points to a short or overload that needs deeper troubleshooting.
Also worth a quick look: Many newer homes (and some updated panels) have AFCI breakers for bedrooms and living areas, and sometimes dual-function AFCI/GFCI breakers. Reset them the same way: fully OFF, then ON. If an AFCI keeps tripping, that is a good time to call a pro.

Step 3: Check GFCIs upstream
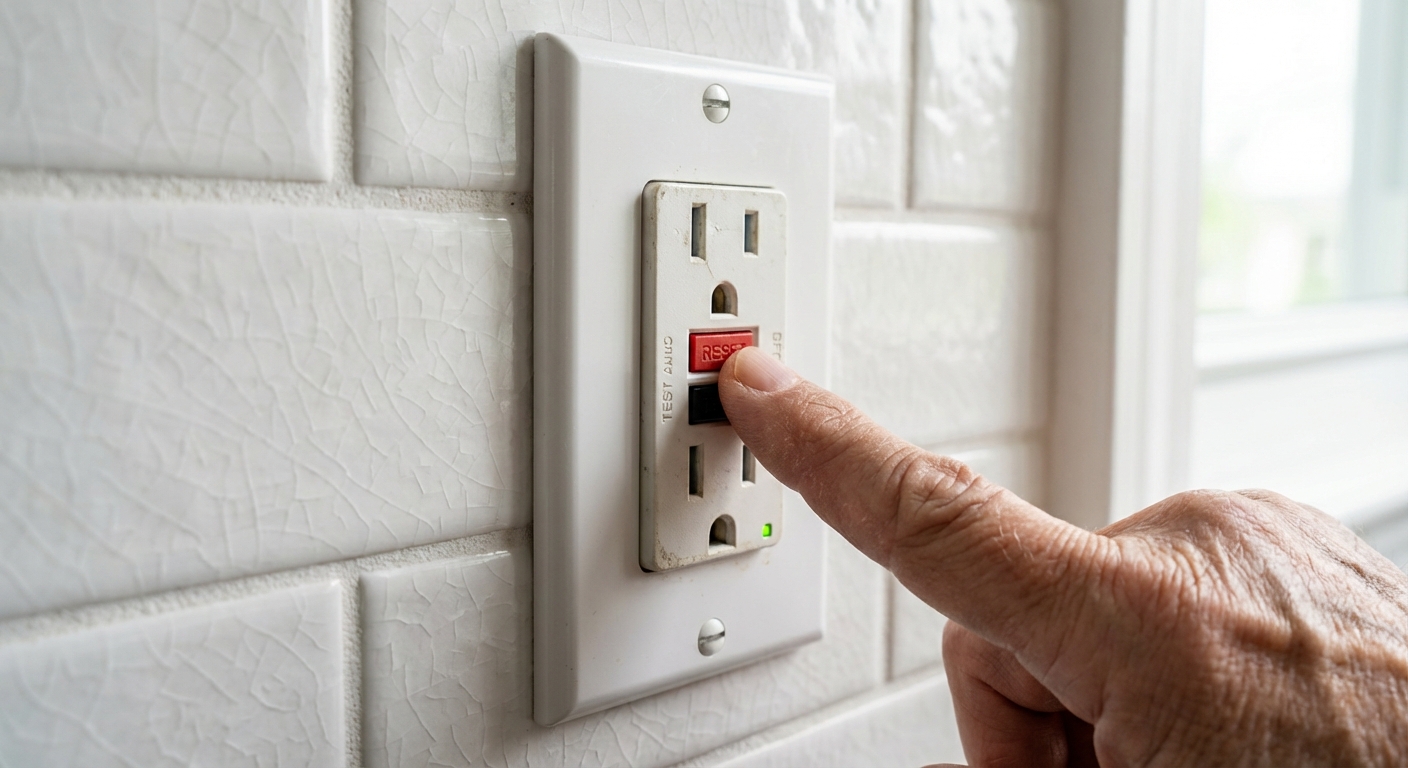
This is one of the most common “mystery” causes of a dead outlet. A single GFCI can protect several regular outlets downstream, sometimes in another room.
Check every GFCI you can find and press RESET:
- Bathrooms
- Kitchen counters
- Garage
- Basement
- Exterior outlets
- Laundry area
- Near a wet bar or utility sink
In older homes, I have also seen a garage GFCI protecting outdoor outlets and even a living room wall. Builders can be creative.
Step 4: Check switches and half-hot wiring
Some outlets are wired “half-hot,” meaning one receptacle is controlled by a wall switch and the other is always on. In a half-hot setup, the little connecting tab on the hot side (the brass-screw side) is usually broken off or removed intentionally. The neutral-side tab typically stays intact.
If the outlet used to be switched and something got changed during a past swap, a miswire here can leave you with one working and one dead, or both dead.
Step 5: Check for a loose connection upstream
If the breaker is on and the GFCI is not tripped, the next most common cause is a loose connection at a different outlet on the same circuit. One bad connection can kill everything downstream.
Here is how to approach it without tearing your whole house apart:
- Identify other dead outlets in the same area.
- Find the nearest working outlet and the first dead outlet in the run. The problem is often at one of those boxes.
- Check any outlet that feels loose, has a cracked cover, or was recently bumped by furniture.
Safety note: Do not open boxes yet. Next we turn off power and test properly.
Step 6: Turn off power and verify
Go to the panel and switch off the breaker you believe feeds the dead outlet. Then verify:
- Use a non-contact voltage tester at the outlet slots and around the cable entering the box (if accessible).
- If you have a plug-in tester, confirm it shows no power.
If you cannot confidently de-energize the outlet, this is a good stopping point for calling an electrician. Guessing is not a strategy with electricity.
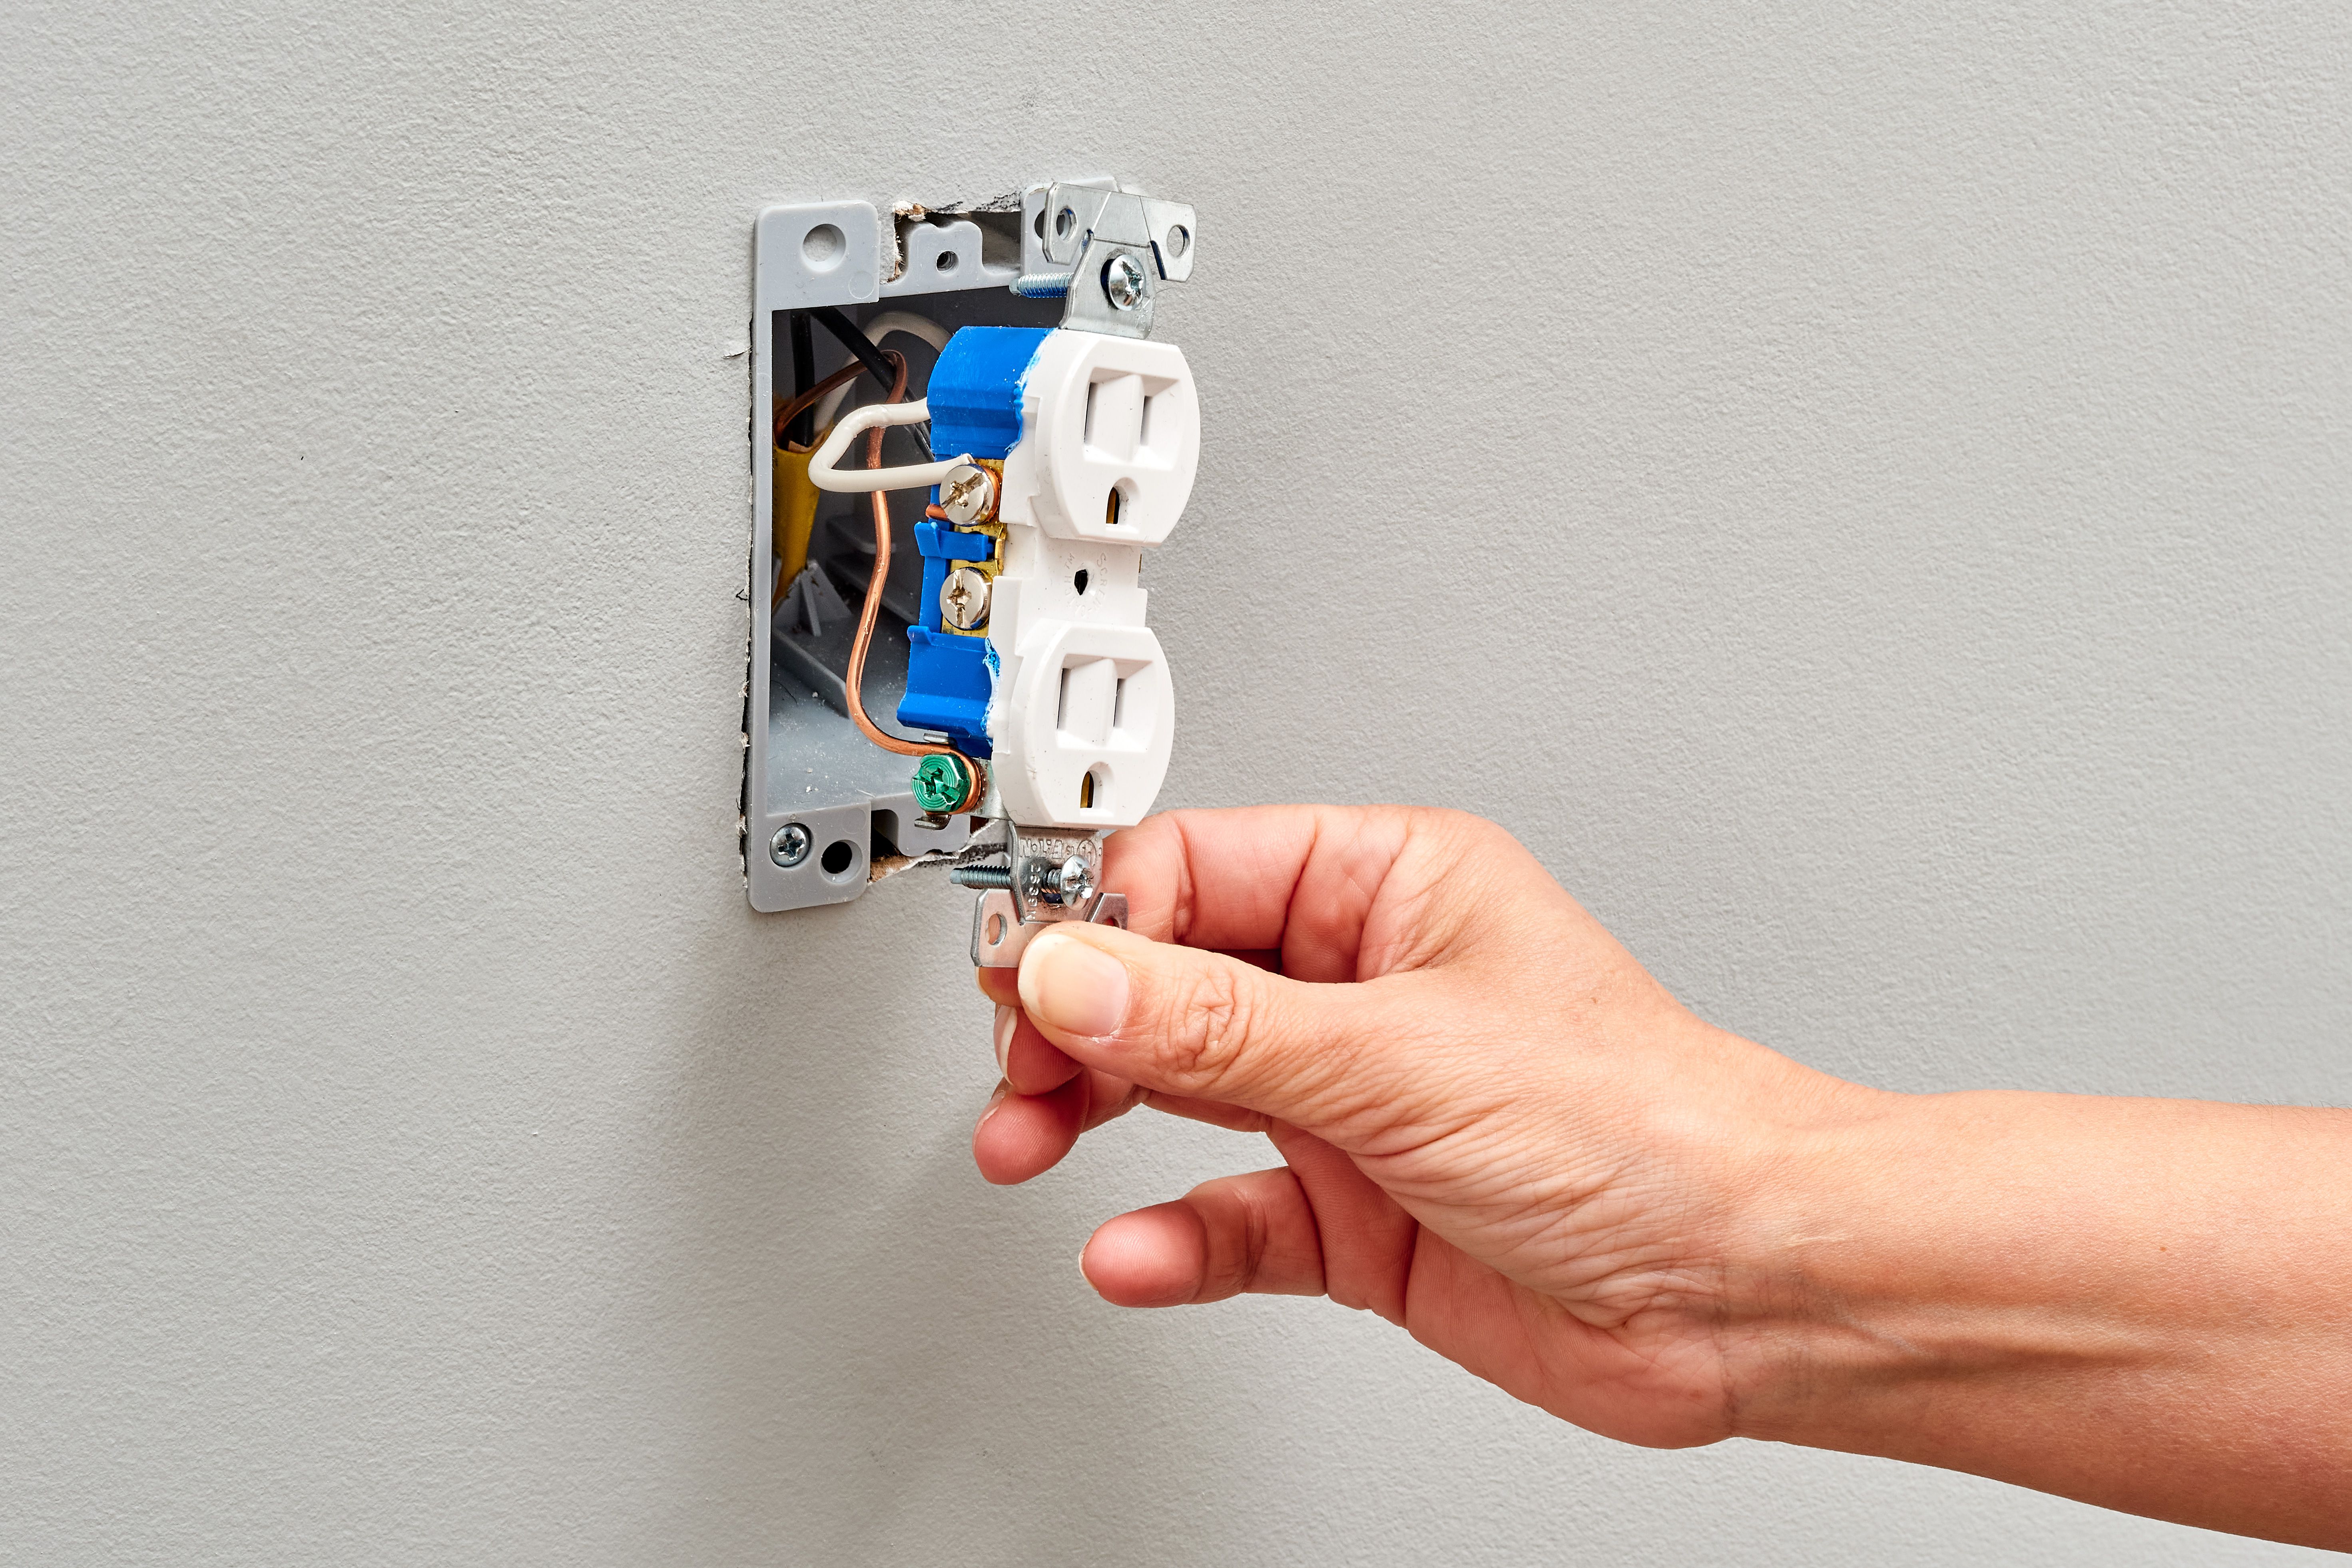
Step 7: Pull the outlet and inspect
Once power is confirmed off:
- Remove the faceplate.
- Remove the two screws holding the receptacle to the box.
- Gently pull the outlet out, keeping wires attached.
One last verification: As soon as the outlet is out of the wall, wave your non-contact voltage tester near the exposed side terminal screws and wires before you touch anything with bare hands.
Look for:
- Burn marks on the outlet or wires
- Loose screws on the terminals
- Backstabbed wires (wires pushed into holes in the back instead of wrapped on screws)
- Broken outlet body or cracked insulation
Backstabs are notorious for loosening over time. In my own house, the “dead outlet” mystery has been solved more than once by moving a backstabbed connection to the side screw terminals.
Quick nuance: Some devices have clamp-style back-wire terminals (you tighten a screw and a clamp grabs the wire). Those are different from cheap backstabs, and they tend to be much more reliable.
Step 8: Test with a multimeter
If you are comfortable using a multimeter, this is where you stop guessing.
How to test for voltage (power ON test)
Only do this if you are confident and steady-handed. If not, skip to calling a pro. Electricity does not reward improvising.
- With the outlet pulled out but positioned so it will not touch the metal box, grounded wires, or any other metal, turn the breaker ON.
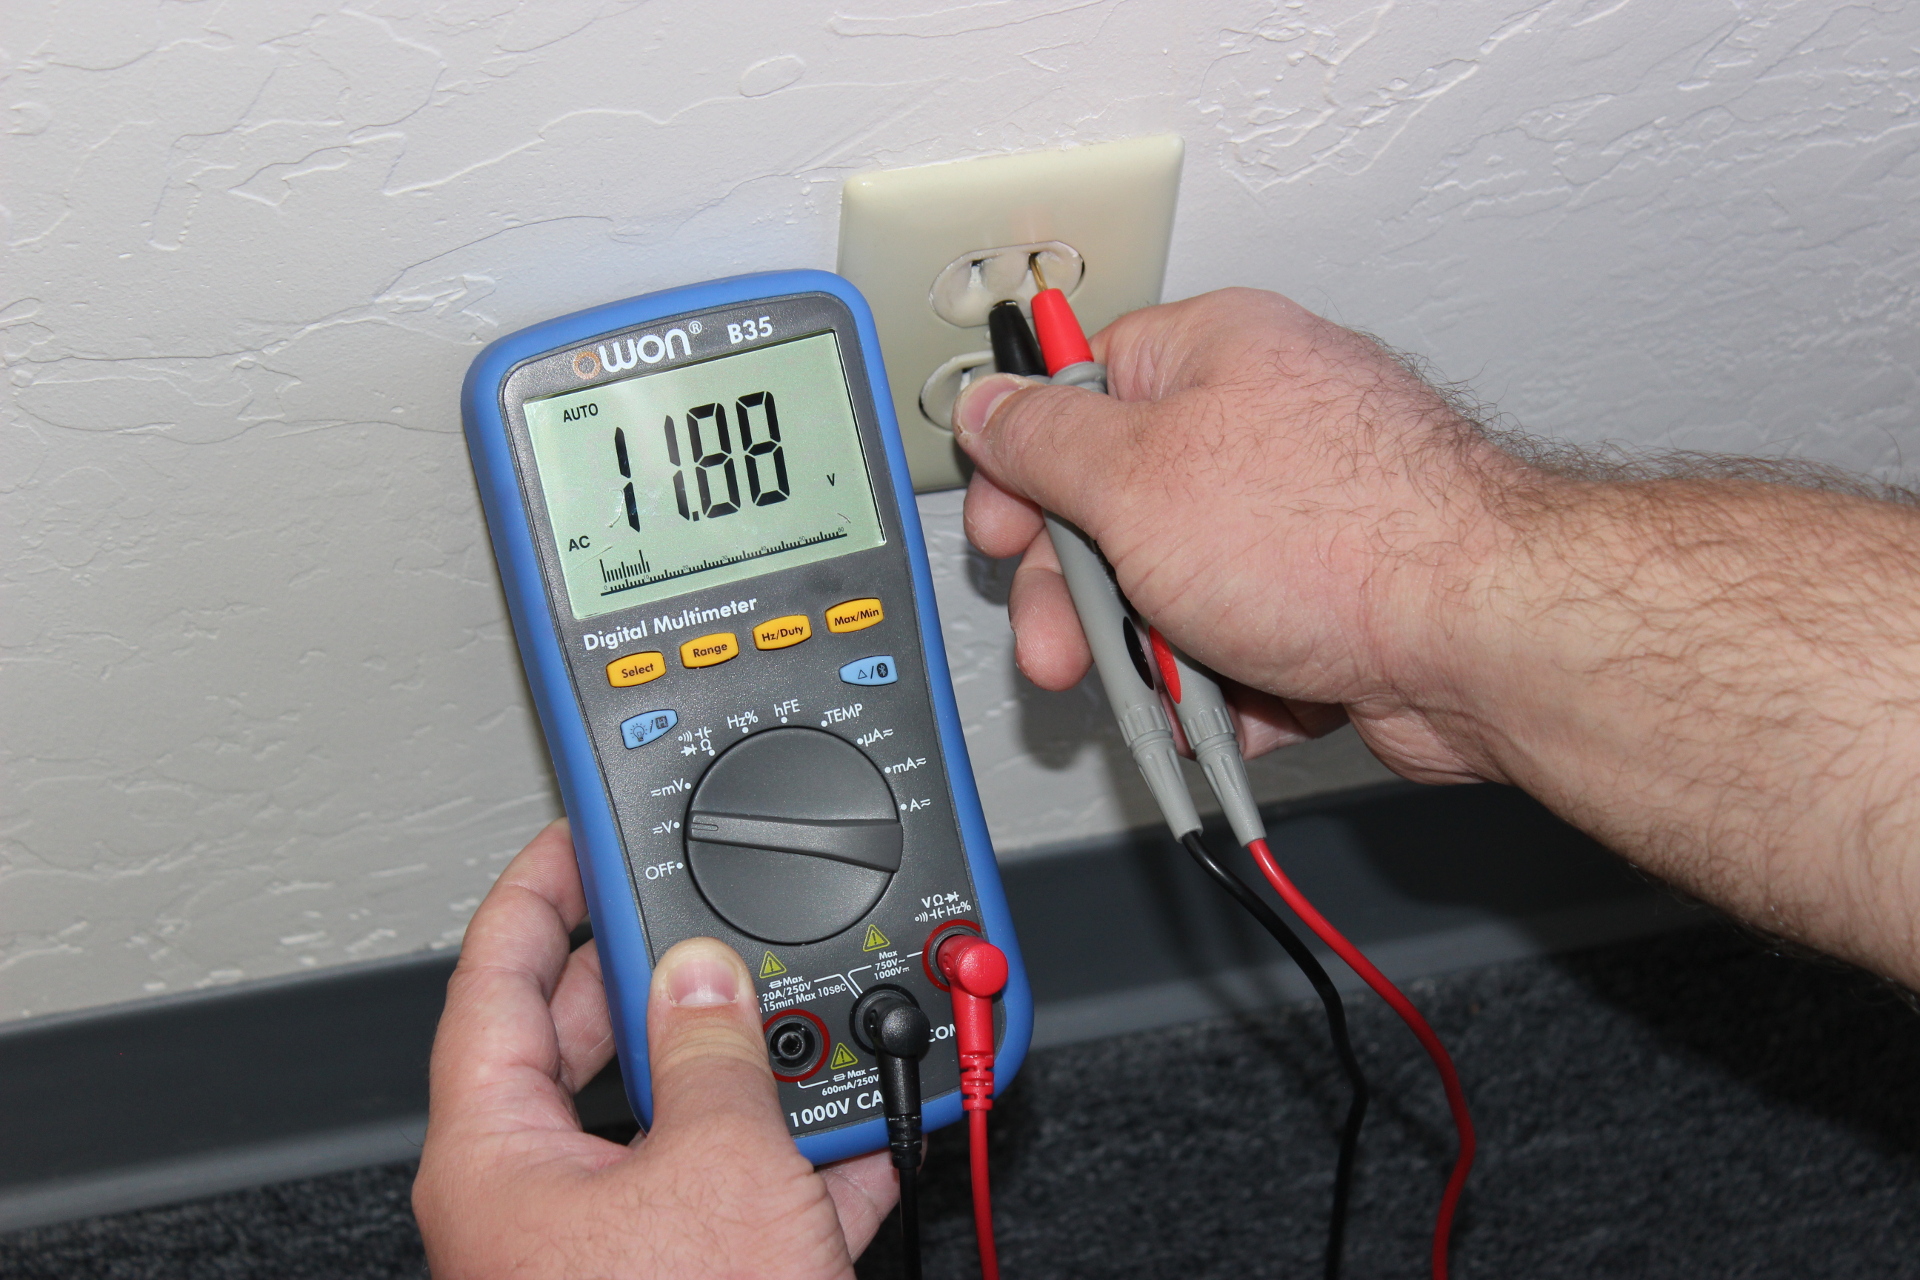
- Set your multimeter to AC voltage (often marked V~). If it is not auto-ranging, choose the next range above 120V (commonly 200V or 600V, depending on your meter).
- Carefully place one probe on the hot (brass screw side) and one probe on the neutral (silver screw side).
- You should read around 120V in North America.
What the readings usually mean
- 120V hot-to-neutral: power is present. The outlet itself is likely bad or has a bad connection.
- 120V hot-to-ground but not hot-to-neutral: likely an open neutral. This can be dangerous and often points to a loose neutral connection upstream.
- 0V everywhere: no feed. Look upstream: breaker, GFCI, or a failed connection in another box.
Note: In some fault conditions you can see confusing “ghost voltage” on high-impedance meters. If readings do not make sense, treat it as a sign to slow down and consider calling an electrician.
After testing, turn the breaker OFF again and verify power is off before touching wires.
Extra caution: If you suspect an open neutral and especially if you see two hots sharing a neutral in a box (a multi-wire branch circuit), call a pro. Open neutrals in that setup can create dangerous over-voltage conditions.
Step 9: Replace the outlet
If you have confirmed the circuit is off and the wiring looks intact, replacing a worn receptacle is usually straightforward.
Match the outlet to the circuit
- 15-amp circuit: use a 15A receptacle (common in most rooms). Choose Tamper-Resistant (TR) in most residential spaces.
- 20-amp circuit: many 20A circuits with multiple outlets can use a standard 15A duplex receptacle (common and generally permitted). Use a 20A receptacle where specifically required, or when you are installing a single receptacle on a 20A circuit.
If you are not sure, check the breaker handle. It will be labeled 15 or 20.
A 20A receptacle (NEMA 5-20R) has a distinctive T-shaped slot on one side.
Move backstabs to screws
If your old outlet has backstab connections, I strongly recommend moving those wires to the side screws on the new outlet:
- Remove wires from the old receptacle (release tabs if present, or loosen screws).
- Trim and re-strip wire ends if they are nicked or bent up.
- Make a clockwise hook and place it under the correct screw.
- Tighten firmly so the wire is snug under the screw head.
Use pigtails when there are multiple wires
If two or more wires land on the same terminal, consider a pigtail:
- Join the same-color conductors together with a wire nut and add one short pigtail wire to the outlet.
- This reduces “downstream outage” if the receptacle fails later.
Wire color cheat sheet (typical)
- Black or red: hot (brass screw)
- White: neutral (silver screw)
- Bare copper or green: ground (green screw)
Re-install the outlet, add the cover plate, restore power, and test with a plug-in tester.
Common causes, plain English
- Tripped GFCI upstream: the outlet is fine, it is just being protected by a GFCI elsewhere that tripped.
- Half-tripped breaker: it looks on, but it is not fully engaged.
- Loose backstab connection: the wire is barely making contact, then vibration and heat do the rest.
- Open neutral: power may be present but cannot return properly, which can create weird symptoms and should be taken seriously.
- Worn receptacle: internal contacts loosen over time, especially in frequently used outlets.
After the fix
Once everything is back together:
- Test the outlet with a lamp and a plug-in outlet tester.
- Test nearby outlets on the same circuit.
- If a GFCI was involved, press TEST then RESET to confirm it works properly.
- Make sure the cover plate sits flat and does not pinch wires.
If the outlet still does not work after breaker reset, GFCI reset, and a verified good receptacle, the issue is likely upstream in another box or at a connection you have not found yet. That is a reasonable time to bring in a licensed electrician, especially if you suspect an open neutral or you see any heat damage.
My thrifty tip
When you find the correct breaker, take 60 seconds to label it clearly in the panel. I used to put this off because it felt like “non-project work.” Then I spent an entire Saturday flipping breakers to track one dead outlet. Labeling is cheap. Time is not.
Quick FAQ
Can one outlet being bad make other outlets dead?
Yes. Many outlets are wired in a chain. A loose hot or neutral connection at one outlet can kill everything downstream.
Why did my outlet stop working after I used a space heater?
Space heaters can overload marginal connections. If a breaker tripped, reset it. If it did not trip and the outlet is dead, check for a loose connection or heat damage and consider calling a pro.
Is it safe to just replace the outlet without testing?
I do not recommend it. A dead outlet can be dead because it is not getting power, not because the receptacle is bad. Testing saves time and helps you avoid missing a bigger wiring problem.
About Marcus Vance
Content Creator @ Grit & Home
Marcus Vance is a lifelong DIY enthusiast and self-taught home renovator who has spent the last decade transforming a dilapidated 1970s ranch into his family's dream home. He specializes in budget-friendly carpentry, room-by-room renovations, and demystifying power tools for beginners. Through his writing, Marcus shares practical tutorials and hard-learned lessons to help homeowners tackle their own projects with confidence.