A doorbell is one of those simple home systems you only notice when it fails. The good news is most “dead doorbells” come down to a handful of beginner-friendly issues: a worn button, a loose wire, a tired transformer, or a chime that finally quit after years of service.
I’ll walk you through the troubleshooting path I use at my own 1970s ranch. We’ll start with the easiest checks, then move into multimeter testing for wired systems, and finish with wireless resets and upgrade options.
Before you start: wired or wireless?
Doorbells fall into two main buckets:
- Wired doorbell: A button by the door, a chime inside, and a low-voltage transformer (commonly 16V to 24V AC, but you may also see 10V or 12V in older setups).
- Wireless doorbell: A battery-powered button and a plug-in or battery chime unit that pairs by radio signal.
If you see two small wires behind the button, it’s probably wired. If the button is fully self-contained and pops off to reveal a coin cell or AA battery, it’s likely wireless.
Safety notes (quick but important)
- Wired doorbells are low voltage at the button and chime, but the transformer is powered by 120V on the input side. Treat it like any other electrical device.
- If you’ll touch transformer terminals, open a junction box, or remove a transformer, turn off the breaker first.
- When you use a multimeter, keep your probes on the low-voltage screws only unless you’re trained and comfortable working around line voltage.
- If you’re not sure which breaker feeds the transformer, stop and label it. Guessing is how “quick projects” get expensive.
Tools and supplies (you don’t need much)
- Small Phillips and flathead screwdriver
- Digital multimeter (basic is fine)
- Needle-nose pliers (optional)
- Electrical tape or small wire nuts (for repairs)
- Replacement doorbell button, transformer, or chime if needed
Multimeters look intimidating, but for doorbells you’re usually doing just two checks: AC voltage and continuity.
Wired doorbell troubleshooting (fastest order)
Step 1: Quick checks
- Check the breaker box first: If the doorbell transformer is on a tripped breaker (or a GFCI feeding that circuit), that’s a zero-effort fix.
- No sound at all: could be button, transformer, wiring, or chime.
- Buzzing or humming from the chime: often a stuck button or pinched wires.
- Works sometimes: usually a loose connection at the button, chime terminals, or transformer screws.
Step 2: Check the chime switch and mechanics
If your chime has a volume switch or a mute slider, confirm it’s not turned down. For mechanical chimes, pop the cover and look for:
- A plunger stuck in or jammed with dust
- A loose cover that’s rubbing a moving part
Dust it out and make sure the plungers move freely. This fixes more doorbells than you’d think.
Step 3: Inspect the button (common culprit)
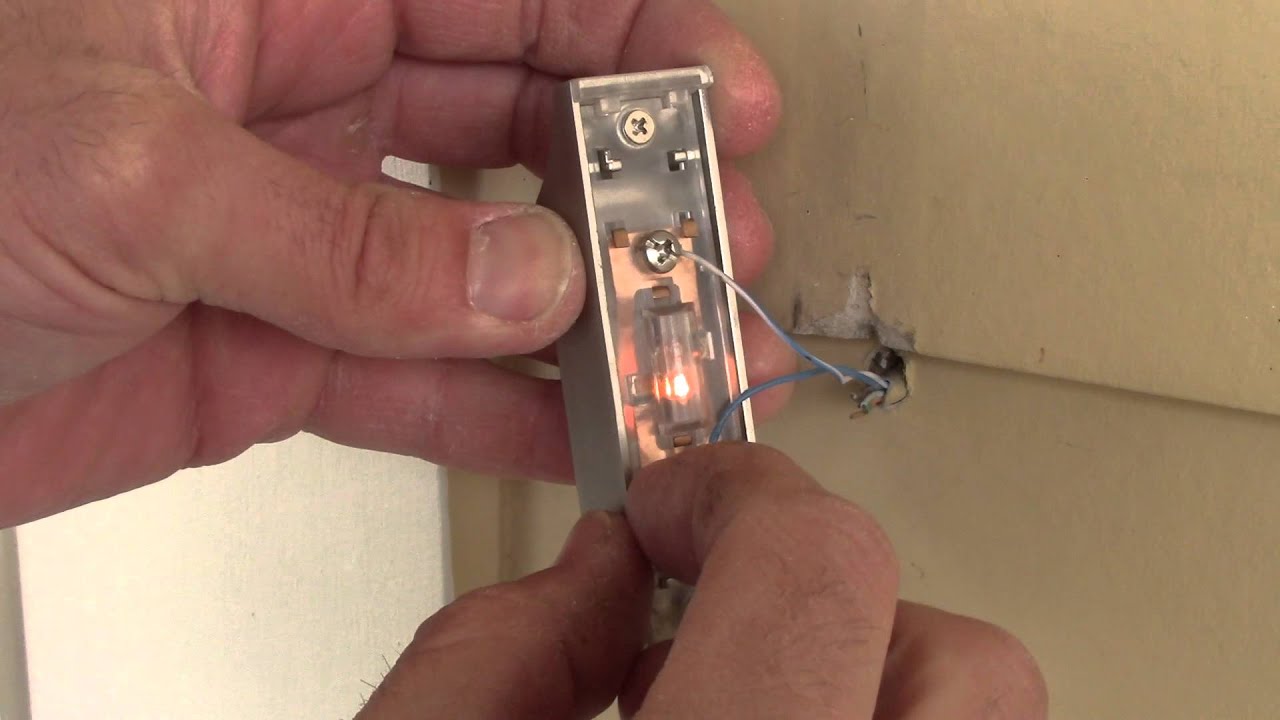
Turn off power at the breaker if you’re going to pull wires out of the wall. Then:
- Remove the two mounting screws and gently pull the button out.
- Confirm both wires are securely attached to the button terminals.
- Look for corrosion or a broken wire right at the stripped end.
Step 4: Quick bypass test at the button
This is my favorite fast test because it tells you whether the rest of the system works.
- With the button pulled out, keep the two wires separated.
- Turn the breaker back on.
- Briefly touch the two wires together for about one second, then separate them.
- If the chime rings, your wiring, transformer, and chime are likely fine. Replace the button.
- If nothing happens, move on. The issue is downstream (chime, transformer, or wiring).
Tip from my own mistakes: don’t hold the wires together. Holding the circuit closed too long can overheat a transformer or chime.
Step 5: Check the chime wiring
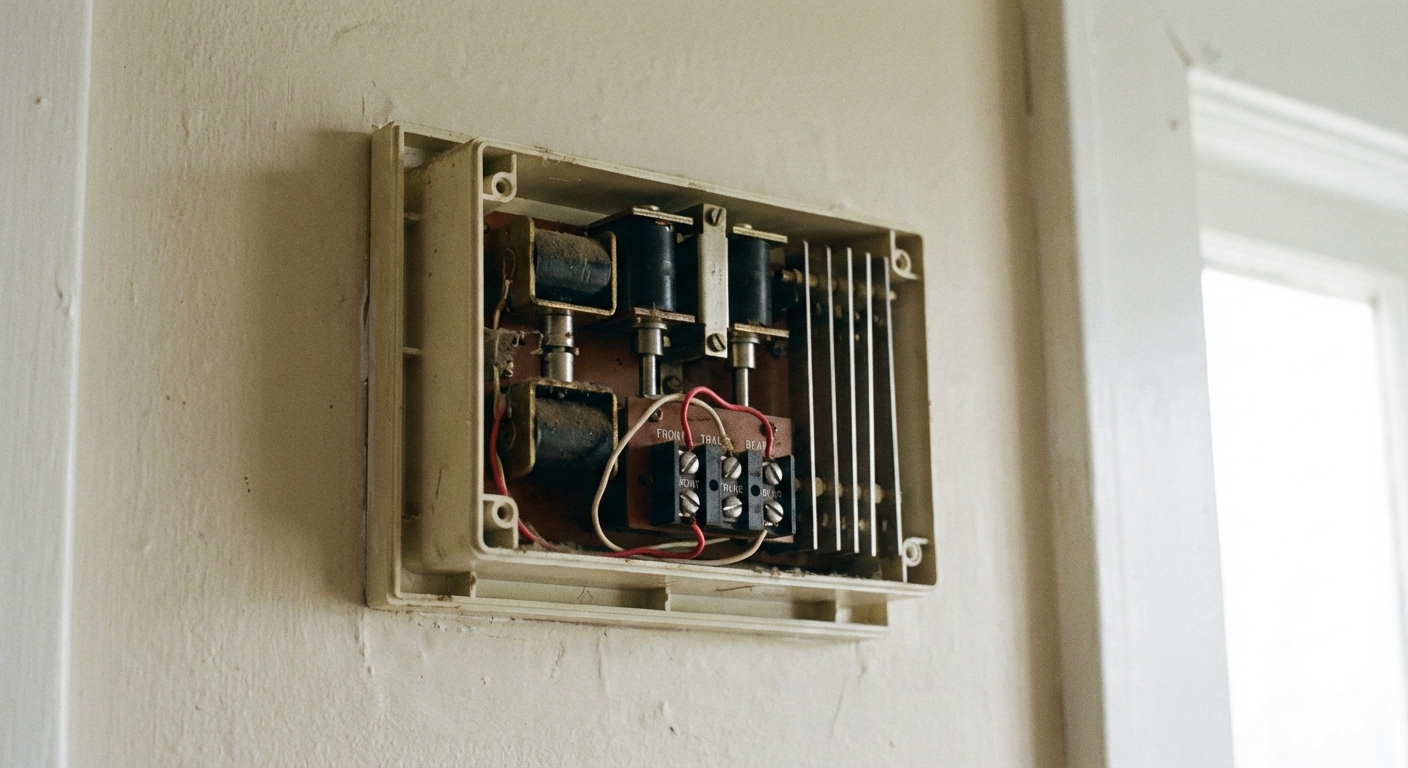
Most chimes have terminals labeled TRANS (or TR), FRONT, and sometimes REAR. Do this:
- Remove the cover.
- Check for loose wires under the screw terminals.
- If you’re moving anything, take a quick photo first.
- One wire under one screw is ideal. If you truly need multiple wires on one terminal (common on TRANS in some setups), use a pigtail and a wire nut so the terminal screw clamps one wire cleanly.
- If you have a rear door and the rear button is the only one not working, swap the FRONT and REAR leads as a quick test.
If you have a video doorbell already, you may also see a small add-on module near the chime. A loose connection there can stop everything.
Step 6: Find the transformer rating
Before you test anything, look at the transformer label if you can. It often lists both:
- Voltage (like 16VAC, 18VAC, 24VAC, sometimes 10VAC or 12VAC)
- VA rating (like 10VA, 15VA, 30VA, 40VA)
This gives you a target for your multimeter readings and helps later if you’re choosing a replacement.
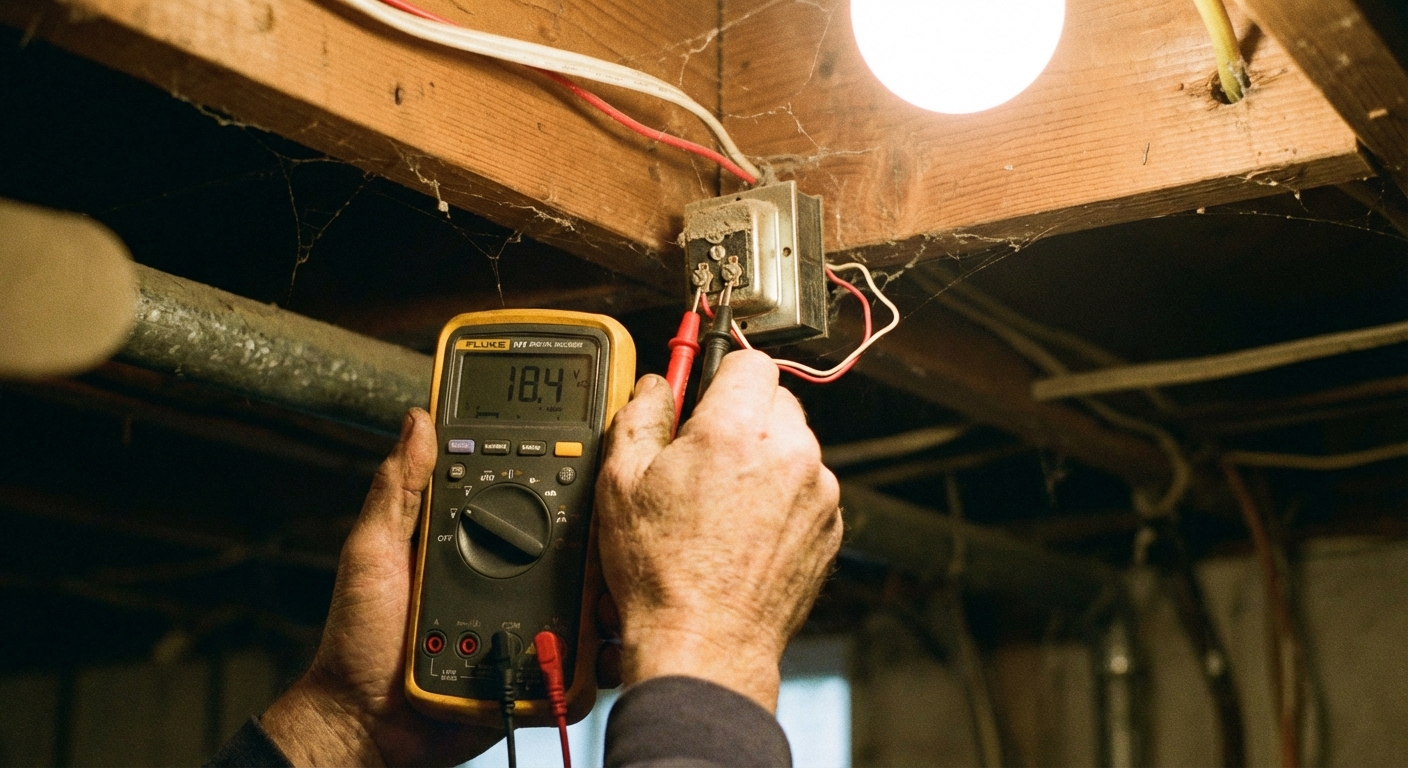
Step 7: Multimeter test the transformer output
This is the “tell me the truth” test. A healthy transformer should output close to its rating, and it can read a bit higher with no load.
- Find the transformer. Common spots: near the electrical panel, on a junction box in the basement or garage, in a utility room, or mounted to a metal box in an unfinished ceiling.
- Set your multimeter to AC volts (often marked V~). Choose a range above 24V if your meter isn’t auto-ranging.
- Touch one probe to each of the two low-voltage screw terminals on the transformer.
- Reading is close to the transformer’s rating: the transformer is likely okay. Move to wiring and chime testing.
- Reading is 0VAC (or very low): the transformer is likely dead, not powered, or you’re not on the right terminals.
If you get 0VAC: check that the breaker is on and that the transformer’s 120V side is actually receiving power. If you’re not comfortable testing the line-voltage side, call an electrician. Replacing a transformer is usually straightforward, but line-voltage diagnosis is where people get hurt.
Note: If your transformer is rated 16VAC and you see something like 14VAC under load, that can still be okay depending on the chime and wiring, especially if you’re also powering a video doorbell.
Step 8: Continuity test the button (bench test)
If you suspect the button but want proof:
- Turn off power.
- Remove the two wires from the button terminals.
- Set the multimeter to continuity (often a sound icon) or ohms.
- Touch probes to the button terminals.
- Press the button.
- Good button: continuity tone (or near 0 ohms) when pressed, open circuit when released.
- Bad button: no change when pressed or erratic readings.
Step 9: Test the chime with the button pressed
If the transformer voltage looks good and the button is not the issue, this quick test helps you separate a dead chime from broken wiring.
- Remove the chime cover so you can access the terminals.
- Set your multimeter to AC volts.
- Put one probe on TRANS and the other on FRONT.
- Have a helper press and hold the doorbell button while you watch the meter.
- You see close to the transformer’s rated voltage (often 16 to 24VAC) but the chime does not ring: the chime is very likely bad.
- You see 0VAC when the button is pressed: the circuit is not closing at the chime, which usually points to a wiring issue between chime and button, or a bad connection at a terminal.
Step 10: Isolate a chime problem
Chimes fail more often than people expect:
- Mechanical chimes can fail with a burnt coil or seized plunger.
- Digital chimes can fail due to a bad internal board.
In most homes, replacing the chime is faster and cheaper than trying to repair it. Take a photo of the wiring before disconnecting anything, then move one wire at a time to the same labeled terminal on the new unit.
Step 11: When it’s probably the wiring
Doorbell wire is thin and can get damaged by:
- Staples driven too tight
- Rodents in basements or crawlspaces
- Trim work or siding projects that nick the wire
- Renovations where a wire got cut and buried
If everything tests good but the system still won’t ring, you may have an open wire between transformer and chime, or between chime and button. Finding that break can be straightforward in unfinished basements, and painful in finished walls. At that point, running new doorbell wire is often the cleanest fix.
Wireless doorbell troubleshooting
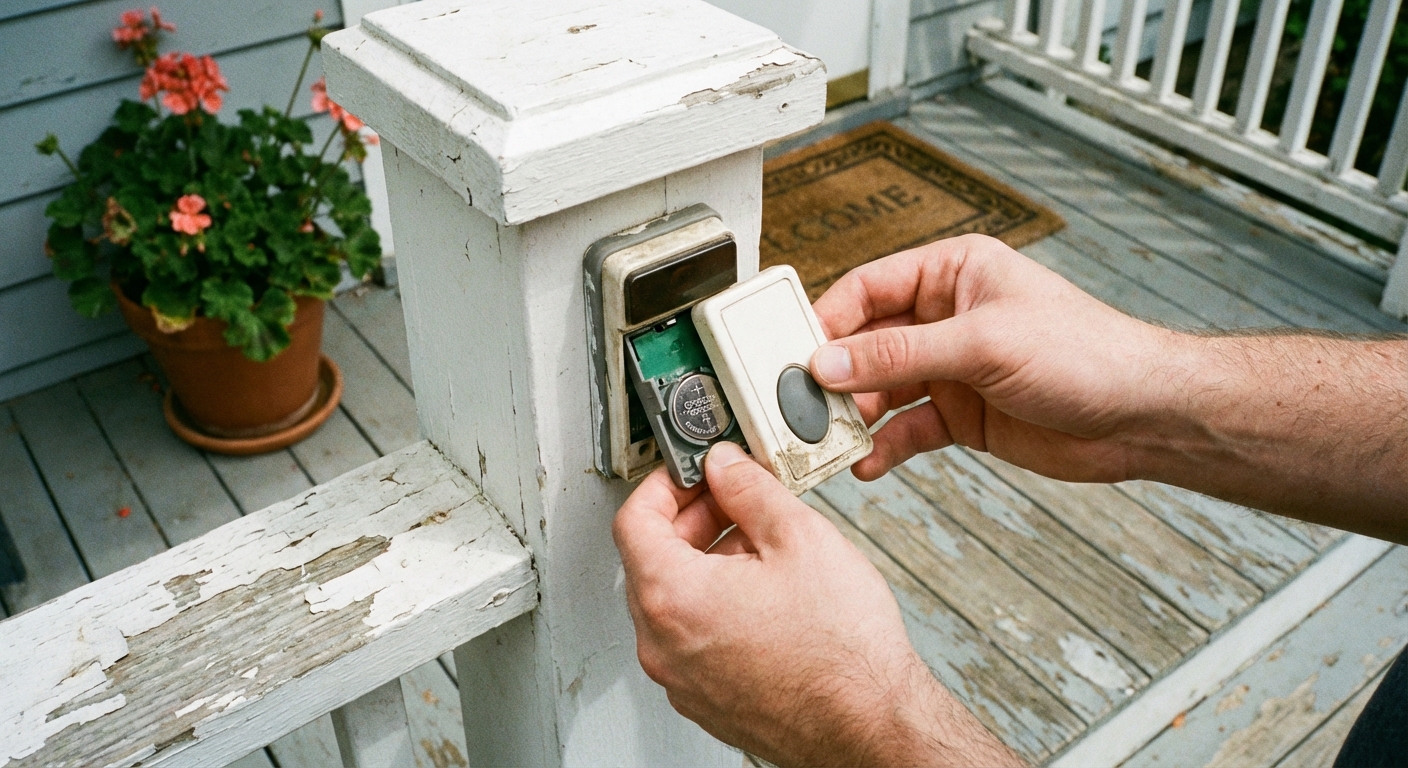
Step 1: Replace the button battery
This is the number-one fix. Even if the button’s LED still flashes, the battery can be too weak to transmit reliably.
Step 2: Check the chime power
- If the chime plugs into an outlet, verify the outlet works.
- If it uses batteries, replace them as well.
Step 3: Re-pair the system
Most wireless kits have a pairing button on the chime unit. The general process is:
- Unplug the chime (or remove batteries) for 30 seconds.
- Plug it back in.
- Hold the chime’s pairing button until it enters learn mode.
- Press the door button to re-link.
Exact steps vary by brand, so check the manual for your model number.
Step 4: Reduce interference and increase range
- Move the chime to a different outlet farther from Wi-Fi routers, microwaves, or large metal appliances.
- If you have a metal door or metal siding, try spacing the button slightly off the surface using a plastic shim.
- If your kit supports it, add a second chime closer to the button.
Common symptoms
- Doorbell buzzes constantly: stuck button, pinched wires at the button, or incorrect wiring at the chime.
- Doorbell rings by itself: moisture in the button, damaged wiring, or a failing chime module.
- Weak or half ring: loose connections, transformer underpowered for the chime, or a video doorbell drawing more power than the transformer can supply.
- Chime works only if you press hard: worn button contacts. Replace the button.
- Chime rings but won’t stop: stuck button, moisture in the button, or a miswired smart doorbell or chime adapter holding the circuit closed.
When to upgrade to a smart doorbell
If you’re already pulling the button off and doing testing, it’s fair to ask whether you should just upgrade. A smart doorbell can be a great move when:
- Your current chime or button is old and you want motion alerts and video.
- Your transformer is missing, undersized, or failing anyway.
- You have package theft concerns and want recordings.
Two practical notes before you buy:
- Check transformer requirements. Look for both voltage and VA. Many smart doorbells want 16 to 24VAC and often a higher VA rating (30VA is a common requirement, but it varies by model). Your transformer’s rating is usually printed right on it.
- Confirm chime compatibility. Some smart doorbells need a chime adapter or may not work with certain digital chimes.
If you don’t want to touch wiring, consider a battery-powered smart doorbell and a compatible indoor chime. It’s not as “set and forget” as wired, but it’s a low-commitment upgrade.
When to call a pro
I’m all for DIY, but here are the moments I’d stop and bring in help:
- You can’t safely identify the transformer’s power source or breaker.
- You find damaged 120V wiring, a hot junction box, or signs of overheating.
- You need to run new wiring through finished walls and don’t have an access plan.
Quick recap
- Wired: check breaker, bypass test at the button, check chime connections, measure transformer output (AC volts), then test AC volts across TRANS and FRONT at the chime with the button pressed.
- Wireless: replace batteries, verify chime power, re-pair, then address range and interference.
If you want, tell me what you have (wired vs wireless), what the chime does (nothing, buzz, weak ring), and what transformer voltage you measured. I can help you narrow it down quickly.
About Marcus Vance
Content Creator @ Grit & Home
Marcus Vance is a lifelong DIY enthusiast and self-taught home renovator who has spent the last decade transforming a dilapidated 1970s ranch into his family's dream home. He specializes in budget-friendly carpentry, room-by-room renovations, and demystifying power tools for beginners. Through his writing, Marcus shares practical tutorials and hard-learned lessons to help homeowners tackle their own projects with confidence.