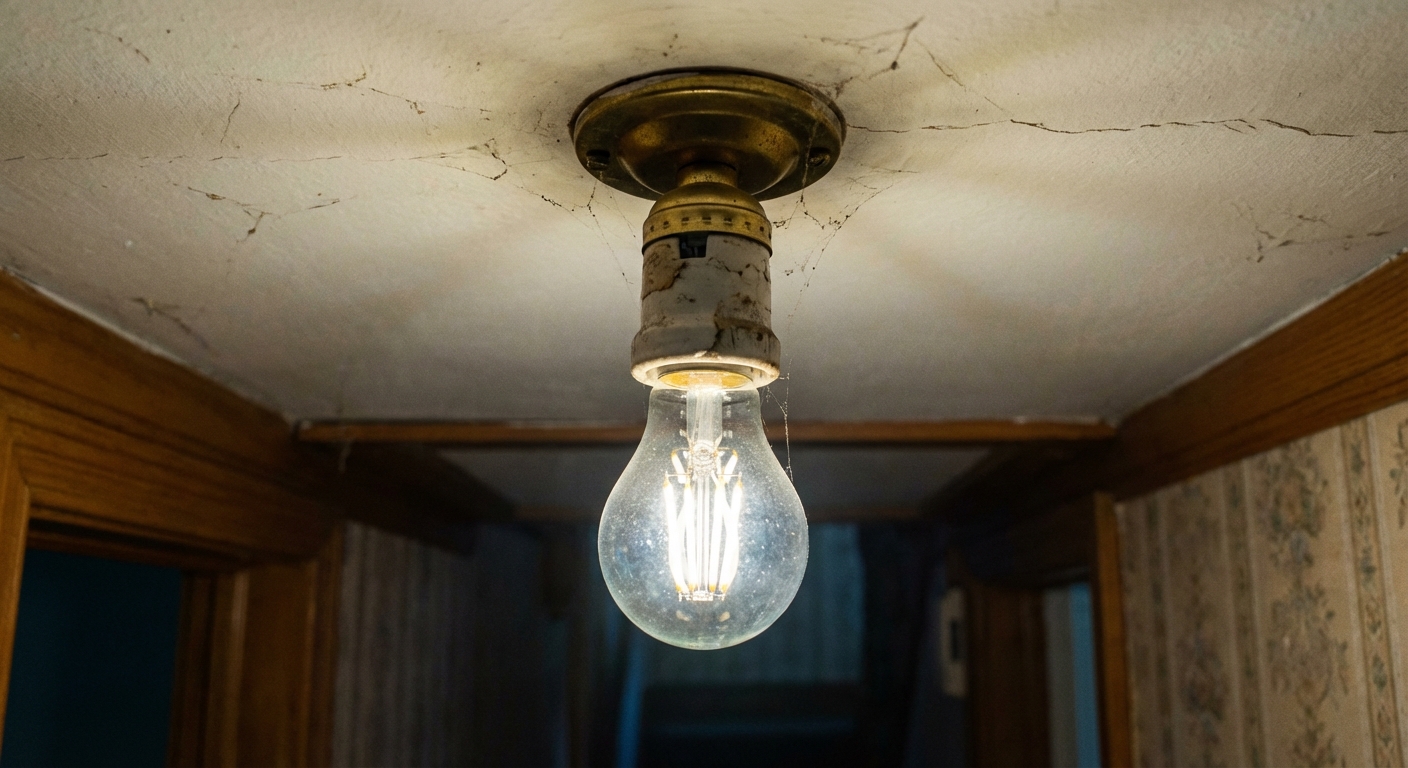
Flickering lights are one of those “small” house annoyances that can turn into a real problem if you ignore them. Sometimes it is as simple as a loose bulb. Other times it is your home warning you about a failing connection that can overheat.
I have chased this issue in my own 1970s ranch more than once, and the fastest path is always the same: start with the easy, safe checks and work your way toward the panel. This guide walks you through that exact order, with clear callouts for when to stop and bring in a pro.
First: One light or many?
This question narrows the search in minutes.
- One lamp or one ceiling light flickers: look at the bulb, socket, fixture wiring, or a switch or dimmer problem.
- Several lights on the same switch flicker: suspect the switch, dimmer, or a loose connection on that circuit.
- Many lights across the house flicker at once: suspect the panel connection, service drop, utility-side issues, or a major load turning on.
Quick pattern clues
- Flickers when you touch or bump something: loose bulb or loose connection.
- Flickers when the fridge, microwave, AC, well pump, or dryer kicks on: voltage dip from heavy loads, an overloaded circuit, or a weak connection upstream.
- Only flickers when dimmed: dimmer compatibility or LED driver issue.
- Flickers randomly plus you hear buzzing or smell something “hot”: stop and treat it as urgent.
Safety first
You can do a lot without opening boxes, but electricity deserves respect. Here is my baseline safety routine.
- Turn the switch off before touching a bulb.
- Let bulbs cool before removing them.
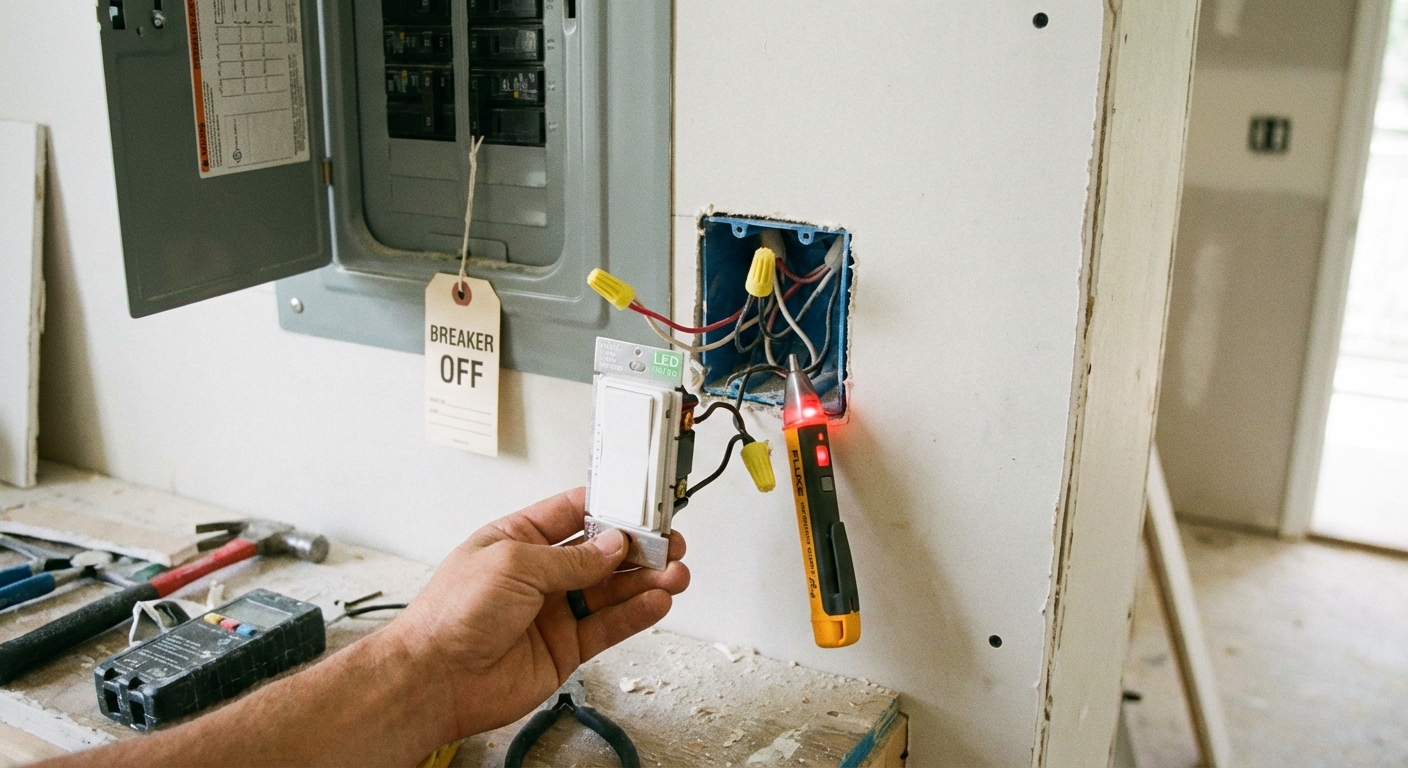
- If you will remove a fixture or switch cover, turn off the breaker and verify power is off with a non-contact voltage tester.
- Never work on energized wiring.
A quick tester reality check
Non-contact voltage testers are great for a fast “is it live?” check, but they can be fooled. Test your tester on a known live outlet first. If anything seems off, confirm with a multimeter or stop and call a pro.
Stop and call an electrician if you notice any of these
- Burning smell, smoke, scorch marks, or melted plastic at a bulb, switch, or outlet.
- Crackling, sizzling, or loud buzzing from a switch, dimmer, fixture, or panel.
- Lights dimming and brightening dramatically, especially across multiple rooms.
- Frequent breaker trips, warm outlets or switches, or shocks or tingles when touching metal parts.
- Flicker that started after water leaks, roof leaks, or plumbing leaks.
- An older aluminum branch wiring system (common in some homes from the late 1960s to mid 1970s) unless you know exactly what you are dealing with.
If the flicker appears across the house, also consider calling your utility company. Many utilities can check the service connection at the pole and the meter, sometimes at no charge, but policies vary.
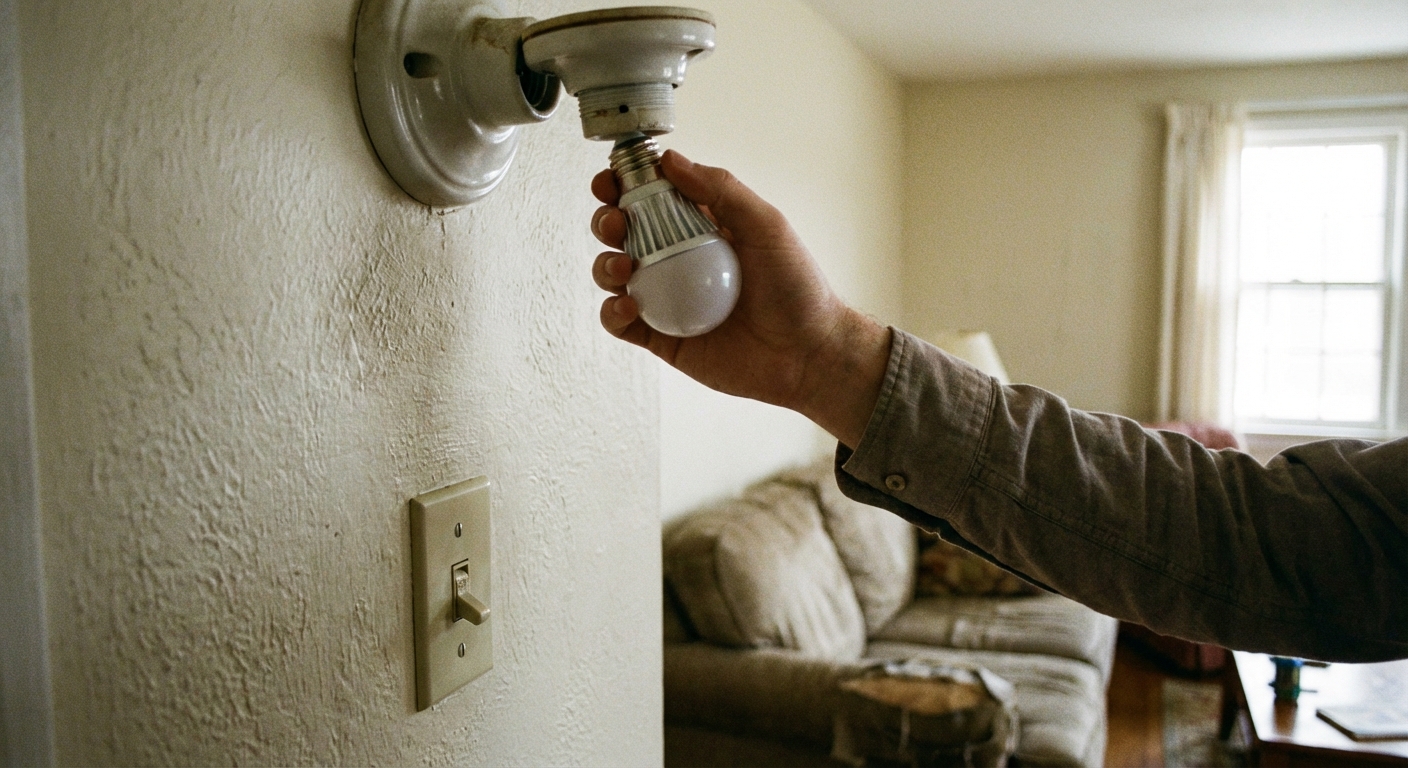
Step 1: Check the bulb
This is the most common fix, and it costs nothing.
Tighten the bulb
With the switch off, gently snug the bulb clockwise. Do not crank down hard. You just want firm contact.
Try a known-good bulb
Swap in a bulb you trust. If the flicker disappears, the original bulb is failing. And yes, a “new” bulb can still be bad. If you have a spare from a different brand or model, it is worth trying.
Match the bulb to the fixture
- Wattage and heat: an overheated bulb can flicker or fail early. Make sure you are not exceeding the fixture rating.
- LED in enclosed fixtures: some LED bulbs are not rated for enclosed glass domes. Heat build-up can cause flicker.
- Vibration: in ceiling fans or garage door openers, vibration can loosen bulbs over time. A bulb with a slightly different base fit can help.
Step 2: Check dimmer and switch compatibility
LED flicker is often a control issue, not an electrical emergency. It is simply the wrong dimmer or switch for the bulb.
Common LED control problems
- Non-dimmable LED on a dimmer: it will flicker, strobe, or buzz.
- Old dimmer (incandescent-only): many older triac style dimmers need a higher minimum load than LEDs provide, so the dimmer never “settles” at low levels.
- Wrong dimmer type: some LED fixtures prefer ELV (reverse-phase) dimmers. A standard forward-phase dimmer can cause shimmer or flicker.
- Too few bulbs on the dimmer: even with a compatible dimmer, a very small LED load can cause shimmer.
- Smart switches: especially no-neutral smart switches, can leak a tiny amount of current to power themselves. That can show up as flicker, shimmer, or “ghosting” when off.
What to do
- Confirm the bulb is labeled dimmable if it is on a dimmer.
- Check the dimmer packaging or model number. Look for an LED-rated or CL (CFL/LED) dimmer, or ELV if your fixture calls for it.
- Try raising the dimmer slightly. If flicker mostly happens at the lowest setting, the minimum load and dimmer design are likely culprits.
- If you are replacing the dimmer or smart switch, pick a reputable brand and follow its LED compatibility list when possible.
If you are comfortable doing basic electrical work, replacing a dimmer or switch is a very doable DIY job. If your box has multiple switches, crowded wires, shared neutrals, or anything looks scorched, that is a good point to hand it off. Also, local rules vary. Some areas want permits for certain electrical work, so do not be shy about checking your local requirements.
Step 3: Check the fixture and socket
If a new bulb and the right control do not fix it, the socket or fixture may be the issue.
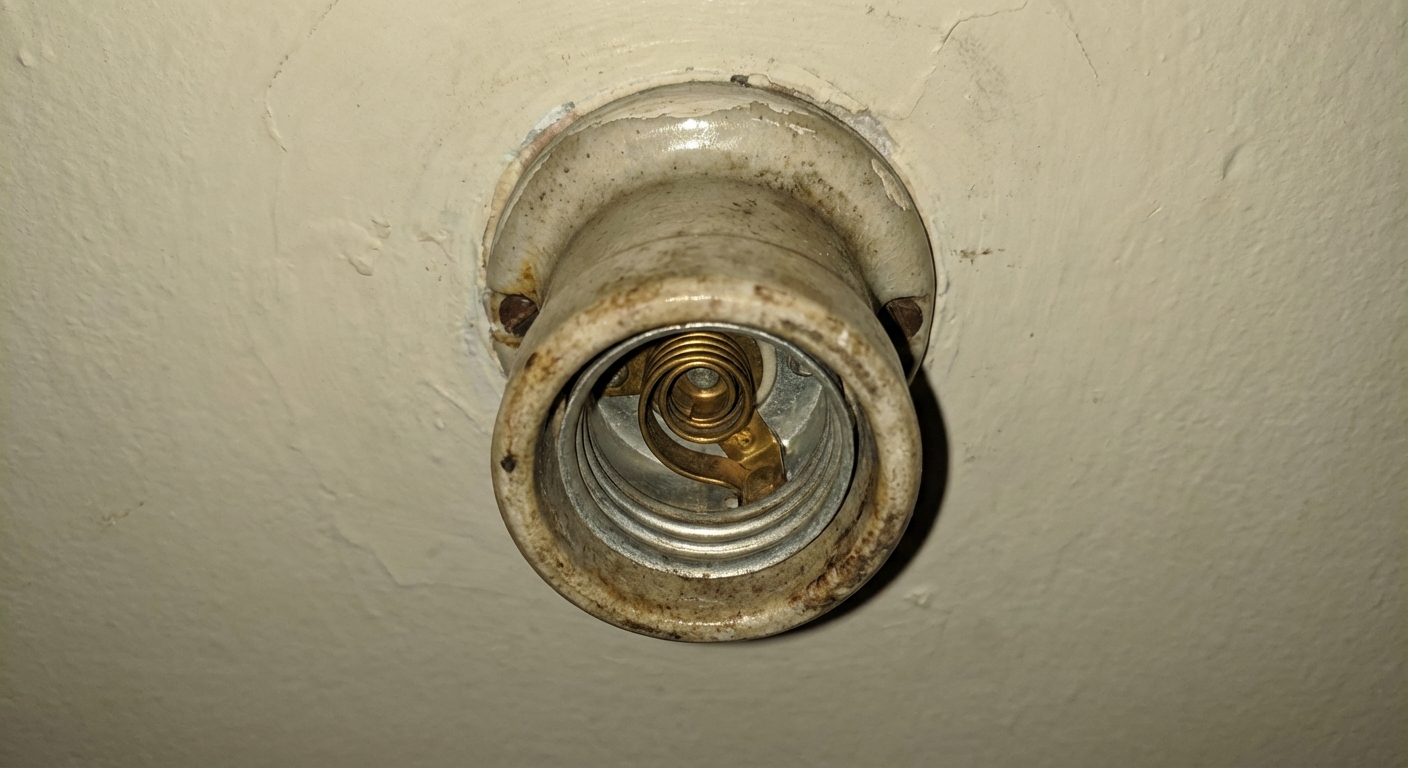
Loose socket tab
In many Edison-base sockets, there is a small metal tab at the bottom that touches the bulb’s center contact. Over time, that tab can get flattened, causing intermittent contact and flicker.
- Turn off the breaker feeding the light. Do not rely on the wall switch for this step. A switch can be miswired to switch the neutral, and the socket can still be energized even when “off.”
- Verify power is off at the fixture with a tester.
- Remove the bulb.
- If you can clearly see the tab, you may be able to very gently lift it slightly using an insulated tool.
- If the socket looks burned or brittle, replace the socket or the entire fixture. Do not try to “massage” damaged parts back to life.
Look for heat damage
Any of these are red flags: brown marks, melted insulation, cracked socket, brittle wiring in the fixture canopy. Replace the fixture or call an electrician.
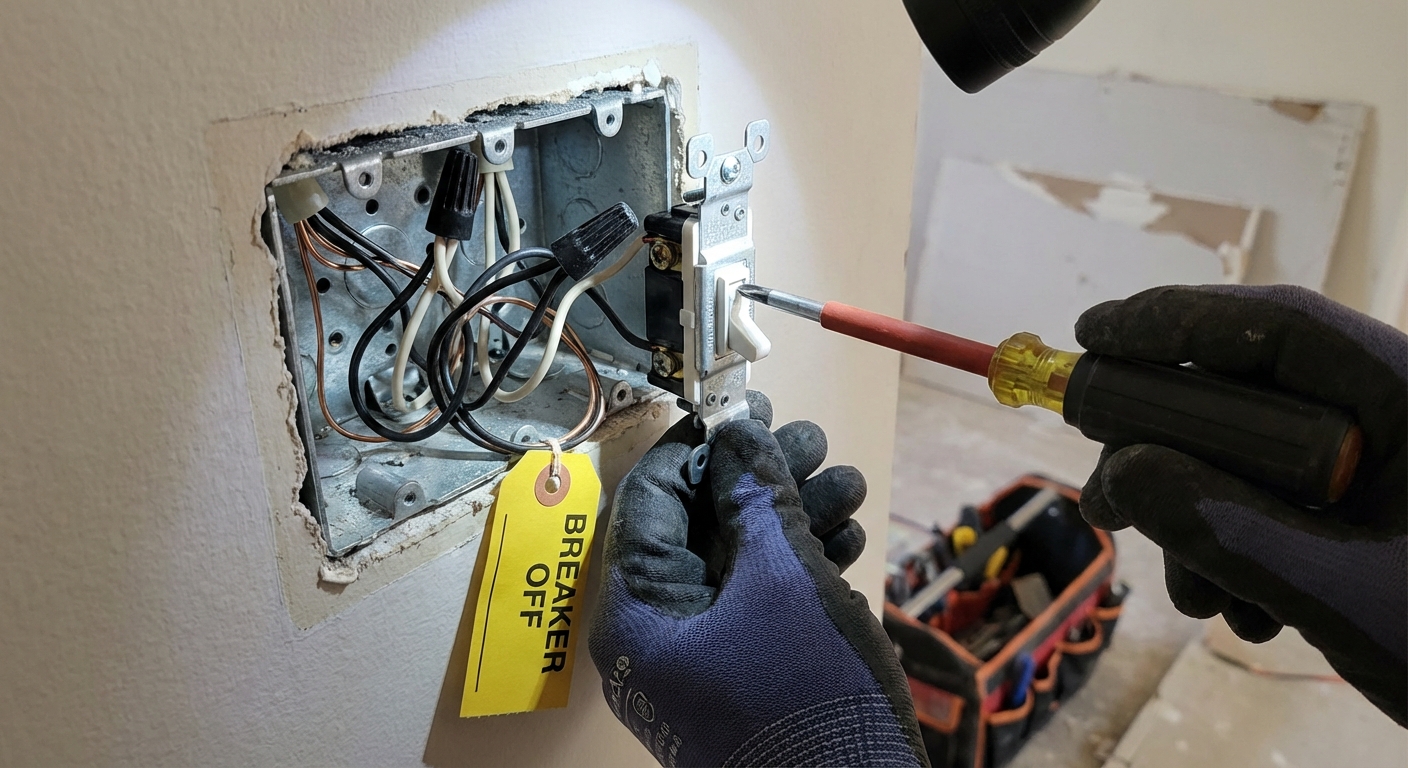
Step 4: Check switch and connections (breaker off)
Loose connections create resistance. Resistance creates heat. Heat is the part we do not negotiate with.
What you can safely look for
- Backstabbed connections: some switches and receptacles allow wires to push into holes in the back. These can loosen over time. Many pros prefer the side screws.
- Loose wire nuts: in a switch box or ceiling box, a loose splice can flicker when the house vibrates or when loads change.
- Damaged insulation: nicked or scorched wire jacket, or brittle cloth insulation in older homes.
DIY rule of thumb
If you open a box and see burn marks, melted wire nuts, or discolored copper, stop. That connection has been hot, and you want an electrician to evaluate the entire circuit.
If everything looks clean and you are experienced enough to work inside boxes, you can re-terminate loose connections: move backstabbed wires to screw terminals, tighten terminals to manufacturer specs, and redo any questionable splices with the right size wire connector. If any of that sounds fuzzy, that is your sign to hire it out.
Step 5: Rule out an overloaded circuit
If the flicker happens when something big starts up, you might be seeing a voltage drop. Some drop is normal, but noticeable flicker can mean the circuit is overloaded or the connection upstream is weak.
Common culprits
- Space heaters, hair dryers, microwaves, toaster ovens
- Window AC units, dehumidifiers, sump pumps, well pumps
- Garage compressors, shop vacs, table saws
What to do
- Try running the heavy appliance on a different circuit temporarily.
- If you are using power strips for permanent loads, consider adding a dedicated outlet or circuit instead.
- Map what is on the breaker feeding the flickering light. If one breaker is carrying half a room plus multiple appliances, it is time to rethink the load.
Persistent flicker during motor start can also point to a loose neutral connection, which is not a DIY fix.
Document the symptom
This sounds boring until you are trying to explain it to an electrician or the utility.
- Which lights flicker and which do not
- What was running when it happened
- Time of day, and whether it is windy or stormy (service drops can move)
- Whether it happens more on one dimmer setting
When flicker is a warning
Here are the scenarios that deserve immediate attention.
Whole-house flicker or lights get too bright
If lights in multiple rooms flicker, or some lights brighten while others dim, a neutral problem is on the table. Loose neutrals can cause unpredictable voltage swings that can damage electronics and create fire risk.
- Loose service neutral (utility side): often shows up as whole-house weirdness and can vary with wind or weather. Call the utility and an electrician.
- Loose branch neutral (your wiring): can affect one circuit, a multi-wire branch circuit, or a section of the home. Call an electrician.
Buzzing near the panel
Make sure the sound is truly coming from the panel itself and not something nearby (like a doorbell transformer). If it is the panel, that is not a “wait and see” situation. Shut off sensitive electronics and call a pro.
Flicker plus hot outlets or warm switch plates
Warmth means resistance and heating at a connection. Turn off the circuit and get it inspected.
Ghosting and “off” flicker
If LEDs glow faintly or flicker when switched off, it is often a control or wiring quirk like a smart switch, a switch with a locator light, induced voltage in long traveler runs, or shared neutrals. Sometimes it is harmless, sometimes it is a sign of a wiring issue that needs a pro to sort out. If it is widespread or new, have it checked.
Fast checklist
- Does it happen in one light or many?
- Tighten the bulb, then swap in a known-good bulb (even a new bulb can be a dud).
- If on a dimmer or smart switch, confirm dimmable LED and use an LED-rated dimmer or a compatible smart switch.
- Inspect socket and fixture for heat damage.
- With breaker off, check switch and box connections for looseness or backstabs.
- Test for overload by turning off big appliances and watching for improvement.
- If whole-house flicker or voltage swings appear, call the utility and an electrician.
Tools and parts
- Non-contact voltage tester (and ideally a multimeter if you know how to use it)
- Screwdrivers (flat and Phillips)
- Known-good bulb (matching base and type)
- LED-rated dimmer (or ELV dimmer if required)
- Compatible smart switch (if applicable)
- Wire connectors and electrical tape (only if you are qualified to re-splice)
One last neighborly note from my own mistake pile: if you find yourself repeatedly “fixing” a flicker by tightening something every few weeks, that is not a fix. That is a symptom. Track down the loose connection before it turns into heat damage.
FAQ
Why do my LED lights flicker when turned off?
This is often caused by a dimmer not designed for LEDs, a switch with a locator light, or a smart switch that leaks a tiny amount of current (common with no-neutral smart switches). Wiring can also allow a small amount of induced or “ghost” voltage in certain setups. An LED-rated dimmer, a different switch, or adding the correct bypass per manufacturer instructions often solves it. If it is happening across multiple circuits, have an electrician check for wiring issues.
Can a flickering light cause a fire?
The flicker itself is not the cause. The loose or failing connection behind the flicker can overheat and create fire risk. That is why flicker paired with buzzing, burning smell, warmth, or discoloration should be treated as urgent.
Why do lights flicker when the AC turns on?
AC compressors draw a big inrush current at startup, which can cause a brief voltage dip. Mild, quick dimming is common. Noticeable flicker or frequent dips can mean an overloaded circuit, undersized wiring, or a weak connection. If it is new or worsening, get it checked out.
Should I call the power company or an electrician?
If flicker happens across the house, especially with voltage swings, call the utility company and an electrician. If it is isolated to one light or one circuit, start with the DIY checks above, then call an electrician if the basics do not fix it.
About Marcus Vance
Content Creator @ Grit & Home
Marcus Vance is a lifelong DIY enthusiast and self-taught home renovator who has spent the last decade transforming a dilapidated 1970s ranch into his family's dream home. He specializes in budget-friendly carpentry, room-by-room renovations, and demystifying power tools for beginners. Through his writing, Marcus shares practical tutorials and hard-learned lessons to help homeowners tackle their own projects with confidence.