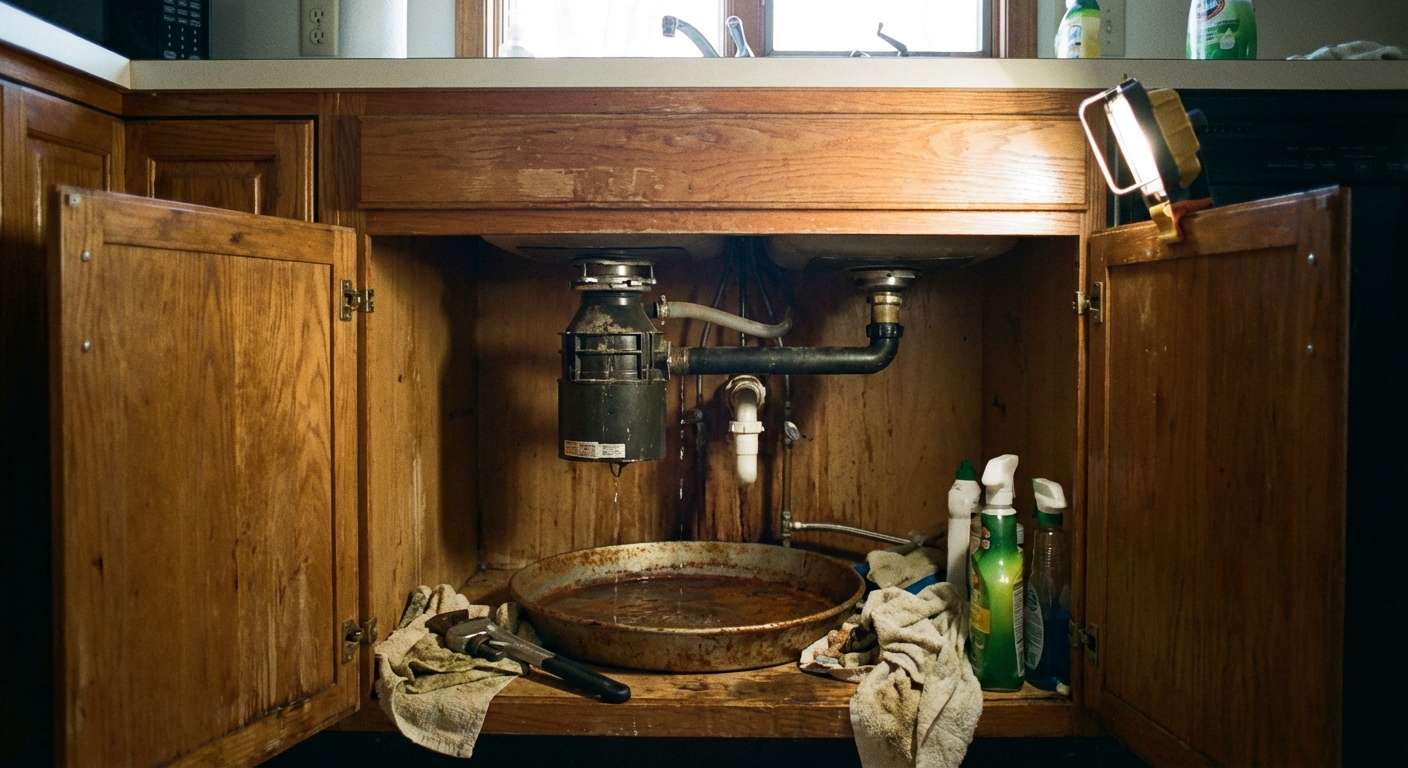
A garbage disposal leak feels like one of those problems that should be simple, until you’re on your back in the cabinet with a headlamp wondering if the water is coming from above, beside, or inside the unit.
The good news is this: most disposal-related leaks come from one of three places.
- The top flange (where the disposal meets the sink)
- The side discharge pipe (where the disposal dumps into the drain)
- The bottom seal (inside the disposal body, usually not repairable)
We’ll identify which one you’ve got and walk through the fix, step by step, without guessing.
Safety first
- Cut the power. Unplug the disposal under the sink. If it’s hardwired, switch off the breaker.
- Don’t put your hand in the disposal. Even unplugged, treat it like it could bite. Use tongs or pliers if you need to remove something.
- Dry everything first. Wipe down the disposal and all pipes so you can see fresh water when it appears.
My thrifty pro tip: Slide a dry paper towel around each suspected spot. The first towel to get wet tells the truth fast.
Before you blame the disposal
A lot of “disposal leaks” turn out to be nearby water that just lands on the disposal and drips off the lowest point. Before you start loosening bolts, do this quick sweep.
- Faucet and sprayer: Run water and look for drips that track down the supply lines or the faucet body into the cabinet.
- Sink drain basket above: Check the sink strainer or basket area. A slow leak there can run down the outside of the disposal and mimic a flange problem.
- Supply lines and shutoff valves: Feel around the connections with a dry paper towel.
- Dishwasher air gap or high loop: If you have an air gap on the sink, check it for drips. If you do not, make sure the dishwasher drain hose has a high loop under the counter (or an air gap, depending on local code) so water does not backflow in weird ways.
- Condensation: In humid cabinets or with very cold water, you can get sweating that looks like a leak. Dry it completely and see if it returns only during heavy cold-water use.
Find the leak in 5 minutes
Step 1: Dry it and set a catcher
Put a bowl or shallow pan under the disposal. Then dry the disposal body, the sink flange area, the discharge pipe, and the P-trap with a towel.
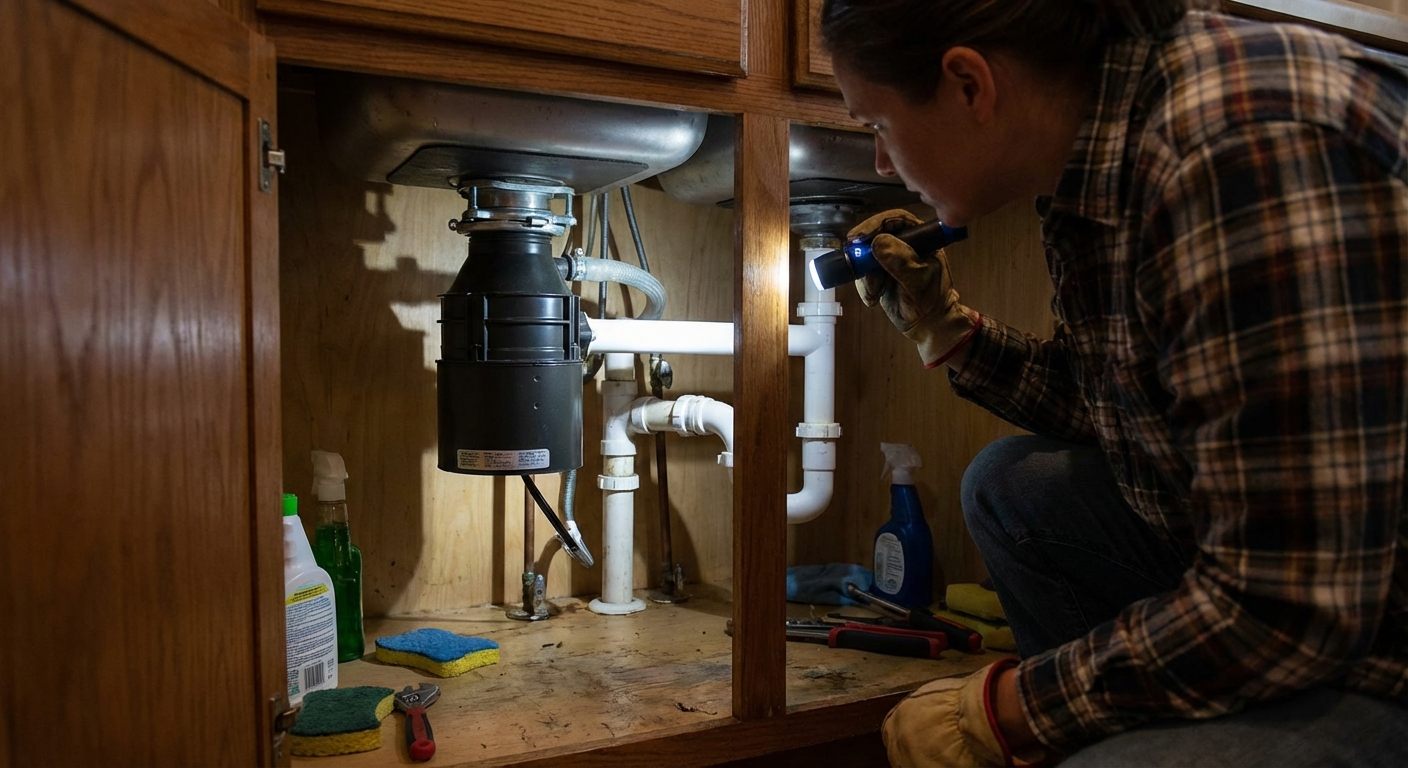
Step 2: Run water (disposal off)
Turn on cold water and let it run into the sink basin (do not switch on the disposal yet). Watch with a flashlight.
- Water dripping from the very top near the sink opening points to the top flange or sink basket area above it.
- Water seeping at a pipe connection on the side points to the discharge pipe or dishwasher hose connection.
- Water appearing from the bottom center or running down the housing with no wet pipes above it points to the bottom seal or water tracking from above.
Step 3: Run the disposal (10 seconds)
Some leaks only show up with vibration. If it stays dry with just running water, flip the switch for a few seconds while the water is running and watch again.
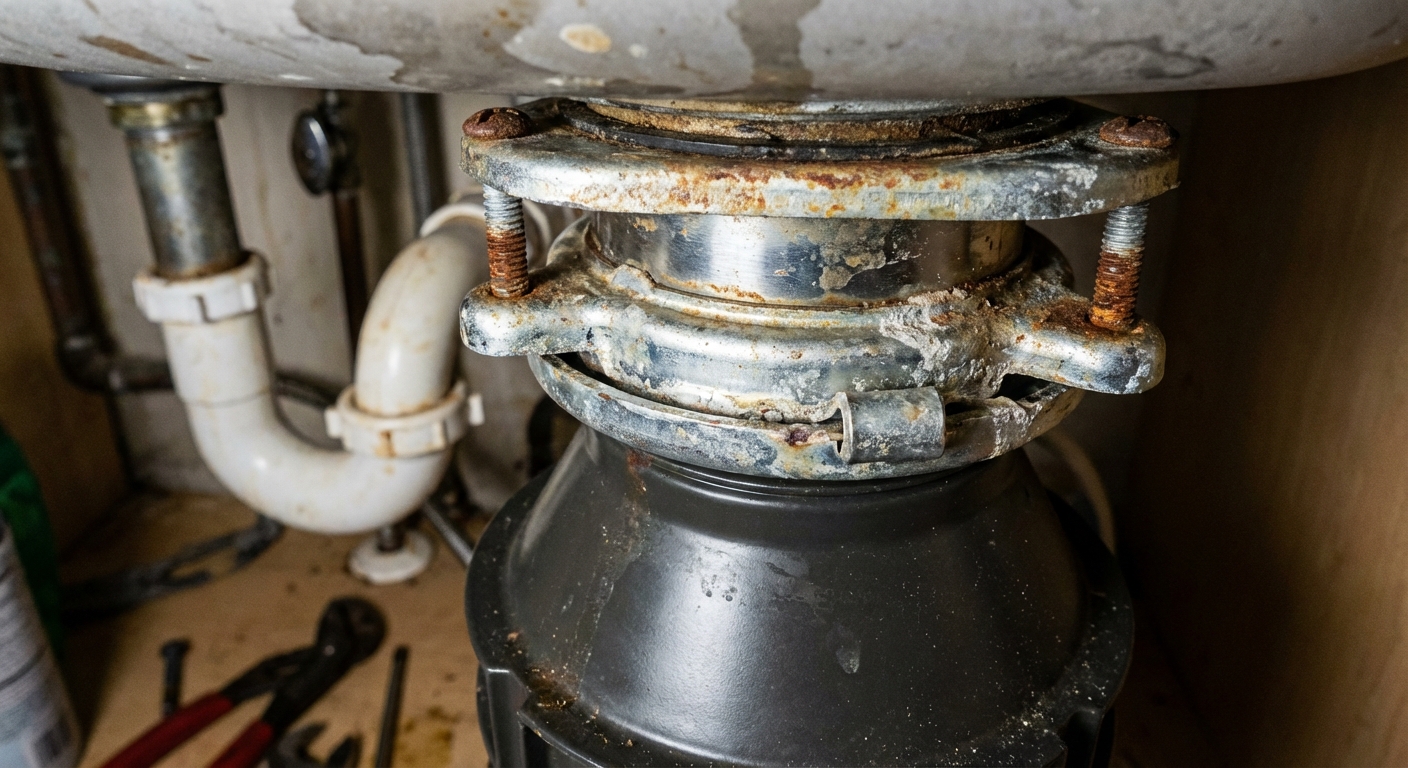
Leak 1: Top flange
If the leak seems to start up at the sink opening and run down the disposal, you’re dealing with the mounting assembly. This is usually a loosened mount or a failed seal at the flange.
What you’ll need
- Flashlight
- Flathead screwdriver (often helps with the locking ring)
- Channel-lock pliers (optional)
- Putty knife
- Plumber’s putty or 100% silicone (use what your sink and disposal manufacturer allows, especially for stone composite, cast iron, or specialty sinks)
- If applicable: a replacement flange gasket for your model
Fix A: Tighten the mounting ring
With the power off, grab the disposal body and gently try to rotate it. If it shifts more than a tiny amount, the mount may be loose.
Support the disposal with one hand. These units are heavier than they look.
Locate the mounting ring just under the sink. You’ll see a metal ring that locks the disposal to the flange assembly.
Turn the ring to tighten. Many models tighten by turning the ring clockwise (looking up from below), but some brands differ. If your hands can’t move it, use a screwdriver to nudge the ring at a tab.
Test again. Run water and check for drips.
If tightening stops the leak, you’re done. If not, the seal is probably compromised.
Fix B: Reseal the top flange
This is the messier job, but it’s straightforward. You’re removing the disposal, pulling the flange, and resealing it. One important note: different brands stack these parts differently. Some rely mostly on plumber’s putty under the flange, others use a gasket stack (rubber and fiber rings), and some sinks call for silicone instead of putty. If you can, follow your model’s instructions and match the original stack-up.
Disconnect the plumbing. Place a pan underneath. Remove the discharge tube and loosen the P-trap slip nuts as needed. If a dishwasher hose is connected, expect some water to drain. Raise the hose as high as you can and keep a towel and bucket handy.
Remove the disposal from the mount. Turn the locking ring to release it and lower the unit carefully.
Remove the sink flange. From above, pry up the flange. From below, loosen the mounting screws on the flange assembly and remove the parts.
Clean everything. Scrape old putty or silicone off the sink and flange. Wipe dry.
Apply new sealant. Roll plumber’s putty into a rope and press it under the flange lip, then seat the flange in the sink opening. (If using silicone instead, apply a continuous bead.)
Reassemble and tighten evenly. Tighten the mounting screws a little at a time in a rotation, so the flange seats flat.
Rehang the disposal and reconnect plumbing. Then run water and check.
Lesson learned the hard way: If you tighten one mounting screw all the way before the others, the flange can tilt slightly. It may look fine, then leak later. Go slow and tighten evenly.
If your sink opening is chipped or irregular: Putty might not seal well. This is where 100% silicone (if permitted for your sink) or a flange repair ring can help, but it’s a “measure twice, cut once” situation. If you’re unsure, this is a good moment to call a plumber.
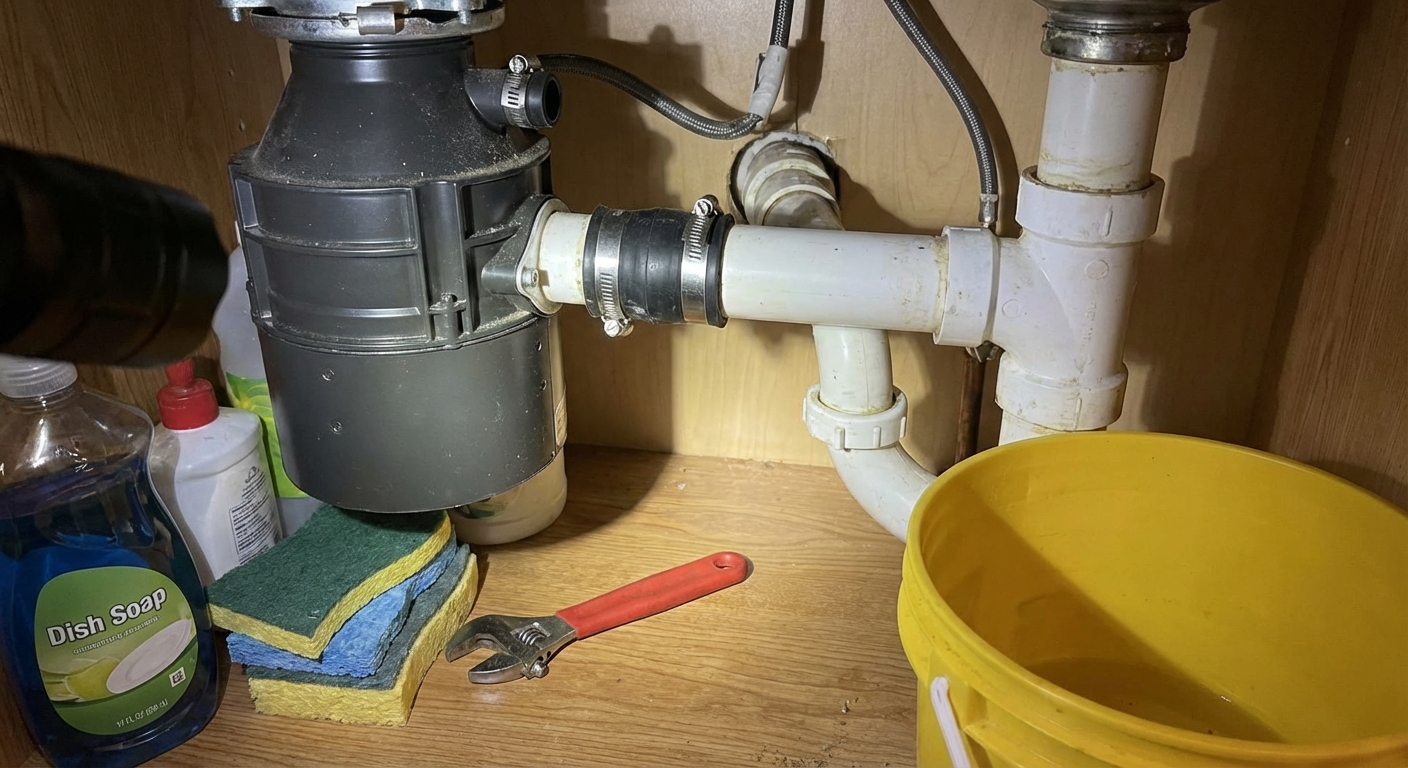
Leak 2: Side discharge pipe
If you see water beading or dripping at the side where the disposal connects to the drain line, you’re usually looking at a worn gasket, a loose connection, or a pipe that’s slightly misaligned.
Check these spots
- Discharge tube connection: Where the metal or plastic discharge tube bolts to the disposal outlet.
- Slip-joint connections: Where the discharge tube meets the drain pipe or P-trap with slip nuts and washers.
- Dishwasher inlet: The small hose connected to the barbed nipple on the disposal (if you have one).
Fix A: Tighten and realign
Power off.
Check alignment. If the discharge tube is pushing sideways or pulling down to “make it fit,” it can leak. Loosen the slip nuts slightly so the pipes can relax into position.
Tighten the two discharge bolts. Most disposals use two small bolts or screws holding a flange plate. Snug them evenly. Do not overtighten and strip them.
Retighten slip nuts. Hand-tight, then a small extra snug with pliers if needed. If the nuts are plastic, resist the urge to crank them down.
Fix B: Replace the discharge gasket
Between the discharge tube and the disposal outlet there’s typically a rubber gasket. If it’s flattened, cracked, or missing, it will leak.
Remove the discharge tube. Back out the two bolts or screws and pull the tube away.
Inspect the gasket. If it looks distorted or brittle, replace it with the correct part for your disposal model.
Clean the mating surfaces. Wipe away slime and mineral buildup so the gasket seats flat.
Reinstall and tighten evenly. Then test with running water.
Should you use plumber’s putty or thread tape here? Usually no. This connection is designed to seal with a gasket. Adding sealant can cause mis-seating and make future service miserable.
Fix C: Dishwasher hose leak
If your dishwasher drains into the disposal, you’ll have a small hose connected to a barbed nipple on the disposal.
Check the clamp. Tighten the hose clamp. If it’s the spring type, consider swapping to a worm gear clamp for easier adjustment.
Inspect the hose. If the hose end is split or hardened, cut off about 1 inch and reattach, or replace the hose.
Make sure it’s fully seated. It should slide all the way over the barb.
Confirm best practice routing. Make sure the hose has a high loop under the counter (or an air gap if required where you live). Poor routing can cause backups that look like mysterious leaks.
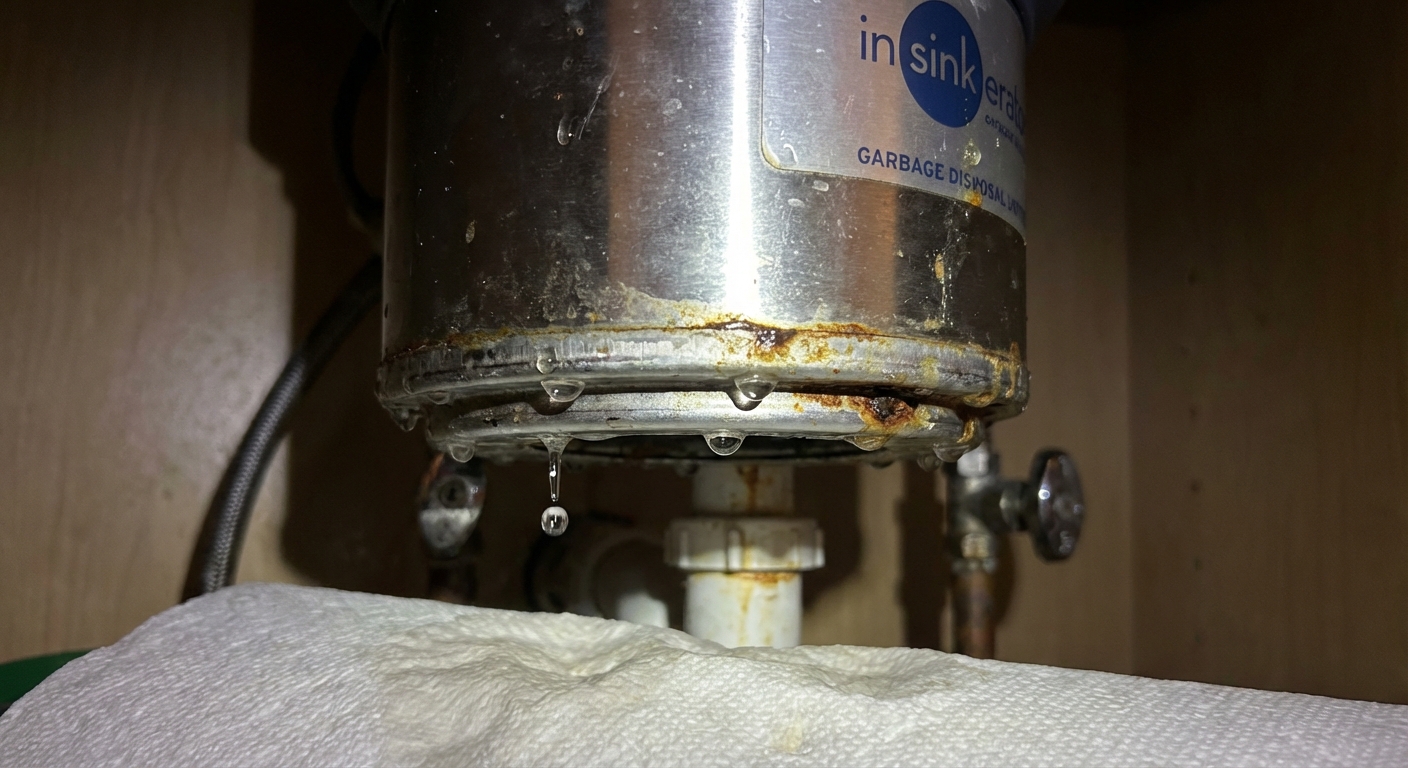
Leak 3: Bottom seal
If water is dripping from the very bottom of the disposal housing, or you see moisture coming from the center seam of the unit with everything above it dry, the internal seal is likely failing.
How to confirm
- Dry the entire disposal and all connections.
- Run cold water into the sink, then run the disposal briefly.
- If the first wet spot appears on the disposal housing itself (not at a pipe joint), it is likely internal.
- Look closely around seams, the reset-button area, and the underside of the grinding chamber. Sometimes water tracks and drips from the lowest edge even when the source is higher.
Can you fix it?
In most homeowner situations, no. The seal is inside the motor housing area. Once it starts leaking, it typically worsens, and water plus electricity is not a combo you want under your sink.
What to do
- Plan for replacement. If your unit is older (often 8 to 12 years depending on use and water quality), replacement is usually the smart move.
- Check the warranty. Some disposals carry multi-year warranties. If it’s leaking from the housing, you may qualify for a replacement unit.
- Replace with the same mount style if possible. Matching brands often lets you reuse the existing sink mounting assembly, which makes the swap much faster.
If you see rust trails or cracks on the disposal body: That’s a replacement, not a repair.
Tools and parts
- Bucket or shallow pan
- Old towels or paper towels
- Flashlight or headlamp
- Flathead screwdriver
- Adjustable wrench or channel-lock pliers
- Plumber’s putty or 100% silicone (sink dependent)
- Replacement discharge gasket (model-specific)
- New slip-joint washers (optional but cheap insurance)
- New hose clamp (if dishwasher line is involved)
Slip-joint washer tip: Orientation matters. The beveled side typically faces the fitting it is sealing against. If you flip it, it can weep no matter how tight you go.
Common mistakes
- Overtightening plastic slip nuts until they crack or deform the washer.
- Using sealant where a gasket should seal (especially at the discharge connection).
- Forcing misaligned pipes instead of loosening and letting everything line up naturally.
- Skipping cleanup of old putty or gunk so the new seal never seats properly.
- Not testing with the disposal running (vibration can reveal leaks you otherwise miss).
- Chasing a “bottom leak” that is really water tracking from above. Dry it, then watch where the first drop forms.
When to call a plumber
I’m all for sweat equity, but here are the moments I’d rather see you make one phone call than three trips to the hardware store.
- You see cracked drain piping or damaged cabinet flooring from long-term leaks.
- The disposal is hardwired and you’re not comfortable with electrical connections.
- You can’t stop a top flange leak after resealing, which can indicate a warped sink opening, a chipped opening that needs a different approach, or mounting damage.
- There’s any sign of internal housing leak and you need help selecting and swapping the unit quickly.
Quick FAQ
Hot or cold water for testing?
Use cold water. It is a better everyday testing baseline, and it avoids pushing softened grease down the line where it can re-solidify later. Also, hot water on warm surfaces can evaporate faster, which can make tiny seeps harder to notice.
Can it leak only when it runs?
Yes. Vibration can open up a tiny gap at a gasket, slip joint, or loose mount. Always test both ways: water running with the disposal off, then on.
How long does a repair take?
Discharge gasket or slip-joint tweaks can be 10 to 30 minutes. Resealing the top flange is often 60 to 90 minutes if it’s your first time and you take it slow.
Dishwasher not draining after a disposal swap?
Check the dishwasher inlet knockout plug. New disposals often ship with a plug that must be punched out before the dishwasher can drain into the unit. It is not a leak issue, but it is a very common “while you’re here” surprise.
Wrap-up
If you remember nothing else, remember this troubleshooting order:
- Top leak: tighten mount, then reseal the flange if needed.
- Side leak: align pipes, tighten connections, replace the discharge gasket, check the dishwasher inlet.
- Bottom leak: confirm it is truly internal, then plan a replacement.
Take your time, dry everything first, and let the water show you the answer. That’s how you turn a frustrating under-sink mystery into a clean, confidence-boosting win.
About Marcus Vance
Content Creator @ Grit & Home
Marcus Vance is a lifelong DIY enthusiast and self-taught home renovator who has spent the last decade transforming a dilapidated 1970s ranch into his family's dream home. He specializes in budget-friendly carpentry, room-by-room renovations, and demystifying power tools for beginners. Through his writing, Marcus shares practical tutorials and hard-learned lessons to help homeowners tackle their own projects with confidence.