Before you touch anything: keep it safe and keep it dry
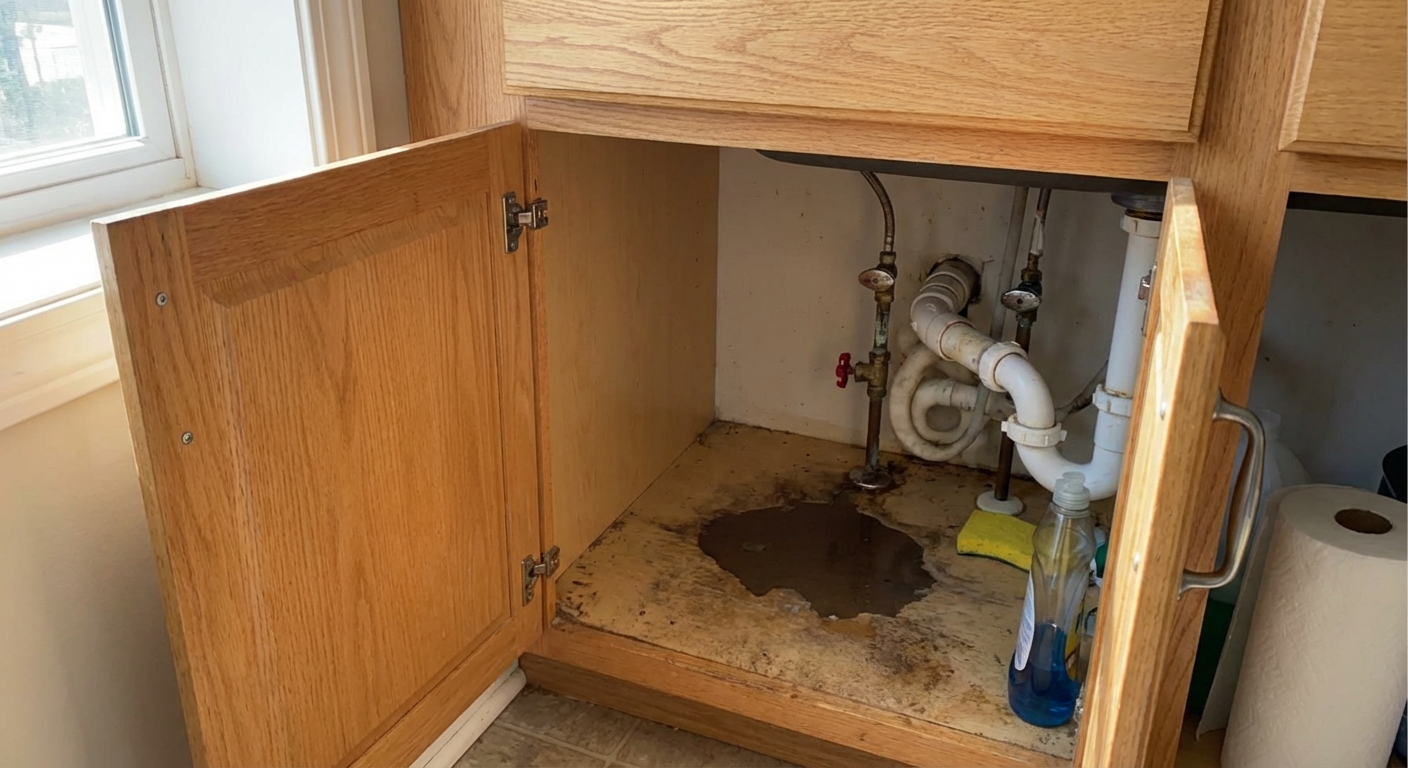
When a pipe leaks under the sink, the damage usually comes from the slow, sneaky kind that soaks the cabinet base, swells particleboard, and invites mold. The good news is most under-sink leaks are simple connections that loosen over time.
- Clear out the cabinet and set a pan or bowl under the plumbing.
- Dry everything with a towel so you can see fresh water appear.
- Use a flashlight and keep paper towels handy. Paper towels are the best leak detector I know because they show the first wet point fast.
- If there is an outlet in the cabinet (garbage disposal, dishwasher plug), avoid standing water and unplug anything you can safely reach.
- If water is pooling and you cannot safely unplug, shut off the breaker for that circuit before you reach into the wet area.
If water is spraying or flowing, skip ahead to the shutoff steps in the next section.
Quick triage: stop the leak and identify it
Step 1: Does it leak only when draining, only when running, or all the time?
- Leaks when the faucet is on: usually something downstream of the shutoffs, like a faucet quick-connect, sprayer hose connection, or a faucet body issue that lets water run down into the cabinet.
- Leaks when the sink drains: usually the drain tailpiece, slip-joint nuts, P-trap, trap arm, disposal discharge tube, or dishwasher branch line.
- Leaks all the time: often a pressurized supply-side problem, like a supply line, a shutoff valve, or the connection at either end of the supply line.
Step 2: Know how to shut off water fast
- Under-sink shutoff valves: turn clockwise to close. If they are stiff, go slow. Forcing them can make things worse.
- If a shutoff will not close: shut off the main water supply for the house, then open the faucet to relieve pressure.
My rule: if you cannot reliably stop the water, you are not repairing a leak, you are gambling with it. Shutoffs come first.
Tools and parts that solve most under-sink leaks
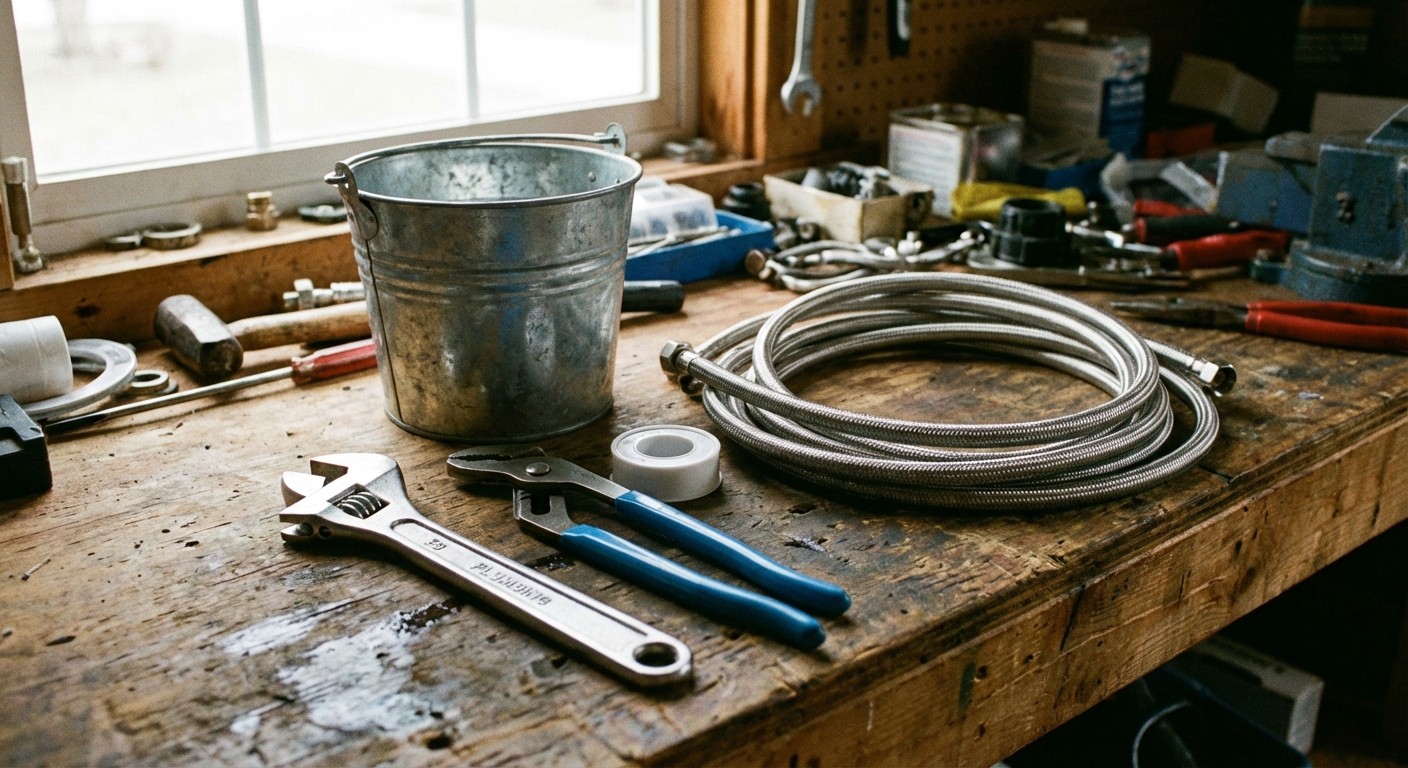
- Adjustable wrench and/or channel-lock pliers
- Bucket or shallow pan
- Paper towels or tissue (for finding the exact drip)
- Plumber’s tape (PTFE tape) for threaded connections
- Replacement braided faucet supply lines
- Slip-joint washers for your trap (usually 1-1/4 in. bathroom or 1-1/2 in. kitchen)
- If needed: new P-trap kit, new shutoff valve, new sprayer hose, or disposal parts (discharge elbow gasket, mounting ring components)
Supply line sizing note: the shutoff side is commonly 3/8 in. compression. The faucet side varies (3/8 in. compression, 1/2 in. FIP/IPS, or a manufacturer quick-connect). Confirm what you have before buying.
If you are unsure on sizes, take a clear photo and bring the old part to the store. Matching by eye beats guessing by memory.
Find the source, not the wet spot
Water loves to travel along pipes and drip from the lowest point. The “drip spot” is often not the leak. Here is a method that works even when everything looks wet.
The paper towel method
- Dry all pipes, fittings, and the cabinet floor.
- Wrap a dry paper towel around one connection at a time.
- Run water or drain the sink, depending on when the leak happens.
- Look for the first towel that shows moisture. That is your leak source.
Work top to bottom: faucet connections first, then supply valves and lines, then trap and drain joints, then anything tied to a disposal or dishwasher.
Common leak points and fixes
1) Supply line leaks (hot or cold)
Supply lines are the small lines that bring water from the shutoff valves to the faucet. Most modern ones are braided stainless steel. These are pressurized, so even a tiny seep matters.
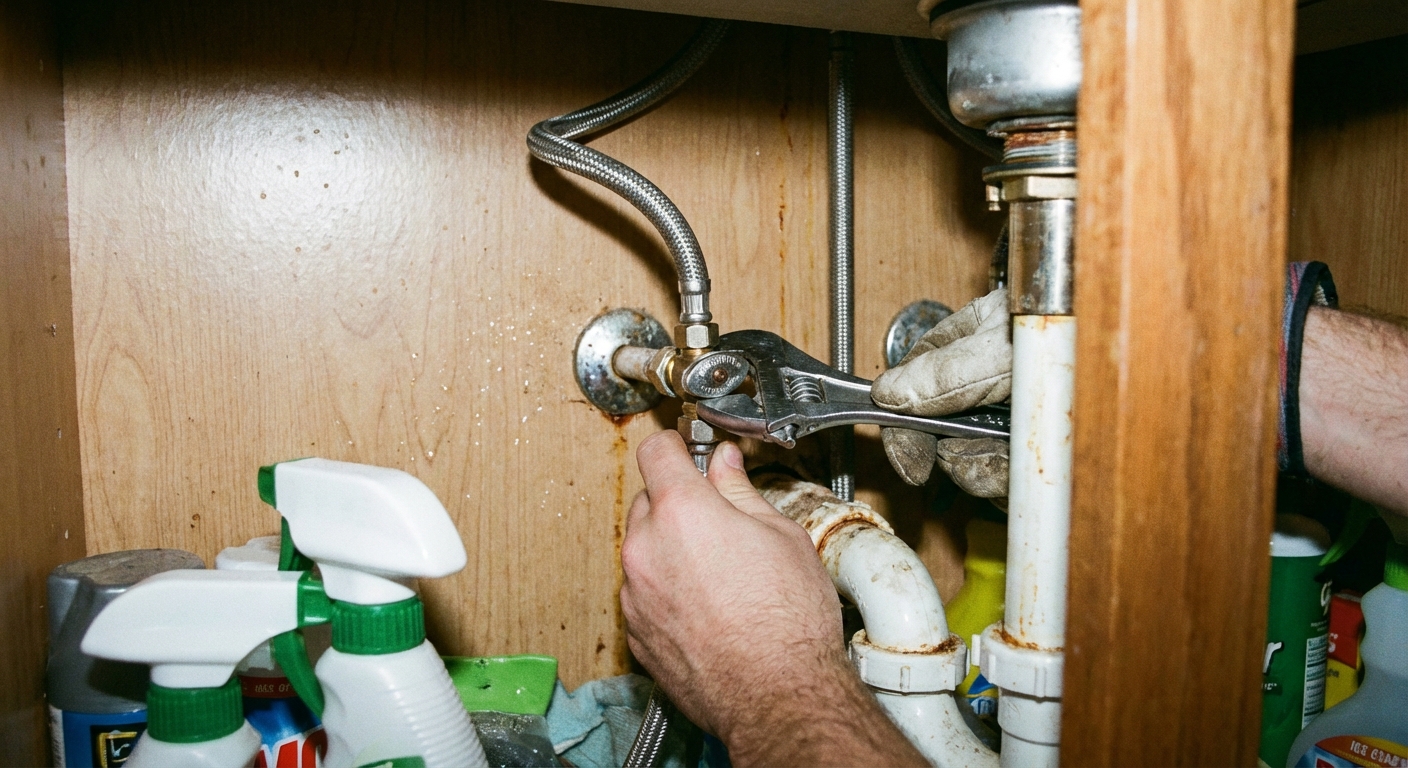
- Check the connection at the shutoff valve: If it is a compression fitting, snug it gently with a wrench. Do not crank hard. Over-tightening can deform the ferrule and make it leak worse.
- Check the connection at the faucet: Many faucet connections are hand-tight plus a small turn with a wrench. If it is dripping, snug it.
- If the line itself is wet or bulging: replace the entire supply line. Do not patch a failed braided line.
Two tape reminders: PTFE tape is not for compression fittings because the seal is made by the ferrule, not the threads. Tape is for threaded pipe connections where the threads are part of the seal.
Pro tip from my own mistakes: If you disconnect a supply line and it is old or stiff, it is often worth replacing instead of trying to reuse it. That is one of those “saved five bucks, spent my Saturday” moves.
2) Shutoff valve leaks (packing nut or valve body)
Shutoff valves often leak at the stem when you turn them, or they seep from old joints.
- Leak at the stem (right behind the handle): snug the small packing nut about 1/8 to 1/4 turn. Turn the valve on and off again and recheck.
- Leak from the valve body or where it meets the pipe: replacement is usually the correct fix. If you have a soldered valve and do not feel comfortable, this is a good time to call a plumber.
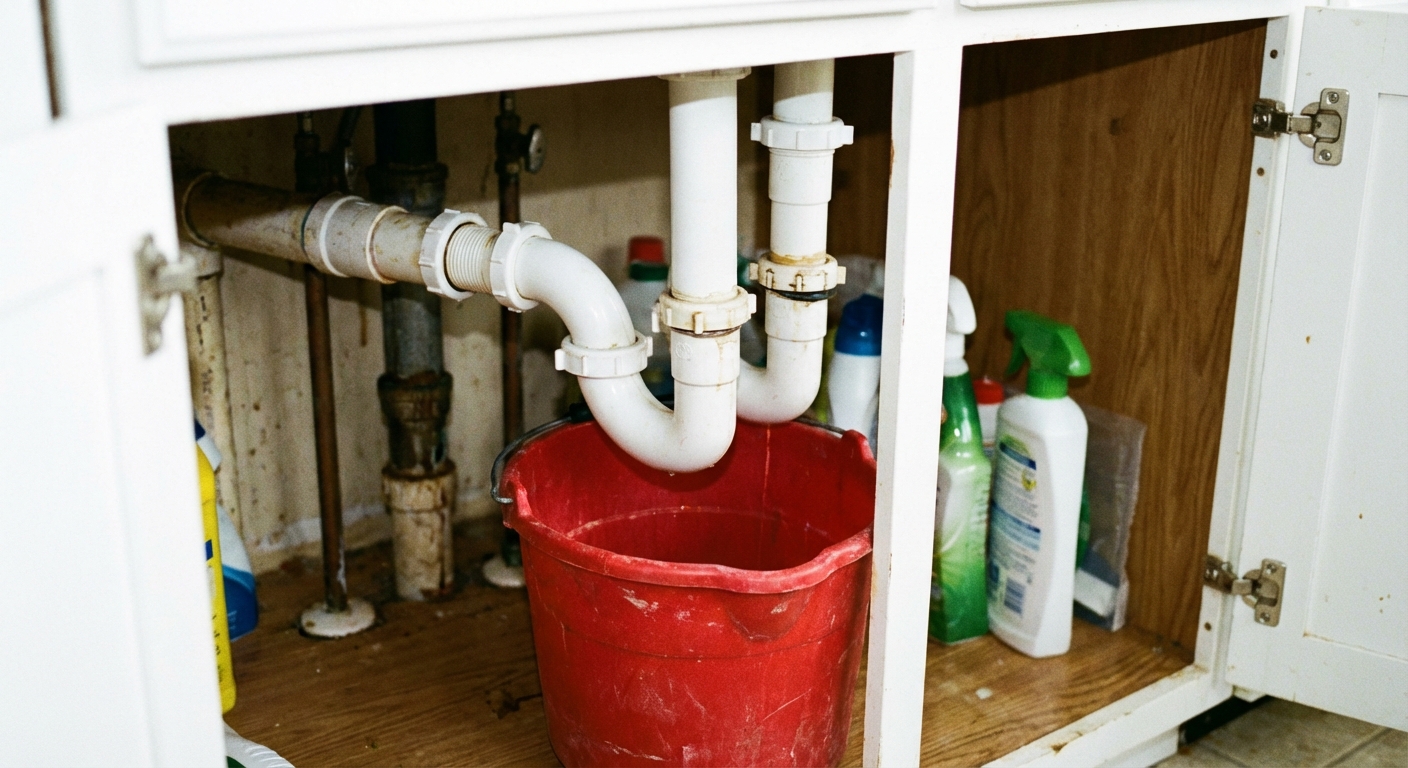
3) P-trap or slip-joint leaks (the classic “only when draining” leak)
The P-trap is designed to hold water and block sewer gas. Most under-sink traps are slip-joint connections with plastic nuts and tapered washers. These are meant to seal by compression, not brute force.
Fix steps
- Put a bucket under the trap.
- Hand-tighten the slip-joint nut that is leaking. Test by running water and draining the sink.
- If it still leaks, disassemble that joint, inspect the washer, clean the mating surfaces, and reassemble.
- Replace the washer if it is cracked, flattened, or missing.
- Tighten by hand, then go another small turn with pliers if needed.
Important: Do not use plumber’s tape on slip-joint threads expecting it to seal water. The washer is what seals. Tape can help the nut turn smoothly, but it does not fix a bad washer or a misaligned trap.
4) Drain tailpiece or sink strainer leaks
If the leak starts at the very top of the drain plumbing, you may have an issue at the tailpiece connection or the sink strainer (the flange in the bottom of the sink). Also check for water running down from above, especially around the faucet base or handle area.
- Tailpiece slip-joint leak: treat it like other slip joints. Reseat and replace the washer.
- Sink strainer leak: if water appears around the underside of the sink bowl right where the strainer passes through, the strainer likely needs to be removed and reset with fresh plumber’s putty or the correct gasket.
- Faucet base leak that shows up under the sink: water can run down the faucet body or deck plate and drip into the cabinet. Wipe the underside of the countertop and faucet shank area dry, run the faucet, and look for water starting up high.
5) Dishwasher drain hose or branch tailpiece leak
Many kitchen sinks have a dishwasher hose that connects to a small barb on the tailpiece or disposal inlet.
- Check the hose clamp: tighten it and inspect for cracks at the end of the hose.
- If the hose end is split or hardened: trim 1/2 inch off (if you have slack) and re-clamp, or replace the hose.
- If the plastic barb fitting is cracked: replace the branch tailpiece or disposal inlet fitting.
6) Pull-down sprayer hose leaks
Pull-down and pull-out faucets have a hose that moves every day. That movement can wear seals or loosen quick-connect fittings.
- Check the quick-connect: push it fully seated, then tug gently to confirm it is locked.
- Look for drips at the spray head: sometimes water runs down the hose from above, making it look like a cabinet leak.
- If the hose jacket is damaged or it leaks mid-hose: replace the hose. Repairs rarely last on moving parts.
7) Garbage disposal leaks
Disposals add a few extra leak points, and one of them is the “nope, replace it” kind.
- Leak at the top mounting ring: look for drips where the disposal meets the sink flange. It may need the mounting ring re-seated, or the sink flange putty and gasket redone.
- Leak at the discharge elbow: check the elbow gasket and screws where the disposal outlet meets the drain pipe. A new gasket often fixes it.
- Leak from the bottom of the disposal: that usually means the internal seal or body has failed. If it is dripping from the bottom housing, replacement is typically the fix.
Temporary fixes that buy time
I am all for smart stopgaps, especially if the leak pops up at 9 p.m. on a Sunday. Just remember: temporary means you still plan the real repair.
Pipe repair tape (silicone self-fusing tape)
- Best for: small pinhole leaks on a rigid pipe section where you can wrap tightly.
- Not great for: slip-joint connections, braided supply lines, or areas that move.
- How: dry the pipe, stretch the tape as you wrap, overlap each pass, and extend beyond the leak area.
Epoxy putty
- Best for: a short-term patch on a small crack where replacement is not immediate.
- Important: treat it as temporary, especially on pressurized lines. Use a product rated for potable water if it is on a supply line, and follow the package cure time and pressure guidance.
- How: shut off water, drain pressure, roughen and dry the surface, knead putty, press firmly around the leak, and allow full cure before restoring pressure.
What not to do
- Do not tape over a leaking compression fitting and call it fixed.
- Do not patch a bulging or corroded supply line.
- Do not keep “snugging” a plastic nut until it cracks. If it will not seal, it is usually misaligned or missing a washer.
When to replace parts instead of tightening
Tightening is great when a connection has simply loosened. Replacement is smarter when a part has physically failed.
- Replace the supply line if it shows corrosion, kinks, bulges, or leaks from the hose itself.
- Replace washers if they are brittle, cracked, flattened, or deformed.
- Replace the trap if the plastic is cracked, the metal is heavily pitted, or the joints will not seal even with new washers and proper alignment.
- Replace the shutoff valve if it will not fully shut off or the body is seeping.
- Replace the disposal if it is leaking from the bottom housing.
Step-by-step: reseat a slip-joint
If you only take one repair skill from this page, make it this one. Reseating a slip joint fixes a huge chunk of under-sink leaks.
- Put a bucket under the joint and loosen the nut.
- Slide the nut back and remove the tapered washer.
- Clean the pipe end and the receiving fitting.
- Install a new washer (or reuse the old one if it is flexible and undamaged).
- Align the pipes so they meet naturally without forcing.
- Hand-tighten the nut fully. Then test.
- If it weeps, tighten just a touch more. If it still weeps, disassemble and check alignment and washer orientation.
Washer orientation reminder: on most slip-joint washers, the tapered side faces the fitting it is sealing into. If you flip it, it can drip no matter how tight you go.
Why under-sink leaks happen
- Vibration and use: opening and closing valves, using a pull-down sprayer, and bumping pipes when storing cleaners can slowly loosen fittings.
- Misalignment: if the trap is under tension, it will fight the washers and eventually seep.
- Aging rubber: washers dry out, flatten, and stop sealing.
- DIY remodel leftovers: one slightly wrong pipe length can create a permanent “almost fits” situation.
My prevention habit is simple: once or twice a year, I pull everything out from under the sink, wipe the pipes, and run the faucet while I look for any shine or dampness. Five minutes now beats replacing a cabinet bottom later.
After the leak: dry it out
Once you have it fixed, do not just close the cabinet and hope. Drying is how you avoid the “mystery smell” a month later.
- Wipe up standing water and pull out wet mats, bins, or cleaners.
- If the cabinet bottom is swollen particleboard, dry it aggressively and monitor it. Swollen areas can crumble later.
- Run a fan and, if you have one, a dehumidifier for 24 to 48 hours.
- Recheck with a paper towel the next day. A slow seep loves a quiet cabinet.
When to call a plumber
Most under-sink leaks are beginner-friendly. A few are not worth pushing through if you are uncomfortable.
- You cannot get the shutoff valve to close, or it starts leaking badly when you touch it.
- The leak is coming from inside the wall or from a corroded pipe stub-out.
- You have galvanized or old copper that is thin and fragile.
- You see signs of major rot or mold and want a professional assessment.
Quick checklist
- Dry everything and use paper towels to locate the first drip.
- Identify whether it is a supply-side pressurized leak (often leaks even with the faucet off) or a drain-side leak (shows up when the sink drains).
- Snug fittings gently. Replace supply lines and worn washers instead of forcing them.
- Use repair tape or epoxy putty only as a short-term bridge to a real fix.
If you want, tell me what you see leaking (a nut, a hose, the trap, the valve, or the disposal) and when it leaks. I can help you narrow it down to the exact part and the right replacement.
About Marcus Vance
Content Creator @ Grit & Home
Marcus Vance is a lifelong DIY enthusiast and self-taught home renovator who has spent the last decade transforming a dilapidated 1970s ranch into his family's dream home. He specializes in budget-friendly carpentry, room-by-room renovations, and demystifying power tools for beginners. Through his writing, Marcus shares practical tutorials and hard-learned lessons to help homeowners tackle their own projects with confidence.