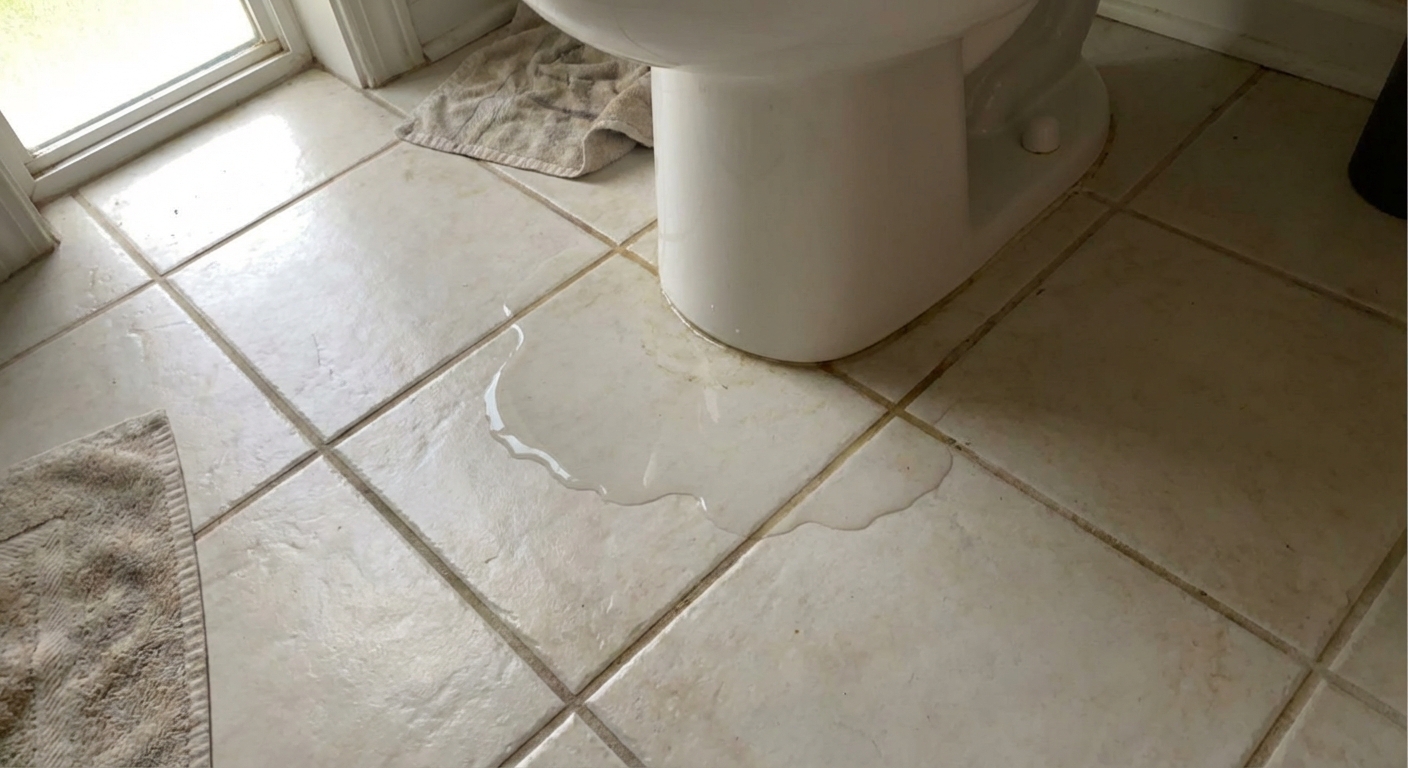
That little halo of water around the toilet base can make your stomach drop. I have been there. The good news is most base leaks come down to a few fixable causes: a compromised wax ring, loose closet bolts, condensation, a supply line drip, or in rarer cases a cracked toilet or flange issue.
This guide walks you through a clean, no-panic diagnosis and the most common repair: pulling the toilet and replacing the wax ring. I will also point out the moments where calling a plumber is the smartest, cheapest move long term.
First: figure out what kind of “leak” you have
Before you grab a wrench, do a quick detective pass. Your goal is to answer one question: is this water coming from the toilet plumbing, or is it just moisture collecting on the outside?
Condensation vs. actual leak
- Condensation (sweating tank or bowl): Water is clear, the floor gets damp in a wider area, and you may notice droplets on the tank or bowl. This is common in humid weather or with very cold fill water.
- Actual leak: Water reappears in a tight ring around the base, especially after flushing. You may also smell sewer gas if the seal is compromised.
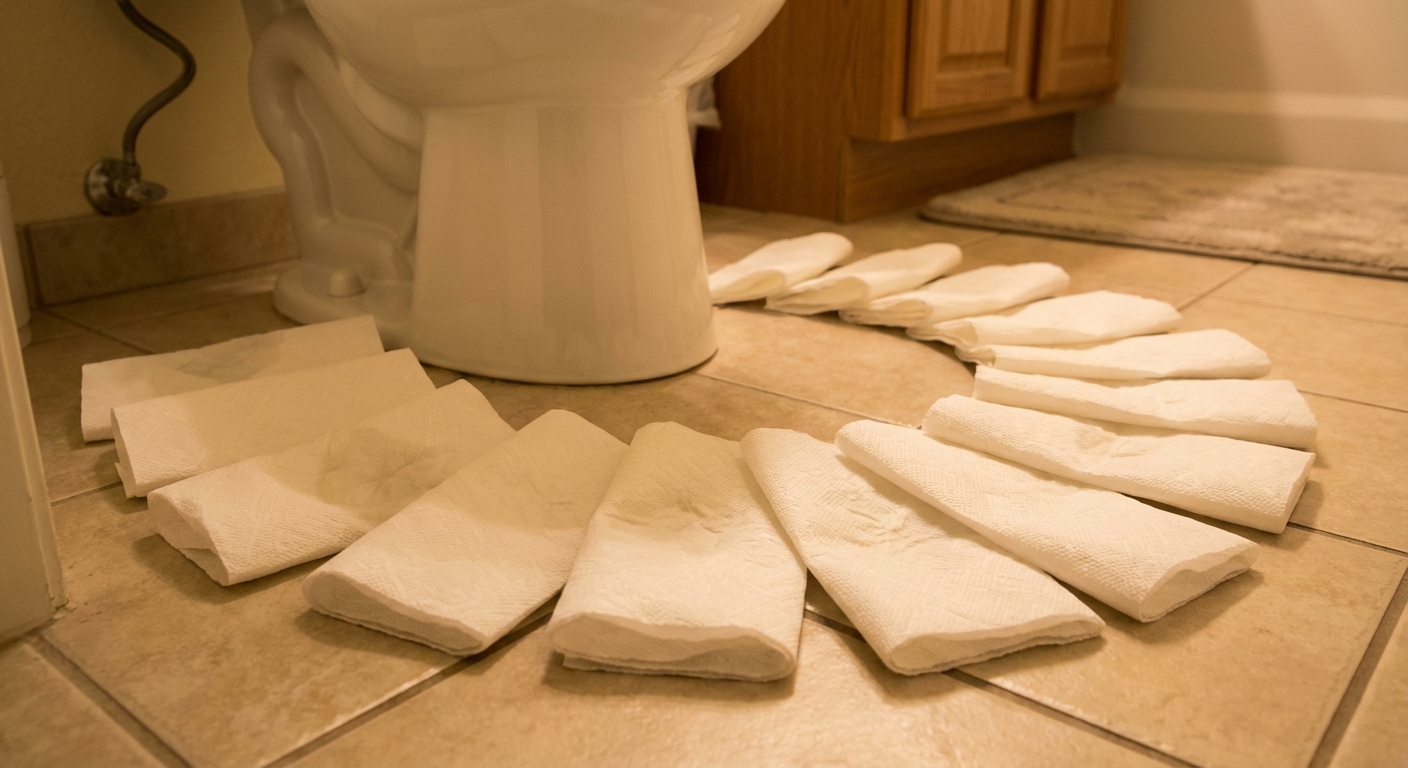
Quick test: Dry everything with towels, then place a few sheets of dry paper towel around the base. Flush once and watch for a wet spot. If the paper towels get wet near the base after a flush, you are likely dealing with a wax ring or flange issue.
Check the easy stuff first
Sometimes the water is not from the base seal at all. Look higher up and work your way down.
- Supply line: Feel the connection at the shutoff valve and under the tank. Even a slow drip can run along the line and end up at the base.
- Tank bolts and gasket: On two-piece toilets, water can leak from the tank-to-bowl gasket or the tank bolts and trickle down.
- Fill valve or shutoff valve: A weeping valve can wet the floor behind the toilet and migrate forward.
Tip from my own mistakes: I once pulled a toilet, replaced the wax ring, and celebrated… only to realize the supply line connection had been the culprit. Always check for drips with dry tissue at each fitting first.
Tools and supplies
You do not need a plumbing truck full of gear. Here is the typical list.
Basic tools
- Adjustable wrench or 1/2-inch wrench
- Putty knife or plastic scraper
- Utility knife (optional)
- Bucket and sponge or shop towels
- Rubber gloves
- Small level
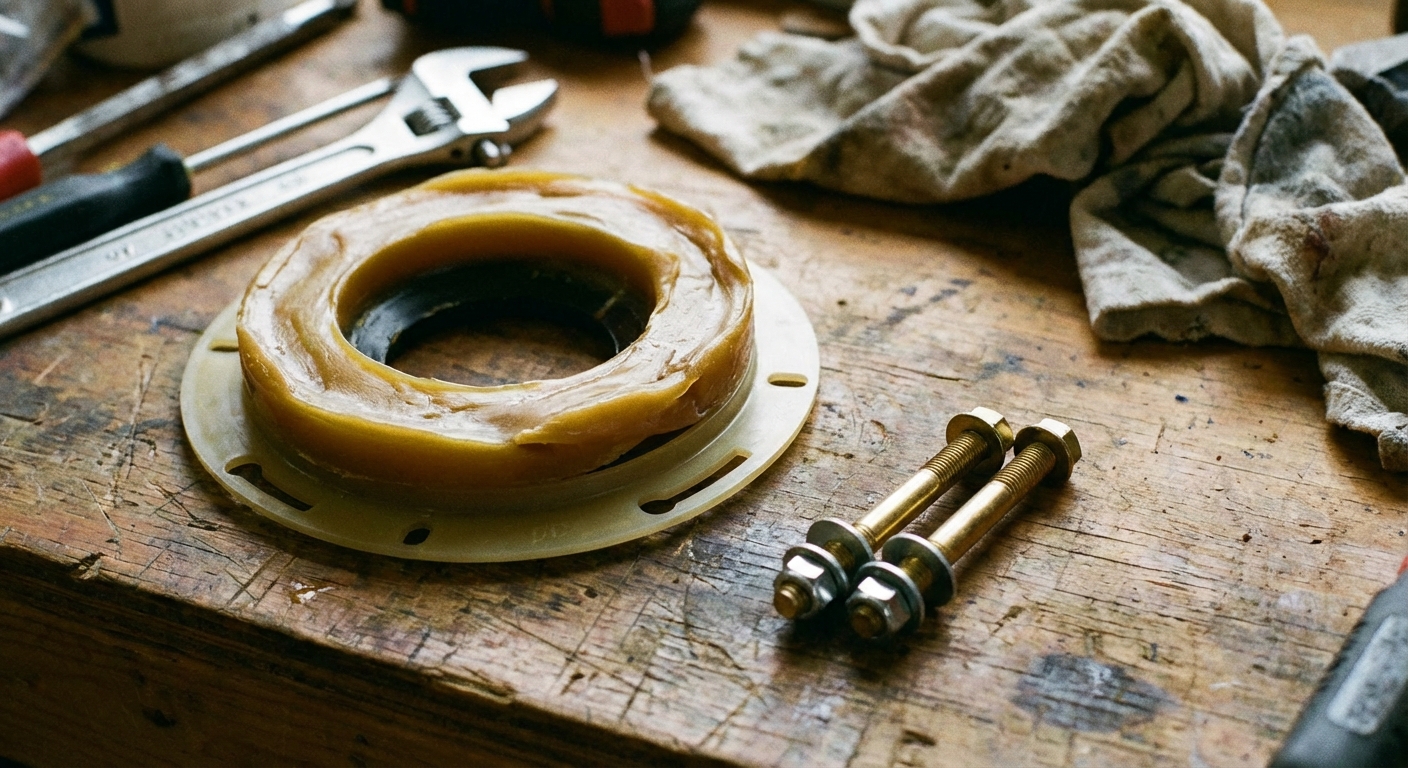
Common replacement parts
- Wax ring (standard or extra-thick)
- Wax ring with horn (only if your setup needs it, more on that below)
- New closet bolts and nuts (recommended)
- Toilet shims (plastic, not wood)
- Optional: new supply line if yours is old or corroded
Budget note: A wax ring and bolt kit is usually inexpensive. Replacing both while the toilet is up is cheap insurance.
Step 1: try tightening the closet bolts (carefully)
If the toilet rocks, even slightly, the wax seal can fail. Sometimes you can stop a minor leak by snugging the closet bolts, but this is not a cure for a fully blown wax ring.
- Pop off the plastic caps at the base.
- Use a wrench to turn each nut just a little, alternating sides.
- Stop when snug. Do not crank down.
Important: Toilets are porcelain. Over-tightening can crack the base. If the nuts keep spinning without getting snug, the bolts may be corroded or the flange slots may be damaged, which often means you are headed toward a pull-and-repair anyway.
Dry the floor, do the paper towel test again, and flush. If it still wets the towels, move on to wax ring replacement.
Step 2: pull the toilet and replace the wax ring
This sounds intimidating, but it is mostly a careful, organized process. Set aside an hour or two the first time you do it. The biggest keys are cleanliness, a steady lift, and making sure the toilet sits solid when you reset it.
2A: shut off water and drain
- Turn the shutoff valve clockwise until it stops.
- Flush to empty the tank and bowl.
- Hold the handle down to push out as much water as possible.
- Sponge out the remaining water from the tank and bowl into a bucket.
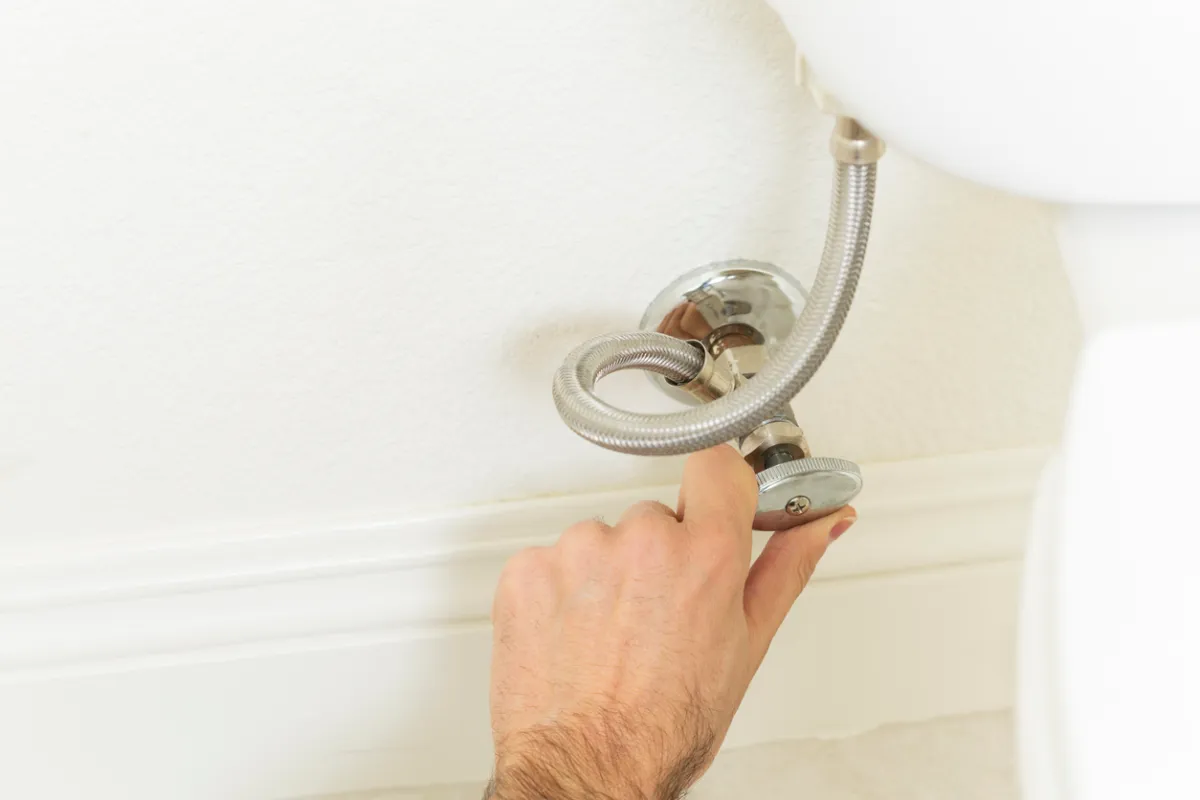
2B: disconnect supply line
Use an adjustable wrench to loosen the nut at the bottom of the tank. Have a towel ready for a little residual water.
2C: remove caps and nuts, then lift the toilet
- Remove the closet bolt caps.
- Remove the nuts and washers.
- Gently rock the toilet to break the wax seal.
- Lift straight up and set the toilet on an old towel or a piece of cardboard.
Solo DIY tip: Toilets are awkward more than they are heavy. If you have back issues or a tight space, ask for a second set of hands. It is not a pride contest.
2D: scrape away old wax and inspect
Scrape old wax from:
- The bottom outlet of the toilet
- The flange on the floor
Now inspect the flange. Look for cracks, missing chunks, rusted-out metal, or screws that no longer bite into the subfloor.
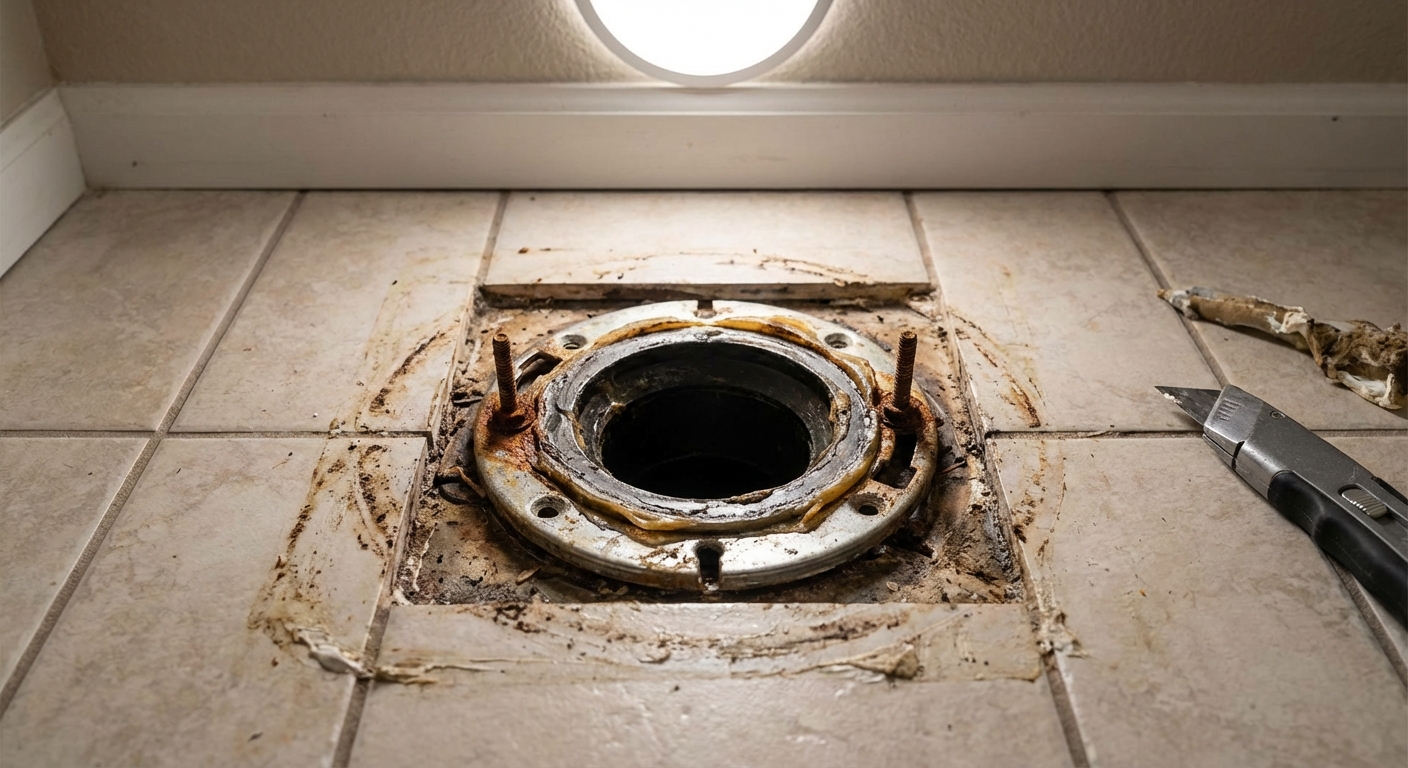
Flange height matters: Ideally, the top of the flange sits about level with the finished floor or slightly above. If your flange is too low because of new tile or flooring, a standard wax ring may not compress enough to seal. In that case, you may need an extra-thick wax ring or a flange extender.
2E: choose the right wax ring
- Standard wax ring: Most toilets with a properly set flange.
- Extra-thick wax ring: Helpful if the flange sits a bit low.
- Wax ring with horn (plastic funnel): Can help guide waste into the drain, but it can also restrict flow if misaligned or if the drain opening is smaller. If you are unsure, a standard ring is often the safest bet.
If your toilet has rocked for a while, plan to use shims when resetting it so the wax ring is not doing the job of stabilizing the toilet.
2F: install new closet bolts
Slide new bolts into the flange slots and snug them in place per your bolt kit instructions. Many kits include small plastic retainers to keep the bolts upright. Use them. It makes the reset much less frustrating.
2G: set the wax ring and reset the toilet
- Press the wax ring onto the toilet outlet or set it on the flange, depending on the product instructions. I typically prefer placing it on the toilet outlet so it stays centered during the lift.
- Line up the toilet with the bolts.
- Lower straight down, keeping the toilet as level as possible.
- Once the base contacts the floor, press down with your body weight to compress the wax.
Do not lift and re-seat repeatedly. Wax does not like second chances. If you set it down crooked and it smears badly, it is best to replace the wax ring with a new one.
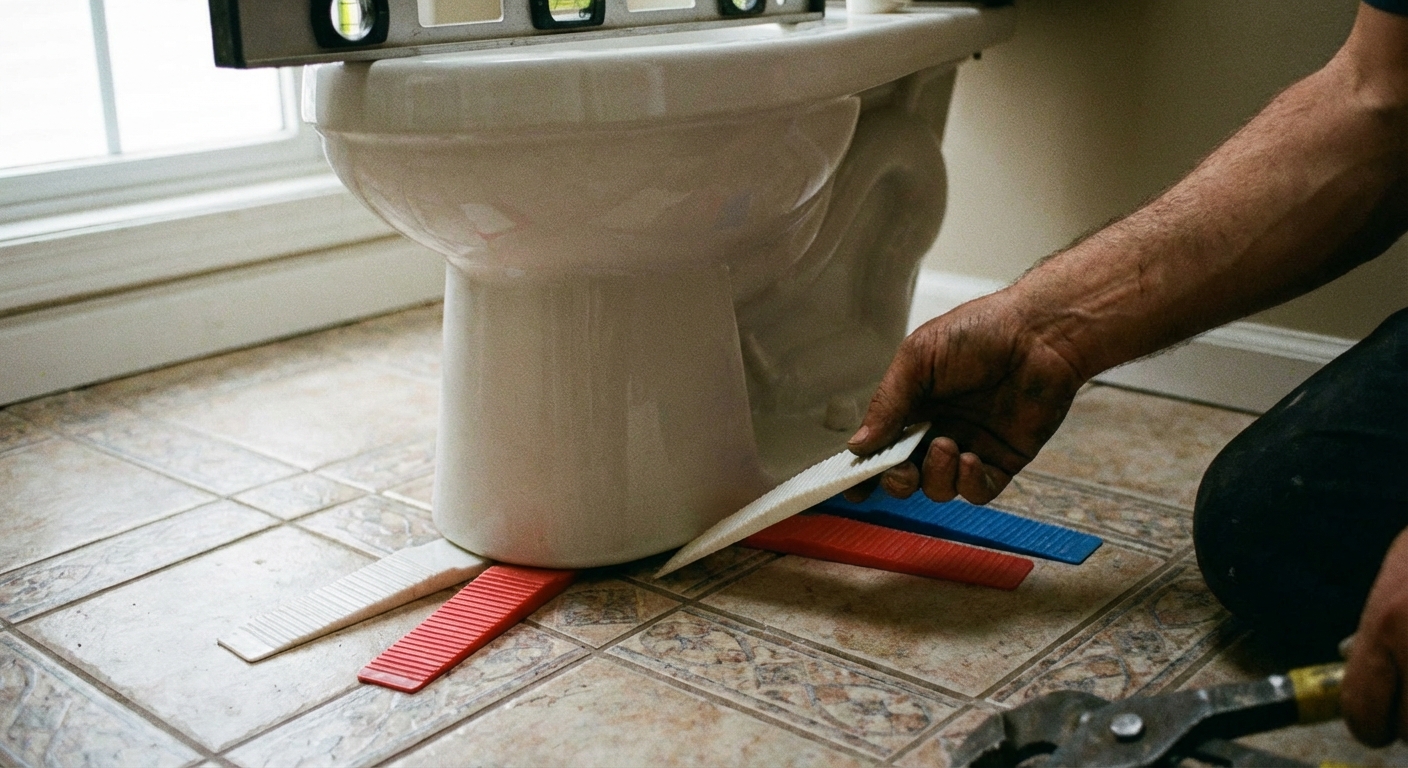
2H: level, shim, and tighten
- Check for rocking. If it rocks, insert plastic shims until solid.
- Use a small level on the bowl rim. Aim for stable more than perfect.
- Tighten nuts evenly, alternating sides. Snug is enough.
- Trim excess shim if needed and snap caps back on.
2I: reconnect water and test
- Reconnect the supply line.
- Turn the shutoff valve on slowly.
- Let the tank fill.
- Flush several times while watching the base and supply connection.
Use dry paper towels again. If they stay dry after multiple flushes, you are in good shape.
What if it still leaks?
If you replaced the wax ring and water still shows up, do not assume you failed. Something else may be going on.
Toilet still rocks
A rocking toilet will eventually break the seal again. Add shims until the toilet is dead stable, then snug the bolts. If the floor is badly uneven or soft, you may be looking at subfloor repair.
Cracked bowl or base
Dry the porcelain completely and inspect with a bright light. Hairline cracks near the base can leak only during a flush.
- If you see a crack in the porcelain, replace the toilet. Repairs are unreliable and the risk of sudden failure is not worth it.
Damaged flange
If the flange is cracked, broken, or too low, a wax ring alone may not solve it. Common fixes include:
- Flange repair ring that reinforces damaged slots
- Flange extender to raise the sealing surface
- Full flange replacement if it is severely damaged or rotted out around it
Flange work can be DIY-friendly if you have good access, but it can also snowball, especially if the subfloor is compromised.
Leak is actually from above
If the base stays dry after a flush but you still find water later, revisit:
- Supply line connections
- Shutoff valve stem
- Tank bolts and tank-to-bowl gasket (two-piece toilets)
- Condensation on tank or bowl
Condensation fixes: Keep the bathroom ventilated, run the fan, consider an anti-sweat toilet tank liner, or install a mixing valve that warms incoming water slightly if humidity is extreme.
Should you caulk around the toilet base?
This is one of those topics that starts arguments in hardware store aisles.
- Pros: Caulk keeps mop water and splashes from getting under the toilet, and it can help stabilize minor gaps.
- Cons: Caulk can hide a future leak until it has already damaged the floor.
My practical approach: if you caulk, leave a small gap at the back of the toilet uncaulked so a leak has a place to show itself.
When to call a plumber
I am all for DIY, but I am also a fan of knowing when a job is about to get expensive if you guess wrong.
- You see signs of subfloor rot (soft floor, dark staining, spongy plywood)
- The flange is broken and you are not comfortable repairing or replacing it
- You have cast iron plumbing and suspect the flange connection is compromised
- Leaks persist after wax ring replacement and supply checks
- You smell sewer gas even when the floor is dry
If you do call, tell them what you tested and what you replaced. That saves time, and time is most of the bill.
Quick troubleshooting checklist
- Water appears right after flushing: wax ring, rocking toilet, flange height, cracked base
- Water appears slowly over hours: supply line drip, shutoff valve seep, condensation
- Water behind toilet: shutoff valve, supply line, tank fittings
- Toilet rocks: shim it now, or you will be doing the wax ring again later
If you fix a base leak promptly, you are not just saving water. You are protecting the subfloor, blocking sewer gas, and keeping a small annoyance from turning into a weekend-long flooring repair. That is the kind of sweat equity I like.
About Marcus Vance
Content Creator @ Grit & Home
Marcus Vance is a lifelong DIY enthusiast and self-taught home renovator who has spent the last decade transforming a dilapidated 1970s ranch into his family's dream home. He specializes in budget-friendly carpentry, room-by-room renovations, and demystifying power tools for beginners. Through his writing, Marcus shares practical tutorials and hard-learned lessons to help homeowners tackle their own projects with confidence.