A toilet that clogs once is annoying. A toilet that clogs repeatedly is a message. Something is off in the way the toilet is flushing, what is going into it, or what is happening downstream in the drain line.
The good news is that you can troubleshoot this without guesswork, and without replacing the whole toilet on day one. I’ll walk you through the same order I use at my own 1970s ranch: start with the simplest fixes, then move into the “let’s find the real cause” checks.
Why a toilet keeps clogging
Most repeat clogs fall into a handful of categories. If you can match your symptoms to one of these, you can usually skip a bunch of wasted effort.
1) Weak flush issues
Some toilets, especially older early-generation low-flow models, just do not move enough water fast enough to carry waste and paper through the trapway and into the drain.
- Signs: You need to hold the handle down, the bowl clears slowly, or you get frequent “almost clogs.”
- Common causes: Low tank water level, partially clogged rim jets, a worn flapper that closes too soon, or a weak fill and flush setup.
Note: Holding the handle down is a symptom, not a fix. If your toilet only flushes well when you do that, the flapper or chain is usually the real issue. Some flappers are adjustable, but a worn one is often cheaper to replace than to fight.
2) Too much toilet paper at once
This is the most common cause I see in real homes, especially with thick, ultra-plush paper. It can wad up in the trapway like papier-mâché and catch anything that follows.
- Signs: Clogs happen more with certain family members, after cleaning, or when guests are over.
- What “too much” looks like: A dense handful, multiple big wraps, or a bowl that is mostly paper before you flush.
- Quick test: Switch to a thinner, fast-dissolving paper for two weeks and see if the problem drops off. “Septic-safe” can help, but it does not automatically mean it dissolves quickly in every brand.
3) “Flushable” and other non-flushables
Even if the package says flushable, wipes often do not break down like toilet paper. Neither do paper towels, feminine products, cotton swabs, floss, and kids’ “mystery objects.” These can create a partial blockage that snags paper every time.
- Signs: Plunging works temporarily, then clogs return quickly.
- Reality check: If it is not pee, poop, or toilet paper, it should not go down the toilet.
4) Partial blockage in the toilet or nearby drain
A partial clog is the repeat offender. Something is stuck just enough to reduce the pipe diameter. The toilet might flush fine once, then choke when a little extra paper shows up.
- Signs: Slow drain after the flush, gurgling, or the bowl level rises higher than normal before it drops.
- Common spots: Inside the toilet’s trapway, at the closet bend (the first turn directly under the toilet), or in the branch line (the smaller drain line that carries waste from your bathroom to the main line).
5) Main sewer line problems
If multiple fixtures are acting up, or clogs keep coming back no matter what you do, the issue may be farther out in the main line (the larger pipe that takes everything to the street or septic).
- Signs: Toilet clogs plus a tub that drains slowly, gurgling in nearby drains, sewage smell, or backups in the lowest drain in the house.
- Common causes: Roots, a sagging pipe (belly), grease buildup, heavy scale, or a collapsed section in older lines.
6) Hard water and old-pipe roughness
Hard water leaves mineral deposits over time. In toilets, that can restrict rim jets and siphon jets, weakening the flush. In drain lines, older materials like cast iron can also corrode and get rough inside (tuberculation), which grabs paper and reduces the effective diameter. Mineral scale can add to the problem, but the rough, corroded interior is often the main culprit in old cast iron.
- Signs: White crusty deposits under the rim, weak swirl, and a toilet that seems “lazy” even when it is not clogged.
- Often paired with: Mineral scale on faucets and showerheads, and water spots everywhere.
7) Venting problems
Your plumbing vent is the pipe system that brings in air so drains can flow smoothly. If a vent is blocked, the toilet may gurgle, drain sluggishly, or act like it is fighting itself.
- Signs: Gurgling after a flush, bubbling in a nearby sink or tub, sewer odor that comes and goes, or slow draining that is not solved by plunging.
- What usually causes it: Leaves and debris, a bird nest, or winter ice blockage in the roof vent stack.
Safety first
Before you start trying things, do a few quick moves to protect your bathroom and yourself.
- Stop the water: If the bowl is rising, turn the shutoff valve behind the toilet clockwise.
- Pause if it is close to the rim: Give it 10 to 15 minutes. Sometimes the water slowly drops as the clog relaxes.
- Gear up: Gloves are a good idea. Eye protection is smart if you are plunging or augering. Keep towels nearby.
- After any overflow: Disinfect the floor and base of the toilet. Do not forget the bottom of the vanity and the edges of the flooring where water likes to hide.
If needed, remove the tank lid carefully. You can lift the float to stop a refill, or turn off the water and flush once to lower the tank level.
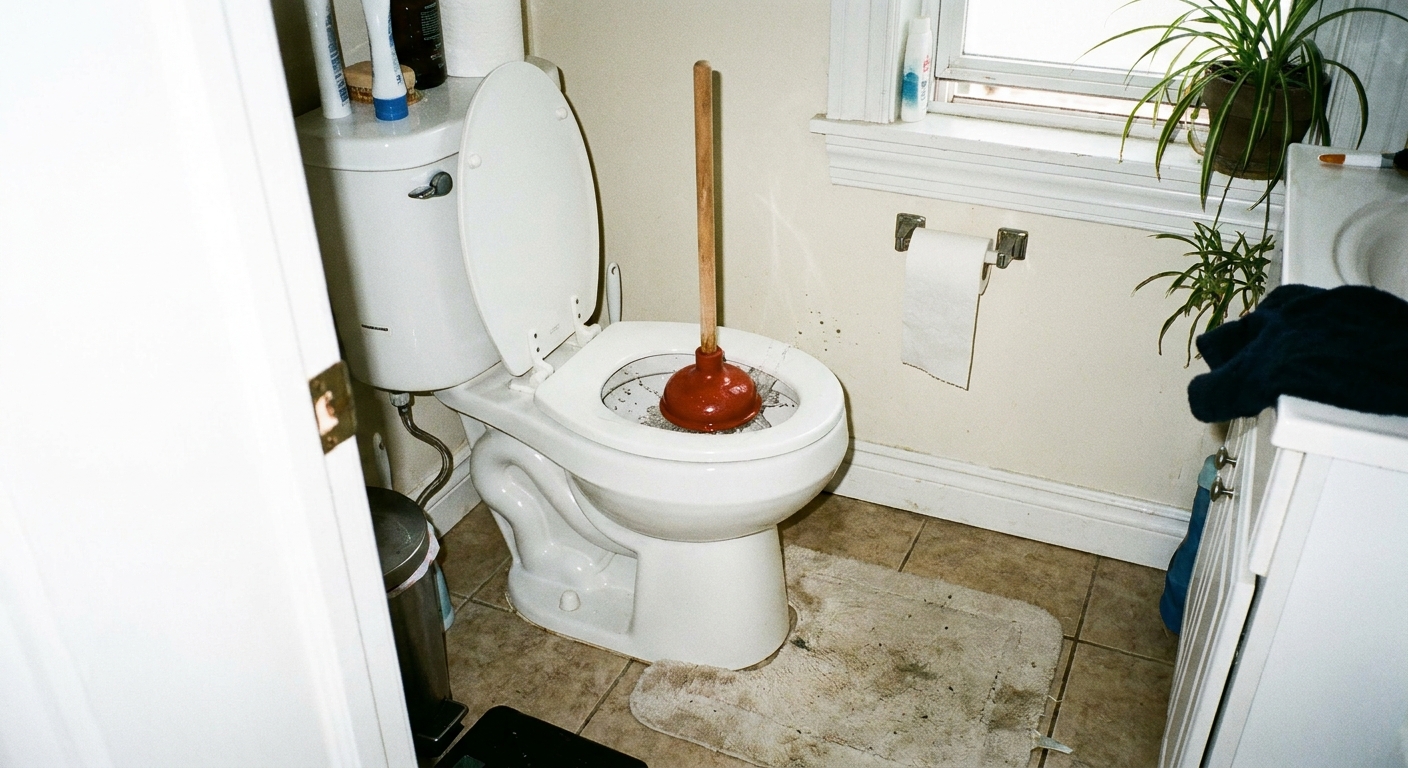
Fix 1: Plunge the right way
Most people jab with a plunger. What you want is a seal and a push-pull pulse that moves the clog back and forth until it breaks apart.
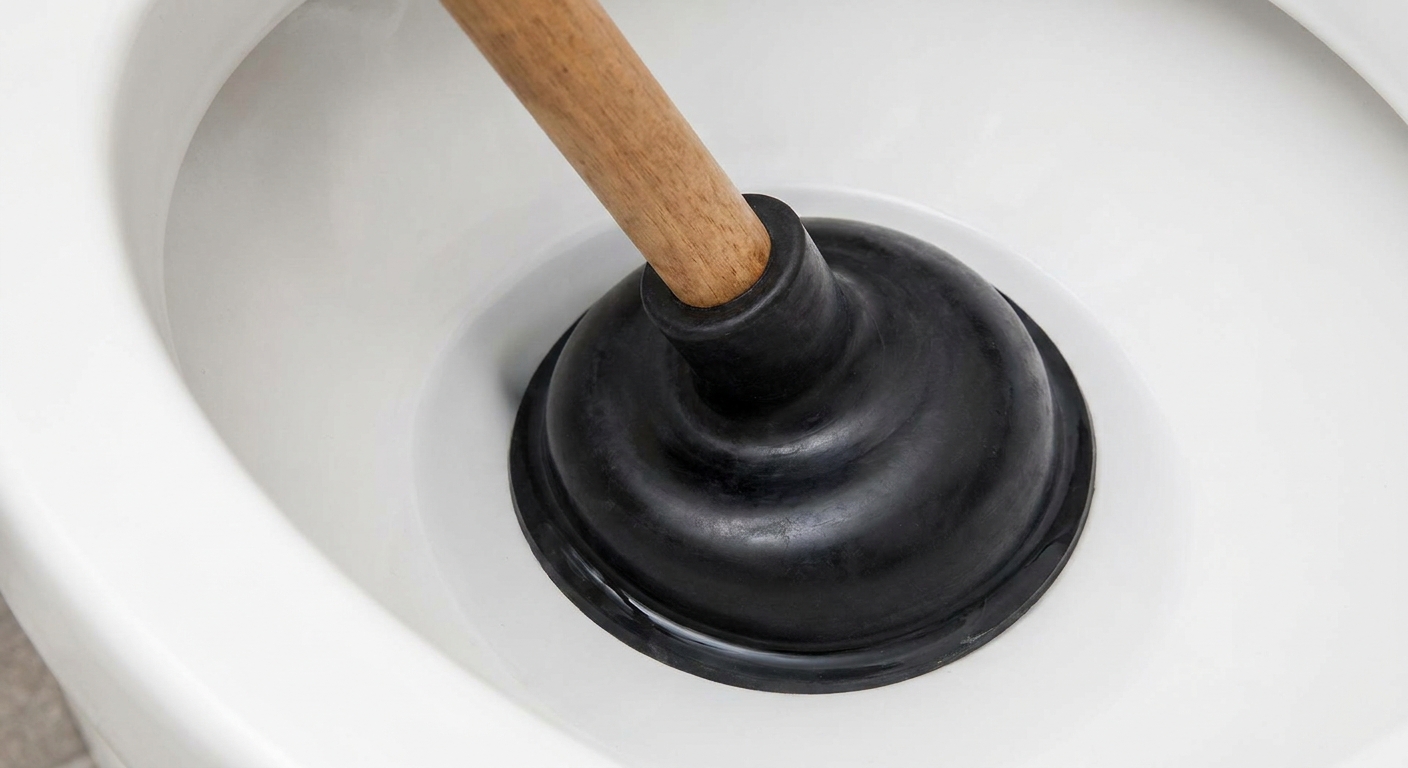
Use the right plunger
For toilets, you want a flange plunger, the kind with the extra rubber sleeve that fits into the drain opening. A flat sink plunger struggles to seal.
My repeatable plunging steps
- Soften the rubber: Run warm or hot tap water over the plunger for 30 seconds so it seals better. Not boiling water.
- Set the seal: Press the flange into the drain hole at the bottom of the bowl.
- Start gently: The first push should be controlled so you do not splash.
- Work the clog: Do 15 to 25 strong push-pull strokes while maintaining the seal.
- Test: Lift the plunger straight up. If the water drops, flush once. If it threatens to rise, stop and plunge again.
Pro tip: If the water in the bowl is low, the plunger cannot do its job. Add enough water to cover the plunger cup by an inch or two.
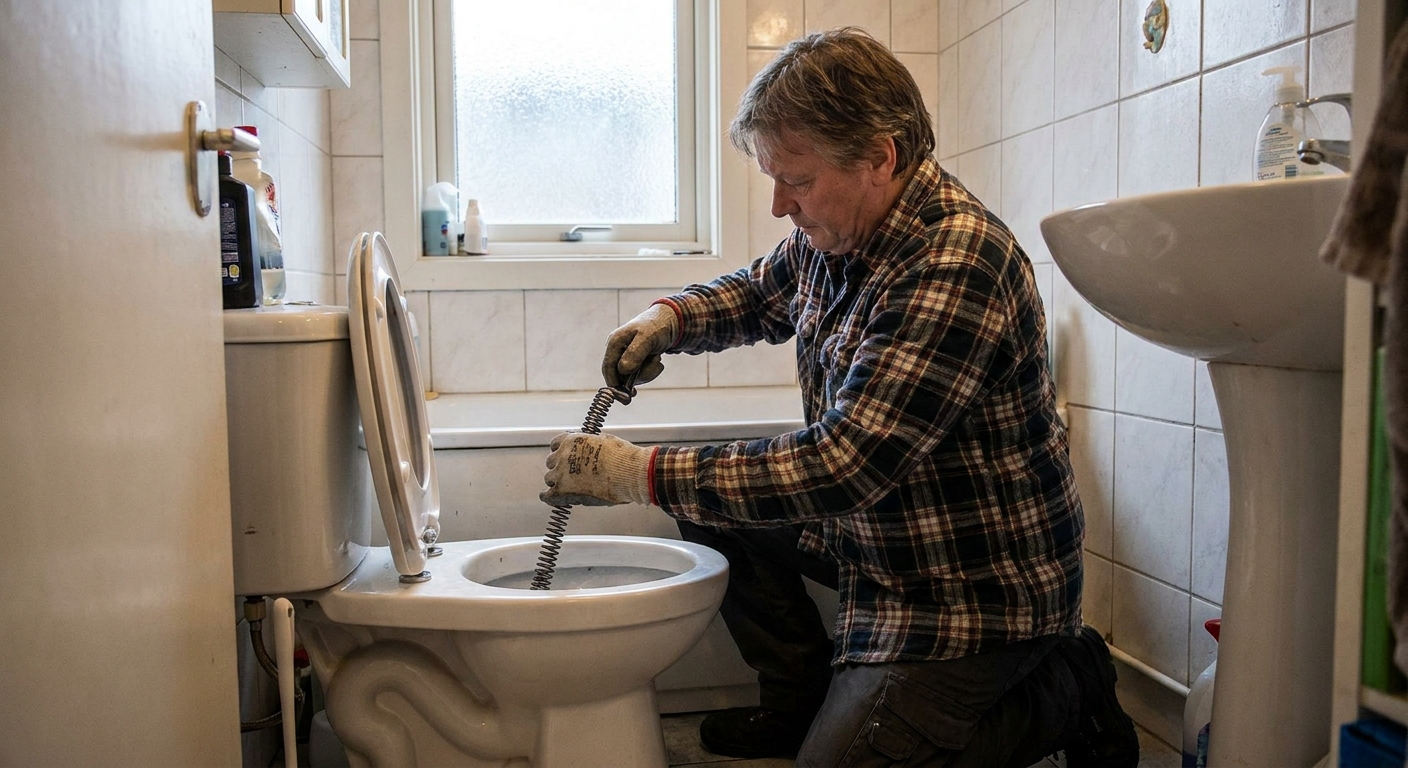
Fix 2: Use a toilet auger
If you are dealing with repeat clogs, a toilet auger (also called a closet auger) is your best friend. It is designed to navigate the toilet trapway without cracking porcelain.
When an auger beats a plunger
- Clogs return after successful plunging
- You suspect wipes, a small toy, or a wad of paper
- The toilet drains slowly even after the bowl clears
How to auger without scratching
- Protect the bowl: Make sure the auger has a rubber sleeve at the elbow. If not, add tape and work carefully.
- Feed the cable: Insert the curved end into the bowl drain opening.
- Crank slowly: Turn the handle clockwise while gently pushing in.
- Feel for resistance: When you hit the clog, keep cranking to break through or hook it.
- Retract and inspect: Pull the cable back slowly. Have a trash bag ready.
- Flush test: Flush once. If it clears strongly, you are likely good.
If you pull out a wipe or something that should not be there, that is your root cause. Fix the habit and the clogs usually stop.
Fix 3: Make the flush stronger
If the toilet clogs mostly with normal use, and the bowl seems to half flush, troubleshoot the flush power. Weak flushes leave material behind that becomes the next clog.
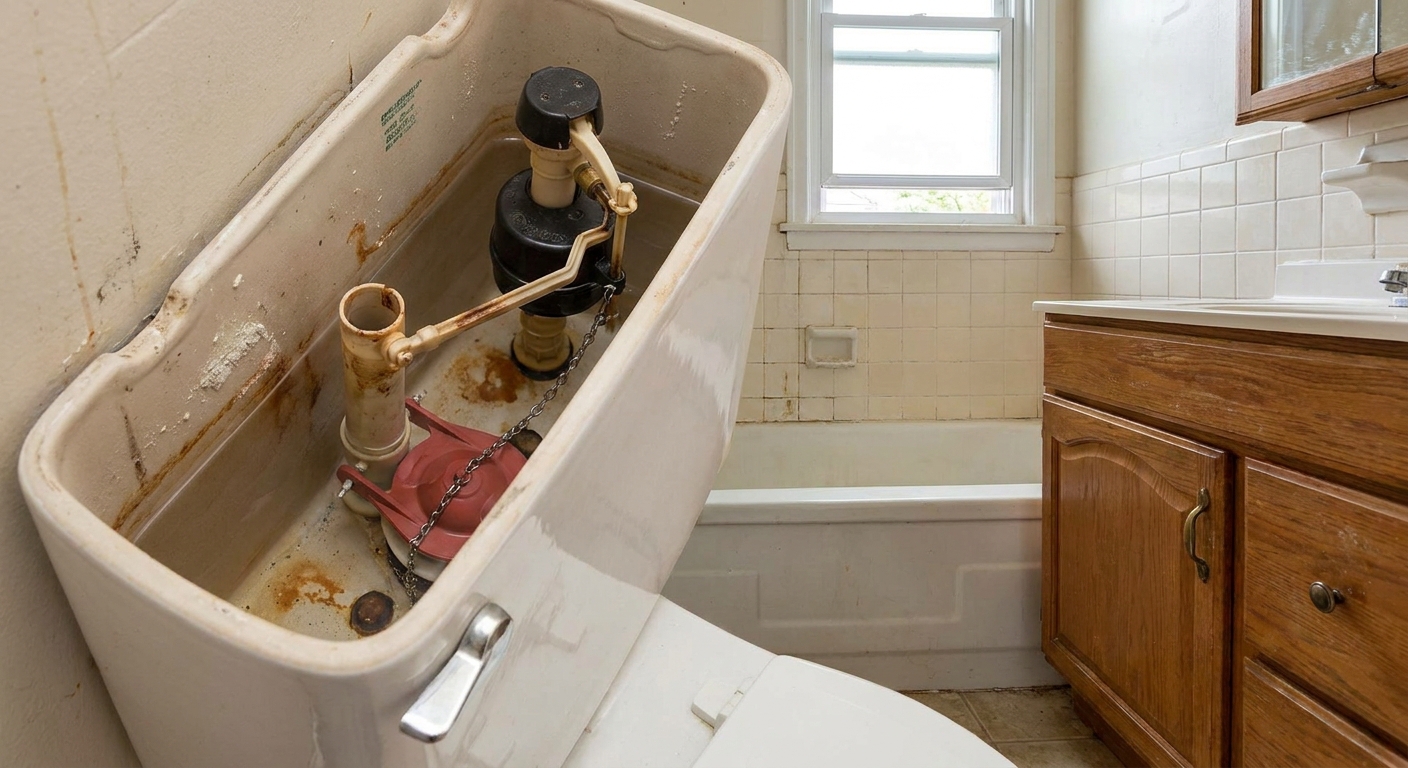
Check tank water level
Pop the tank lid. The waterline should usually be about 1 inch below the top of the overflow tube (exact targets vary by model).
- If the level is low, adjust the float (screw or clip depending on the fill valve type).
- If the fill is slow, the fill valve may be failing or partially clogged.
Check the flapper and chain
- Flapper closes too fast: Not enough water leaves the tank. Replace the flapper if it is warped or slimy and not sealing. Some flappers have adjustment settings, but a stiff, old flapper usually belongs in the trash.
- Chain too tight: The flapper may not seat properly and can cause running.
- Chain too loose: The flapper may not lift fully for a full flush.
Clear rim jets and siphon jet buildup
Mineral buildup under the rim can reduce flow. You can try soaking with vinegar, or for heavier scale, use a toilet-safe descaling approach.
- Vinegar approach (can help): Turn off water, flush to lower the tank, then add vinegar to the overflow tube so it runs through the flush path into the bowl. Let it sit, then scrub rim holes with a small brush. Results vary by toilet design, and some toilets do not let the vinegar soak the rim passages effectively.
- If vinegar does nothing: Go more direct. Scrub rim holes, clean the siphon jet opening, or use a toilet-safe descaler per label directions.
- Reality check: If your home has very hard water and the toilet is older, the internal passages can get restricted enough that replacement is the most time-efficient fix.
Fix 4: Check the drain and vent
If plunging and augering help but do not solve it, the problem may be beyond the toilet in the branch line, the main line, or even the venting.
Simple checks
- Listen for gurgling: After a flush, do you hear gurgling in the tub or sink? That can point to a vent issue or a downstream restriction.
- Check other drains: If the toilet clogs and a nearby tub drains slowly, suspect a branch line clog.
- Watch the bowl: A slow, steady drop after the flush often means the line is restricted, not fully blocked.
- Smell matters: Sewer odor plus gurgling is a strong hint that airflow and drainage are not happy.
What to do next
At this stage, you are usually choosing between:
- Snaking from a cleanout: If you have an accessible cleanout, a drain snake can clear the branch or main line more effectively than working through the toilet.
- Calling for a pro snake or jet: Especially if you suspect grease, roots, or years of buildup.
- Venting next steps: If you strongly suspect a blocked roof vent, this is often a “call a pro” moment unless you are comfortable working on a roof. A plumber can clear the vent safely and confirm whether the issue is venting, a downstream clog, or both.
Important: Avoid chemical drain openers in toilets. They often do not solve the underlying problem, and they can create a hazardous, corrosive bowl of liquid you have to work around.
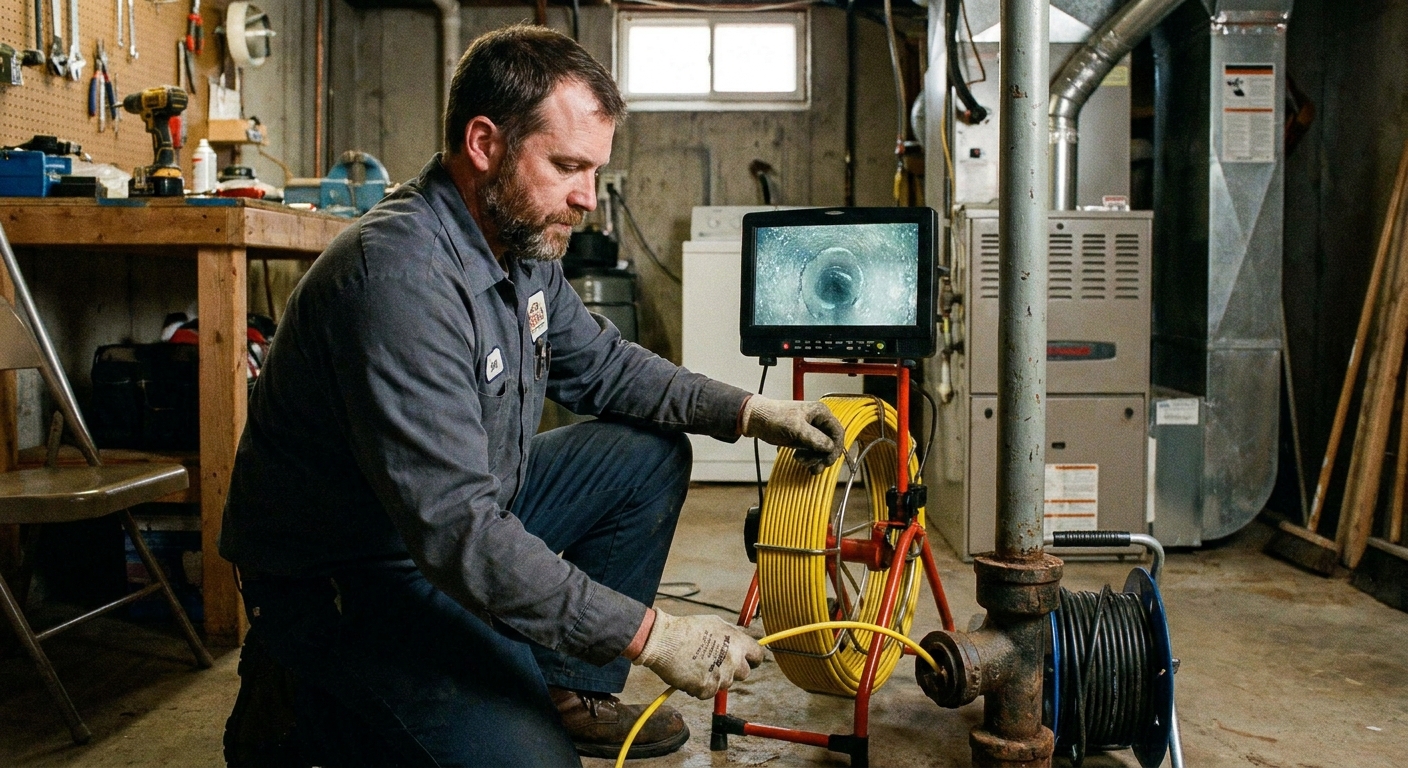
Fix 5: Get a camera inspection
If clogs keep coming back, or you have any signs of a main line issue, a camera inspection is the fastest way to stop guessing.
When I recommend a camera
- Two or more fixtures are backing up
- You cleared the toilet, but clogs return within days or weeks
- The home is older and has cast iron, Orangeburg, or clay sewer piping
- You suspect roots, a belly, or a broken line
What a camera can reveal
- Root intrusion at joints
- Collapsed or offset pipe sections
- Scale or heavy corrosion narrowing the pipe
- Foreign objects lodged in the line
- Where the problem sits, so repairs are targeted
Hard water: stop the slow flush cycle
If you live with hard water, repeated clogs can be a symptom of a toilet that is slowly losing flush performance. This is the slow flush cycle I see in older homes: rim jets crust up, flush weakens, paper starts hanging around, and then you are plunging way more than you should.
- Monthly: Clean under the rim and keep rim jet holes clear.
- Every 6 to 12 months: Inspect tank parts and replace a worn flapper before it causes a weak flush.
- Long game: If your water is extremely hard, consider a whole-house water softener to protect fixtures and help slow buildup.
When to replace the toilet
I am a repair first guy, but some toilets are just chronic cloggers by design or by age.
- Replace if: The toilet is an early low-flow model that struggles even when everything is working, the internal trapway is rough and narrow, or mineral restriction is severe.
- Consider replacement if: You improved flush power, cleared the line, and the toilet still clogs under normal use.
If you shop for a new toilet, MaP performance ratings can be a useful filter, but do not treat them like magic. Real-world performance also depends on design, installation, and what your house pipes look like. In plain English: pick a model with a strong reputation for clearing in one flush, not just a good number on a chart.
Quick order checklist
- Step 1: Confirm no one is flushing wipes, floss, paper towels, or “flushable” anything.
- Step 2: Reduce paper load for a couple weeks and see if clogs drop off.
- Step 3: Plunge with a flange plunger using a seal and push-pull strokes.
- Step 4: Run a toilet auger, especially for repeat clogs.
- Step 5: Improve flush power: tank level, flapper, rim jets.
- Step 6: Check for branch, main line, or vent symptoms: gurgling, slow drains, smells, lowest drain backups.
- Step 7: Get a camera inspection if clogs persist or multiple fixtures act up.
When to stop DIY
- Repeat overflows that threaten flooring or ceilings below
- Any sewage backup, especially in the lowest drain
- Multiple fixtures backing up at once
- You suspect a main line clog, broken pipe, or blocked vent and you are not equipped to handle it safely
If you get stuck, take notes on what you observed. Water rise behavior, gurgling, smells, and which fixtures are affected are exactly what a plumber will ask, and it can save you money in diagnostic time.
About Marcus Vance
Content Creator @ Grit & Home
Marcus Vance is a lifelong DIY enthusiast and self-taught home renovator who has spent the last decade transforming a dilapidated 1970s ranch into his family's dream home. He specializes in budget-friendly carpentry, room-by-room renovations, and demystifying power tools for beginners. Through his writing, Marcus shares practical tutorials and hard-learned lessons to help homeowners tackle their own projects with confidence.