A window that won’t stay open is one of those little home problems that turns into a daily annoyance fast. You prop it with a paint stick. You wedge a book in the track. And eventually you accept that the “fresh air” window is basically decorative.
The good news is this is usually a straightforward fix once you identify why the sash is sliding down. Most of the time you are dealing with one of four culprits:
- Broken or weak balances (springs) in a double-hung window
- Friction problems from dirty tracks, misalignment, or swollen wood
- Paint that is binding the sash or stops
- Worn hardware like pivot shoes, sash cams, or latches that no longer line things up
I’ll walk you through quick diagnosis first, then the step-by-step repair that matches what you find. No mystery jargon. No “replace the whole window” energy.
Before you start: safety and a quick check
If your window is very large, very old, or you suspect the glass is loose in the sash, work slowly and wear cut-resistant gloves and eye protection. If you have a second story window and you are removing sashes, keep kids and pets out of the room. A sash can surprise you when a balance releases.
Tools you’ll likely use
- Flathead and Phillips screwdriver
- Pliers
- Utility knife
- Putty knife (stiff works best)
- Small brush and vacuum
- Silicone spray or dry PTFE spray (vinyl windows, check your manufacturer guidance)
- Paste wax (wood windows)
- Replacement balances or hardware (once identified)
My thrifty rule: Do the cleaning and paint-release steps first. It costs almost nothing, and I have “fixed” more than one window just by getting 50 years of grit and paint out of its way.
Quick diagnosis: what kind of window, and what’s it doing?
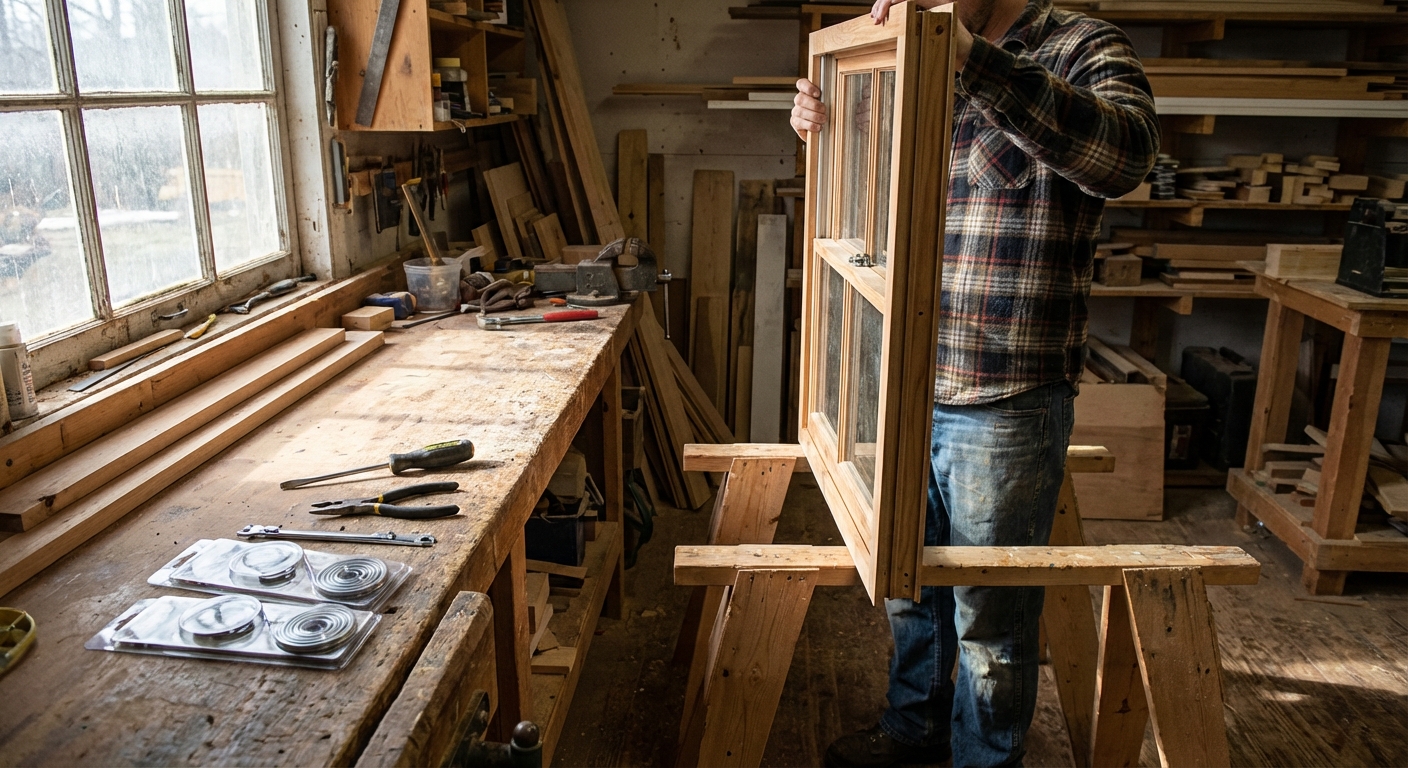
Step 1: Confirm the style
This guide focuses on the most common “won’t stay open” situation: double-hung windows, where the bottom sash slides up and down (and often the top sash slides too). If your window is a horizontal slider or a crank-out casement, the fix is usually different (rollers or a crank operator).
Step 2: Try these simple tests
- Does the sash fall quickly, like it has no resistance? That points to a broken balance, disconnected pivot, or snapped sash cord.
- Does it feel sticky and hard to move, especially in humid weather? That points to swollen wood, paint binding, or debris in the track.
- Does it stay up only if you push it slightly left or right? That suggests misalignment, worn pivot shoes, or a tilted sash.
- Is the window painted shut, or do you hear paint cracking when you force it? Paint is likely gluing the sash to the frame or stops.
- Does it stop at an odd height and refuse to go higher? Check for engaged sash limit stops (also called vent stops). Some are meant for child safety and ventilation, and they can be mistaken for a balance problem.
The most common fix: replace failed balances
Balances are the counterweight system that helps the sash stay where you put it. Older wood windows often use weights and cords in the side jamb pocket. Many vinyl and newer wood windows use spring-based balances (spiral, block-and-tackle, or constant-force coil).
Identify your balance type
- Block-and-tackle balance (common in vinyl): A metal or plastic channel on each side with a cord and spring inside.
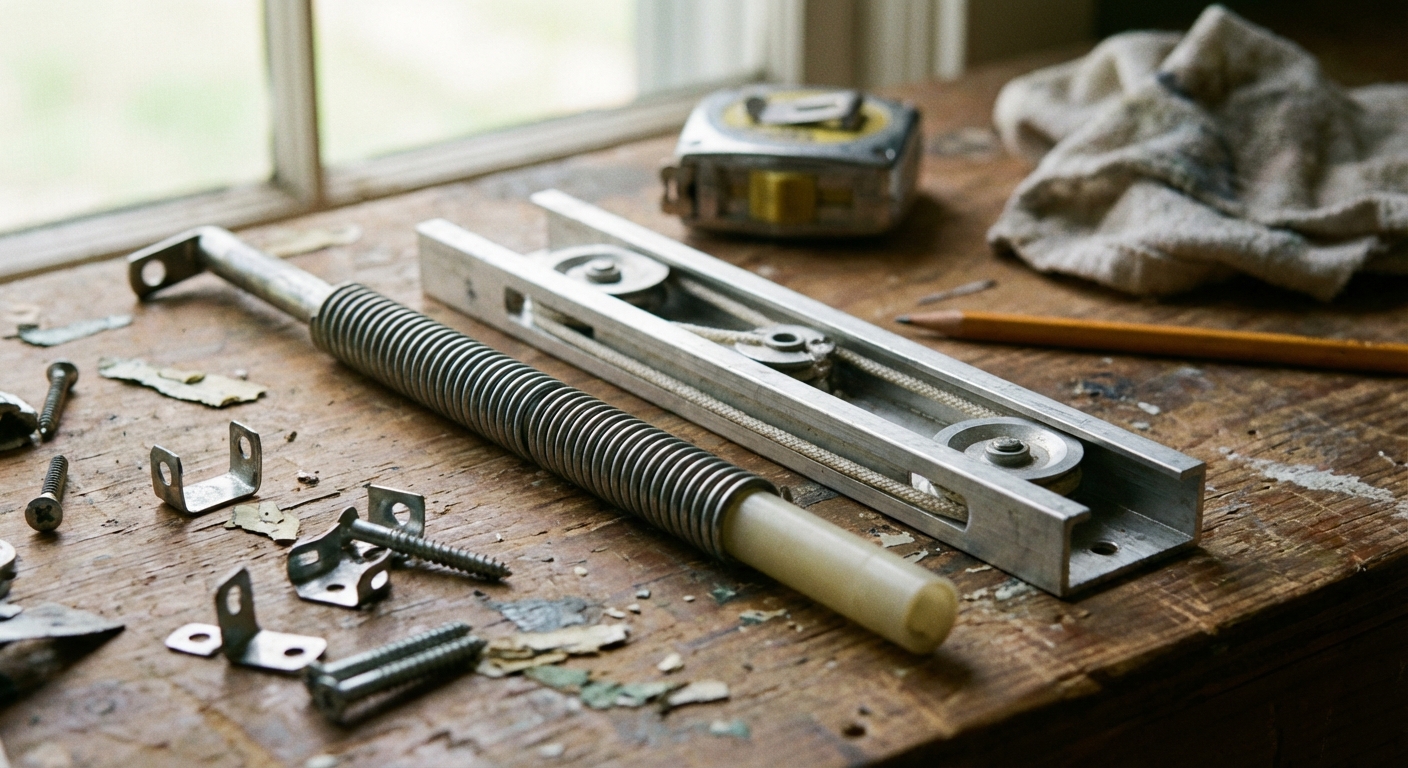
- Spiral balance (common in many tilt double-hungs): A visible metal tube with a spiral rod, usually on each side jamb.
- Constant-force (coil) balance (very common in modern vinyl): A coiled steel band (like a tape measure) that winds and unwinds inside a small housing, usually near the bottom jamb, connected to a pivot shoe.
- Weight and pulley (older wood windows): A rope or chain over a pulley, connected to a hidden weight inside the side pocket.
Pick the right strength
Getting the correct balance strength matters as much as getting the right length. Many replacements use stamped codes or color tags. If you cannot find a code, the most accurate approach is to weigh the sash (remove it and use a bathroom scale). Most parts charts key off sash weight plus balance length.
Tilt windows: remove the bottom sash
- Unlock the window. Raise the bottom sash a couple inches.
- Tilt the sash in. Most tilt windows have tilt latches at the top of the sash. Pull them in and tilt the sash toward you.
- Lift one side up and out. Once tilted, shift the sash to free one pivot pin, then the other. Set the sash somewhere safe.
If your window does not tilt, look for removable interior stops. Many wood windows have thin strips (stops) that pry off carefully.
Fix A: block-and-tackle balance replacement
This is the “window falls shut like a guillotine” scenario on many vinyl double-hungs.
- Locate the balance channel. It runs vertically in the side jamb.
- Find the shoe. At the bottom is a pivot shoe where the sash pivot pin sits.
- Relieve tension carefully. Use a flathead screwdriver to rotate the shoe cam (if present) to the release position. Keep your face and fingers out of the track and out of the line of travel. The balance can snap upward fast.
- Remove the balance. Usually it is held by one or two screws at the top. Remove screws and slide it out.
- Match the replacement. You need the same length and the correct strength rating. Look for stamped numbers. If not, measure the channel length and weigh the sash.
- Install the new balance. Screw the top in place, seat the shoe in the track, and set the cam back to the locked position.
- Reinstall the sash. Engage both pivot pins into the shoes, tilt up, and test movement.
Tip from my mistake pile: Replace balances in pairs. I once replaced just one side, and the window started drifting and wearing the new part unevenly within months.
Fix B: spiral balance adjustment or replacement
Spiral balances can sometimes be re-tensioned if the sash slowly slides down but the parts are not broken.
- Remove the sash (tilt in if possible).
- Check the spiral rod and clip. If the rod is disconnected, re-seat it. If it is bent or the tube is damaged, replace the balance.
- Increase tension using a spiral balance tension tool (best) or pliers (carefully). Rotate the rod a turn or two to add tension, then lock it back into the clip.
- Test and fine-tune. Too much tension makes the sash want to spring up. Too little and it slides down.
Fix C: constant-force (coil) balance basics
Coil balances often live in the lower side jamb and hook into the pivot shoe. When they fail, you might see a loose steel band, a broken plastic housing, or a sash that will not stay up even though the track feels smooth.
- Remove the sash.
- Inspect the pivot shoe. Many coil systems connect to the shoe, so a cracked shoe can look like a “bad balance.”
- Match the coils. Coils come in different strengths (often color-coded). Replace both sides and use the same strength on each side.
- Re-hook and test. Keep hands clear while seating the coil and shoe. The band is under tension.
If you are unsure what you have, a photo of the coil housing and pivot shoe plus your sash weight usually gets you a correct match from a window parts supplier.
Fix D: old wood windows with weights and cords
If your wood window uses weights, a broken sash cord is a classic reason it won’t stay open.
- Score paint lines along the interior stop with a utility knife.
- Pry off the interior stop carefully with a putty knife. Work slowly to avoid splitting it.
- Remove the lower sash. Support it as you pull it free.
- Remove the parting bead (the thin strip between the lower and upper sash tracks) if you need access to the upper sash. Beginners often confuse the stop and the parting bead, so label them as you go.
- Open the weight pocket. Many windows have a small painted panel on the side jamb held by a screw or nails.
- Retrieve the weight and tie on new sash cord (or chain). Feed it over the pulley and reattach to the sash.
- Reassemble and test. The sash should stay up without needing a wedge.
If it’s hard to move: friction fixes
Sometimes the window won’t stay open because it never truly gets to the position you want. It binds, then slips. Or it takes two hands to lift, then drifts down because you cannot set it gently.
Step 1: Clean the tracks and jambs
- Vacuum loose debris from the track and side jambs.
- Wipe with warm water and a drop of dish soap, then dry thoroughly.
- For sticky residue, use isopropyl alcohol on a rag (test in a hidden area first).
Step 2: Lubricate the right way
- Vinyl windows: Use a light silicone spray or a dry PTFE spray on a rag, then wipe the side tracks. Do not soak it. Avoid greasy lubricants that attract dust and grit, and always defer to the window manufacturer if you can find the manual.
- Wood windows: Use paste wax on the sash edges and the jamb contact points. Buff it. Avoid silicone on wood you plan to paint.
Step 3: Fix swollen wood (wood windows)
If the window sticks in humid months and behaves in winter, swelling is likely. Do not force it so hard you break glass or pop joints.
- Find rub points. Open and close the sash and look for shiny spots or scraped paint on the edges.
- Remove the sash if possible.
- Sand lightly at the rub points with 120 to 150 grit. You are removing a little material, not reshaping the world.
- Seal bare wood with primer and paint. Unsealed wood swells again quickly.
Budget note: A $7 can of paste wax and a little sanding has saved me from buying “new” windows more than once.
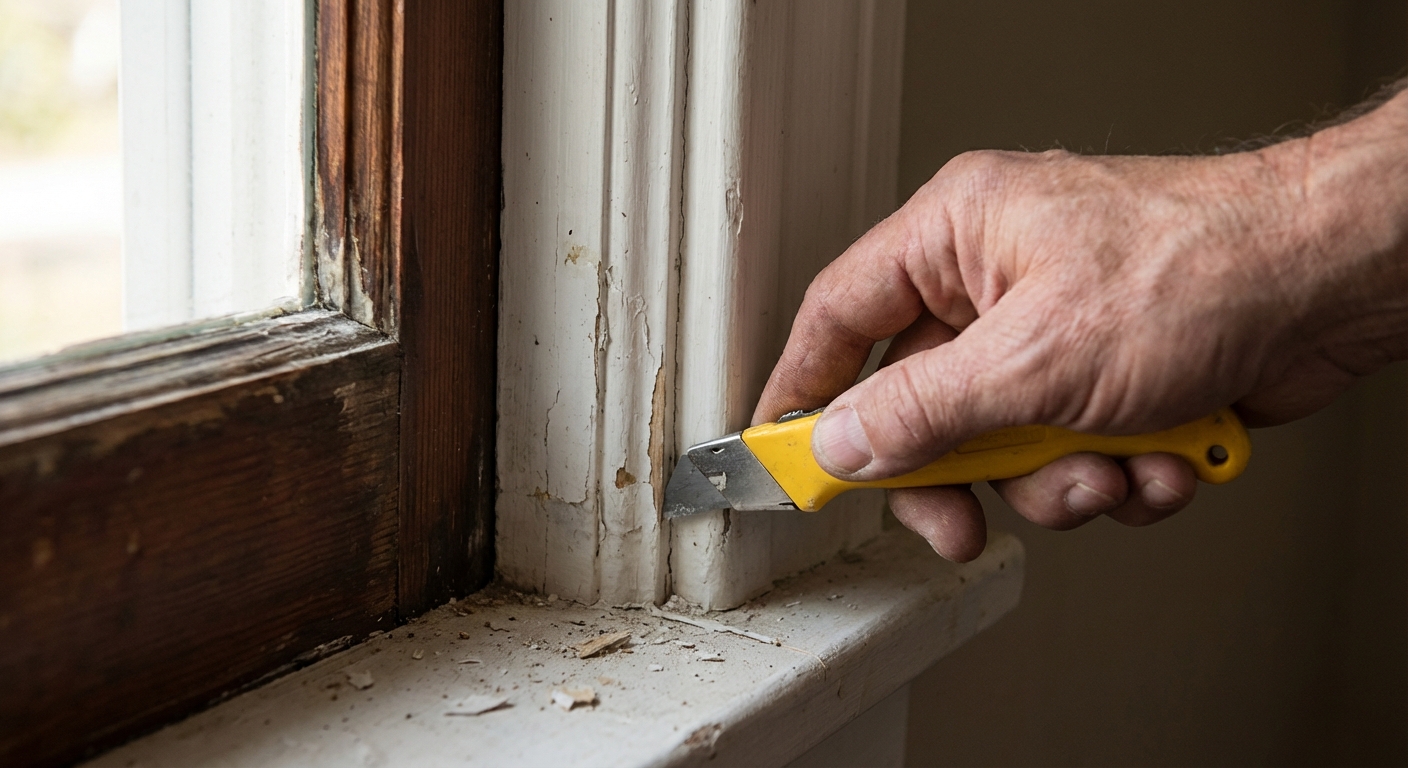
If it’s painted shut: free it safely
Painted-shut windows are common in older homes and rentals. The sash might open a little, then slam shut because the paint is still binding, or because you broke the seal in one spot but not the others.
Step-by-step: break the paint seal
- Score every seam where sash meets stop and where stop meets frame using a sharp utility knife. Use multiple light passes.
- Work a stiff putty knife into the seam and slide it along the edge to separate paint.
- Tap gently with a rubber mallet on a wood block if needed. Gentle pressure beats brute force.
- Check the parting bead (wood windows). Paint can glue the sash to this thin strip between sashes.
- Once free, clean and wax. Remove paint ridges with a scraper, then use paste wax on sliding surfaces.
If you suspect lead paint (common before 1978), avoid dry sanding and aggressive scraping. Keep dust down, contain the area, and use a HEPA vacuum. For bigger paint disturbances, follow EPA Renovation, Repair and Painting (RRP) practices or hire a lead-safe certified pro.
If it drops crooked: pivot and hardware issues
If the sash is falling down while leaning to one side, the balances might be fine. The sash may not be seated correctly in the pivot shoes, or a small plastic part is worn just enough to throw everything off.
Common symptoms and fixes
- Sash pops out of the track when tilted: Check pivot pins on the sash bottom corners. Replace if bent or loose.
- One side moves, the other binds: A pivot shoe may be cracked or the cam is stuck in tilt position. Replace the shoe or reset the cam with a flathead.
- Window won’t align at the top and won’t lock: Sash may be racked. Re-seat pivots, then check for worn top guides or sash cams.
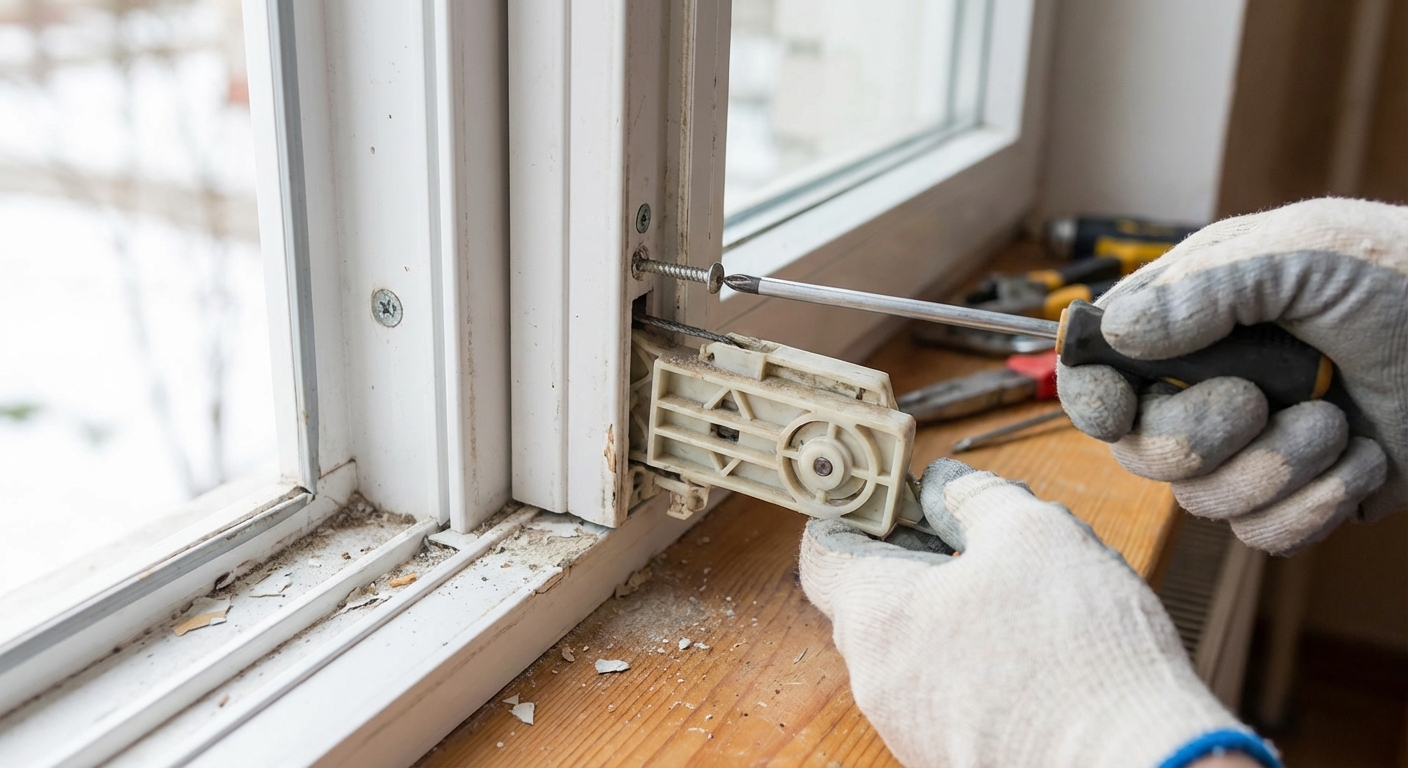
How to replace a pivot shoe
- Remove the sash.
- Relieve balance tension (this varies by brand, but usually involves rotating the cam to release). Keep hands and face out of the track while doing this.
- Slide the old shoe out of the track.
- Slide in the new shoe, lock the cam, and re-tension if required.
- Reinstall the sash and test for smooth, even movement.
If you are unsure which parts you need, take a clear photo of the balance and shoe, plus measurements (length of the metal channel, width of the shoe). Many local glass shops and online window part suppliers can match them from that info.
Wood vs. vinyl: what changes
Vinyl windows
- More likely to use block-and-tackle balances, constant-force (coil) balances, and pivot shoes
- Tracks should be cleaned and lubricated lightly with silicone or dry PTFE
- Avoid oily lubricants that attract grit, and be cautious with petroleum-based products since some plastics and seals can be sensitive over time
Wood windows
- More likely to have weights and cords (older) or spiral balances (some units and retrofits)
- Swelling and paint buildup are common causes of sticking and slipping
- Wax and sealed, smooth contact surfaces make a huge difference
What doesn’t change: If the sash will not stay put, you either have a counterbalance problem, a friction problem, or a misalignment problem. The steps above cover all three in a practical order.
Fast troubleshooting table
- Sash drops immediately: Balance broken or disconnected. Replace balances (both sides).
- Sash slowly creeps down: Weak balance tension or wrong rating. Re-tension spiral or replace balances with the correct strength.
- Sash is hard to lift, then won’t stay: Clean tracks, reduce friction, check for swollen wood or paint binding.
- Sash tilts or sits crooked: Pivot pins or shoes worn. Re-seat or replace pivot hardware.
- Window won’t budge: Painted shut. Score seams and separate paint before forcing.
- Window stops at a certain height: Vent stops or limit stops engaged. Disengage per your window design.
When to call a pro
I’m all for DIY, but a few situations are worth outsourcing:
- You have a very large picture window sash or unusually heavy glass that is risky to handle alone.
- The frame is visibly rotted, soft, or the sill is failing structurally.
- You suspect lead paint and the window needs major sanding or paint removal.
- Multiple windows are failing and you want a whole-house parts match and tune-up.
My quick cheap fix for today
Sometimes you just need the window to stay open while you wait on parts.
- Clean the tracks and reduce friction first. It can improve holding power immediately.
- Use a temporary sash prop cut from a scrap of 1x2 or even a straight paint stir stick. Cut it so it fits snugly between the bottom sash and the sill at the height you want.
This is not the final repair, but it buys time safely without risking fingers from a dropping sash.
What to measure before buying parts
To avoid the classic DIY mistake of ordering the wrong balance twice, grab these details first:
- Window brand (often etched in a corner of the glass or on a label in the jamb)
- Balance type (block-and-tackle, spiral, constant-force coil, or weight and pulley)
- Channel length (metal part length, not including plastic ends) or coil housing size
- Any stamped codes or numbers on the balance
- Sash weight (best for strength matching)
- Photos of the balance, pivot shoe, and how the sash pivot pin connects
Parts sourcing note: OEM parts are great when you can get them, but quality generic replacements work fine if you match length and rating. Do not mix random ratings left and right unless you enjoy weird binding and premature wear.
FAQ
Can I just tighten something so the window stays up?
Sometimes. Spiral balances can often be re-tensioned. Constant-force coils are replaced rather than “tightened.” Block-and-tackle balances usually need replacement when they fail. If the sash is crooked, you may be able to re-seat a pivot shoe cam, but cracked plastic parts should be replaced.
Should I replace only one balance?
I recommend replacing both sides together. If one failed, the other is usually not far behind, and mismatched tension can make the sash bind or wear parts faster.
What lubricant should I use on window tracks?
For vinyl, use silicone applied lightly with a rag or a dry PTFE spray, depending on what your manufacturer recommends. For wood, use paste wax. Avoid greasy lubricants that collect dust and grit.
Why does my wood window only stick in summer?
Humidity makes wood swell, especially if bare wood is exposed where paint wore off. Light sanding at rub points plus sealing with primer and paint is the long-term fix.
About Marcus Vance
Content Creator @ Grit & Home
Marcus Vance is a lifelong DIY enthusiast and self-taught home renovator who has spent the last decade transforming a dilapidated 1970s ranch into his family's dream home. He specializes in budget-friendly carpentry, room-by-room renovations, and demystifying power tools for beginners. Through his writing, Marcus shares practical tutorials and hard-learned lessons to help homeowners tackle their own projects with confidence.