Bed bugs are one of those problems that can make a clean home feel instantly stressful. The good news is that bed bugs are beatable. The bad news is you cannot wish them away with one spray can and a weekend of hope.
In this guide, I’ll walk you through how to spot bed bugs, how to confirm what you’re seeing, and the treatment steps that can work for DIY homeowners, including heat, steam, diatomaceous earth, and mattress encasements. I’ll also be honest about when DIY stops making sense and it’s time to call in a professional.
Quick safety note: If you use any pesticide product, use one that is labeled for bed bugs and follow the label exactly. Labels are the law, and they are written for a reason.
First: What bed bugs are (and what they are not)
Bed bugs are small, flat, reddish-brown insects that feed on human blood, usually at night. They hide in tight cracks and seams close to where people sleep or sit, then come out to feed.
- They are not a “dirty house” pest. They can hitchhike into spotless homes on luggage, used furniture, or even a visitor’s bag.
- They do not usually live on your body like lice do. They hide near beds and furniture instead.
- They can go without feeding for weeks to months, depending on life stage and conditions. That is one reason they are hard to eliminate.
If you are feeling embarrassed, don’t. Treat it like a leak behind a wall: annoying, fixable, and easier to deal with early.
Signs of bed bugs
Most people find bed bugs in one of three ways: bites, evidence on bedding, or spotting the bugs themselves. The key is to look for a pattern, not a single clue.
1) Bites (but don’t rely on bites alone)
Bed bug bites often show up as itchy red welts, sometimes in a line or cluster. Some people react strongly. Others do not react at all.
- Common locations: arms, shoulders, neck, lower legs, and anywhere skin is exposed during sleep.
- Timing: itching may start hours to days after being bitten.
- Lookalikes: mosquito bites, flea bites (often around ankles), contact dermatitis, and allergic reactions.
2) Rust-colored stains and black specks
Check sheets, pillowcases, and mattress seams.
- Rust or reddish stains: crushed bugs or blood spots.
- Black pepper-like dots: bed bug fecal spots. These can bleed into fabric like a marker when wiped with a damp cloth.
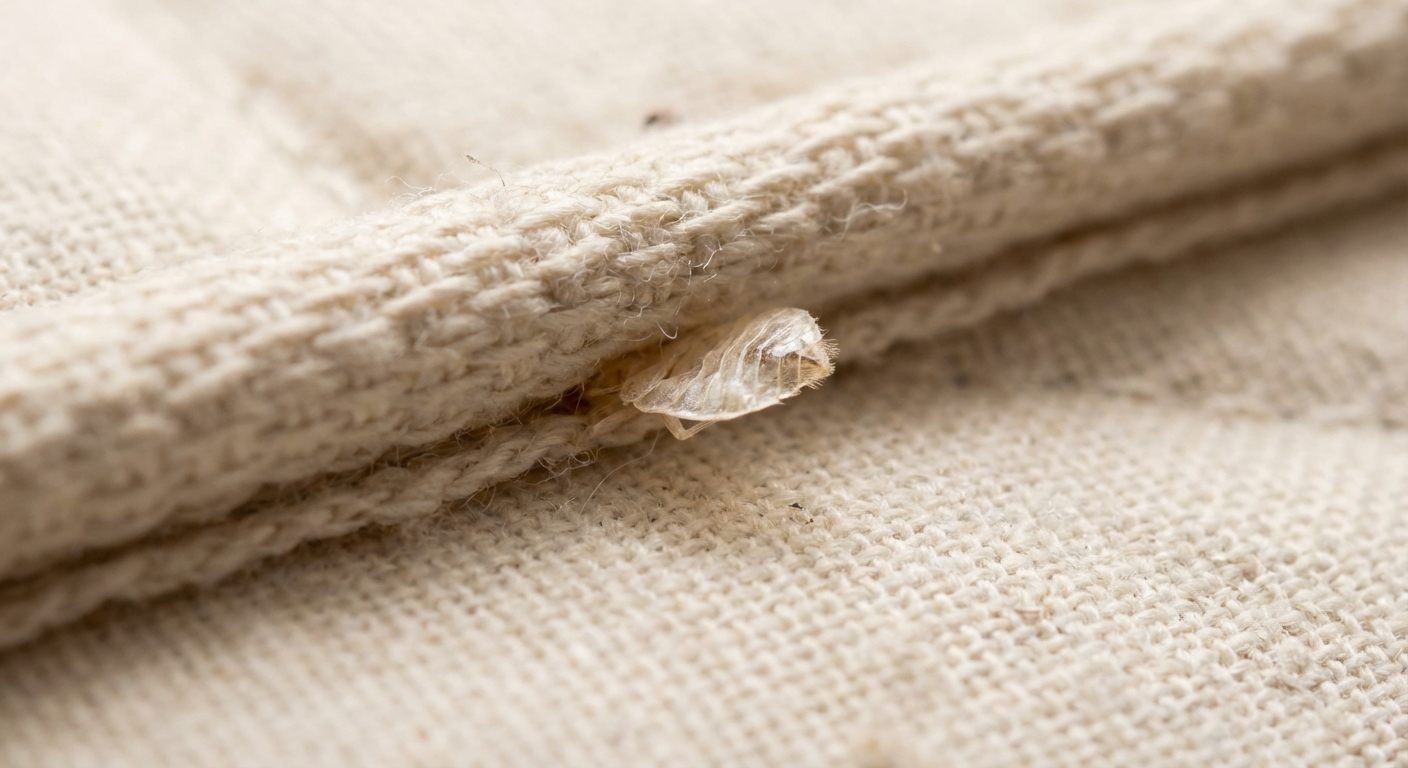
3) Shed skins and tiny eggs
As bed bugs grow, they shed pale tan skins (exoskeletons). Eggs are tiny, whitish, and often glued into cracks and seams.
4) A musty, sweet odor (usually in heavier infestations)
Some infestations develop a musty smell. If you smell something “sweet and stale” near the bed along with other signs, take it seriously.
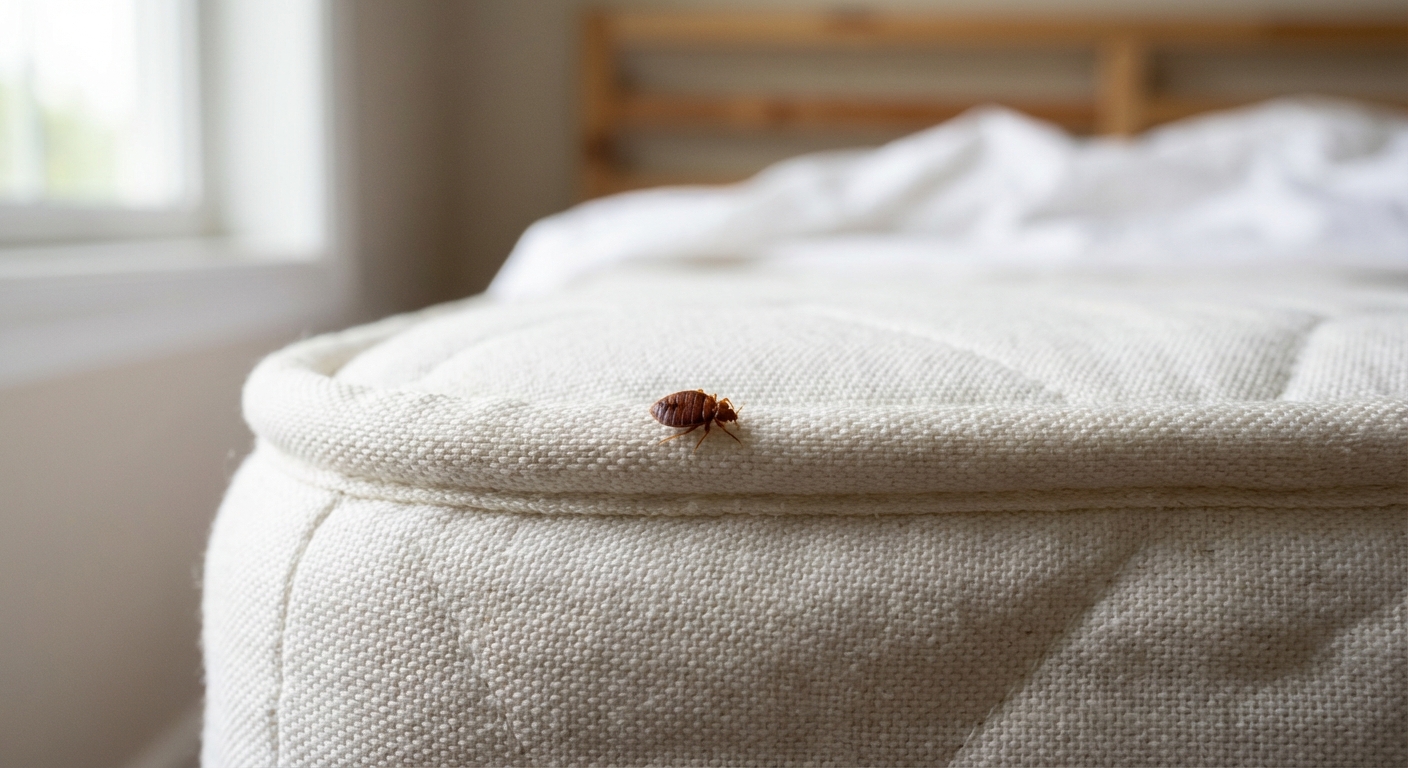
5) Seeing the bugs
Adult bed bugs are about the size of an apple seed. Younger ones are smaller and lighter. You might spot them:
- Along mattress piping and seams
- Behind the headboard
- In box spring corners
- In bed frame joints and screw holes
- Along baseboards or the edge of carpet near the bed
- In upholstered furniture seams
How to confirm bed bugs
When I’m troubleshooting anything at home, I try to avoid guessing. Bed bugs are no different. Here’s a simple, repeatable check.
What you need
- Bright flashlight
- Old credit card or thin plastic scraper
- Disposable gloves
- Zip-top bags
- Optional: magnifying glass
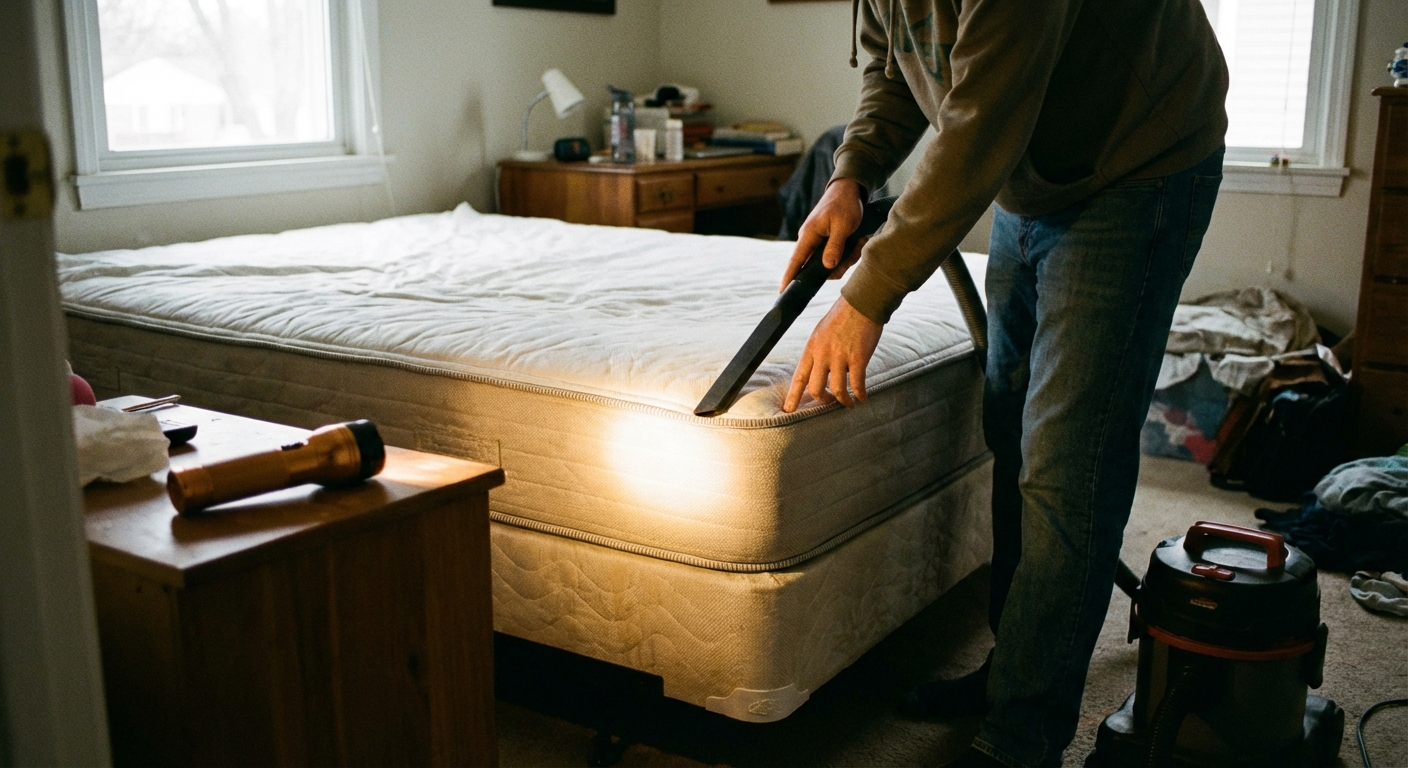
Where to look (in order)
- Mattress seams and tags: slowly run the flashlight along the piping and pull seams open with your fingers.
- Box spring: check corners, underside, and around the dust cover. Bed bugs love box springs.
- Bed frame and headboard: inspect joints, bolt holes, and any cracks in wood.
- Nearby furniture: nightstand corners, drawer joints, and the back side facing the wall.
- Edges of the room: baseboards, carpet tack strip area, and behind picture frames near the bed.
How to collect proof
If you find a bug, try to capture it intact if you can. Trap it in a zip-top bag (a small piece of tape inside helps), or gently press it onto clear tape and stick it to a white index card. A clear specimen makes it easier for a pest pro or extension office to confirm.
Heads up: If you are in an apartment or condo, report suspected bed bugs early. Delaying can allow spread into adjacent units, and that complicates everyone’s treatment.
DIY bed bug treatment that can work
To get rid of bed bugs, you have to do two things at the same time:
- Kill the bugs you have today
- Stop the next generation by dealing with eggs and hidden bugs
No single DIY tool is perfect. The most reliable home approach is a layered plan: reduce clutter, launder and heat-treat what you can, vacuum carefully, use steam where dryer heat is not an option, then add physical barriers and targeted dusts.
Step 1: Declutter and isolate the bed
Clutter gives bed bugs endless hiding spots. You do not need to throw everything away, but you do need to control the battlefield.
- Move items off the floor and out from under the bed.
- Place bedding, clothes, and soft items into sealed bags before carrying them through the house.
- Pull the bed a few inches away from the wall.
- Remove bed skirt and anything that touches the floor.
Bed isolation checklist: bed not touching the wall, bedding not touching the floor, and interceptors (later step) under each leg.
Step 2: Laundry and heat (one of your best DIY weapons)
Heat is one of the most dependable killers of bed bugs and their eggs, but it has to be done correctly.
- Wash and dry bedding, clothes, and curtains (if near the bed). Hot water helps, but the dryer heat is the critical part.
- Dry on high for at least 30 minutes after items are fully dry. For thick loads (like comforters), extend the time so the heat reaches the core.
- For items that cannot be washed (stuffed animals, shoes, delicate fabrics), run them through the dryer on a safe heat setting if the material allows.
Tip from hard experience: Use clean bags for “treated” items and label them. It is way too easy to mix a clean pile with a questionable pile during a long weekend of treatment.
Step 3: Vacuum like you mean it
Vacuuming will not solve bed bugs by itself, but it removes live bugs, shed skins, and some eggs from accessible areas.
- Use a crevice tool along seams, tufts, and bed frame joints.
- Vacuum baseboards and the carpet edge around the bed.
- Important: take the vacuum outside (or at least into a garage) before you open it to empty it.
- If you have a bagless vacuum, empty the canister into a trash bag, seal it, and take it to an outdoor bin right away. Clean the canister and filter per the manufacturer’s instructions.
Step 4: Steam treatment for seams and edges
High-heat steam is one of the most useful DIY tools because it can treat places the dryer cannot: mattress seams, couch seams, bed frames, baseboards, and carpet edges.
- Use a steamer that can produce hot, dry steam, ideally with a nozzle attachment for seams and cracks.
- Move slowly. A quick pass does not transfer enough heat. Aim for a steady, controlled pace along seams and edges.
- Avoid blasting so much moisture that you soak fabric or wood. Damp is one thing, wet is a mold invitation.
- Focus on hiding spots: mattress piping, tufts, bed frame joints, headboard seams, and baseboards near the bed.
Real talk: steam is not a one-and-done miracle. It is a repeatable tool you can use during weekly follow-ups.
Step 5: Mattress and box spring encasements
A quality bed bug encasement does three important jobs:
- Keeps trapped bugs contained so they cannot escape and re-infest seams
- Eliminates hiding spots in seams and fabric folds
- Makes inspections easier because the surface is simple and bright
What to look for:
- Specifically labeled for bed bugs
- Strong zipper with a locking end or zipper seal
- Fits tightly with no gaps or slack
Important: keep encasements on and fully zipped. If the zipper breaks or the cover tears, replace it. Many homeowners keep them on for 12 months or longer, since bed bugs can survive a long time without feeding in some conditions.
Step 6: Diatomaceous earth (DE) done safely
Diatomaceous earth is a fine dust that can kill bed bugs by damaging their outer protective layer and dehydrating them. It is not an instant knockdown like a spray. Think of it as a slow, steady helper in the cracks where bed bugs travel.
- Use a product that is labeled for indoor insect control. “Food-grade” does not mean it is safe to breathe.
- Apply a very thin dusting in cracks, crevices, and voids, not big piles. Bed bugs avoid heavy buildup.
- Good locations: along baseboards, behind the headboard, inside bed frame joints, and in wall voids only if you know what you are doing and can keep dust contained.
- Keep it out of the air. Wear a mask during application and avoid dusting where kids or pets can stir it up.
- Some pros prefer silica gel dusts for bed bugs because they can work faster. If DE is not helping, it may be an application issue, a product issue, or a sign you need a pro.
My thrifty take: DE is inexpensive, but more is not better. The goal is a barely-there layer in the places bed bugs crawl.
Step 7: Targeted heat for small items
If you suspect items like books, bags, or shoes, consider heat treatment options:
- Portable bed bug heaters designed for luggage and small items can be effective when used exactly per instructions.
- Hot car method: I do not recommend relying on a parked car for treatment. Temperatures are inconsistent and easy to get wrong, especially in mild weather.
Step 8: Interceptor traps to monitor progress
Bed bug interceptor cups placed under bed legs can catch bugs trying to climb up or down. They are helpful for:
- Confirming activity
- Tracking whether your treatment is working over time
- Reducing bites when the bed is truly isolated (bed pulled from wall, bedding not touching the floor, interceptors under every leg)
Step 9: Follow-up schedule
This is the part most people skip, and it matters.
- Inspect and vacuum every 3 to 7 days for the first few weeks, focusing on the bed, nearby furniture, and baseboards.
- Re-steam seams and edges during follow-ups if you are still seeing signs.
- Reapply dust only if needed, like if you cleaned, vacuumed it up, or it got damp or clumped.
- Keep interceptors in place and watch for captures. A quiet trap is one of your best indicators that you are winning.
What not to do
- Do not move to another room to sleep. You can accidentally spread bed bugs to a new area.
- Do not drag untreated bedding or clothes through the house. Bag it first.
- Do not buy random foggers. Many “bug bombs” do not reach where bed bugs hide and can push them deeper into walls or adjacent rooms.
- Do not throw the mattress on the curb without wrapping it. That is a good way to spread bed bugs to neighbors. If disposal is necessary, wrap and label it according to local guidelines.
- Do not rely on essential oils. They may repel temporarily, but they are not a dependable elimination method.
- Do not spray unapproved products on sleeping surfaces. If you use any insecticide, make sure it is labeled for bed bugs and for the exact location you plan to treat.
When to call a professional
I love DIY, but bed bugs are one of those problems where the “right” answer is sometimes a pro with the right tools. Call a licensed exterminator if:
- You see bed bugs in multiple rooms
- You are finding them during the day (often a sign of heavier infestation)
- DIY steps reduce bites but do not stop activity after a few weeks
- You live in a multi-unit building and the issue may be spreading between units
- Someone in the home has health concerns that make prolonged exposure to bites or DIY dusts risky
What professional treatment may include
- Whole-room or whole-home heat treatment: rooms are heated to lethal temperatures for bed bugs with specialized equipment, then monitored for time and coverage.
- Targeted insecticides: applied to cracks and crevices by a licensed technician, often over multiple visits.
- Integrated pest management (IPM): a combined strategy using monitoring, mechanical removal, and chemical tools as needed.
What to ask before hiring:
- How many visits are included?
- Do you provide a written prep checklist?
- Do you use heat, chemical treatment, or both?
- What is the warranty or guarantee period?
- How do you prevent re-infestation between visits?
Bed bug prevention for travelers
Most bed bug stories start with travel. A few cautious habits can drastically reduce your risk without turning every trip into a paranoia project.
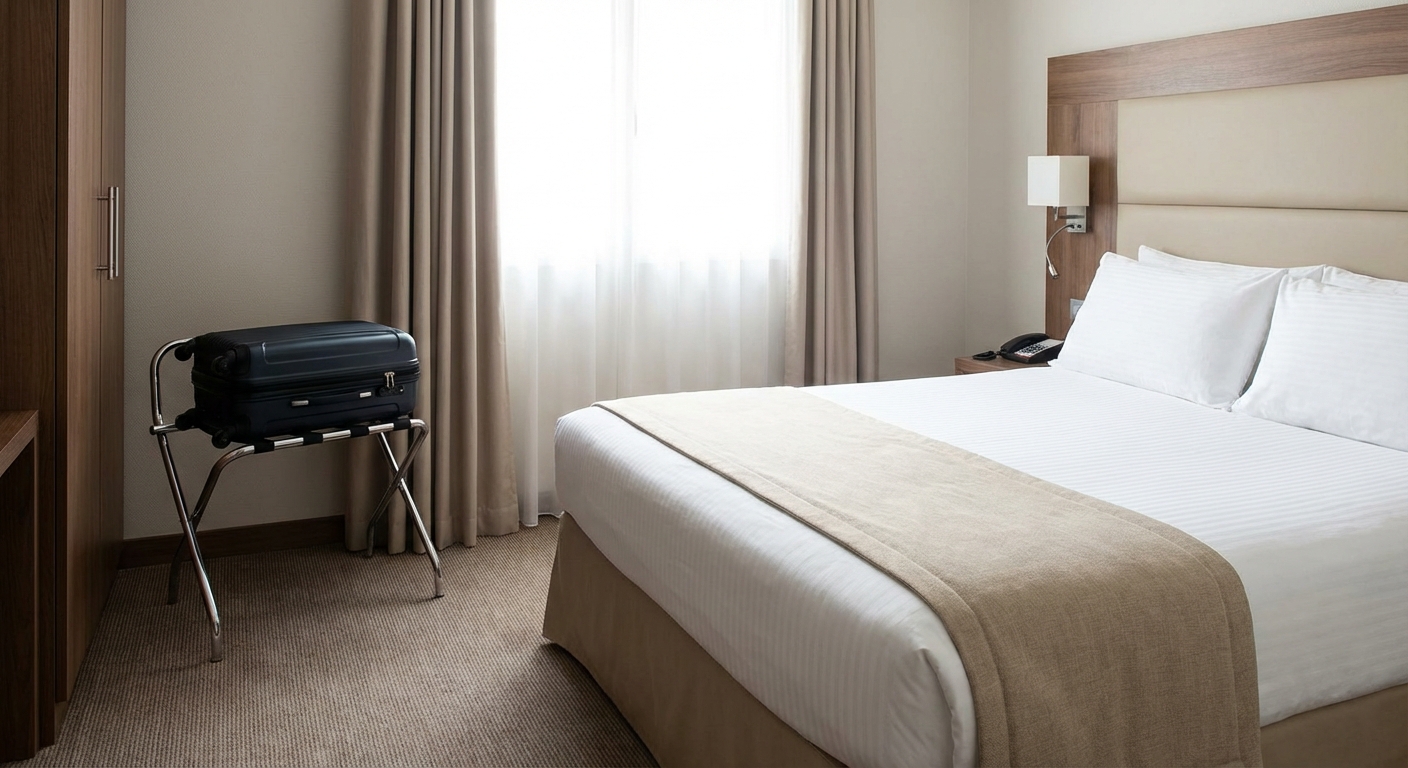
In the hotel or rental
- Keep luggage off the bed. Use the luggage rack, and pull it away from the wall.
- Do a 2-minute bed check: peel back sheets at the head of the bed and look along mattress seams for black specks or bugs.
- Check the headboard area if it is easy to access.
- Store clothes in your suitcase instead of dresser drawers if you want to be extra cautious.
When you get home
- Unpack in a hard-surface area like a garage, laundry room, or entryway if possible.
- Dry travel clothes on high heat before putting them away, even if they were not worn.
- Inspect and vacuum luggage, especially seams and pockets, then store it away from bedrooms.
Quick checklist
- Confirm signs with a focused inspection
- Declutter and bag items before moving them
- Launder and dry on high heat
- Vacuum seams and edges, then empty the vacuum outside
- Use steam on seams, furniture edges, and baseboards
- Install mattress and box spring encasements and keep them sealed
- Use a light, targeted application of labeled dust in cracks and crevices
- Set interceptors under each bed leg and isolate the bed
- Repeat inspections and follow-ups every 3 to 7 days early on
- Call a pro if the infestation is widespread or not improving
If you want one final piece of neighbor-to-neighbor advice: keep notes. Write down what you treated, where you found evidence, and when you saw activity. Bed bug control is a process, and a simple log can keep you from repeating steps or missing a problem area.
Common questions
Can I get rid of bed bugs myself?
Sometimes, yes, especially if you catch it early and the infestation is limited to one room. Success usually comes from combining dryer heat, steam, careful cleaning, encasements, and ongoing monitoring. If it is spreading or persistent, professional treatment is often faster and more reliable.
Do bed bugs live in mattresses only?
No. Mattresses are a common hiding spot, but bed bugs can also live in box springs, bed frames, headboards, nightstands, couches, baseboards, and cracks in walls.
Will throwing away the mattress fix it?
Not usually. If bed bugs are in the frame, box spring, or room cracks, a new mattress can become infested quickly. Encasements and room-level treatment matter more than replacing the mattress.
How long does it take to eliminate bed bugs?
DIY treatment can take weeks to months because you need to catch newly hatched bugs and keep pressure on hiding spots. Professional heat treatments can be faster, but follow-up monitoring is still important.
About Marcus Vance
Content Creator @ Grit & Home
Marcus Vance is a lifelong DIY enthusiast and self-taught home renovator who has spent the last decade transforming a dilapidated 1970s ranch into his family's dream home. He specializes in budget-friendly carpentry, room-by-room renovations, and demystifying power tools for beginners. Through his writing, Marcus shares practical tutorials and hard-learned lessons to help homeowners tackle their own projects with confidence.