Carpenter bees: annoying, destructive, and beatable
If you have neat, perfectly round holes in your porch trim or fascia, you are not imagining things. Carpenter bees do not chew wood to eat it. They drill it to build nursery tunnels, and they often pick the same sheltered spots year after year.
The good news is you can usually stop them without tearing anything apart. The key is doing it in the right order: confirm it’s carpenter bees, treat active tunnels, then make the wood unattractive for the next round.
One quick note before we get into it: carpenter bees are also beneficial pollinators. This is about protecting your woodwork, not wiping out every bee in the neighborhood.
How to identify carpenter bee damage
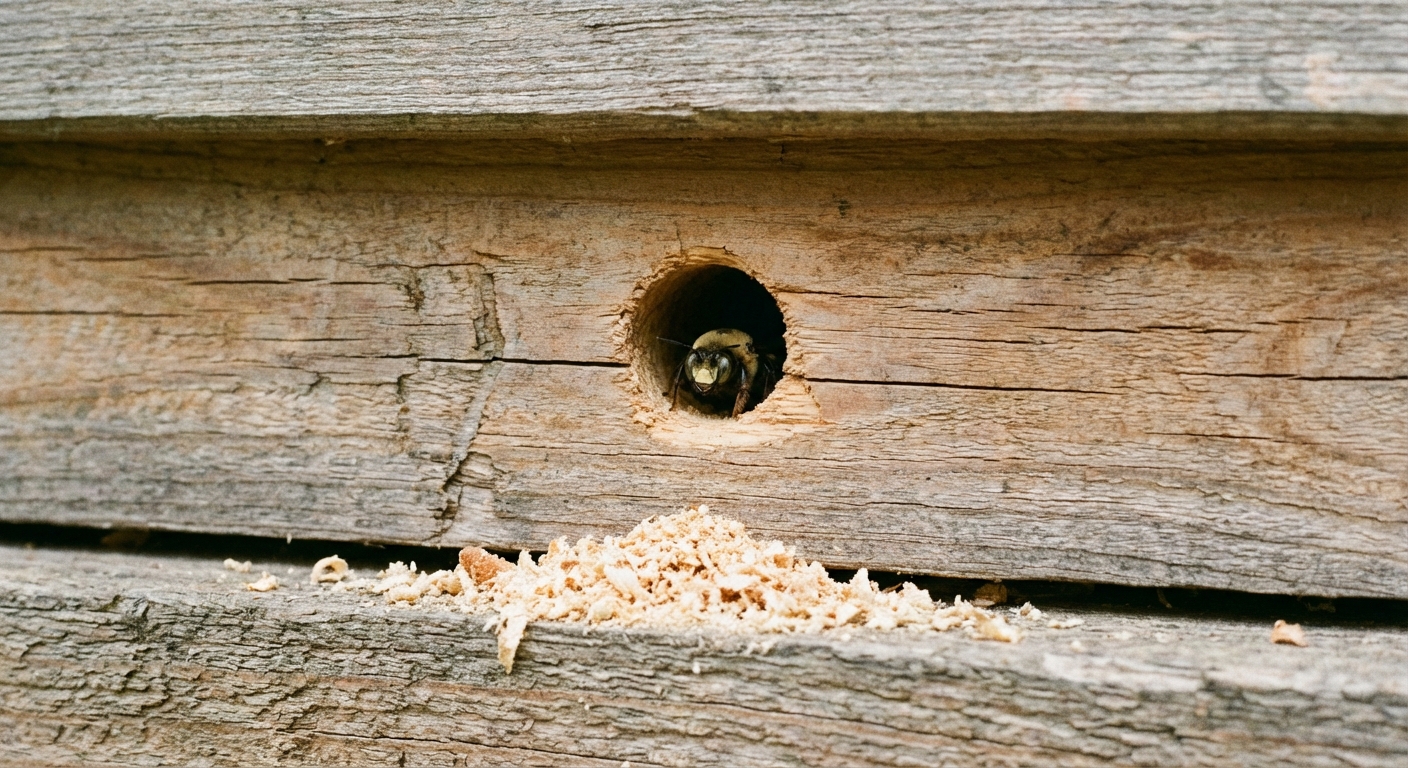
What the holes look like
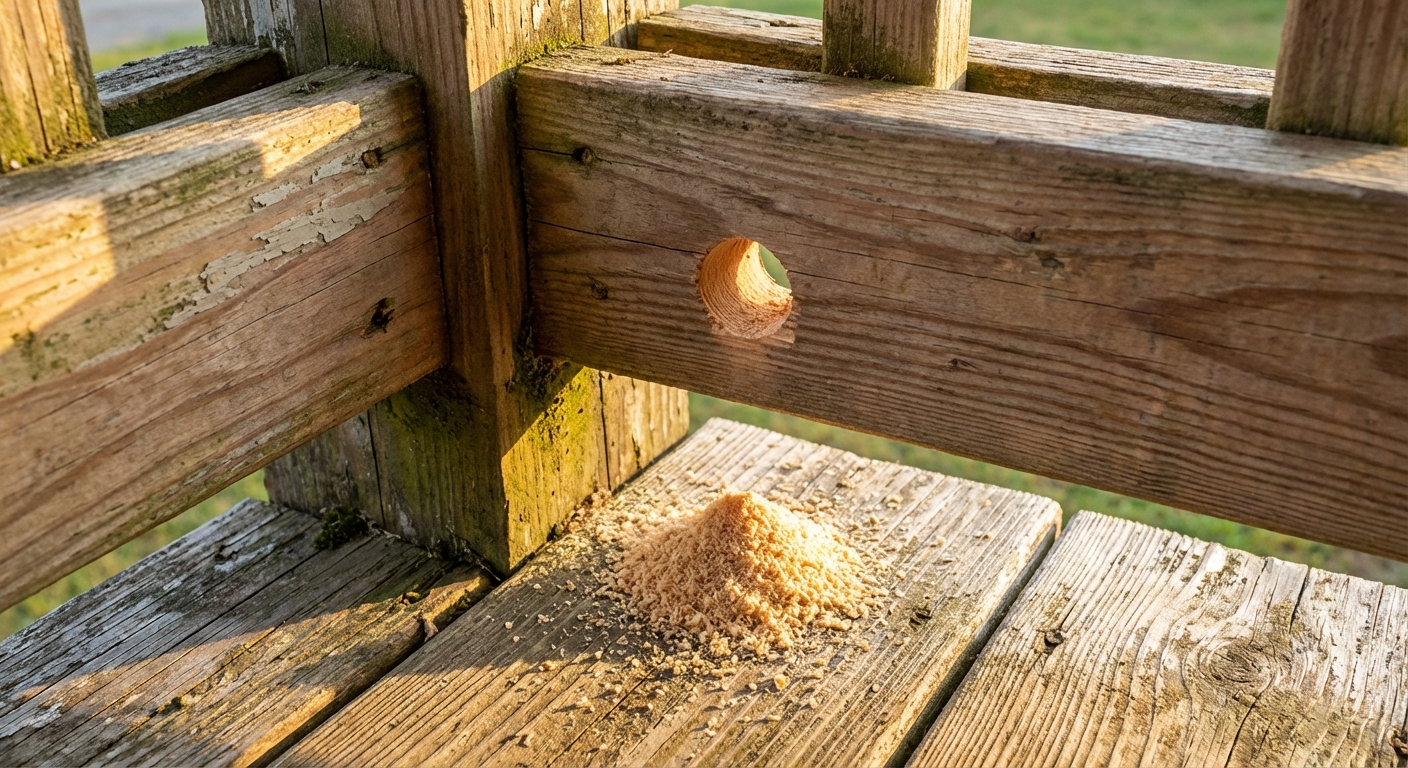
- Perfectly round entry holes typically around 3/8 to 1/2 inch in diameter (often described as pencil-eraser size, but some are closer to dime size depending on species and region).
- Holes are often on undersides of boards: soffits, porch ceilings, deck joists, railings, pergolas, and fascia boards.
- You may see fresh, light-colored sawdust or coarse wood shavings below the hole.
- After the entry hole, the bee turns and creates a tunnel that runs with the grain for several inches, sometimes longer over multiple seasons.
Other clues you are dealing with carpenter bees
- Hovering around the same section of trim, especially on warm spring days.
- Male bees “buzzing” you near the holes. Males are territorial but cannot sting.
- Females can sting, but they are generally docile and usually only sting if you grab or pin them.
- Drips or streaks on the wood below holes from bee waste and pollen.
Carpenter bees vs bumblebees
This mix-up is common, because carpenter bees and bumblebees are both big, fuzzy, and active in spring. But their behavior is very different.
- Carpenter bee: shiny, mostly hairless black abdomen, often seen around bare wood where it drills round holes.
- Bumblebee: fuzzy, hairy abdomen with yellow and black banding, most commonly nests in ground cavities, but some species will use above-ground cavities (like bird boxes or wall voids). They do not drill clean, round holes in sound wood.
If you are seeing round holes in wood, that points strongly to carpenter bees.
Before you treat: quick safety and timing tips
- Best time: evening or early morning when bees are in the tunnels and less active.
- Wear: safety glasses, gloves, and long sleeves. You are working overhead a lot of the time.
- Ladder safety: set the ladder on firm ground and avoid leaning sideways to reach a hole.
- Do not plug first: if you seal an active tunnel before treating it, you can trap bees in the wood and push them to chew new exits.
- Pollinator safety: avoid spraying when bees are actively foraging, avoid drift onto flowers, and follow the product label exactly.
Step-by-step: treat existing carpenter bee holes
Step 1: Confirm the tunnel is active
Fresh sawdust, hovering bees, and brand-new clean-edged holes are your best signs. Older holes look weathered or have spider webs.
Seasonally, the busiest time is usually spring when adults are starting new galleries. Later in summer, new adults may emerge. Either way, the same rule applies: treat when you see activity.
Step 2: Apply a labeled dust or spray into the hole
For tunnels, a residual insecticide dust is often effective because it clings inside the gallery where the bee travels. Use a product that is specifically labeled for carpenter bees and follow the label exactly. A straw-style aerosol can also work, but dust tends to stay put longer in a tunnel.
- Treat at dusk or dawn.
- Apply a small amount into the hole. You want coverage, not a packed tunnel.
- Let it work for 24 to 48 hours so returning adults contact the treatment.
If you want a non-chemical approach for a couple of isolated holes, you can sometimes reduce activity by swatting/vacuuming hovering adults at dusk and then moving straight to sealing once you are confident the tunnel is inactive. It is not always as reliable as a residual dust, but it can help in light cases.
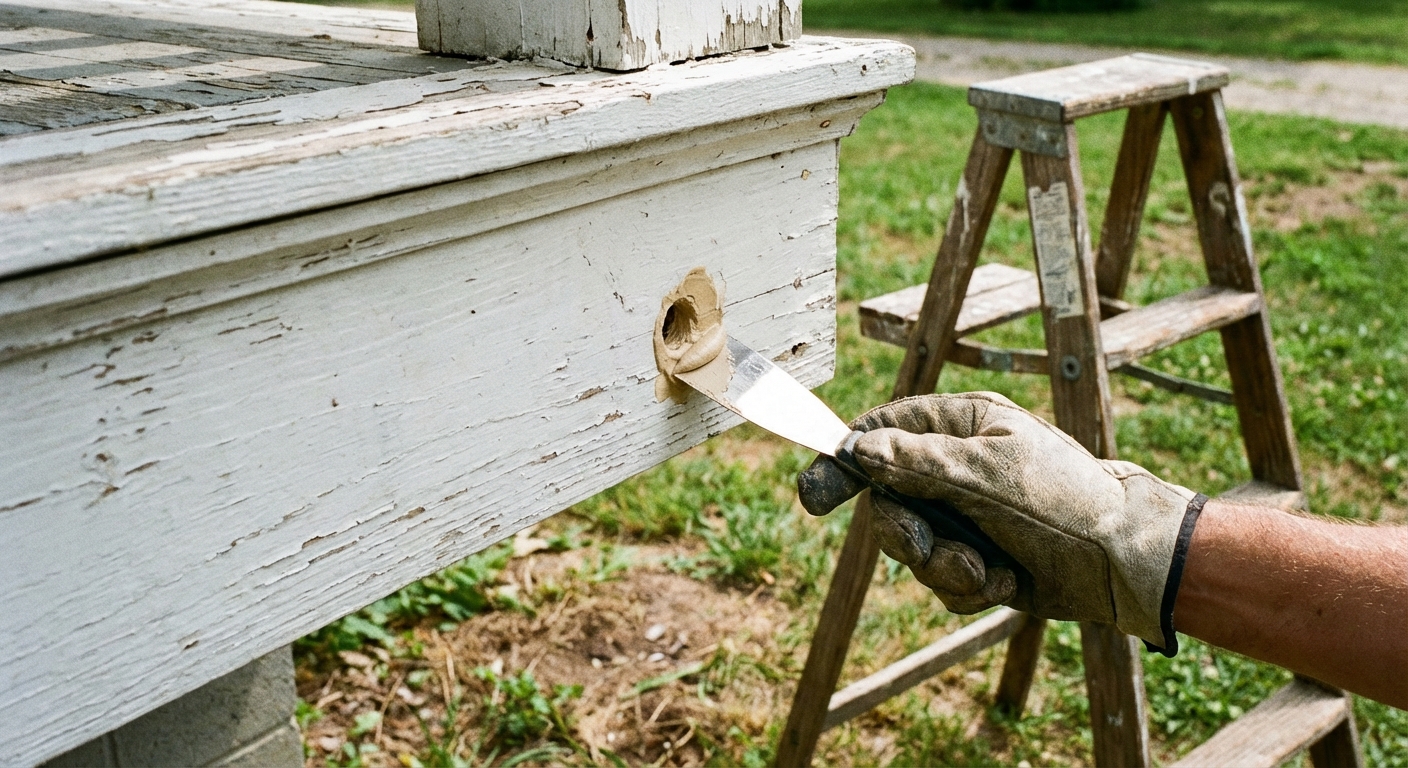
Step 3: Plug the hole after the treatment window
Once you are confident activity has stopped, seal the entrance. This is what prevents the next generation or new adults from reusing that same tunnel.
- For painted trim: pack lightly with exterior wood filler, sand smooth, then prime and paint.
- For stained wood: use exterior-grade stainable filler or a snug wood dowel with exterior wood glue, then stain and seal.
- In a pinch: a tight-fitting wooden plug plus exterior caulk, then paint.
Tip from my own trial-and-error: if you only caulk the opening and skip filler or a plug, the caulk can sink into the tunnel and crack later. A solid fill holds up much better through freeze-thaw cycles.
Prevent carpenter bees from coming back
Here is the part a lot of people skip: carpenter bees prefer unfinished, unpainted wood, especially softwoods like pine, cedar, and fir. They also love protected areas that stay dry, like under eaves and porch roofs. If you want this to be a one-and-done fix, you need to change what makes that spot attractive.
1) Paint or seal bare wood
The single best long-term prevention is a durable finish. Painted wood is generally less attractive to carpenter bees than stained wood, but it is not a guarantee. A quality exterior stain plus a film-forming topcoat sealer is still far better than leaving wood bare.
- Paint: scrape, prime exposed wood, then use two coats of exterior paint.
- Stain and seal: use an exterior stain and keep up with maintenance coats. If it is just a thin stain with no protective topcoat, do not be surprised if bees still test it.
- Don’t skip end grain: bees often start on edges and corners where the wood is most exposed.
2) Reduce sheltered “bee-friendly” spots
- Replace rotted or split boards. Cracks and soft spots invite repeat drilling.
- Add a bead of exterior caulk in seams where water gets in and wood stays damp.
- Consider adding trim or flashing where exposed wood is tucked under an overhang.
- In high-risk areas, wrapping wood with aluminum or vinyl, or replacing problem trim with composite/PVC, can be a long-term deterrent.
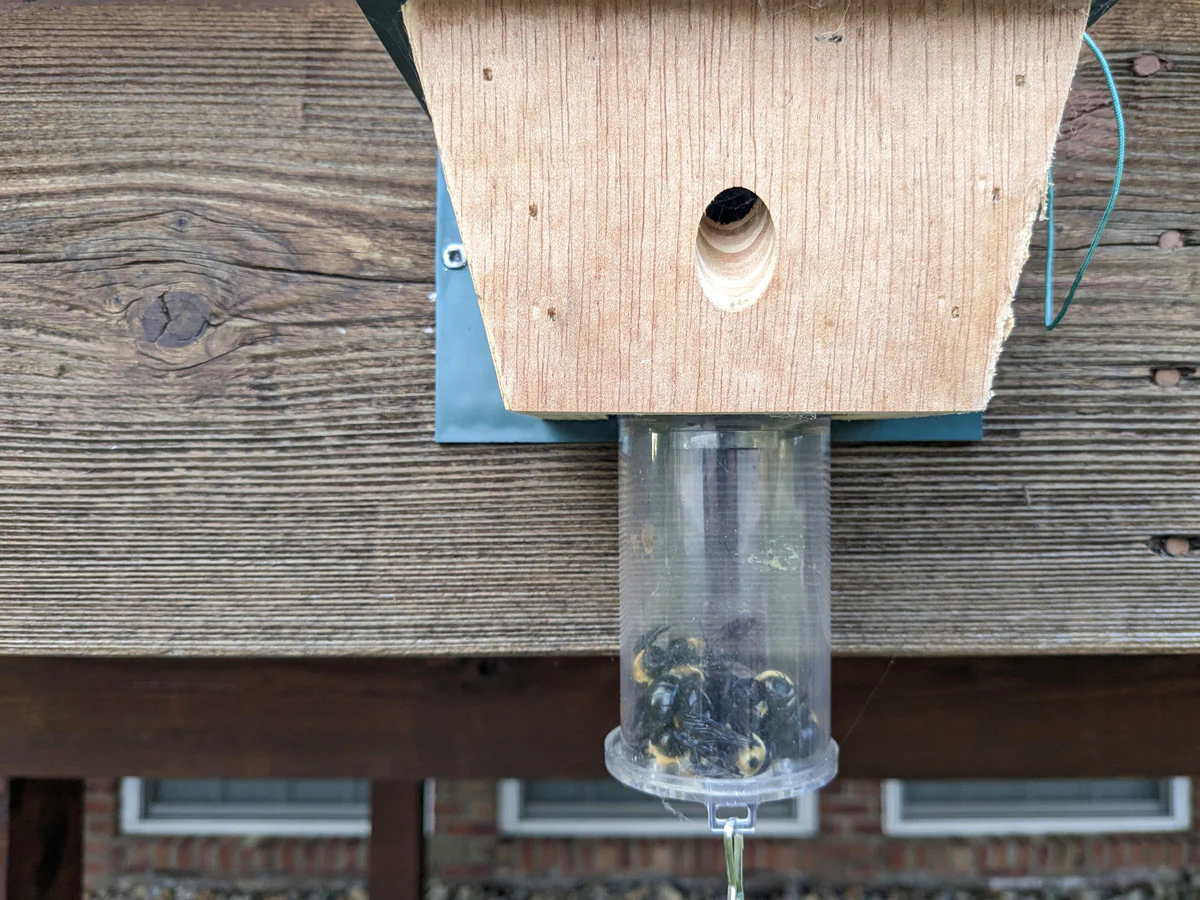
3) Use traps as a pressure reducer
Carpenter bee traps can help reduce the local population, especially when placed early in the season near known activity. They work best as part of a plan, not as the only solution.
- Hang traps as a starting point, often 10 to 20 feet away from the problem area, or follow the trap maker’s guidance.
- Place them in spring when bees first show up.
- Empty regularly and keep them out of reach of kids and pets.
Avoid the common mistake: do not hang a trap directly on the exact board you are trying to protect. You can accidentally draw attention to the area.
What not to do
- Do not seal holes before treating them. You can force bees to chew new exits and create more holes.
- Do not soak the wood with random chemicals not labeled for carpenter bees. Follow label directions for any pest product.
- Do not ignore the problem for “next year.” Tunnels often get expanded and reused, which is how minor damage becomes real carpentry work.
When carpenter bee damage becomes a structural problem
A few holes in a railing are one thing. Years of tunneling in the wrong location can be another. Carpenter bees can contribute to wood deterioration, and their tunnels can allow moisture in. Also, woodpeckers sometimes tear into infested wood to eat larvae, which can make damage look dramatically worse.
Consider professional help if:
- You find clusters of holes and the wood sounds hollow when tapped.
- Damage is in structural members like deck joists, beams, posts, or roof framing.
- You see signs of water intrusion, rot, or sagging near the activity.
- You have treated and sealed, but activity returns heavily each spring.
A pest control pro can confirm the insect, treat inaccessible areas safely, and recommend repairs. If load-bearing wood is compromised, bring in a qualified carpenter or contractor for an assessment.
Quick checklist (save this)
- Look for 3/8 to 1/2 inch round holes and light-colored sawdust on sheltered wood.
- Treat active tunnels at dawn or dusk with a labeled product.
- Wait 24 to 48 hours, then plug with filler or a dowel and finish over it.
- Paint or seal bare wood and keep up with maintenance coats.
- Add traps nearby to reduce the local population.
- Call a pro if you suspect structural damage or repeated heavy infestations.
My thrifty rule of thumb
If you remember one thing, make it this: treat, then seal, then finish. Skipping the finish is like patching a roof leak and leaving the shingles off. A solid paint or seal coat is what makes your repair last and keeps those perfectly round holes from becoming a yearly tradition.
About Marcus Vance
Content Creator @ Grit & Home
Marcus Vance is a lifelong DIY enthusiast and self-taught home renovator who has spent the last decade transforming a dilapidated 1970s ranch into his family's dream home. He specializes in budget-friendly carpentry, room-by-room renovations, and demystifying power tools for beginners. Through his writing, Marcus shares practical tutorials and hard-learned lessons to help homeowners tackle their own projects with confidence.