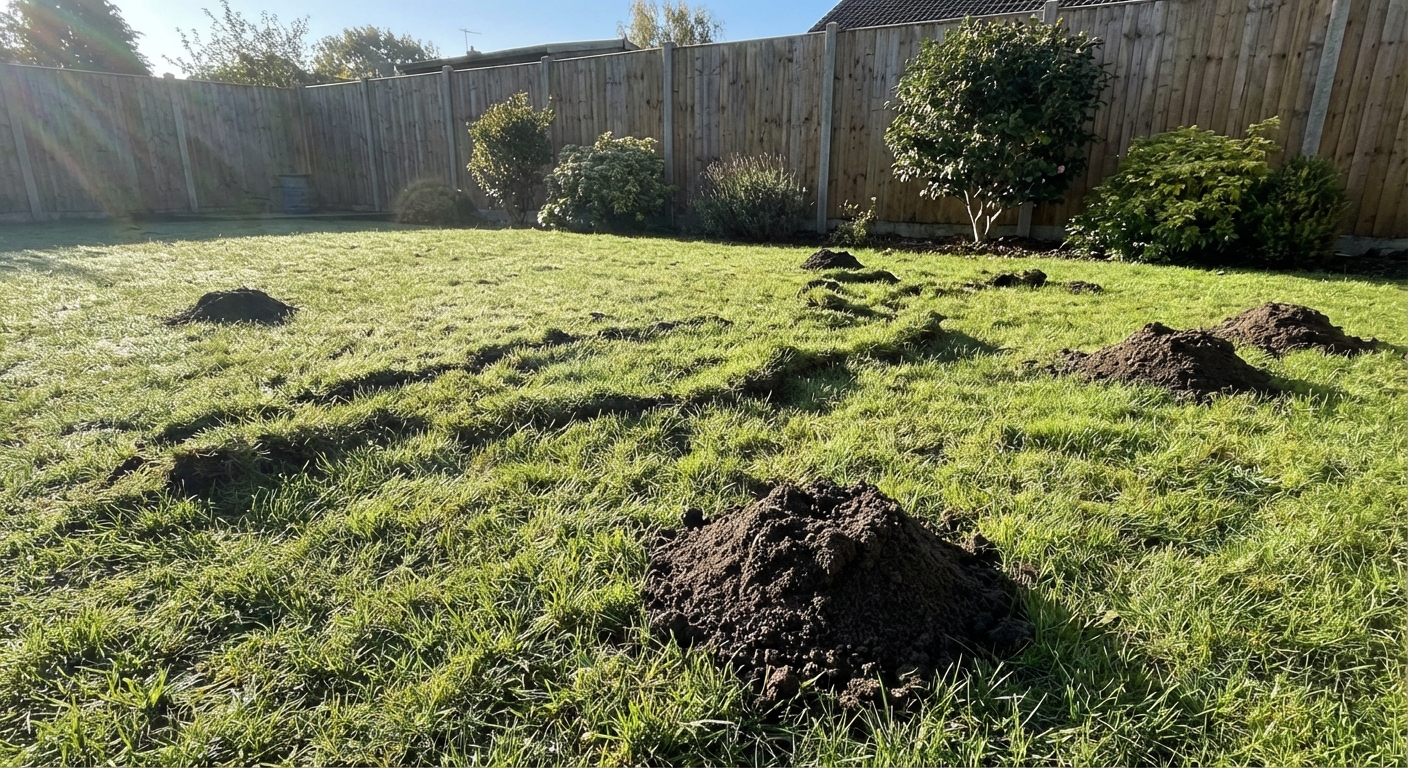
Moles are one of those yard problems that can make you feel personally attacked. You go to bed with a decent lawn and wake up to squishy ridges, random dirt piles, and a yard that looks like it got pranked overnight.
The good news: moles are predictable. If you can identify where they travel and choose a removal method that fits your comfort level, you can usually stop the damage without turning your whole yard into a science experiment.
First: Make sure it is actually moles
Before you buy traps or repellents, confirm the culprit. Moles, voles, gophers, and even ants can leave dirt in places you do not want it. The fix depends on the animal.
Signs of mole activity
- Raised surface tunnels that look like long, soft ridges in the grass. Step on one and it may collapse.
- Mounds of loose soil that are often volcano-shaped (but can also look more rounded or football-shaped depending on region and species). These are pushed up from deeper digging.
- Random, wandering tunnel paths rather than neat little runways.
- Little to no plant eating in the tunnel itself. Moles mainly eat insects and worms, not your grass roots. Lawn damage is usually from tunneling, heaving, and roots drying out after the soil gets lifted.
What it might be instead
- Voles: Shallow, visible runways in grass and mulch plus gnawed plants. Often you can see small openings. Voles eat plants.
- Gophers: Fan-shaped or crescent-shaped mounds, usually with a plugged hole. Gophers are less common in some regions and dig deeper burrow systems.
- Ants: Small crumbly piles with fine soil texture, usually near pavement cracks or edges.
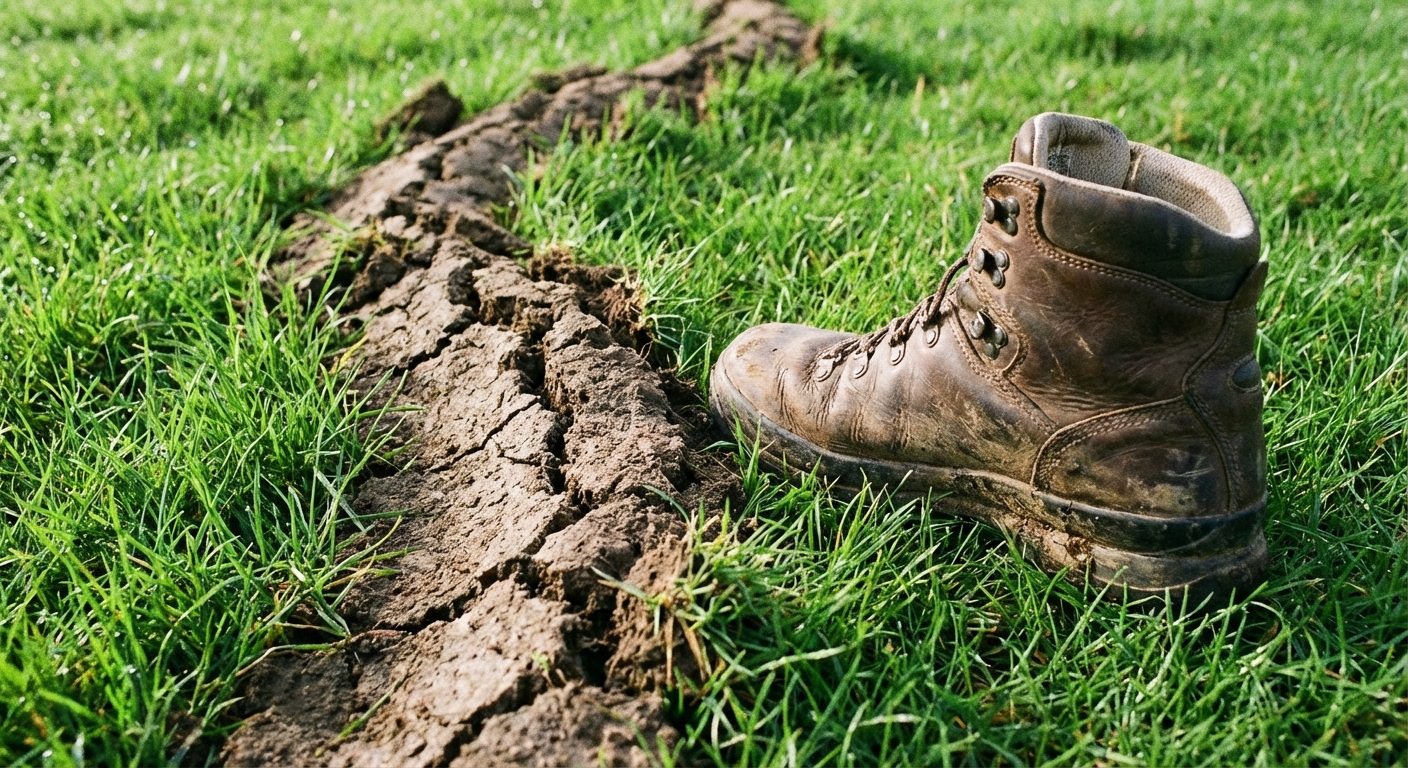
Quick test: Pick one straight tunnel segment and stomp it flat. Check it again in 24 to 48 hours. If it pops back up quickly, that tunnel is active and worth targeting. If it stays flat for a couple days, it is likely an old route (or a low-traffic feeding run).
How moles operate
Moles are insect-eaters. They build two main kinds of tunnels:
- Shallow feeding tunnels just under the sod where they hunt grubs, earthworms, and other insects.
- Deeper travel tunnels that act like mole highways. These are often used repeatedly and are the best place for traps.
In most yards, the winning strategy is to identify an active travel route and trap there, while also making the yard less appealing long-term.
Most effective DIY method: trapping
If you want the fastest, most reliable results, trapping is the move. It is not glamorous, but it works because you are removing the mole, not just asking it politely to leave.
Best trap types
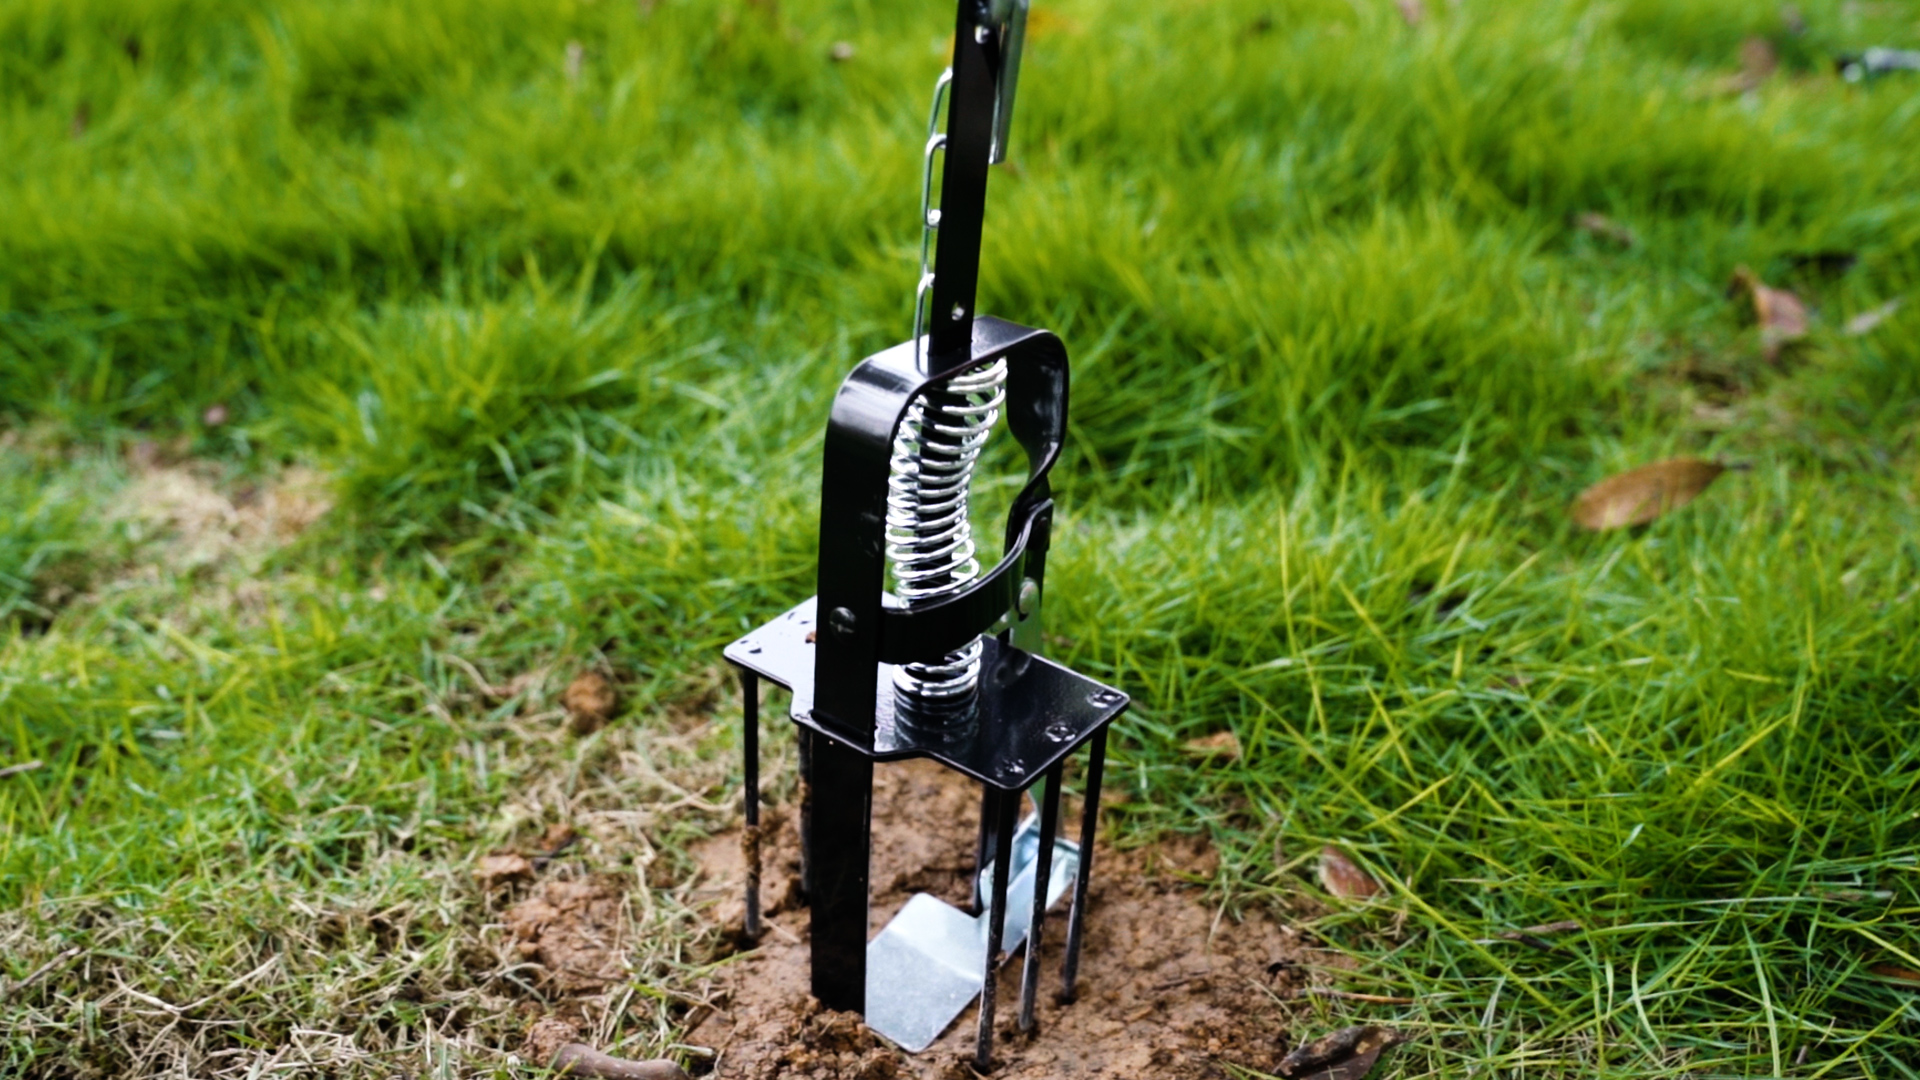
- Scissor or pincher traps (often used in surface tunnels): Good for shallow, active runs. They trigger when the mole moves through the run and hits the trigger pan or wires.
- Harpoon/spike traps: Set over a tunnel and trigger when the mole pushes up to reopen or raise the run. Effective, but you must set them carefully and keep pets and kids away.
- Choker loop traps (often used in deeper runs): Great for main travel tunnels where the mole passes through a confined space.
How to find the right spot
- Look for straight runs along fences, patios, driveways, or the edge of woods. Those are often travel lanes.
- Look for connectors where multiple feeding tunnels seem to branch into one route, especially between two “busy” areas of the yard. Those connectors are often the main commute.
- Pay attention to feel: a main travel tunnel often feels a bit deeper and more defined underfoot than a flimsy surface ridge.
- Use the stomp test on two or three candidate tunnels and re-check the next day (or the day after, if weather is dry or activity is light).
- Pick one or two active locations and focus there. Ten random traps in dead tunnels is just yard decor.
Trap-setting tips
- Minimize disturbance: Moles notice changes. Be careful not to collapse the tunnel far beyond where the trap sits.
- Wear gloves to reduce human scent. It is not magic, but it can help.
- Make the tunnel feel normal again: Many traps work better when the tunnel is re-shaped so the mole keeps using it.
- Mark the spot with a small flag or stake so you do not forget where you set it.
- Check daily and reset as needed. Fast feedback is how you win this.
My honest DIY note: The first time I trapped moles, I set traps where the yard looked worst. That was mostly feeding tunnels. When I switched to straight travel tunnels along my fence line, success came a lot quicker.
Repellents: castor oil (set expectations)
Repellents are popular because they feel gentler than trapping. They can work best when mole pressure is light, or when you are trying to push moles away from a specific area like a garden bed.
Castor oil repellents
Castor oil products are intended to make the soil environment unpleasant so moles choose to relocate. Most are applied with a hose-end sprayer or as granules that you water in. Just know the independent evidence is mixed, so think of this as a “might help” tool, not a guarantee.
- Pros: Easy to apply, non-lethal, can be part of prevention.
- Cons: Results are inconsistent. Heavy rain and irrigation can reduce effectiveness. If your neighbors have moles, new ones can move in.
How to use castor oil effectively
- Follow label rates and water it in properly. The product has to move into the soil where the activity is.
- Treat the whole active zone, not just one mound. Think in terms of “their tunnel network,” not “that one pile.”
- Reapply after heavy rain or as directed, especially during peak activity seasons.
Skip these common DIY myths: chewing gum, broken glass, diesel, flooding tunnels, mothballs, and homebrew poisons. Also, those sonic or vibration stakes are popular, but real-world results are usually disappointing. Some methods are unsafe, some are illegal in certain areas, and most just do not solve the problem.
Remove the food source: grub control
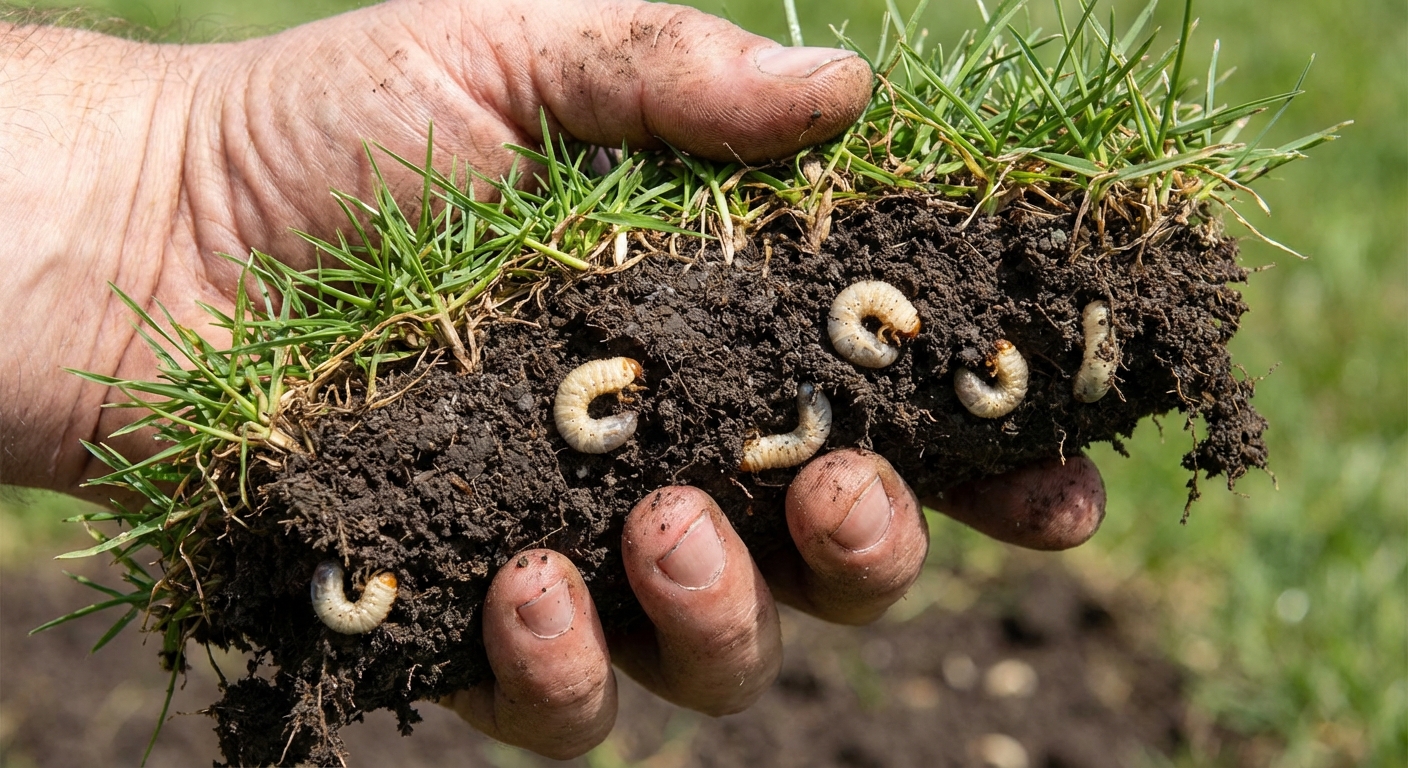
Moles eat a mix of grubs, beetle larvae, and earthworms. If you have a serious grub problem, addressing it can reduce mole activity. But here is the catch: even a grub-free lawn can still have earthworms, and moles love those too.
How to tell if grubs are part of your problem
- Patchy brown spots that peel back like a loose rug (grubs chew roots).
- Lots of skunks or raccoons digging up turf (they hunt grubs).
- When you cut a small flap of sod and find several C-shaped larvae in the top couple inches of soil.
Grub control options
- Preventive treatments (timed seasonally): Help stop young grubs before they do major damage.
- Curative treatments: Designed for active infestations, usually later in the season. Timing matters a lot.
- Beneficial nematodes: A non-chemical option that can help in the right conditions, applied when soil temps and moisture are suitable.
Thrifty homeowner tip: Do not treat for grubs just because you see moles. Confirm grubs first. Otherwise you can spend good money solving the wrong problem.
Fix the lawn while you fight
I get it. You want your yard to look normal again. You can tidy up as you go, just do not erase all signs of activity before you have a plan.
How to flatten tunnels and mounds
- For surface tunnels: Step them down gently, then use a lawn roller (or a sheet of plywood and your body weight) to firm the soil.
- For mounds: Rake the soil out with the back of a rake, then water lightly to settle it.
- Overseed if needed: If tunnels dried out the roots, scratch in seed and keep it evenly moist.
If you are actively trapping, leave a few key tunnels visible so you can monitor what is still being used.
Prevention: keep them from coming back
Once you get control, prevention is about making your yard less convenient and spotting new activity early.
Long-term prevention checklist
- Monitor in spring and fall: Mole activity often spikes when soil is moist and easy to dig.
- Keep grub populations in check if you have a history of them, using properly timed treatments or nematodes.
- Reduce overwatering: Constantly damp soil attracts worms and makes digging easier.
- Install a barrier for garden beds if they target a specific area. Hardware cloth buried at least 12 to 24 inches can help protect small zones. For best results, add an outward L-shaped bend at the bottom to discourage tunneling under the edge (and know a determined mole can still go deeper, so this is for small, high-value areas).
- Maintain lawn health: A healthy root system tolerates minor tunneling better and recovers faster.
DIY vs. professional
I am all for DIY, but there are times it makes sense to hire a pro, especially when you are losing the battle week after week.
DIY is usually fine when
- You have a few active tunnels and can monitor them daily.
- You are comfortable setting and checking traps safely.
- The damage is annoying but not destroying the whole yard.
Call a professional when
- You have persistent activity across a large property and it keeps spreading.
- You have irrigation lines, low-voltage wiring, or shallow utilities and you are worried about digging to set traps.
- You cannot monitor daily and traps keep getting tripped without results.
- You need a guaranteed service plan or you are prepping for a home sale and want fast stabilization.
Pros typically know how to identify travel tunnels quickly and can set multiple traps efficiently. If you value your time more than the learning curve, it is a reasonable spend.
What success looks like
- Expect a little new damage at first: Even with traps set, you might see fresh ridges or a mound or two for a couple days.
- Trapping timelines vary: Sometimes you get results in 24 hours. Sometimes it takes several days of adjusting location.
- There may be more than one mole: If activity drops, then starts again, you might be dealing with multiple animals or a new one moving in.
Quick action plan
- Confirm it is moles using the tunnel and mound clues.
- Find active tunnels with the stomp test (check in 24 to 48 hours).
- Set traps on straight, active travel runs and check daily.
- If you suspect grubs, confirm them by inspecting a small patch of sod, then treat if needed.
- Use castor oil repellent as a supporting tool, especially around gardens and beds.
- Repair and overseed once activity drops.
If you stick with a method for a full week and see zero progress, adjust. With moles, the difference between frustration and success is usually location, not effort.
Safety and legality notes
- Keep traps away from kids and pets and follow the manufacturer’s setup instructions.
- Be cautious with baits and poisons: Many mole toxicants are restricted, mislabeled, or illegal for lawn use in some areas, and misuse can harm pets and wildlife. Always check local rules and follow the label exactly. When in doubt, skip it.
- Skip toxic or off-label chemicals in the yard. Besides safety concerns, some products and methods are restricted by local regulations.
- When in doubt, contact your local extension office for region-specific timing on grubs and best practices for your area.
About Marcus Vance
Content Creator @ Grit & Home
Marcus Vance is a lifelong DIY enthusiast and self-taught home renovator who has spent the last decade transforming a dilapidated 1970s ranch into his family's dream home. He specializes in budget-friendly carpentry, room-by-room renovations, and demystifying power tools for beginners. Through his writing, Marcus shares practical tutorials and hard-learned lessons to help homeowners tackle their own projects with confidence.