
🚨 In a DIY emergency or rush?
Skip the details and jump straight to our 30-second cheat sheet for the most crucial info.
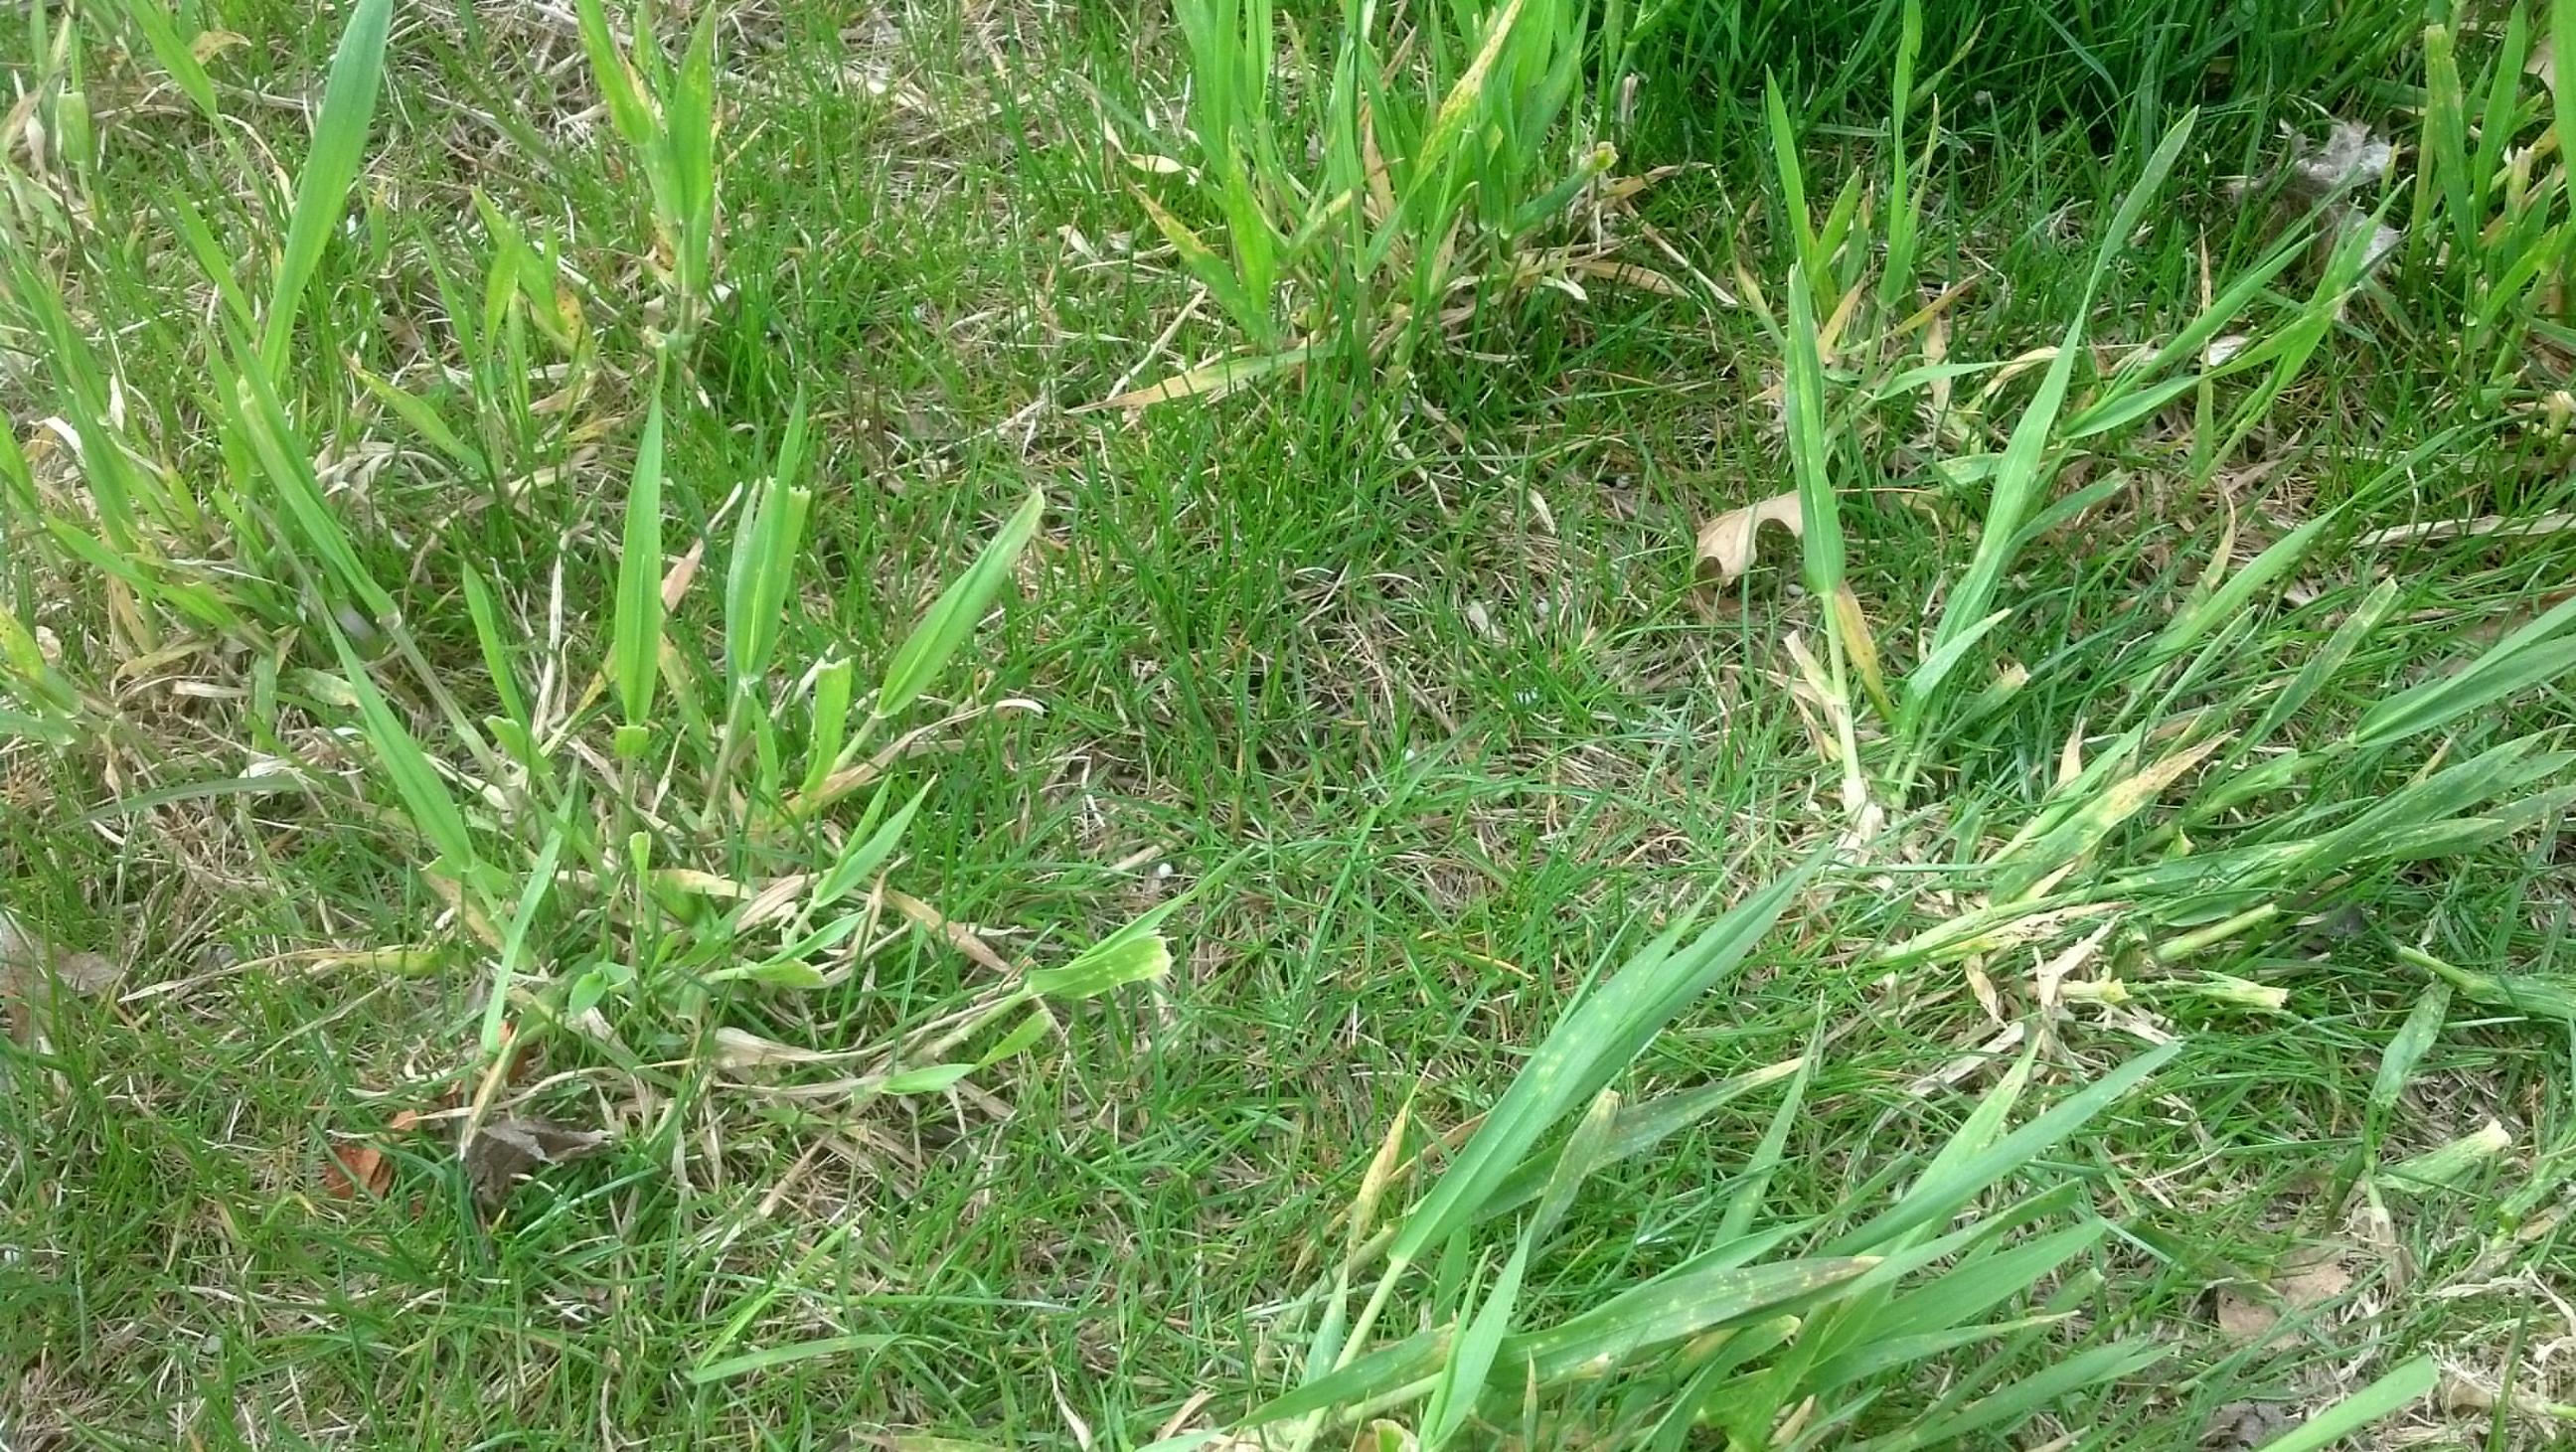
I learned the hard way that quackgrass is not a “pull it once and you’re done” kind of weed. The first time I saw it, I treated it like crabgrass, tossed down a crabgrass pre-emergent, and felt pretty proud of myself. A few weeks later, the same coarse, blue-green blades were back, threading through my lawn like they owned the place.
If you’re dealing with quackgrass, the winning move is understanding how it spreads and choosing a removal method that does not leave behind little underground pieces that resprout. Let’s break it down.
What quackgrass is and why it returns
Quackgrass (Elymus repens) is a perennial grassy weed. That one word, perennial, is the whole story.
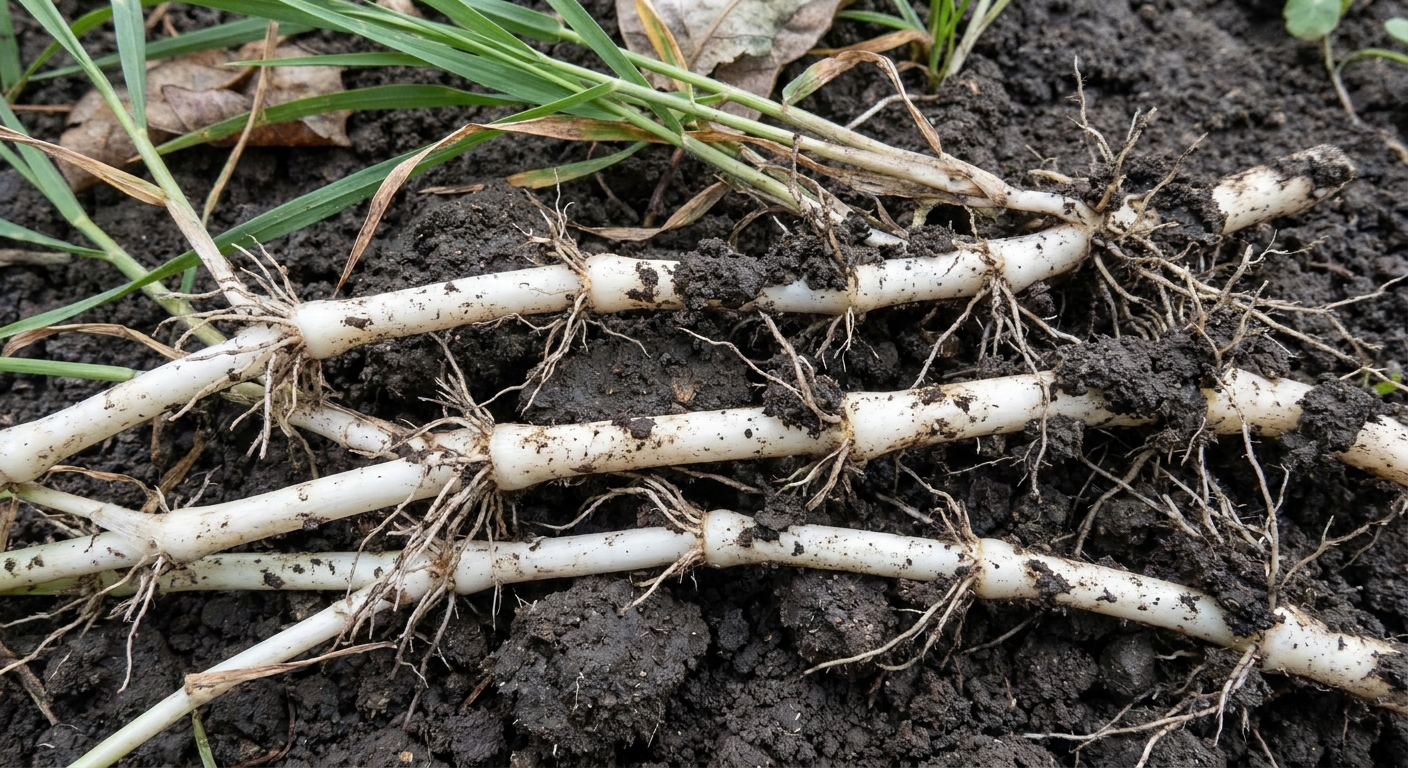
Unlike crabgrass, which is a summer annual that mostly spreads by seed, quackgrass spreads aggressively through underground rhizomes. Rhizomes are stems that creep sideways under the soil. New shoots pop up from nodes along those stems, and even small leftover segments can generate new plants.
Quick ID clues
- Color and texture: Often a dull blue-green, coarse, and upright compared to many turf grasses.
- Growth habit: It forms patches but also sends runners outward.
- Collar clue: Quackgrass typically has small clasping auricles where the leaf blade meets the stem. They look like tiny “claws” hugging the stem.
- Underground giveaway: When you dig, you’ll see tough, white rhizomes running horizontally.
If you are still unsure, dig a small section at the edge of a patch. If you find those white runners, treat it like quackgrass. If you do not find rhizomes, you may be looking at a different grassy weed and the best control plan may change.
Why crabgrass preventer will not work
Most crabgrass preventers are pre-emergent herbicides. They work by stopping germinating seeds from developing roots. That is great for crabgrass because crabgrass shows up from seed each year.
Quackgrass does not need to germinate from seed to spread in your yard. It is already established underground, spreading by rhizomes. So a crabgrass pre-emergent can be doing its job perfectly and you can still have quackgrass marching right through your lawn.
In plain terms: pre-emergent is a gate at the seed stage. Quackgrass is using a tunnel under the fence.
Before you start: pick a strategy
There is no single best method for every yard. Here is how I decide which route to take.
- Small patch in a bed or along an edge: Dig-out is usually fastest.
- Big patch where you do not want chemicals: Smothering can work if you are patient and you stay on the edges.
- Quackgrass woven through turf: Spot-treat with a systemic nonselective herbicide, then repair.
Whatever you choose, the main rule is the same: do not chop and stir the soil in a way that spreads rhizome pieces. That includes aggressive rototilling in an infested area unless you plan to repeatedly rake, pick out runners, and follow up with more control.
Option 1: Dig it out
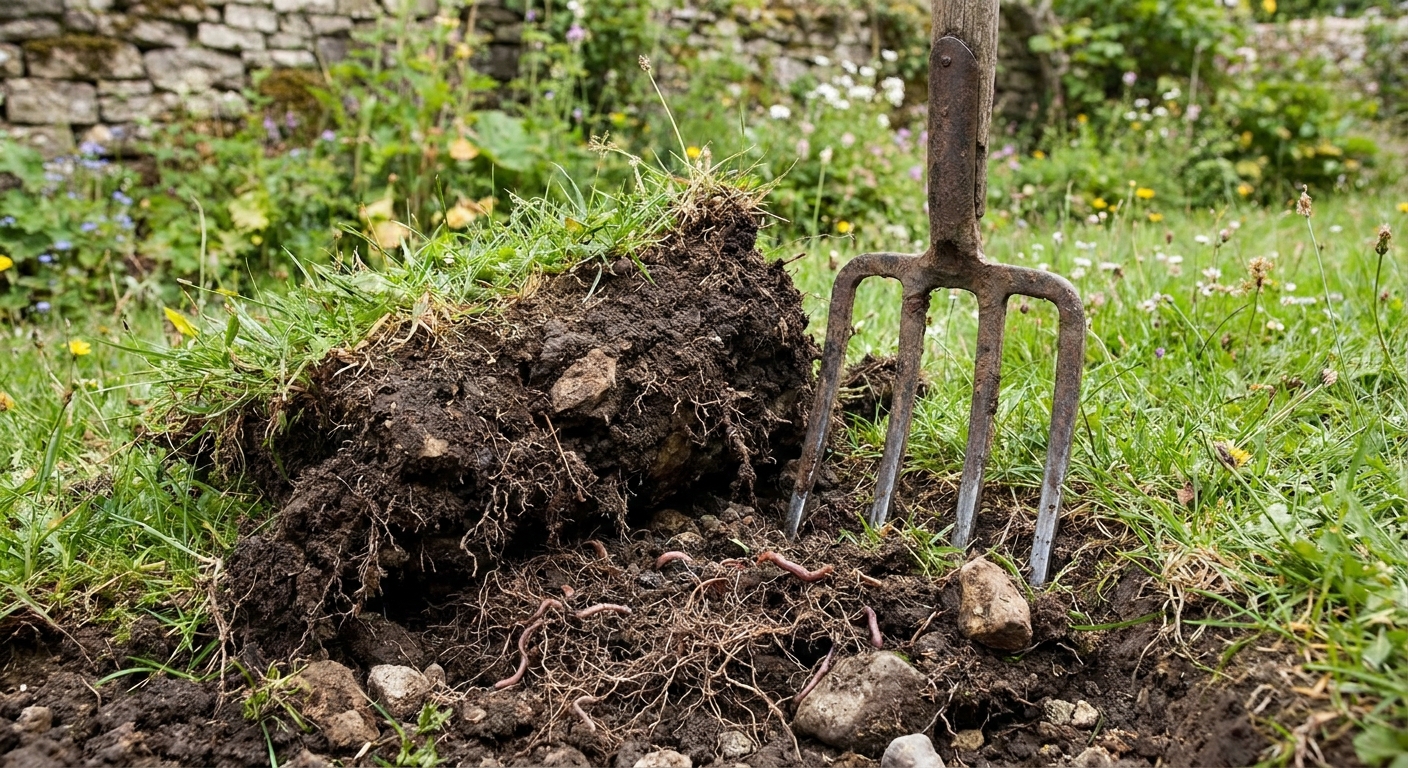
Digging is the most satisfying method when the infestation is contained. The trick is not just removing the green tops. It is removing the rhizome network.
Tools I like for this
- Spading fork (my go-to for minimizing rhizome breakage)
- Flat shovel
- Hand cultivator for teasing out runners
- Bucket or tarp for debris
- Work gloves
Step-by-step
- Water the area lightly the day before if the soil is dry. Slightly moist soil releases roots more cleanly.
- Start at the patch edge. Slide a spading fork under the turf and lift gently.
- Pull slowly and follow the runners. When you see a rhizome, keep loosening soil ahead of it so you can pull it out in long sections.
- Do not shake and scatter. Place rhizomes directly into your bucket or onto a tarp.
- Sift the loosened soil by hand. This is the part people skip, and it is why it comes back. Hunt for white pieces and remove them.
How to dispose of what you dig up
Do not toss living quackgrass rhizomes into a home compost pile you plan to reuse in the yard. Bag it for trash pickup if your local rules allow, or follow your municipal yard-waste guidelines. The goal is to avoid spreading it around your property.
Common dig-out mistakes
- Using a rototiller: It can chop one long rhizome into many pieces that can resprout.
- Yanking hard from the top: You snap the rhizomes, leaving the “business end” underground.
- Leaving the soil bare afterward: Bare soil is an invitation for whatever is nearby to move in, including quackgrass from the edge.
Option 2: Smother it
Smothering works because quackgrass needs leaf growth to feed the rhizomes. If you consistently block light, the plant can burn through stored energy and weaken. Over time, this can knock it back hard or even kill it, but results vary, and edge escapes are the most common reason it survives.
This is best for garden beds, side yards, or areas you can sacrifice for a season. It is tough to do in the middle of a prized front lawn without it looking rough for a while.
Materials
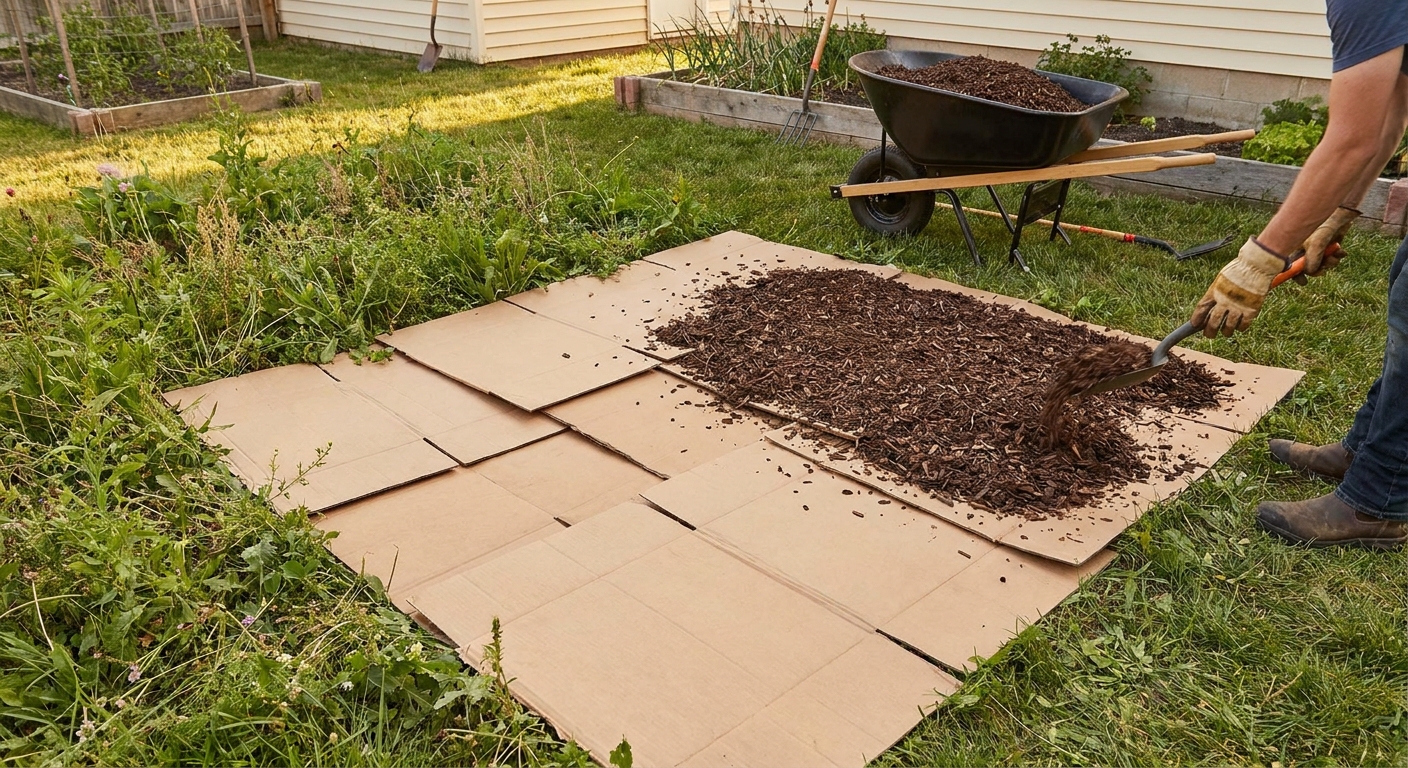
- Plain cardboard (remove tape and glossy print)
- Mulch or compost to weigh it down
- Landscape staples or rocks (optional)
Step-by-step
- Mow the quackgrass low or cut it down close to the soil.
- Lay cardboard with overlap. Overlap seams by at least 6 inches so light does not find a crack.
- Wet the cardboard to help it conform to the ground.
- Top with 3 to 6 inches of mulch or a thick compost layer.
- Guard the edges. If you see shoots sneaking out, lift that section and pull the runners you can reach, then re-cover immediately.
How long it takes
Plan on at least one full growing season for strong control, sometimes longer for established patches. In warmer, longer-season climates, you may need to stay on it into the following year. The better you seal seams and edges, the faster it goes.
Option 3: Nonselective herbicide
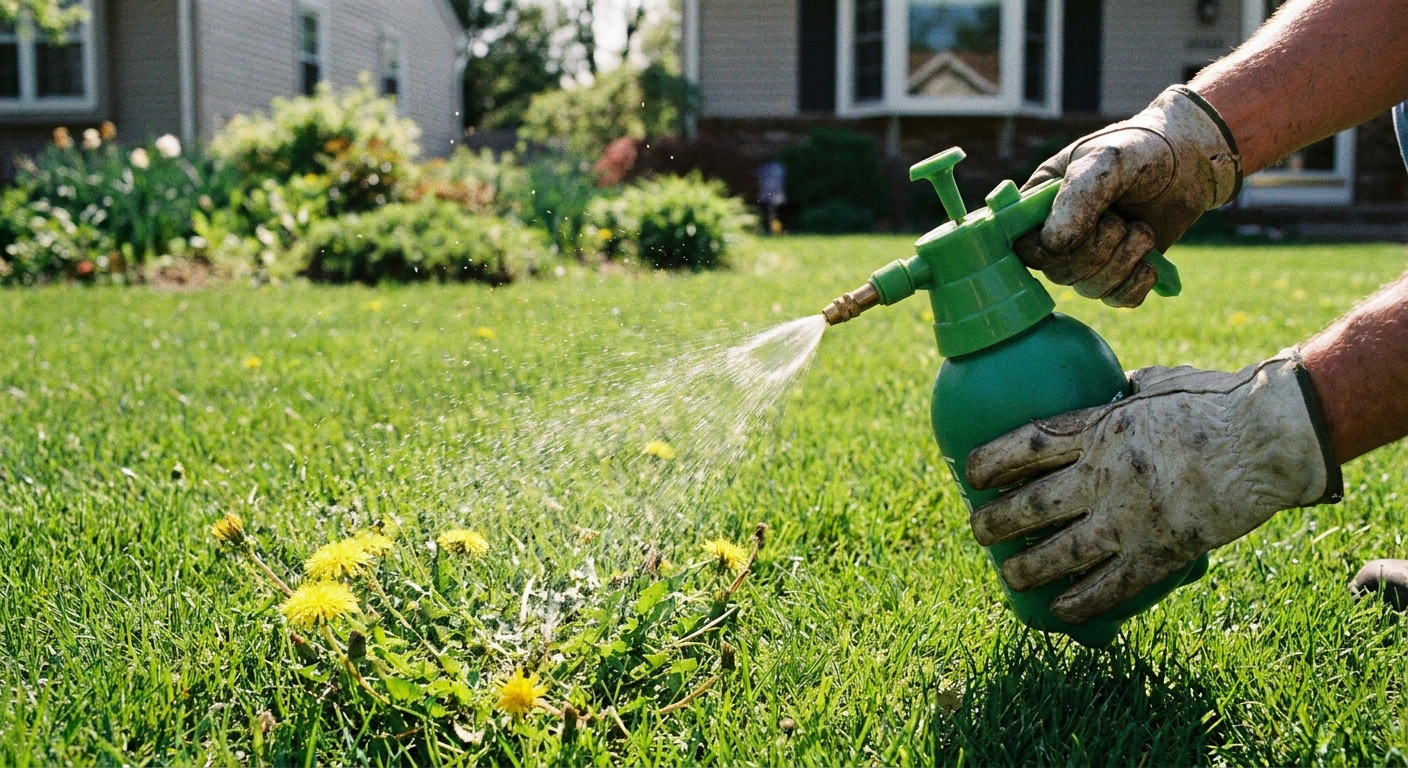
When quackgrass is tangled through decent turf, digging can destroy more lawn than you want. This is where a systemic nonselective herbicide can be the most practical tool, used as a targeted spot treatment. Systemic products move through the plant, which is what you want when the real problem is underground.
Nonselective means it can harm or kill most green plants it contacts, including your lawn. Read and follow the product label exactly, and consider local regulations. If you are not comfortable using herbicides, stick with dig-out or smothering.
It also helps to know this: selective control options for quackgrass in many lawns are limited and often involve multiple applications with very label-specific products. That is why people so often end up using careful spot treatments and then repairing the turf.
How to get better results and avoid collateral damage
- Spray when it is actively growing. Perennial grasses often respond best when they are moving sugars down into the roots, commonly in late summer into early fall. Spring growth can work too, depending on the product and conditions.
- Do not mow right before spraying. You want enough leaf surface to absorb the product.
- Choose a calm day. Drift is how good lawns get ruined.
- Watch the weather. Avoid spraying right before rain or irrigation unless the label says otherwise.
- Use a shield. A piece of cardboard held behind the target clump works great to protect nearby grass.
- Expect follow-up. Because of rhizomes, one treatment is not always the finish line. Watch for regrowth and re-treat per the label schedule.
Avoid the “chop then spray” trap
If you cut quackgrass down to nubs and immediately spray, you often reduce uptake. I have done this. It feels productive, but it can slow your results. Give it time to regrow to a decent height so it can absorb the treatment effectively.
What to do after it browns out
Once the treated patches are clearly dead, rake out the debris, loosen the surface a bit, and then move on to reseeding or patching with sod. I know it is tempting to rush this, but waiting for full dieback saves you from redoing the same spot.
Stop rhizomes from spreading
This is the part that separates “I battled it for three years” from “I knocked it back and kept it back.”
- Clean tools between areas. Rhizomes can hitchhike in clumps of soil stuck to shovels and tiller tines.
- Work from clean to dirty. Do your healthy lawn work first, then tackle quackgrass patches.
- Do not move soil from infested areas. That is basically planting quackgrass.
- Edge control matters. If quackgrass is coming from a neighbor’s lot or a neglected strip, install a physical edge barrier in beds and stay on top of the border.
Repair the lawn
Once you have removed or killed the rhizomes, the next job is closing the gap. Bare spots are where weeds return, even if it is not quackgrass.
Step 1: Rake and loosen topsoil
Rake out dead grass and any remaining runners you can see. Loosen the top 1 to 2 inches of soil with a rake or cultivator. You are aiming for good seed-to-soil contact.
Step 2: Add a thin layer of clean topsoil or compost
A quarter inch to a half inch is plenty. This helps hold moisture and gives seed a better start. Keep it thin so you do not smother existing turf at the edges.
Step 3: Reseed or re-sod
- Seeding: More budget-friendly, but needs consistent watering.
- Sod: Faster cover, great for high-visibility spots, usually costs more.
If you seed, choose a grass type that matches your existing lawn and your sunlight conditions. In my yard, mismatched grass is the giveaway that I patched in a hurry.
Step 4: Water consistently
New seed needs the surface kept consistently damp until germination. For many lawns, that means a light watering once or twice a day (sometimes more in heat or wind), just enough to keep the top layer from drying out. Once the new grass is up, transition to deeper, less frequent watering to encourage roots. Sod needs frequent watering at first as it knits to the soil.
Step 5: Mow and fertilize at the right time
- Mow when the new grass is tall enough that mowing removes only the top third.
- Fertilize based on your grass type and season. A soil test is never a bad idea if you are reworking multiple areas.
Step 6: Watch for stragglers
Even with careful removal, you may get a few shoots from missed rhizome bits. The key is to catch them early. A quick dig-out of a small runner beats starting over on a big patch.
Keep it from coming back
After you win a round, make the lawn a tougher place for quackgrass to re-enter. Keep your turf a little taller (scalping opens the door), avoid letting borders go feral, and do not let bare spots linger. Quackgrass loves an unclaimed edge.
FAQ
Will vinegar or salt kill quackgrass?
Household vinegar and salt can burn back foliage, but they are unreliable for killing the underground runners that make quackgrass a problem. Salt also damages soil structure and can prevent anything you actually want from growing.
Can I just pull it by hand?
You can, but pull slowly and be prepared to dig. If you snap off rhizomes and leave them behind, it usually comes right back.
Can thick turf outcompete quackgrass?
Healthy turf helps prevent new invasions, but established quackgrass can push through surprisingly dense lawn. I see thick turf as prevention after removal, not a standalone cure.
The 30-Second Cheat Sheet
Essential takeaways for: How to Get Rid of Quackgrass
What you’re dealing with
- Quackgrass is a perennial that spreads by underground rhizomes (creeping stems).
- Those rhizomes can resprout from small leftover pieces, which is why it keeps coming back.
Why crabgrass preventer won’t work
- Crabgrass pre-emergent stops germinating seeds.
- Quackgrass spreads mainly from existing rhizomes, not new seedlings, so pre-emergent won’t stop it.
3 reliable removal options
- Dig-out (best for small patches): Lift turf gently with a spading fork and remove as many rhizomes as possible in long sections. Avoid rototilling an infested area unless you plan to repeatedly rake and remove rhizome pieces.
- Smother (chemical-free): Mow low, overlap cardboard seams, wet it down, and cover with 3 to 6 inches of mulch. Keep edges sealed. This can weaken and eventually kill patches over time, but edge escapes can keep it going.
- Systemic nonselective herbicide spot treatment: Use carefully to avoid killing your lawn. Apply on a calm day when quackgrass is actively growing, follow the label, and expect you may need a follow-up treatment.
Key rule to avoid regrowth
- Do not leave rhizome pieces behind. Bag and remove rhizomes, clean tools, and avoid spreading contaminated soil.
Repair the lawn after removal
- Rake out dead material and loosen the top 1 to 2 inches of soil.
- Add a thin layer of clean topsoil or compost.
- Reseed (budget-friendly) or lay sod (fast cover).
- Water consistently until established, then transition to deeper, less frequent watering.
- Watch for stragglers and remove early.
💡 Tip: Scroll up to read the full article for detailed, step-by-step instructions.
⬆️ Back to top
About Marcus Vance
Content Creator @ Grit & Home
Marcus Vance is a lifelong DIY enthusiast and self-taught home renovator who has spent the last decade transforming a dilapidated 1970s ranch into his family's dream home. He specializes in budget-friendly carpentry, room-by-room renovations, and demystifying power tools for beginners. Through his writing, Marcus shares practical tutorials and hard-learned lessons to help homeowners tackle their own projects with confidence.