Why stink bugs show up in the fall
Stink bugs are not moving in because your house is dirty. They are moving in because it is warm, dry, and full of tiny cracks that feel like perfect winter shelter.
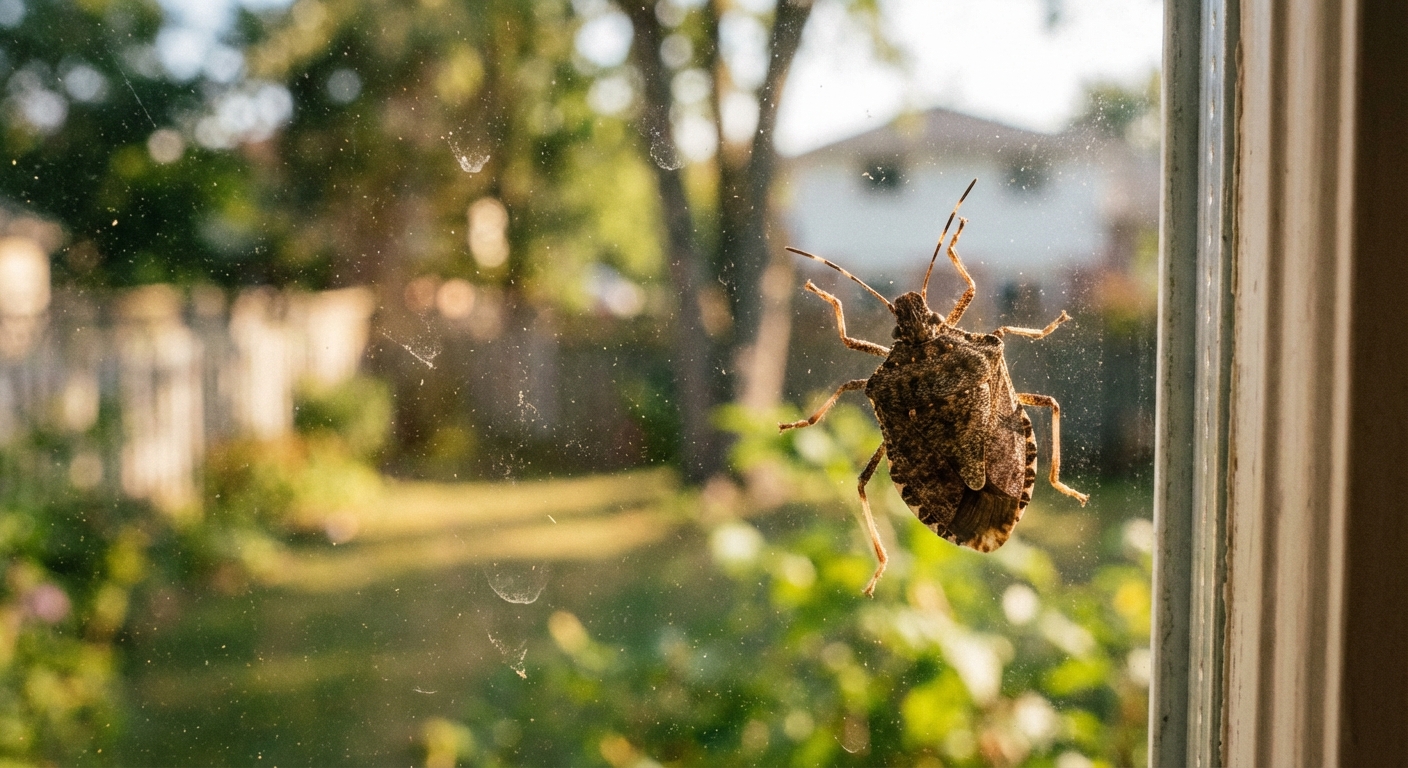
In late summer and fall, adult stink bugs (especially the brown marmorated stink bug) look for protected places to overwinter. Temperature changes and shortening days kick this off, and they use visual cues like sun-warmed exterior walls and bright windows, which is why you often spot them near sunny windows, upper floors, and the side of the house that gets afternoon sun.
Quick ID note
The brown marmorated stink bug is mottled brown and often has light bands on the antennae and along the outer edge of the abdomen. Other stink bugs can wander indoors too, but the control plan below is basically the same: remove gently, then seal entry points.
What you will notice
- Slow, clumsy bugs on walls or curtains, especially on warm days.
- Clusters around windows, recessed lights, attics, and garages.
- A sharp odor only after one gets crushed or stressed.
The goal is simple: remove the ones you see without triggering the smell, then seal the routes they are using to get in.
First rule: do not smash them
I learned this the hard way in our first fall at the old ranch. One squish on a painted wall and the smell lingered like burnt cilantro for days. Stink bugs release odor when they feel threatened or get crushed.
One important clarification: that stink is a defensive alarm chemical, not the main thing that calls in more bugs. When stink bugs truly “invite friends,” it is usually from aggregation pheromones released by live bugs once they find a good overwintering spot. Still, smashing them is a lose-lose: it stinks, it stains, and it turns cleanup into a project.
Also avoid these common mistakes
- Do not vacuum them with a regular vacuum unless you are okay with your vacuum smelling for a while.
- Do not set off indoor bug bombs (foggers) for a handful of stink bugs. Foggers are not very effective on stink bugs, and they can create unnecessary chemical exposure. They can also drive pests into wall voids instead of solving the entry problem.
- Do not rely on “contact kill” sprays indoors as your main plan. You still have to clean up bodies, and you can trigger odor.
Remove them without the stink
If you are seeing a few stink bugs at a time, the safest and most effective approach is hands-on removal. Slow and steady beats dramatic.
Method 1: Cup-and-card capture (my go-to)
This is the same move you use for a spider, just gentler.
- Hold a cup or jar over the stink bug.
- Slide a stiff piece of paper or thin cardboard between the wall and the cup.
- Carry it outside and release it away from the house.
Method 2: Soapy water jar (best if you want them gone)
Soapy water helps because it breaks surface tension and can interfere with the bug’s breathing, so you do not have to crush anything.
- Fill a jar or deli container with 1 to 2 cups warm water.
- Add a few drops of dish soap and swirl gently.
- Knock the bug into the jar and put the lid on.
Disposal tip: If you want to be sure you are not releasing live bugs, let the jar sit for a while, then pour it through a fine strainer. Bag the contents and put it in the outdoor trash, and dump the water down an indoor drain.
Method 3: Tape pickup (for walls and ceilings)
For a stink bug on a ceiling, sometimes the simplest tool is packing tape.
- Wrap tape around your hand, sticky side out.
- Press lightly on the bug to lift it off.
- Fold the tape over itself and discard in an outdoor trash bin.

DIY traps you can build fast
If you are catching several per day, traps help you stop playing whack-a-bug. The key is giving them a place to drop into without spraying your living room.
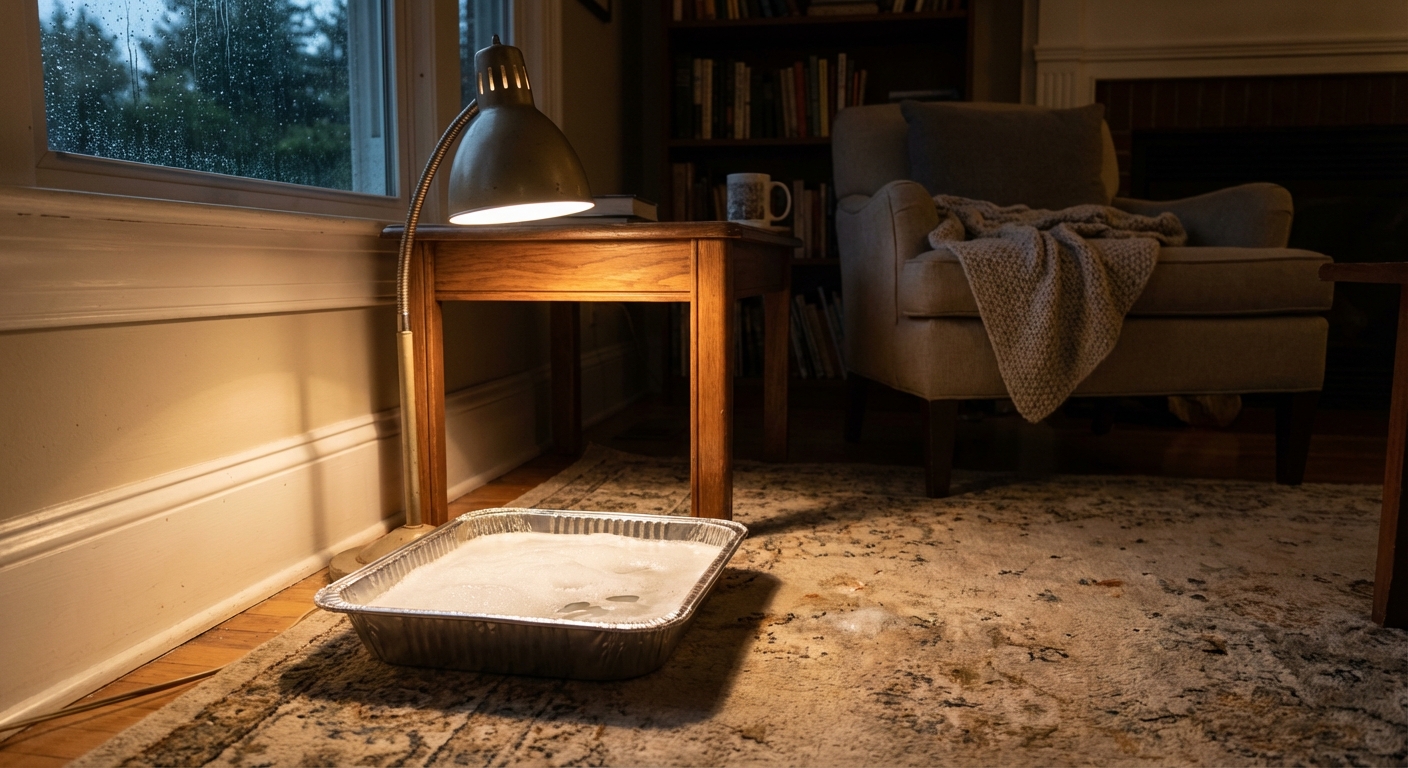
Soapy light trap (simple and effective)
This works because stink bugs are often drawn to lights at night, especially when the rest of the room is dark. You are basically offering them the wrong “window.”
What you need
- A shallow pan or disposable aluminum roasting pan
- Water
- Dish soap
- A desk lamp or clamp light
Steps
- Set the pan on the floor near where you see stink bugs most, often a window or exterior door.
- Fill with 1 inch of water.
- Add 1 teaspoon dish soap and stir gently.
- Aim the lamp so it shines directly on the pan (do not put a hot bulb close to anything flammable).
- Run it for a few hours at night, then empty it in the morning.
Safety notes
- Keep the pan and cord where kids and pets cannot reach it.
- Use a stable lamp and avoid placing it where it can be knocked over.
Bottle trap (good for windowsills)
This one is nice when you want a contained trap you can cap and toss.
- Cut the top third off a plastic bottle.
- Invert the top like a funnel and tape it in place.
- Add a little soapy water to the bottom.
- Place it near a sunny window where stink bugs gather.
Seal entry points for the long term
Removal handles today. Sealing handles next week, next fall, and every warm spell in between. Stink bugs squeeze through surprisingly small gaps, especially around windows, doors, and utility penetrations.
Where stink bugs get in
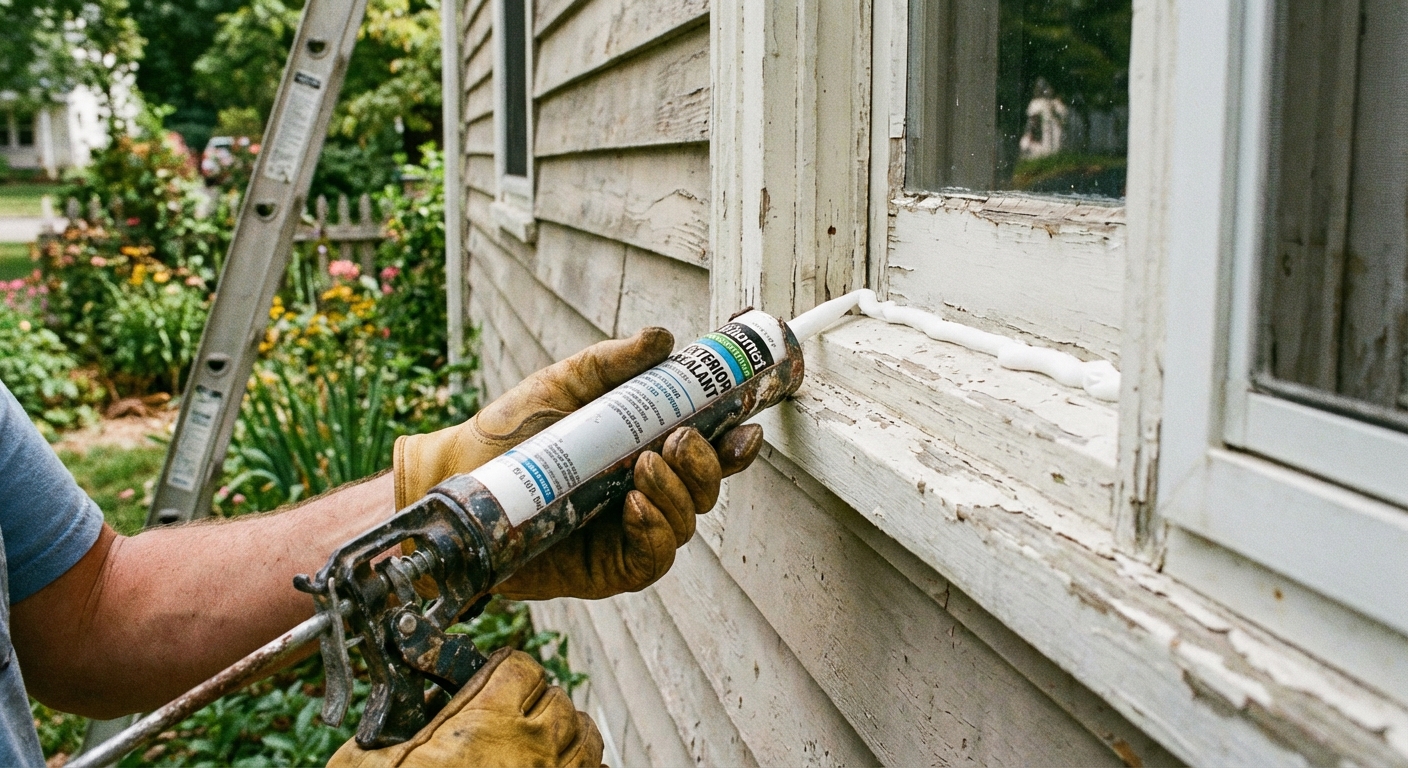
- Window frames and damaged exterior caulk lines
- Door jambs and worn door sweeps
- Siding corners, soffits, and fascia gaps
- Holes where pipes, cables, and AC lines pass through walls
- Attic vents, gable vents, and un-screened openings
- Garage door edges and weatherstripping
- Chimney flashing gaps and other roofline penetrations
A weekend sealing checklist
- Replace the door sweep if you can see daylight under exterior doors.
- Add or replace weatherstripping on entry doors and the garage service door.
- Caulk exterior cracks around window trim and where siding meets trim using exterior-rated caulk.
- Seal utility gaps with caulk for small cracks or pest-rated expanding foam for larger openings.
- Screen vents tightly (attic, soffit, gable) and repair window screens so they fit snug. Use a sturdy, tight-fitting mesh meant for vents.
Thrifty tip from my own house: If you only have time to do one thing, do the sunny side of the house first. That is where I see the biggest fall pressure every year.
What about insecticides?
For most homes, you can get excellent results without spraying indoors. Stink bugs are more of a nuisance pest than a destructive one inside, and sprays often create more hassle than they solve.
If you do want chemical help, the best approach is usually a targeted exterior perimeter treatment in late summer or early fall, plus sealing entry points. Choose products labeled for stink bugs and follow the label exactly. If you are not comfortable choosing and applying products safely, this is the moment to call a local pro.
When to call pest control
- You are seeing dozens per day and sealing is not slowing it down.
- You have hard-to-access entry points like tall gables or complicated rooflines.
- Someone in the home has sensitivities and you want a professional plan.
Prevention schedule
Stink bug prevention is mostly about timing. If you wait until you see them inside, they have already found a way in.
Late summer (August to early September)
- Walk the exterior with a tube of caulk and fix obvious gaps.
- Check weatherstripping and door sweeps.
- Repair window screens and vent screens.
Early fall (September to October)
- Reduce night lighting near doors if possible. Bugs often follow light.
- Keep shrubs and vines trimmed back from siding.
- Monitor sunny windows and set a light trap for a few nights if activity spikes (it works best in a darker room).
During the season
- Remove stragglers with cup-and-card or the soapy water jar.
- Do quick spot-sealing when you discover a specific entry point.
FAQs
Why do stink bugs keep appearing after I remove them?
You are likely dealing with two things: more bugs still outside trying to enter, and hidden bugs that already slipped into wall voids or attics and are wandering out on warm days. Removal plus sealing is the one-two punch.
Will stink bugs lay eggs in my house?
In most cases, stink bugs do not successfully reproduce indoors. They are typically trying to overwinter, not nest. That said, you can still see a lot of them because the same entry points keep letting new ones in.
What if I accidentally vacuumed them?
Take the vacuum canister or bag outside immediately if you can. Wash the canister with warm soapy water, and consider leaving it open in a garage to air out. Some people dedicate a cheap shop vac for seasonal bug cleanup.
A simple plan for today
- Tonight: Set a soapy light trap near the worst window.
- This week: Remove the ones you see using a jar of soapy water or cup-and-card.
- This weekend: Replace door sweeps, refresh weatherstripping, and caulk obvious exterior gaps.
- Next season: Do your sealing and screening in late summer before the fall rush.
If you want to stay sane through stink bug season, think like a renovator: control the openings, control the problem.
About Marcus Vance
Content Creator @ Grit & Home
Marcus Vance is a lifelong DIY enthusiast and self-taught home renovator who has spent the last decade transforming a dilapidated 1970s ranch into his family's dream home. He specializes in budget-friendly carpentry, room-by-room renovations, and demystifying power tools for beginners. Through his writing, Marcus shares practical tutorials and hard-learned lessons to help homeowners tackle their own projects with confidence.