I still remember my first ceiling fan install in our 1970s ranch. I shut off the switch (not the breaker), assumed the power was dead, and got a spicy reminder that “off” does not mean “safe.” Learn from my mistake. If you can take your time, stay organized, and respect electricity, installing a ceiling fan is one of the best comfort upgrades per dollar you can make.
This guide walks you through replacing an existing ceiling light with a fan: how to confirm your ceiling box is listed for fan support, how to wire it correctly, and how to avoid the common wobble issues that make people hate their new fan.
Safety first (read this before you touch anything)
- Turn off the breaker that feeds the ceiling box. Do not rely on the wall switch.
- Verify power is off with a non-contact voltage tester at the fixture wires and switch. Test the tester on a known live circuit first.
- Use a solid ladder on flat ground. Ceiling fan installs are overhead work and fatigue makes mistakes more likely.
- Never hang a fan from drywall or a standard light-duty box. Only use a ceiling box that is listed/marked for ceiling-suspended fans and installed to framing or a listed fan brace.
- If any wiring looks damaged (brittle cloth insulation, melted wire nuts, scorch marks), stop and call a pro.
When to call an electrician: If there is no ground wire and you are unsure how to proceed, if you have aluminum wiring, if your box has more than one cable and you cannot identify what’s what, if your breaker trips, if you suspect knob-and-tube or other legacy wiring, or if you do not have a box listed for fan support and the framing situation is unclear.
Tools and materials
Tools
- Non-contact voltage tester
- Phillips and flathead screwdrivers
- Wire strippers
- Needle-nose pliers (helpful for bending hooks and guiding wires)
- Drill/driver (optional but speeds things up)
- Small level
- Ladder
Materials
- Ceiling fan kit (fan body, bracket, downrod if used, blades, light kit if included)
- Wire connectors (often included, but have extras)
- Electrical tape (optional, for wrapping wire nuts if desired)
- Fan-support listed ceiling box and brace (only if your existing box is not listed for a ceiling-suspended fan)
Tip from my own toolbox: Keep a small cup or magnetic tray for screws. Ceiling fan installs come with a small mountain of fasteners, and losing two of them in the carpet will add 30 minutes to your day.
Before you buy: pick the right fan
- Room size: Roughly, 36 inch fans suit small rooms, 42 to 48 inch for most bedrooms, and 52 inch for larger living areas. When in doubt, measure your space and check the manufacturer’s chart.
- Ceiling height: Aim for good airflow without sacrificing safety. Many installers like blades around 8 to 9 feet from the floor for comfort, but treat that as a nice-to-have. The bigger rule is clearance: keep blades at least 7 feet above the floor (and follow your local code and the fan instructions).
- Wall clearance: As a general target, keep blade tips about 18 inches from walls and other obstructions for smoother airflow and less turbulence.
- Sloped ceilings: If your ceiling is angled, confirm the fan is slope-rated or plan on the manufacturer’s sloped-ceiling adapter.
- Wet vs damp rating: Outdoors under cover usually needs “damp-rated.” Direct weather exposure needs “wet-rated.”
- Controls: If you want a wall control, confirm the fan supports it. If you want independent fan and light control, you may need a second switched leg or a remote kit.
Step 1: Shut off the breaker and confirm it’s dead
- Turn the existing light on so you can see it go dead when you shut off the breaker.
- At the electrical panel, turn off the correct breaker.
- Back at the ceiling, support the fixture while you loosen the canopy or mounting screws.
- Carefully lower the canopy enough to access the wires.
- Use your non-contact voltage tester on the wires and connections. Confirm nothing is energized.
My rule: If the tester beeps at anything up there, I do not touch bare copper. I go back to the panel and sort it out first.
Step 2: Remove the old light fixture
- Support the fixture with one hand while you remove the mounting screws.
- Lower the fixture to expose the wire connections.
- Take a quick photo of the wiring before you disconnect anything. Future-you will appreciate it.
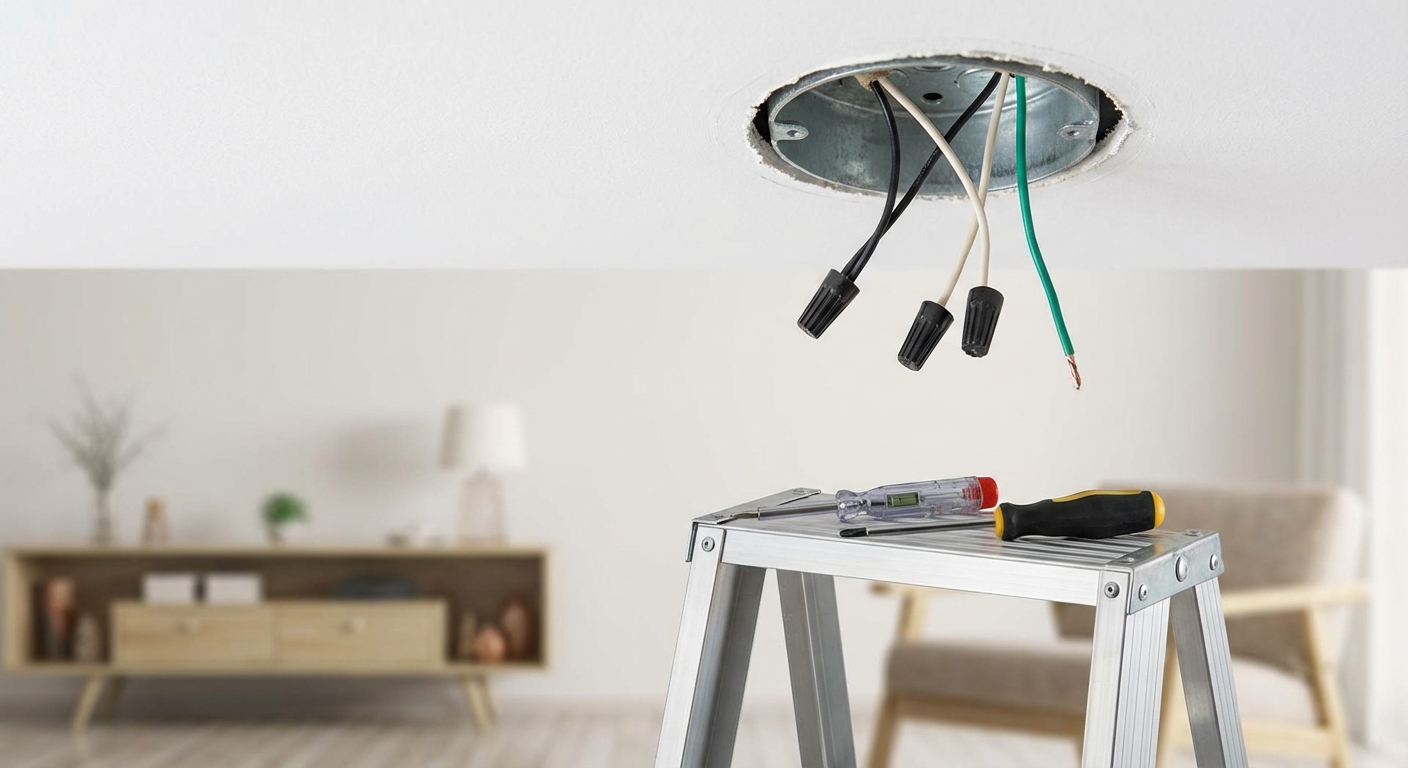
- Remove the wire nuts: typically black to black (hot), white to white (neutral), and bare/green to ground.
- Remove the mounting bracket from the electrical box.
Step 3: Confirm the box supports a fan (this matters)
This is the step that separates a safe install from a dangerous one. A ceiling fan creates vibration and torque. A standard light-duty box often cannot handle it.
How to tell if it is listed for fan support
- Look inside the box for markings like “For use with ceiling-suspended fans”, “Fan support”, or a fan-specific weight rating.
- Do not assume based on material. Many standard plastic boxes are not fan-rated, but some plastic boxes are listed for fan support. The only thing that counts is the marking and the listed installation method.
- The box must be secured to framing or a listed fan brace, not just floating in drywall.
If it is not listed for a fan
Plan to replace it with a fan-support listed box and brace designed to span between joists through the existing ceiling opening. If you are not comfortable doing that overhead, this is a great point to call an electrician or a skilled handyman.
Step 4: Install the fan bracket
- Feed the house wires through the center of the fan mounting bracket.
- Attach the bracket to the fan-support box with the manufacturer-supplied screws (or screws listed for the box). Tighten firmly.
- Make sure the bracket is oriented correctly for your fan. Some brackets have a “ceiling” side or specific slots for the canopy screws.
Quick check: Grab the bracket and try to wiggle it. You want “rock solid,” not “pretty good.”
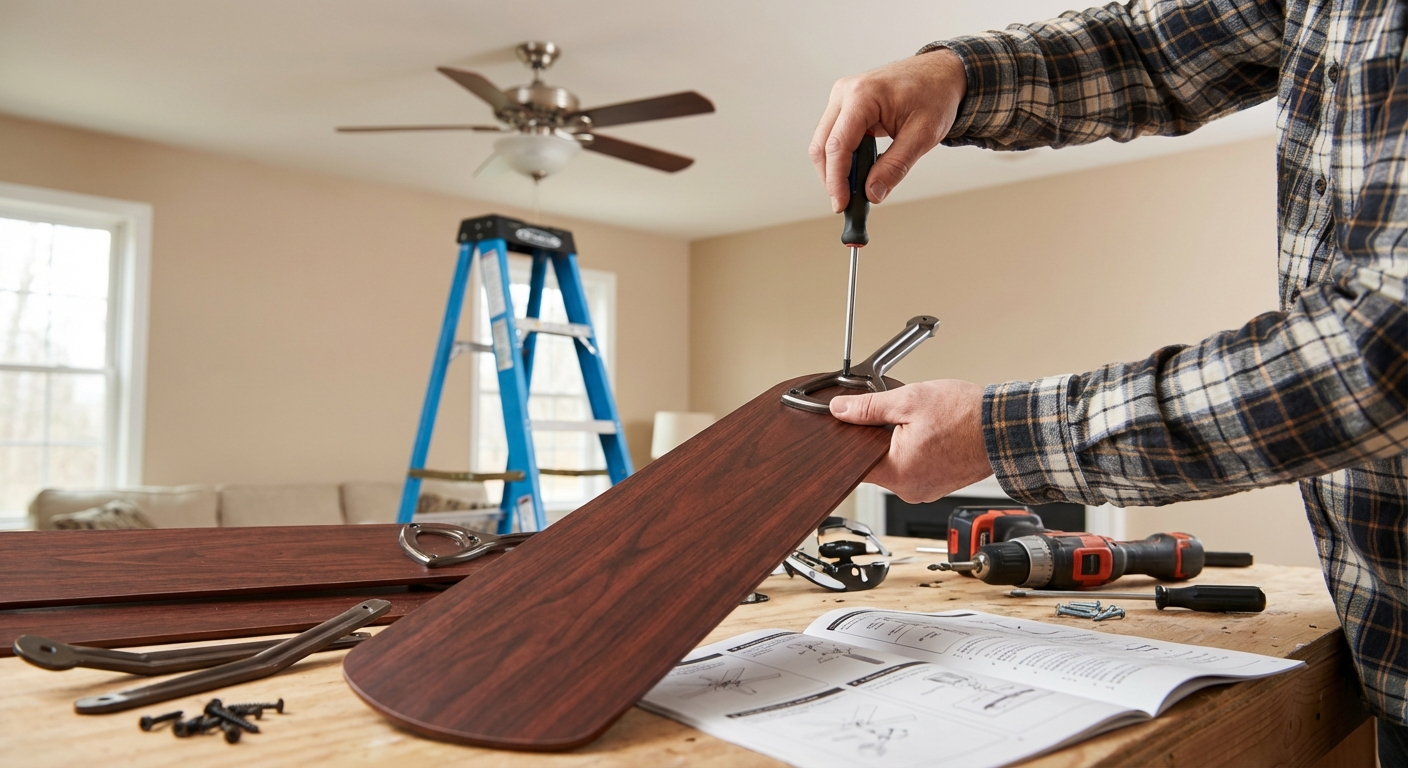
Step 5: Assemble the fan (do it on the floor)
Overhead work is where you drop screws, cross-thread bolts, and invent new words. If your model allows it, pre-assemble on the ground.
- Attach blades to blade arms (or blade arms to the motor), depending on your fan design.
- If your fan uses a downrod, thread the wires through the downrod and attach the downrod to the motor housing per instructions. Tighten the set screw and install the cotter pin if provided.
- If there is a light kit, you may install it later, after the fan is hanging, depending on access.
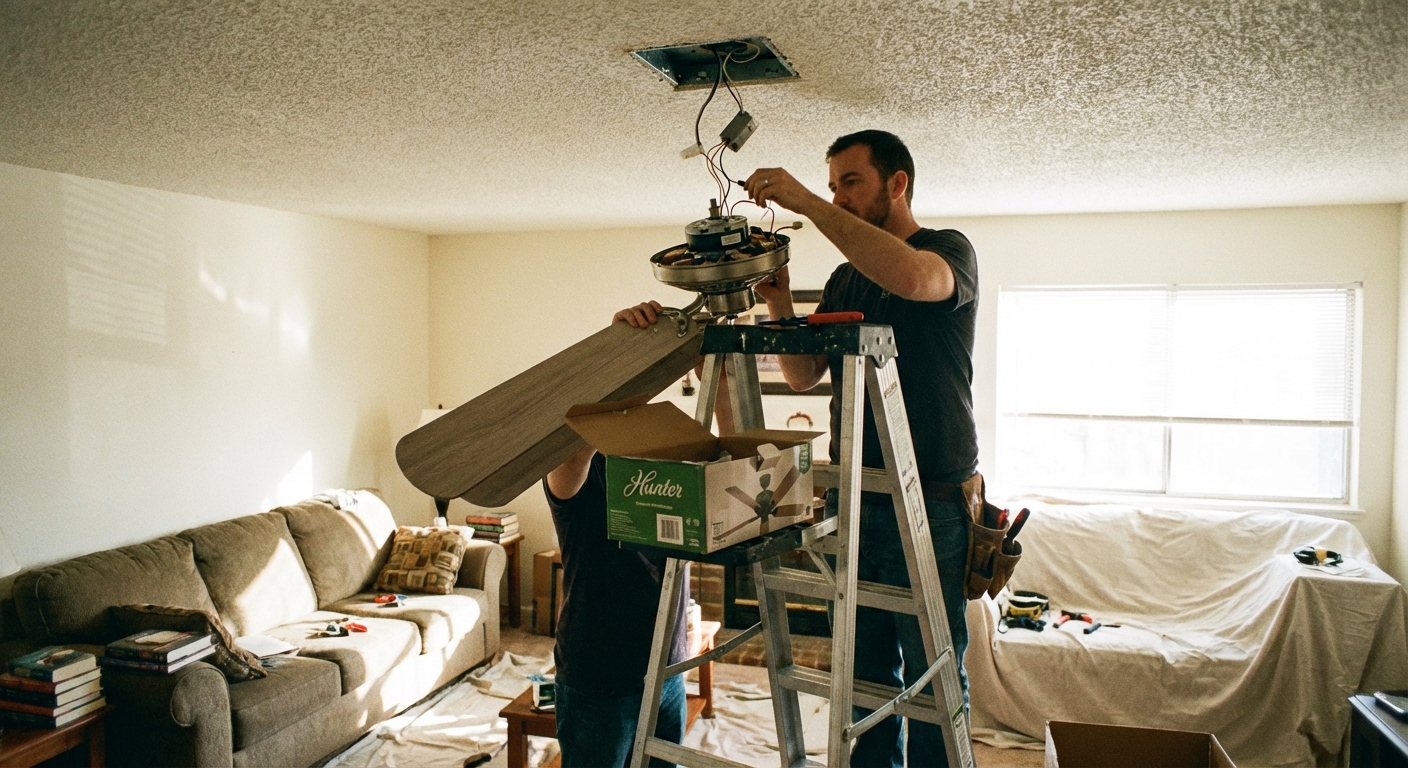
Step 6: Hang the fan and connect the wires
Most fans have a temporary hanging hook or a slot that lets the motor hang while you wire. Use it. Your arms will thank you.
Wiring basics (typical colors)
Note: The colors below reflect common North American wiring, but older homes and past DIY work can be full of surprises. Always follow the fan manual and verify what you have in the box.
- House black (hot) usually connects to fan black (fan motor hot).
- House white (neutral) connects to fan white.
- Ground (bare copper or green) connects to the fan green and the metal box/bracket ground if required.
- Fan blue is commonly the light kit hot.
Common wiring scenarios
Scenario A: One wall switch controls everything
- Connect house black to fan black + fan blue together (fan and light share the switched hot).
- Connect house white to fan white.
- Connect grounds together.
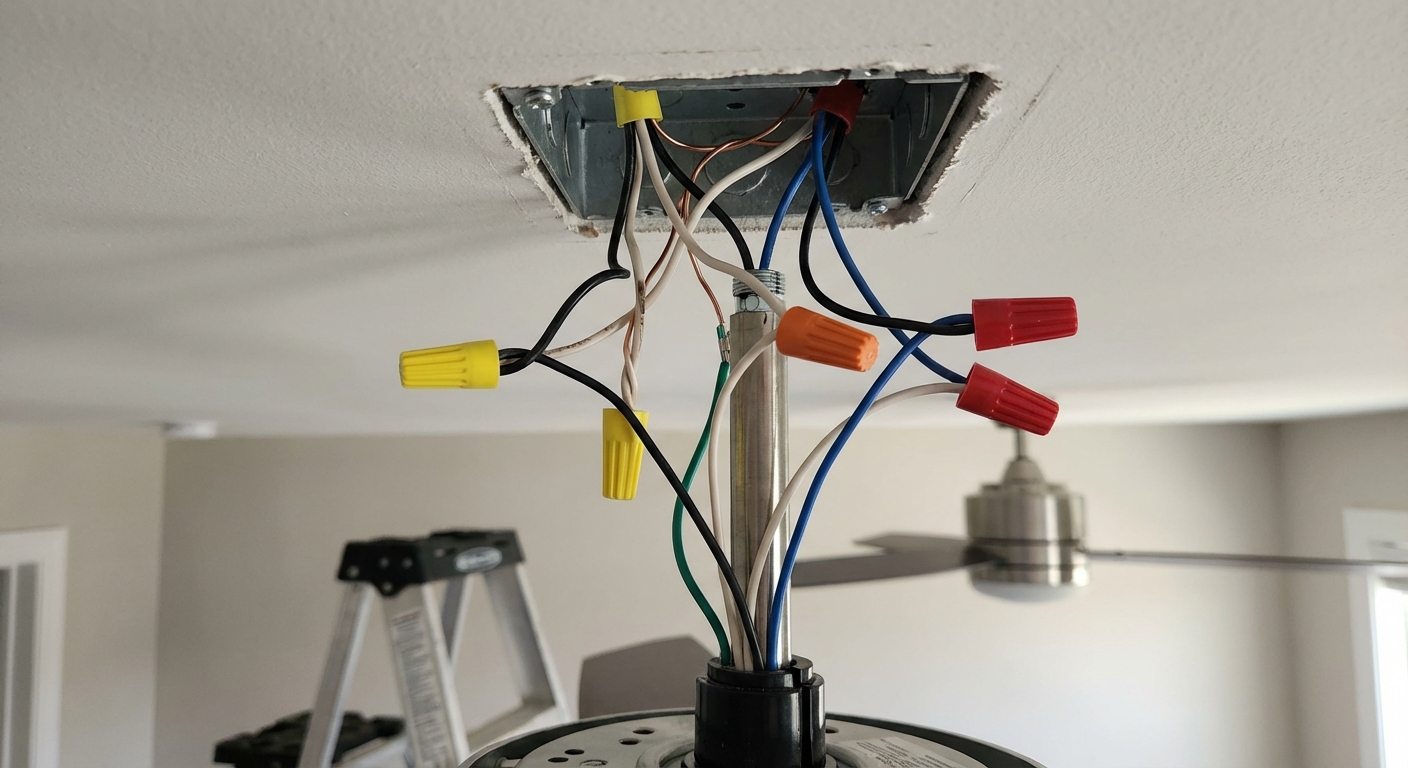
Scenario B: Two switches, separate fan and light
- Connect house black (one switch leg) to fan black.
- Connect house red (second switch leg) to fan blue.
- Connect house white to fan white.
- Connect grounds together.
Important: Not every ceiling box has that extra red wire. If you only have black, white, and ground, you cannot get separate wall-switch control without running additional cable or using a remote receiver, depending on the fan.
Make solid connections
- Strip wire ends to the length recommended (usually about 1/2 to 3/4 inch).
- Match the wire connector to the conductors you are joining (quantity and gauge). If in doubt, use the connectors that came with the fan, or a properly sized listed connector.
- Hold wires even, twist the wire nut on until snug, then gently tug each wire to confirm it is captured.
- Confirm there is no bare copper exposed below the wire nut (other than ground where appropriate).
- Fold wires neatly into the box so the connectors sit deep and the canopy will fit without pinching.
Step 7: Mount the canopy
- Lift the canopy up over the bracket and align screw holes.
- Tighten canopy screws evenly.
- Confirm the canopy sits flush to the ceiling and does not wobble.
If the canopy will not sit flush: Usually it is a wire connector or ground loop sitting too high in the box. Turn the breaker back off, lower the canopy, and repack the wires more neatly.
Step 8: Install blades and the light kit
- Attach blades or blade arms according to the manual. Tighten screws firmly, but do not strip them.
- Install the light kit and connect its plug or wires (often a quick-connect).
- Install bulbs that match the fixture’s max wattage, or use LEDs for lower heat and power.
Pro habit: After the first full spin by hand, re-check that no blade is close to the ceiling, pull chains, or glass shades.
Step 9: Restore power and test
- Turn the breaker back on.
- Test the fan at each speed.
- Test the light and any dimming functions (if supported by your switch and fan).
- Stand under it and listen: you want a steady “fan hum,” not clicking, scraping, or rattling.
If it does not turn on: Turn the breaker off again and re-check your connections. A loose neutral or a missed quick-connect plug is a common culprit.
How to fix a wobbling ceiling fan
A little movement is normal, but a fan should not look like it is trying to escape the ceiling.
Start with the simple stuff
- Re-tighten everything: blade screws, blade arm screws, bracket screws, canopy screws.
- Check for a bent blade arm: a small bend can cause big wobble.
- Confirm blades are matched: some fans have blade labels. Make sure you did not mix sets.
Use the balancing kit (it works)
- Turn the fan on medium speed.
- Use the clip from the kit on the edge of one blade, midway between motor and tip.
- Move the clip blade-to-blade until wobble improves.
- Once you find the best blade, place the adhesive weight on top of that blade near where the clip helped most.
My honest mistake: I used to slap the weights on randomly. Take five minutes and do the clip step. It saves you from guessing.
Switches and controls (do not skip)
- Do not run a fan motor on a standard light dimmer. If you want wall control, use a fan speed control (or the manufacturer’s control) that is rated and intended for your fan.
- Light dimming is separate: A fan with a light kit may allow dimming, but only with a compatible dimmer and bulbs. Many LED bulbs hate cheap dimmers.
- If your fan has a remote receiver: Follow the manual for wiring and pairing. Most “mystery failures” are a missed receiver connection or a pairing step.
Troubleshooting quick hits
- Fan works, light does not: check the blue wire connection and any light kit plug connection inside the housing.
- Light flickers: verify bulbs are seated, use quality LED bulbs, and ensure your wall dimmer is compatible. Many fans require a specific dimmer or no dimmer at all.
- Remote is dead: replace batteries, verify the receiver wiring, and confirm dip switches or pairing steps match.
- Rattling: glass shade screws are notorious. Snug them gently and add rubber washers if included.
- Breaker trips: stop and call an electrician. This can indicate a short, miswire, or damaged insulation.
Permits and code notes
Rules vary by location, but these are common requirements:
- A ceiling fan must be supported by a box listed for ceiling-suspended fans installed per its listing and local code.
- All splices must be inside an approved box. The fan canopy serves as the box cover only when installed as part of the listed fan assembly, per the manufacturer’s instructions.
- Grounding must be continuous and properly connected.
If you are unsure what your local jurisdiction requires, a quick call to the building department can save you headaches later, especially if you plan to sell.
My final checklist
- Breaker off during work, breaker on only after everything is closed up
- Box is listed for fan support and bracket is tight
- Wire connectors are tight, sized correctly, and wires are tucked with no pinching
- Canopy is flush and secure
- All blade screws are tightened
- Fan runs smoothly on every speed with no odd noises
If you want, tell me what wires you see in your ceiling box (colors and how many cables) and whether you have one or two switches. I can help you map the most likely wiring setup before you connect anything.
About Marcus Vance
Content Creator @ Grit & Home
Marcus Vance is a lifelong DIY enthusiast and self-taught home renovator who has spent the last decade transforming a dilapidated 1970s ranch into his family's dream home. He specializes in budget-friendly carpentry, room-by-room renovations, and demystifying power tools for beginners. Through his writing, Marcus shares practical tutorials and hard-learned lessons to help homeowners tackle their own projects with confidence.