I still remember my first dimmer swap. I was feeling confident, flipped the breaker I thought was right, and got a very humbling reminder that confidence is not a voltage tester. The good news is a dimmer switch is a beginner-friendly upgrade when you take it slow, identify the wires correctly, and choose the right dimmer for your bulbs.
This guide covers both single-pole (one switch controls one light) and three-way (two switches control one light) setups, plus how to pick an LED-rated dimmer and how to confirm you are not overloading it.
Quick note: Wiring colors and common practices can vary by country and by era of construction. Follow your dimmer instructions and your local electrical code requirements.
Before you start
Tools and supplies
- LED/CFL-compatible dimmer switch (single-pole or three-way as needed)
- Flathead and Phillips screwdriver
- Non-contact voltage tester (NCVT) and a plug-in lamp for double-checking
- Optional but helpful: multimeter (for identifying line versus load)
- Wire stripper and needle-nose pliers
- Wire connectors (wire nuts) sized for your wire gauge
- Electrical tape
- Flashlight and a small piece of masking tape for labeling
Safety basics I follow every time
- Turn off the breaker and then verify power is off at the switch with a tester.
- Test your tester. Check it on a known live source, then verify the switch is dead, then check it on known live again. Non-contact testers are great, but they can be fooled.
- The light turning off is not proof the box is dead. You can still have a hot in the box from another circuit or a wiring oddity.
- Do not trust wire color alone. Colors help, but previous DIY work can make them unreliable.
- If you see aluminum wiring (often dull silver, common in some 1960s to 1970s homes), stop and call an electrician unless you are trained and using approved connectors and devices rated for it.
- If the box is crowded or wires are brittle, plan on a deeper box or professional help. Dimmers can be bulkier than standard switches.
Pick the right dimmer
The best wiring job in the world will still flicker if the dimmer and bulbs do not play nicely together. Here is what to look for when shopping.
Match the switch type
- Single-pole: One switch controls the light. Most common in bedrooms, closets, porches.
- Three-way: Two switches control the same light. Common in hallways and stairways.
If you have two switches controlling one light, you need a three-way capable dimmer. Typically only one of the two locations will be a dimmer, and the other stays a regular three-way switch, unless you are using a matched companion system from the same brand.
Use dimmable LEDs plus an LED-rated dimmer
Two labels matter here:
- Bulbs: Look for bulbs labeled “Dimmable”.
- Dimmers: Look for a dimmer labeled “LED/CFL compatible” or “works with dimmable LEDs”.
Traditional incandescent-only dimmers can cause LED flicker, dropouts at low levels, or buzzing.
Dimmer type matters sometimes
Most standard wall dimmers are forward-phase (triac) and work with a lot of dimmable LEDs. Some LEDs behave better on reverse-phase dimmers (often labeled ELV or trailing-edge). If you are chasing flicker or buzz with otherwise “correct” parts, checking the dimmer type and the manufacturer compatibility list can save your sanity.
Combo models save headaches
Many modern dimmers are labeled “single-pole or 3-way”. These are great because you can use the same dimmer for either configuration, as long as you wire it correctly.
Check the load rating
Dimmers are rated in watts, but LED loads behave differently than incandescent. Many dimmers list separate maximums like:
- 600W incandescent/halogen
- 150W LED/CFL (example)
Always follow the dimmer’s LED rating, not the incandescent rating.
Do a quick load calculation
Add up the wattage of every bulb controlled by that dimmer.
- Example: 6 recessed LEDs at 10W each = 60W total
- If your dimmer is rated for 150W LED, you are good.
Important: If you are dimming multiple fixtures, include every bulb on that switch. If you are unsure, read the bulb base or packaging, or look up the model online.
Multi-gang derating is manufacturer-specific
If your dimmer sits in a box with other switches (a 2-gang or 3-gang box), it may need derating. Some dimmers have break-off fins and the instructions show how the maximum wattage drops when installed next to other devices. Follow the chart for your dimmer. This is one of those boring details that prevents overheating.
Smart dimmers and neutrals
Many basic dimmers do not need a neutral, but many smart dimmers do. If the instructions require a neutral and your box does not have one, do not improvise. Pick a model designed for no-neutral installs or call an electrician.
Step 1: Confirm what you have
Single-pole signs
- Only one switch controls the light.
- When you pull the switch out, you usually see two insulated wires on the switch (often black), plus ground.
- The switch may have two brass screws (and a green ground screw).
Three-way signs
- Two switches control the same light.
- When you pull a switch out, you typically see three insulated wires on the switch (two travelers plus one common), plus ground.
- The switch typically has three screws plus ground. One screw is a different color (often black) and that is the common.
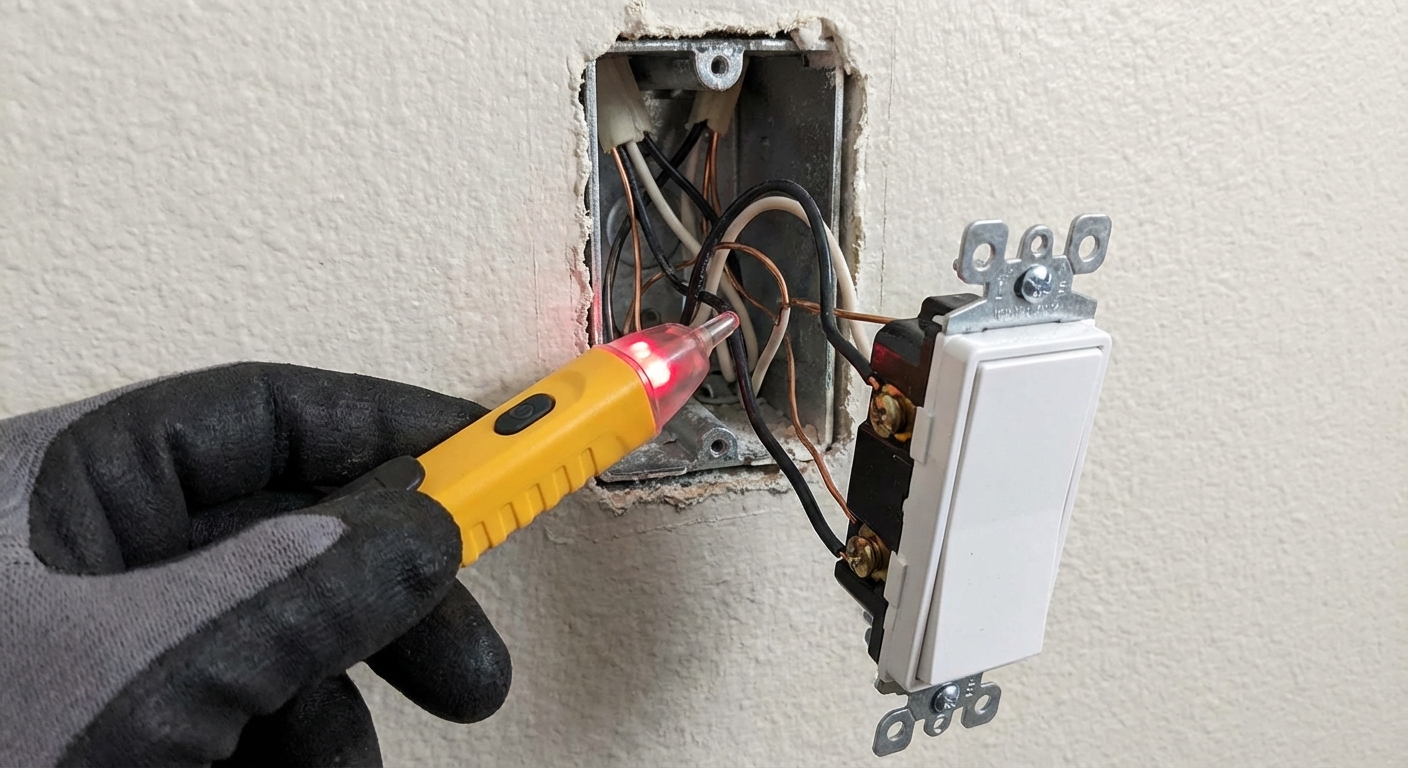
Step 2: Shut off power
Turn the light on at the switch so you can see when power is off.
Turn off the correct breaker.
Confirm the light turns off, but remember that does not guarantee the box is de-energized.
Remove the switch plate and use a non-contact voltage tester at the screws and wires in the box.
If you have a multimeter and know how to use it, confirm no voltage is present where you will be working.
If your tester still indicates voltage, stop and find the correct breaker. In some homes, a box can have power from multiple circuits.
Step 3: Remove the old switch
Unscrew the switch from the electrical box and gently pull it out.
Take a clear photo of the wiring before you disconnect anything. Future-you will thank you.
-
Identify what you can:
- Ground: bare copper or green insulated wire, connected to a green screw or the metal box.
- Neutral: usually white wires tied together in the back of the box. Many dimmers do not use neutral, but some smart dimmers require it.
- Three-way travelers: two wires that run between the two three-way switches.
- Line (hot) and load: the always-hot feed and the wire going to the light. These are not always obvious by color.
Reality check for beginners: If you cannot positively identify line versus load (especially in a box with multiple cables or a white wire used as hot), that is a good stopping point. A multimeter and a careful method can sort it out, but if you are not comfortable testing a live circuit, call an electrician.
Pro tip from my own mistakes: On three-way circuits, do not assume the common is the black wire. The common terminal screw is what matters. Label that wire with tape before disconnecting.
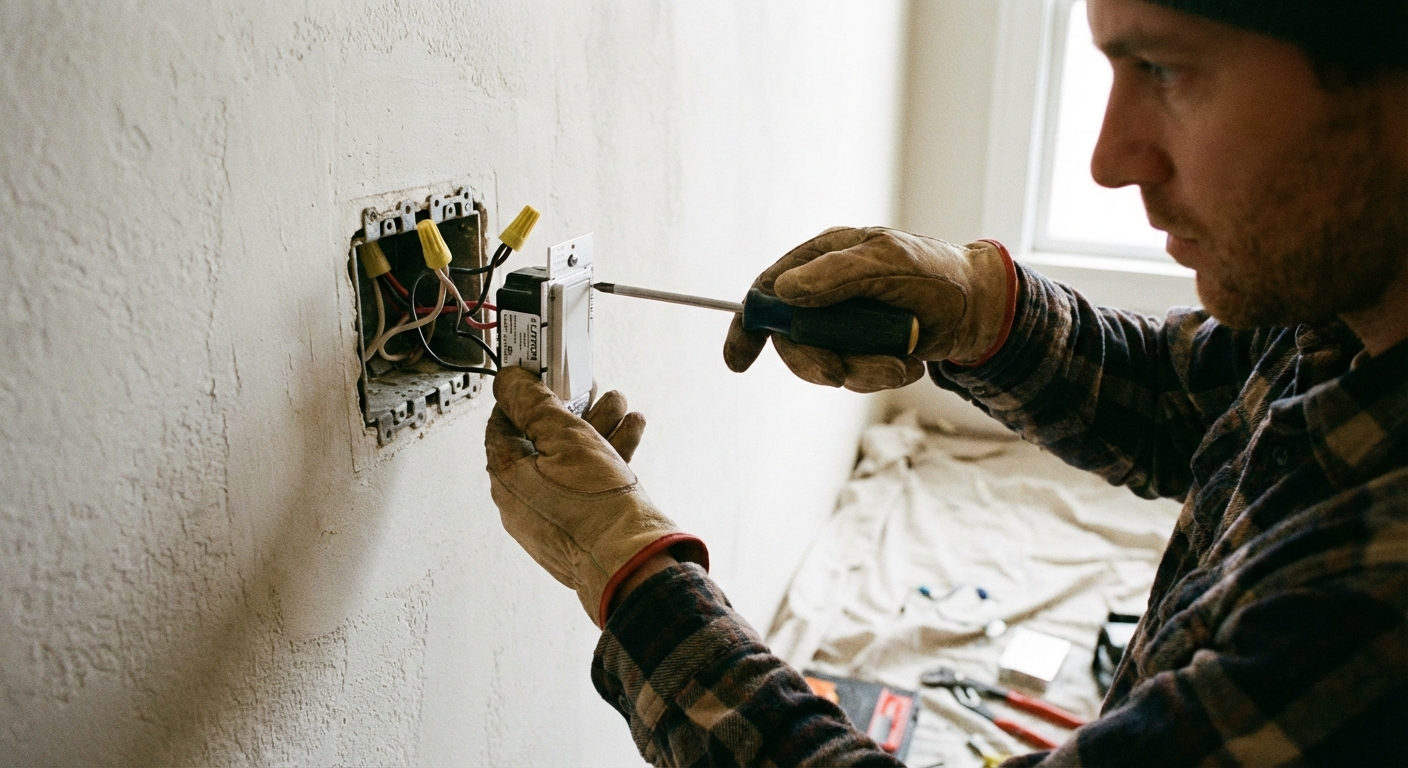
Install a single-pole dimmer
Single-pole is the simplest swap. Your dimmer will either have two leads (wires coming out of it) or two terminal screws.
Typical connections
- Dimmer ground to bare/green ground in the box
- Dimmer line (hot) to the always-hot wire from the breaker
- Dimmer load to the wire going to the light
Steps
Disconnect the old switch wires. If they are backstabbed (pushed into holes), release them using the slot next to the hole, or cut and strip fresh copper if needed.
Connect the ground first. If your box is metal, make sure the box is grounded too. If the grounds are not already joined, you may need a grounding pigtail to bond the dimmer and the metal box.
Connect line and load. Some dimmers are interchangeable, but many electronic and smart dimmers are line/load specific. Follow the wiring diagram for your exact model.
Make tight wire-nut connections: hold wires even, twist clockwise, and tug-test each wire individually.
Neatly fold wires back into the box. Mount the dimmer, install the wall plate.
Turn the breaker back on and test.
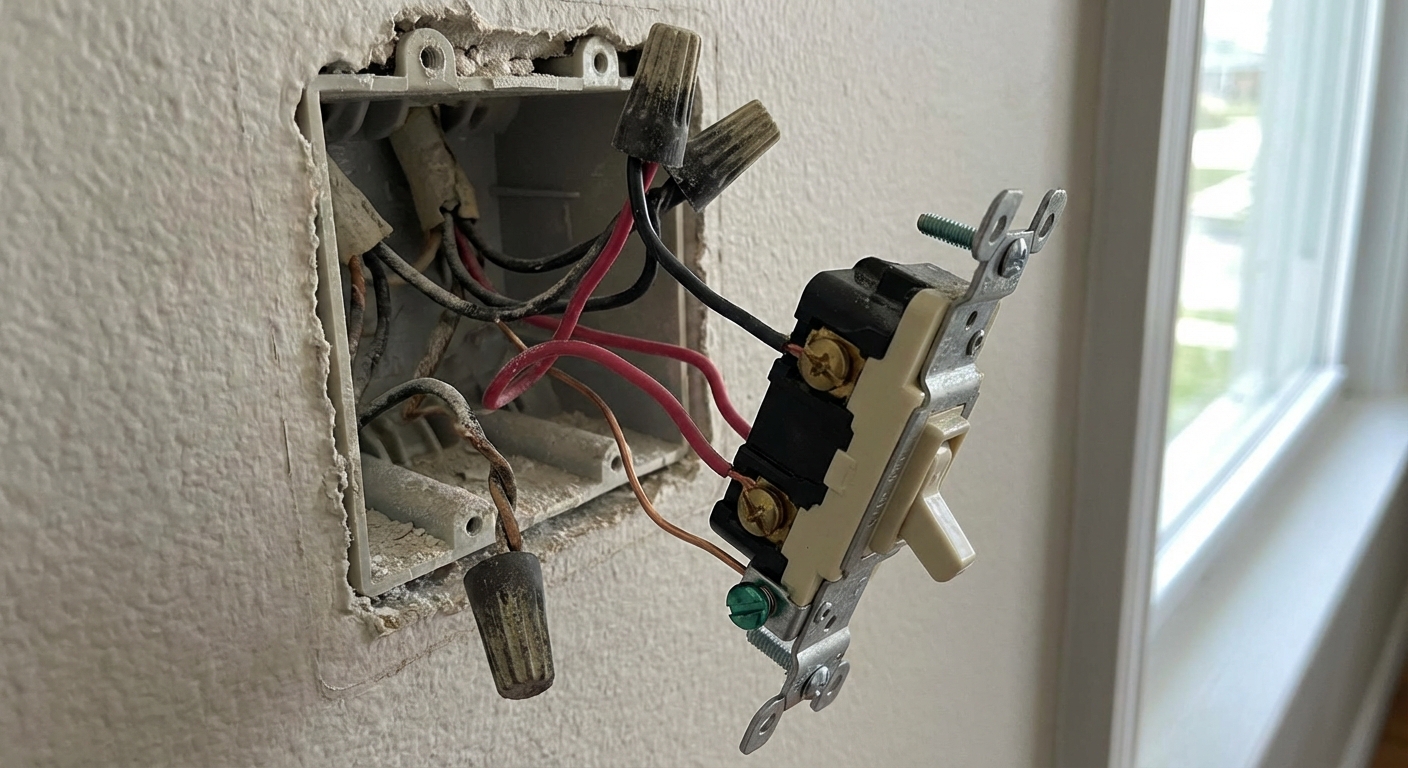
Install a three-way dimmer
Three-way wiring is where most DIYers get tripped up, and it is usually because the common wire was not labeled before disconnecting.
Three-way terminals
- Common: the odd-colored screw (often black). This is either the always-hot feed or the switched leg to the light, depending on the box.
- Travelers: two screws that are the same color (often brass). These go to the other three-way switch.
- Ground: green screw.
Steps
With power off and verified, pull the old three-way switch out.
Find the common terminal (odd-colored screw) and label the wire connected to it as COMMON.
Label the other two wires as TRAVELER 1 and TRAVELER 2 (their order usually does not matter).
Disconnect the wires.
On your dimmer, locate the wire or screw labeled COMMON (often a black lead). Connect your labeled COMMON wire to that.
Connect the two travelers to the dimmer traveler leads or traveler screws (often red and red/white leads). If your instructions say to cap a specific lead for certain setups, follow the dimmer manual exactly.
Connect ground. If you have a metal box, make sure it is bonded as well.
Fold wires carefully, mount the dimmer, install the wall plate, restore power, and test from both switch locations.
About “up” and “down”: On a three-way, switch orientation is not guaranteed. One location might feel like “up is on” today and “up is off” tomorrow depending on the other switch position. That is normal for three-way circuits. If one location stops working or it behaves truly inconsistently, re-check that the common wire landed on the dimmer common.
Wire ID quick reference
Every home has its own surprises, but these patterns show up a lot.
- Two black wires on a single-pole switch: one is line, one is load. A basic switch does not care which is which, but some dimmers do.
- White wire on a switch: it may be a re-identified hot (especially in older switch loops). It should be marked with black tape if done correctly, but often is not.
- Bundle of whites tied together in the back: neutrals. Some dimmers ignore these, some smart dimmers require a neutral connection.
- Metal box: ground continuity matters. Make sure the device and box are grounded.
If you open the box and the wire colors do not match what you expect, slow down. Take photos, label, and consider using a multimeter to identify line versus load. If you cannot do that confidently, this is a great time to bring in a pro.
Stop flicker and buzz
Common causes
- Non-dimmable LED bulbs
- Incompatible dimmer (incandescent-only dimmer used on LEDs, or the wrong dimmer type for the driver)
- Load too small for the dimmer’s minimum rating
- Loose wire connection
- Multi-gang derating not followed for that specific dimmer
Fixes that usually work
- Swap to a known dimmable LED brand and model. Many dimmer manufacturers publish compatibility lists.
- If your dimmer has a low-end trim adjustment, set it per the instructions so the LEDs do not cut out at the bottom of the range.
- Re-check every wire nut connection with a firm tug test.
- Confirm your total LED wattage is within the dimmer’s rating, including any derating rules from the manufacturer.
When to call a pro
- You see aluminum wiring or scorched insulation
- The box has multiple circuits and you cannot verify all are off
- You need to expand or replace an undersized box to meet fill requirements
- The wiring does not match expected single-pole or three-way patterns and you cannot confidently identify line, load, and travelers
- Your new dimmer requires a neutral and you do not have one in the box
There is no shame in tagging in an electrician. The goal is a safer home and a dimmer that works every time.
Quick checklist
- Breaker off, power verified off with a tester (and you tested the tester)
- Correct dimmer type: single-pole vs three-way
- Dimmable LEDs paired with an LED/CFL-rated dimmer
- Total wattage within dimmer LED rating (and derated if multi-gang per the manufacturer chart)
- Common wire labeled on three-way before disconnecting
- All connections tight, wires folded neatly, device mounted securely
About Marcus Vance
Content Creator @ Grit & Home
Marcus Vance is a lifelong DIY enthusiast and self-taught home renovator who has spent the last decade transforming a dilapidated 1970s ranch into his family's dream home. He specializes in budget-friendly carpentry, room-by-room renovations, and demystifying power tools for beginners. Through his writing, Marcus shares practical tutorials and hard-learned lessons to help homeowners tackle their own projects with confidence.