Laminate flooring gets a bad rap sometimes, but modern click-lock laminate is one of the most forgiving, budget-friendly floors a beginner can install. If you can measure, cut straight(ish), and follow a system, you can absolutely do this in a weekend.
I have installed flooring in my 1970s ranch with plenty of lessons learned the dusty way. This guide walks you through the whole job: acclimating planks, prepping the subfloor, laying underlayment, clicking rows together, making clean cuts around doorways, and finishing with transitions.
Scope note: this is for click-lock floating laminate. Glue-down laminate (less common now) is a different workflow.
Big idea: laminate is a floating floor. You are building one big “raft” that must be able to expand and contract, so expansion gaps and a flat subfloor matter more than brute force and glue.
Quick expectations:
- Difficulty: Beginner to intermediate (mostly patience and careful measuring)
- Time: 1 weekend for a typical bedroom or living room (subfloor fixes can add time)
- Cost: Budget-friendly vs. hardwood (price depends heavily on laminate tier and trim)
Before you start: laminate vs. LVP
If you are still choosing materials, laminate and LVP install similarly, but they behave differently with water and dents. We have a full comparison here: LVP vs. laminate flooring. If you are installing over a hard surface like tile, you may also like: How to install LVP over tile.
Tools and materials (what you actually need)
Tools
- Tape measure and pencil
- Speed square or framing square for straight cut lines
- Utility knife (for underlayment and opening boxes)
- Jigsaw for notches and curved cuts (pipes, door jamb corners)
- Miter saw or circular saw for crosscuts and ripping (a table saw is nice but not required)
- Tapping block and pull bar (laminate install kit)
- Spacers for expansion gaps (usually in the install kit)
- Rubber mallet
- Oscillating multi-tool for undercutting door jambs (highly recommended)
- Straightedge (4 to 6 feet) or long level to check subfloor flatness
- Shop vac or broom, plus microfiber mop for dust control
- Safety gear: safety glasses and hearing protection, and a dust mask for cutting
Materials
- Click-lock laminate planks (buy 10% extra for waste, 15% for diagonal layouts or lots of doorways)
- Underlayment rated for laminate (some laminates have attached pad, many do not)
- Vapor barrier if required (common over concrete slabs, sometimes integrated with underlayment)
- Underlayment seam tape (use the tape recommended by the underlayment brand; do not assume painter’s tape is OK)
- Transition strips (T-moldings, reducers, thresholds, stair nosing as needed)
- New baseboards or quarter round (optional, but common)
- Wood filler or patch compound for small subfloor defects
Tip from my own mistakes: buy the install kit on day one. Trying to “make do” with a scrap 2x4 instead of a tapping block is how you chip locking edges, especially on the final rows.
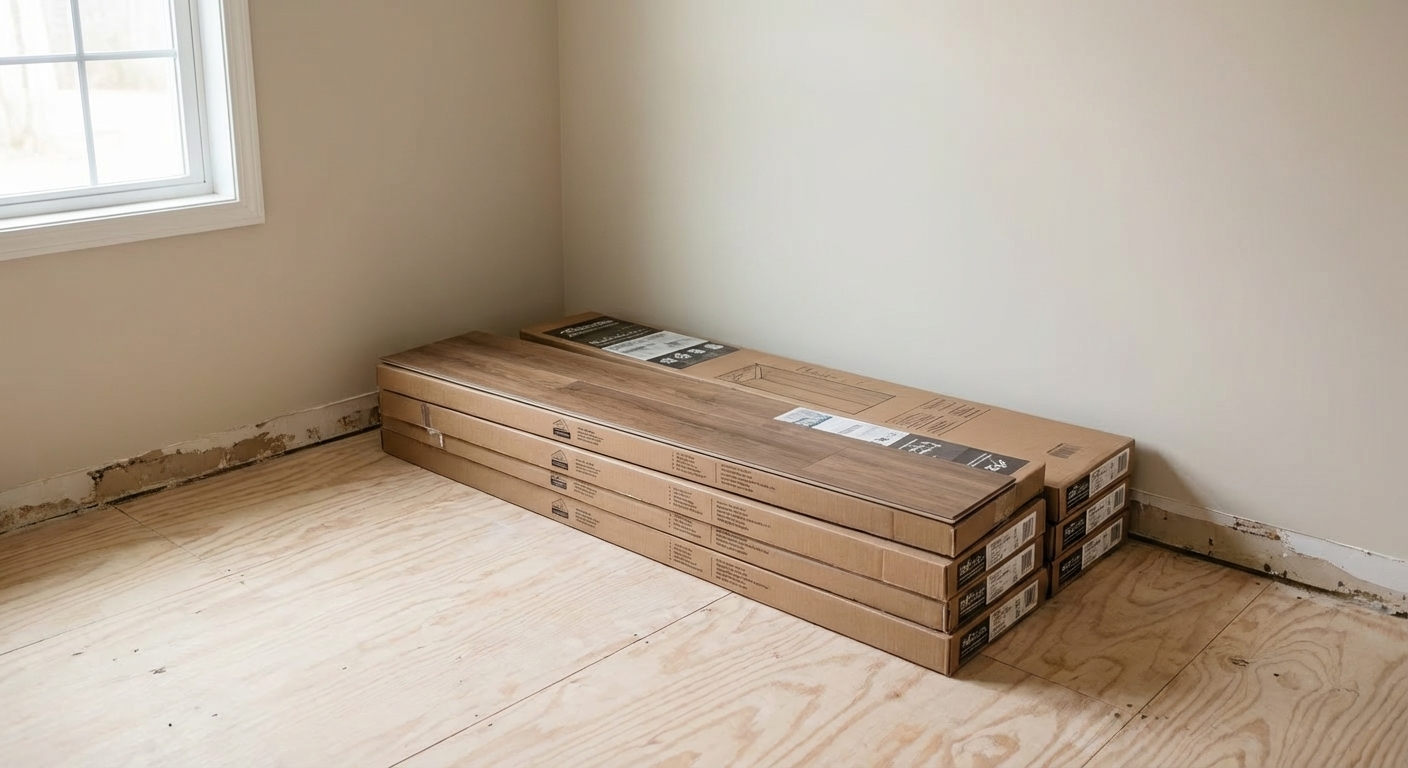
Step 1: acclimate the planks (do not skip)
Laminate needs time to adjust to your home’s temperature and humidity. If you install straight from a cold garage into a warm house, the floor can gap or buckle as it settles.
- Bring unopened boxes into the room and stack them flat.
- Acclimate per the manufacturer (commonly around 48 hours, but some products call for 24 or 72 hours, or specific temperature and humidity targets).
- Run the HVAC like you normally would. Avoid “construction mode” heat and open windows.
Step 2: plan the layout (10 minutes that saves hours)
Pick your direction
- Most people run planks parallel to the longest wall for a clean look.
- If you have a big window, running planks toward the light can often hide seams.
- If you are tying into other floors, sometimes direction is dictated by transitions and hallways.
Avoid skinny slivers on the last row
Measure the room width (perpendicular to plank direction). Divide by the plank width. If the last row will be less than about 2 inches, rip the first row narrower so both sides look balanced.
Example: If you will end with a 1 inch strip at the far wall, take 1 inch off the first row instead. The floor looks intentional instead of like you ran out of room.
Check max run length
Some laminate floors require an expansion break (often a T-molding) after a certain span or in long hallways and big open plans. Check your product’s maximum continuous run and plan transitions before you start clicking planks together.
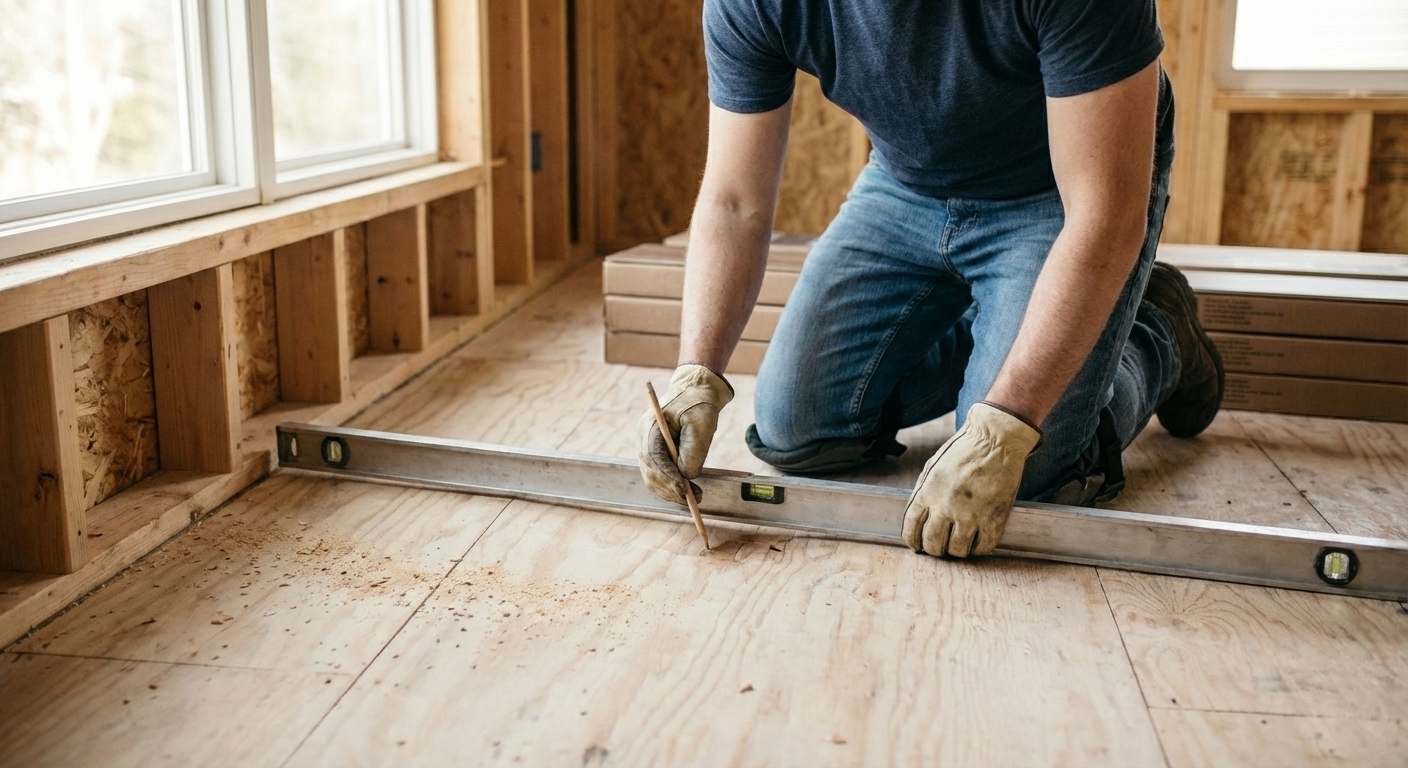
Step 3: prep the subfloor (flat beats perfect)
Laminate does not like hills and valleys. A slightly ugly but flat subfloor is better than a pretty one with dips.
Check for flatness
Use a long straightedge. Many manufacturers call for something like 3/16 inch over 10 feet or 1/8 inch over 6 feet, but check your flooring paperwork for the exact spec.
- High spots: sand or scrape down (especially old adhesive ridges).
- Low spots: fill with floor patch or self-leveling compound (follow product directions).
Fix squeaks and loose panels
- On plywood/OSB: add subfloor screws into joists where it squeaks.
- Remove protruding staples, nails, and drywall mud blobs.
If you are installing over an existing floor
Many click-lock laminates can go over hard, flat, secure surfaces (like vinyl, linoleum, or tile) if the manufacturer allows it and the floor is not cushy or loose. The goal is no flex, no big grout lines telegraphing through, and no moisture issues trapped underneath. When in doubt, remove it and start clean.
Clean like you mean it
Vacuum thoroughly. Grit under underlayment can telegraph through as crunching and soft spots.
Step 4: remove baseboards and undercut door jambs
Baseboards
You can install laminate and then cover the expansion gap with quarter round, but the cleanest look is usually removing and reinstalling baseboards slightly higher.
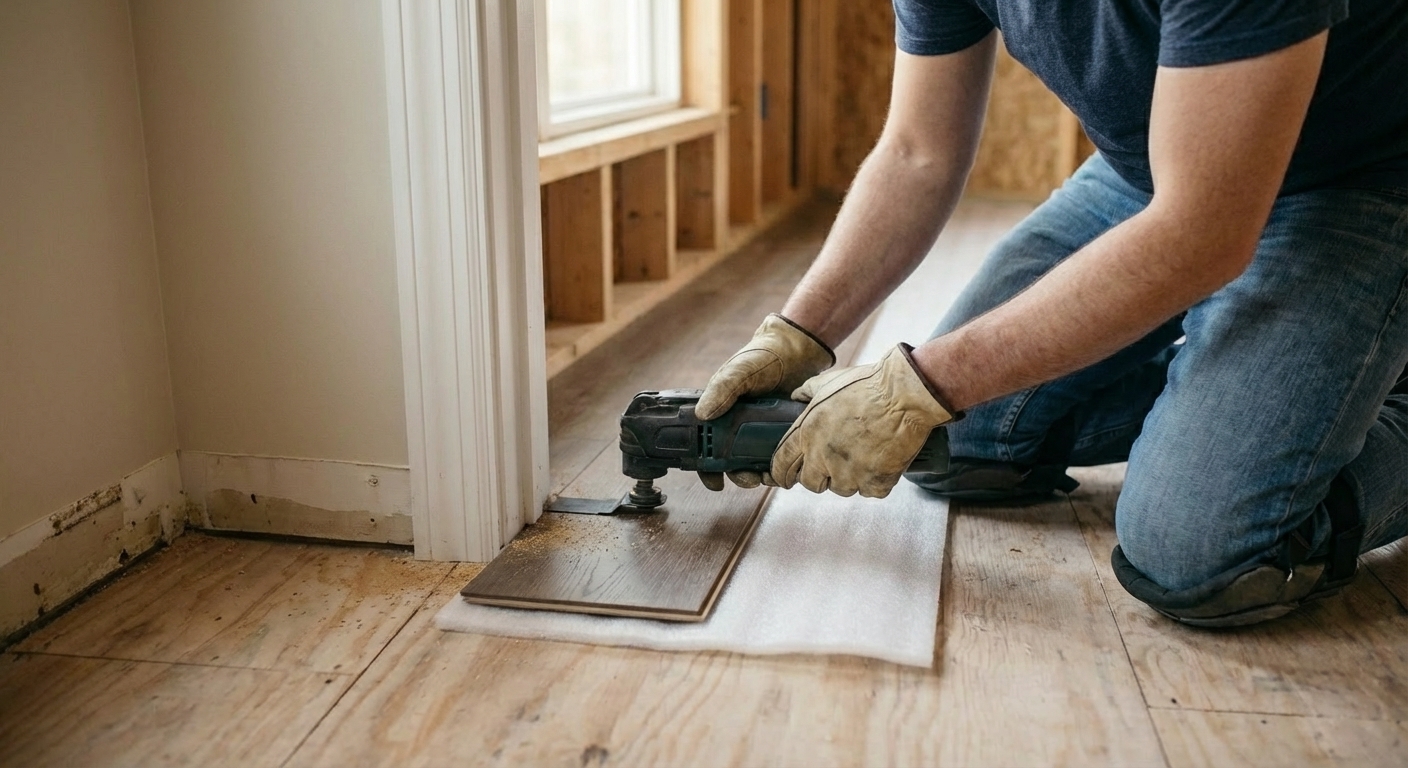
Undercut door jambs (the pro move)
Instead of notching every plank around jambs, undercut the trim so the plank slides underneath.
- Lay a scrap piece of laminate plus underlayment next to the jamb as a height guide.
- Use an oscillating multi-tool to cut the casing and jamb to that height.
- Vacuum out the dust and test fit a scrap.
Step 5: lay underlayment (and vapor barrier if needed)
Underlayment cushions the floor, reduces noise, and helps minor imperfections. Some laminates come with attached padding. If yours does, use only what the manufacturer allows.
Over wood subfloors
Most basic foam underlayments work fine, but use the thickness and type your laminate calls for. Too thick can cause click joints to fail.
Over concrete slabs
You typically need a vapor barrier or an underlayment with a vapor retarder built in. Many products also require slab moisture testing (calcium chloride test or in-slab RH testing) before installation. Basements are where people learn this lesson the hard way.
Reality check: even when a box says “waterproof,” that does not mean standing water is harmless. Most laminate failures start at the edges and seams.
- Roll it out in the direction you will install planks.
- Butt seams, do not overlap unless the product says to overlap.
- Tape seams with the tape recommended by the underlayment brand.

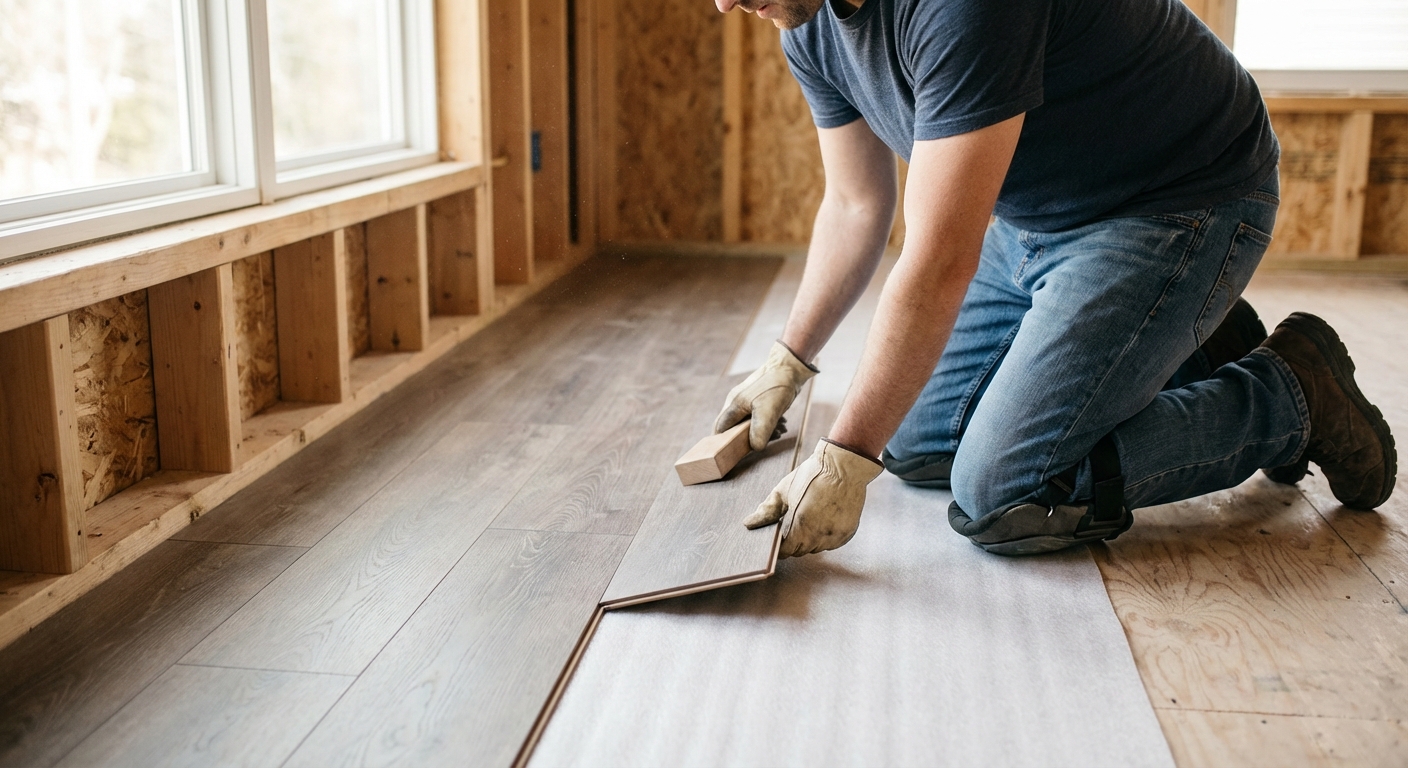
Step 6: start the first row (straight matters)
The first row sets the tone for the entire floor. If it is crooked, every row after fights you.
Set expansion gap spacers
Place spacers along the starting wall. Most laminates need a 1/4 inch to 3/8 inch expansion gap around the entire perimeter, plus around fixed objects like pipes and cabinets.
Which side faces the wall?
It depends on the locking system. Many laminates start with the tongue side facing the wall, but follow your specific brand’s instructions.
Build the row
- Start in a left corner (common), working across.
- Click plank ends together and keep the row tight against spacers.
- Check the row occasionally with a string line or by measuring to the wall at a few points.
Thrifty tip: If your wall is wavy, keep the expansion gap consistent, not the plank-to-wall distance. Baseboard covers the gap, but a pinched spot can cause buckling later.
Step 7: stagger joints like a brick pattern
Staggering makes the floor stronger and looks better. Most manufacturers require end joints to be at least 8 to 12 inches apart from row to row. Check your box.
Easy staggering method
- Row 1: start with a full plank (or your planned cut plank).
- Row 2: start with a plank cut to about 1/3 length.
- Row 3: start with a plank cut to about 2/3 length.
- Repeat, while also using offcuts when they are long enough to meet the minimum stagger.
Avoid: a repeating “stair step” pattern where joints march diagonally across the room. Mix it up.
Step 8: click rows together without breaking the locks
Most click-lock laminates connect by angling the plank into the long edge groove, then lowering it. Some systems also require tapping the end joint tight.
- Keep the seam free of debris. A single wood chip can hold the joint open.
- Use a tapping block on the long edge only where the manufacturer allows.
- Use a pull bar near walls where you cannot swing a mallet.
My reality check: If a joint refuses to close, do not “persuade” it harder. Pull it apart, inspect the groove, and try again. Over-tapping is how corners chip.
Step 9: cutting planks (straight cuts and tricky spots)
Straight crosscuts
- Measure the needed length, accounting for the expansion gap at the wall.
- Mark a square line and cut with a miter saw or circular saw.
- Chipping tip: use a sharp, fine-tooth blade and orient the plank for your saw.
- Miter saw: good face up (blade enters from the top).
- Circular saw: good face down (blade enters from the bottom).
Ripping the last row
Measure from the wall to the installed row at several points and subtract the expansion gap. Transfer the measurement to planks and rip them. Walls are rarely parallel, so measuring at multiple spots matters.
Door jambs
After undercutting, slide the plank under the trim. Often you will still need a small notch at the corner where the jamb meets the casing. A jigsaw is perfect here.
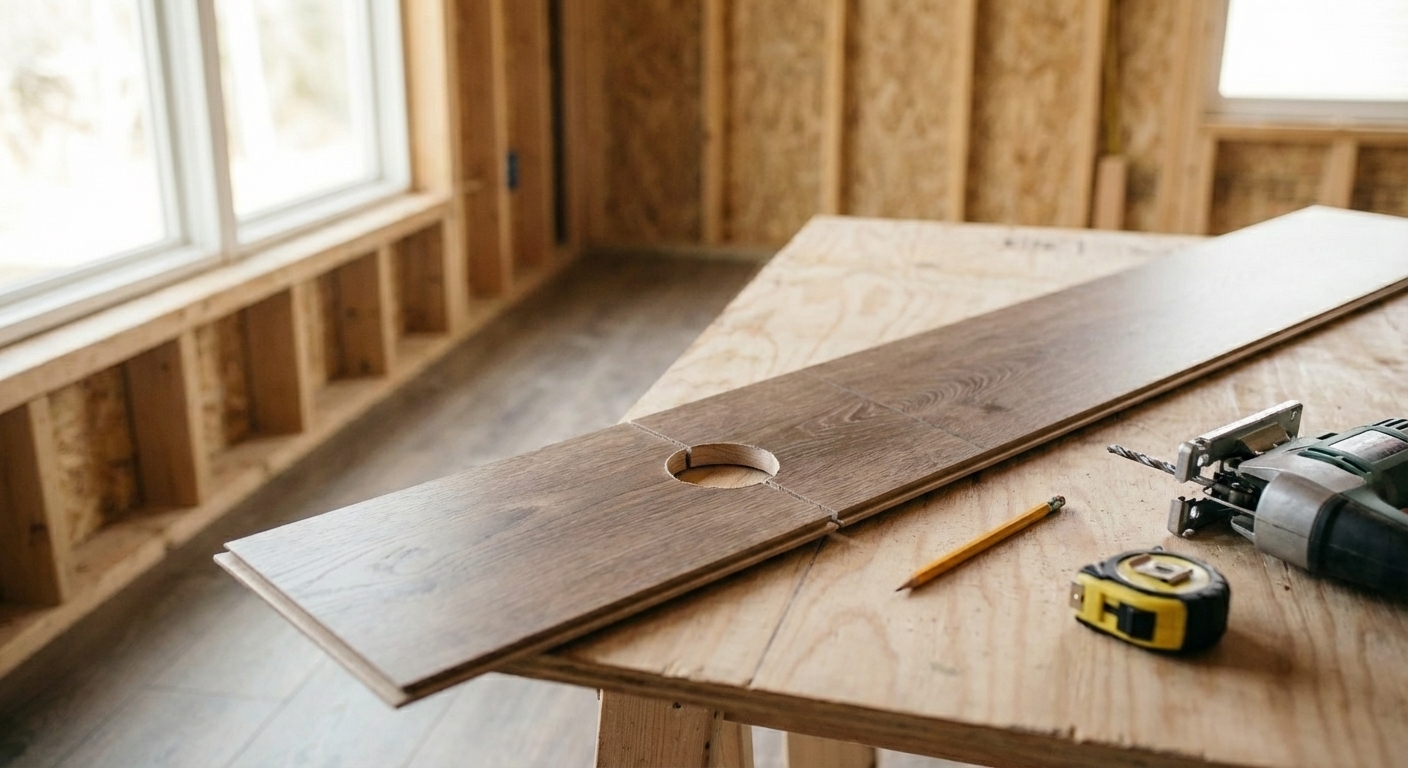
Pipes and floor vents
- For pipes: drill a hole slightly larger than the pipe diameter to maintain expansion clearance, then cut a wedge to allow the plank to fit around the pipe.
- For floor vents: measure carefully and cut a rectangular opening with a jigsaw.
Step 10: install the final rows (the tightest part of the job)
As you get close to the far wall, you lose room to angle planks into place. This is where a pull bar earns its keep.
- Rip the last row to width if needed.
- Click the long edge as best you can.
- Use the pull bar to snug seams without crushing the edge.
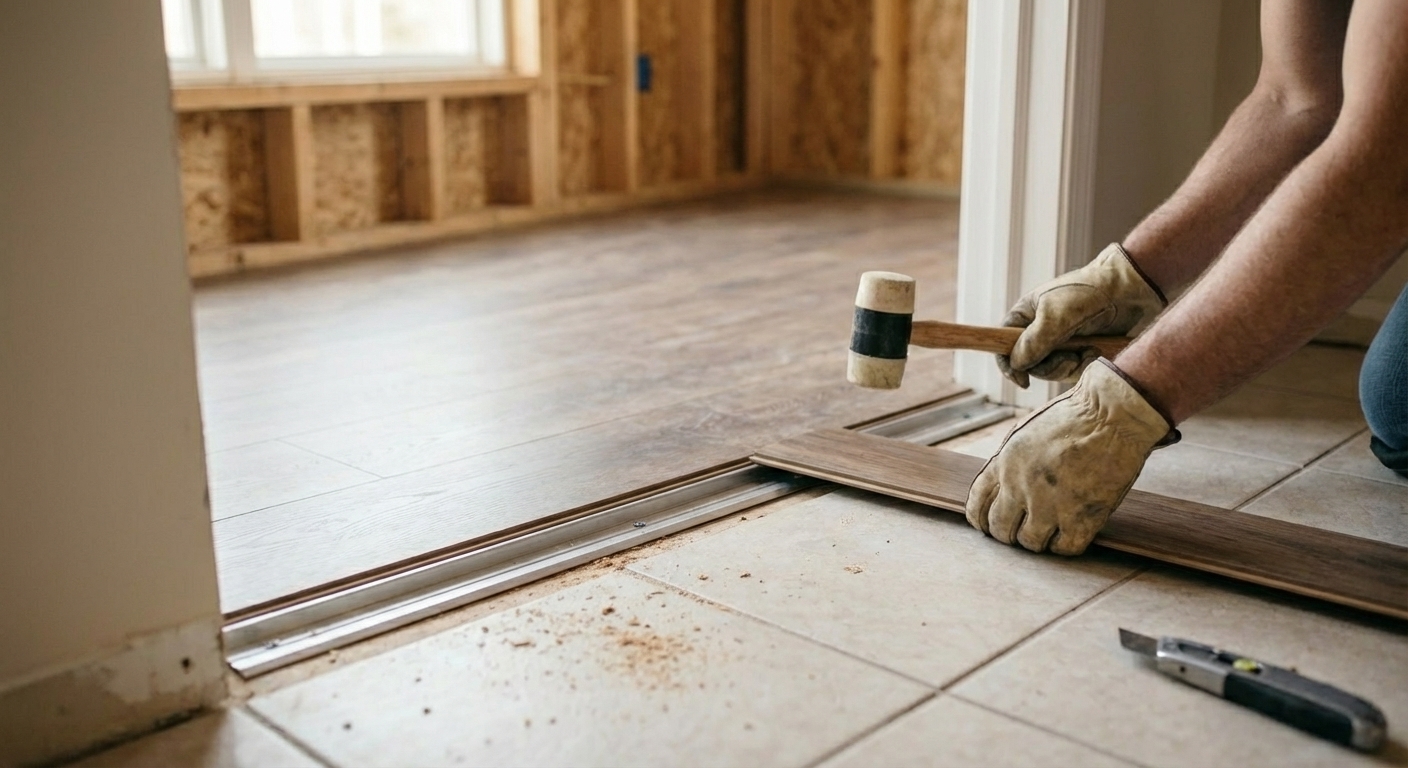
Step 11: transitions and thresholds
Transitions make the floor look finished and, more importantly, allow the floating floor to move.
Common transition types
- T-molding: between two floors of similar height (laminate to laminate, laminate to hardwood)
- Reducer: from laminate down to thinner flooring (vinyl sheet, low-profile tile)
- Threshold/saddle: at exterior doors or where you need a more sealed edge
- Stair nosing: for stairs and landings
Most transitions use a track that fastens to the subfloor, with the transition snapping in. Keep fasteners out of the laminate itself. If you pin the floating floor down, it can buckle.
Doorway tip: leave the required expansion gap at exterior doors and cover it with the correct threshold profile. If you use caulk, use it as a seal on trim or threshold edges only, not as glue that bonds the laminate to the floor.
Step 12: reinstall trim and clean up
- Remove spacers.
- Reinstall baseboards, or add quarter round to cover the expansion gap.
- Keep nails in the trim only. Do not nail into the laminate.
- Vacuum and dry mop. For routine cleaning, use a barely-damp microfiber mop or a laminate-approved cleaner. Avoid traditional wet mopping, steam mops, and leaving water sitting on the floor. That is how edges swell.
Common mistakes (and how to avoid them)
- Forgetting expansion gaps: Leave 1/4 inch to 3/8 inch at walls, pipes, and fixed cabinets. Cover with trim, not caulk that glues the floor in place.
- Installing over an uneven subfloor: You will get bounce, broken locks, and noisy seams. Flatten first.
- Skipping acclimation: Gaps in winter, buckles in summer, or both.
- Wrong underlayment: Too thick can cause joint failure. Use what your laminate specifies.
- Poor staggering: Weakens the floor and looks repetitive. Keep joints separated per the manufacturer.
- Lock damage from over-tapping: If it will not close, pull it up and check for debris or a damaged tongue.
- Installing under heavy fixed items: Many laminates should not be installed under kitchen cabinets, islands, or other fixed cabinetry. For heavy appliances like a fridge, many floors are fine as long as the floor can still move at the perimeter, but check your product rules and use an appliance mat or plywood path so you do not gouge the surface while moving it.
- Ignoring slab moisture: Over concrete, test and use the vapor barrier your product requires. Moisture trapped under laminate leads to swelling, odor, and moldy surprises.
Quick checklist for a smooth weekend install
- Boxes acclimated in the room (per manufacturer, commonly 48 hours)
- Subfloor flat within manufacturer tolerance (often 3/16 inch over 10 feet or 1/8 inch over 6 feet)
- Concrete slab moisture requirements met (if on slab or basement)
- Door jambs undercut
- Correct underlayment and vapor barrier (if needed)
- Underlayment seams taped with the recommended tape
- Expansion spacers placed at every wall
- Stagger pattern planned and minimum offsets met
- Max run length checked and expansion breaks planned (if required)
- Transitions purchased and dry-fit before final trim
If you want, tell me what you are installing over (plywood, OSB, existing vinyl/tile, or concrete) and your room size. I can help you estimate materials and flag any gotchas before you start cutting.
About Marcus Vance
Content Creator @ Grit & Home
Marcus Vance is a lifelong DIY enthusiast and self-taught home renovator who has spent the last decade transforming a dilapidated 1970s ranch into his family's dream home. He specializes in budget-friendly carpentry, room-by-room renovations, and demystifying power tools for beginners. Through his writing, Marcus shares practical tutorials and hard-learned lessons to help homeowners tackle their own projects with confidence.